Flaky Sourdough Croissants – With Step by Step Instructions
These sourdough croissants are buttery and flaky, and leavened entirely with your sourdough starter, no commercial yeast. The process is spread over two days, but it isn’t actually difficult, and this step-by-step guide walks you through every stage!
I haven’t updated this post for a long time, but I took new photos recently so thought it was finally time! The recipe itself is the same one you know and love, I have just done a rewrite to make it much clearer and so you can see exactly what the dough and butter should look like as you go.

About these sourdough croissants
These croissants are made entirely with sourdough starter, with no commercial yeast. The slower fermentation is what gives them their flavour, with just a gentle tang. The outside bakes up crisp and shattery and the inside is soft and layered.
It does take a bit of time, but the steps themselves are simple and once you get the rhythm it doesn’t feel like a big deal. The process is spread over two days, and you can choose whether to laminate the dough on day 1 or day 2. Either way, you’ll be mixing, fermenting, laminating, shaping, proofing and baking. None of the individual steps are particularly difficult but there are just a few of them!
The one thing that makes or breaks croissants is keeping the butter cool. The flaky layers come from thin sheets of solid butter trapped between layers of dough, and if that butter warms up and melts into the dough, those layers disappear and you get a bready texture instead. This is why croissants are easiest to make in a cool kitchen. If your room is above 25°C (77°F), you’ll struggle to keep the butter firm enough as you work, so aim for a cooler day or a cooler spot in the house.
The starter
These croissants rely only on your sourdough starter, so it needs to be active, bubbly, and low in acid. A weak or sleepy starter will give you slow, flat croissants that don’t rise properly, and an over-acidic starter will affect both the flavour and the dough strength.
You’ll need around 140g of fed, active starter at 100% hydration (equal weights of flour and water when feeding). A few tips for getting it right:
- When you feed it depends on which schedule you’re following. For Schedule 1 I feed it in the morning of day 1 and let it peak before mixing.
- For Schedule 2 I feed it the night before so it’s peaked and ready first thing, since day 1 is busier. More on this in the schedule below.
- Refresh your starter regularly using a small amount of seed starter each time. This slows the acid build-up and keeps the flavour mild.
- Ideally, use the starter when it’s at or close to its peak, before it has collapsed significantly. A starter that’s been left too long after peaking may be more acidic and less vigorous, which can affect the dough strength, flavour and proofing time.
At a room temperature of 21 to 23°C, a starter fed at a 1:2:2 ratio will double or even triple within around 6 hours. Good lamination starts with strong dough, and a well-fed, active starter builds the strength that lets the dough hold all those butter layers. You can read more about acid content in starters if you want to go deeper.

Baker’s schedule
Sourdough croissants are a two-day bake, and there are two ways to split the work. The difference is when you feed the starter, when you laminate, and which dough rests overnight. Both give great results, so pick whichever suits your day.
Schedule 1: laminate on day 2. Feed the starter in the morning of day 1 and let it reach its peak, which takes around 6 hours for mine. Mix and ferment the dough, then chill it overnight. The next day, make the butter packet and laminate with three folds (30-minute chills between each), chill for at least 2 hours, then shape, proof and bake. This is a good option if you’d rather spread the work out, though day 2 can run quite long.
Schedule 2: laminate on day 1 (my preferred way). Feed the starter the night before so it’s at its peak and ready first thing. You may need to use a higher feeding ratio or a cooler spot overnight so it doesn’t peak too early. Mix and ferment the dough, chill it for 2 to 3 hours, then laminate with all three folds that afternoon and rest the laminated dough overnight. Day 2 is then just shape, proof and bake, so you can have fresh croissants around lunchtime, depending on how quickly they proof. The overnight rest also relaxes the gluten and makes rolling much easier.
Watch the dough, not the clock. These timings are a guide and can be adjusted to suit your kitchen.
Method
The dough
- Feed your starter so it’s bubbly and active.
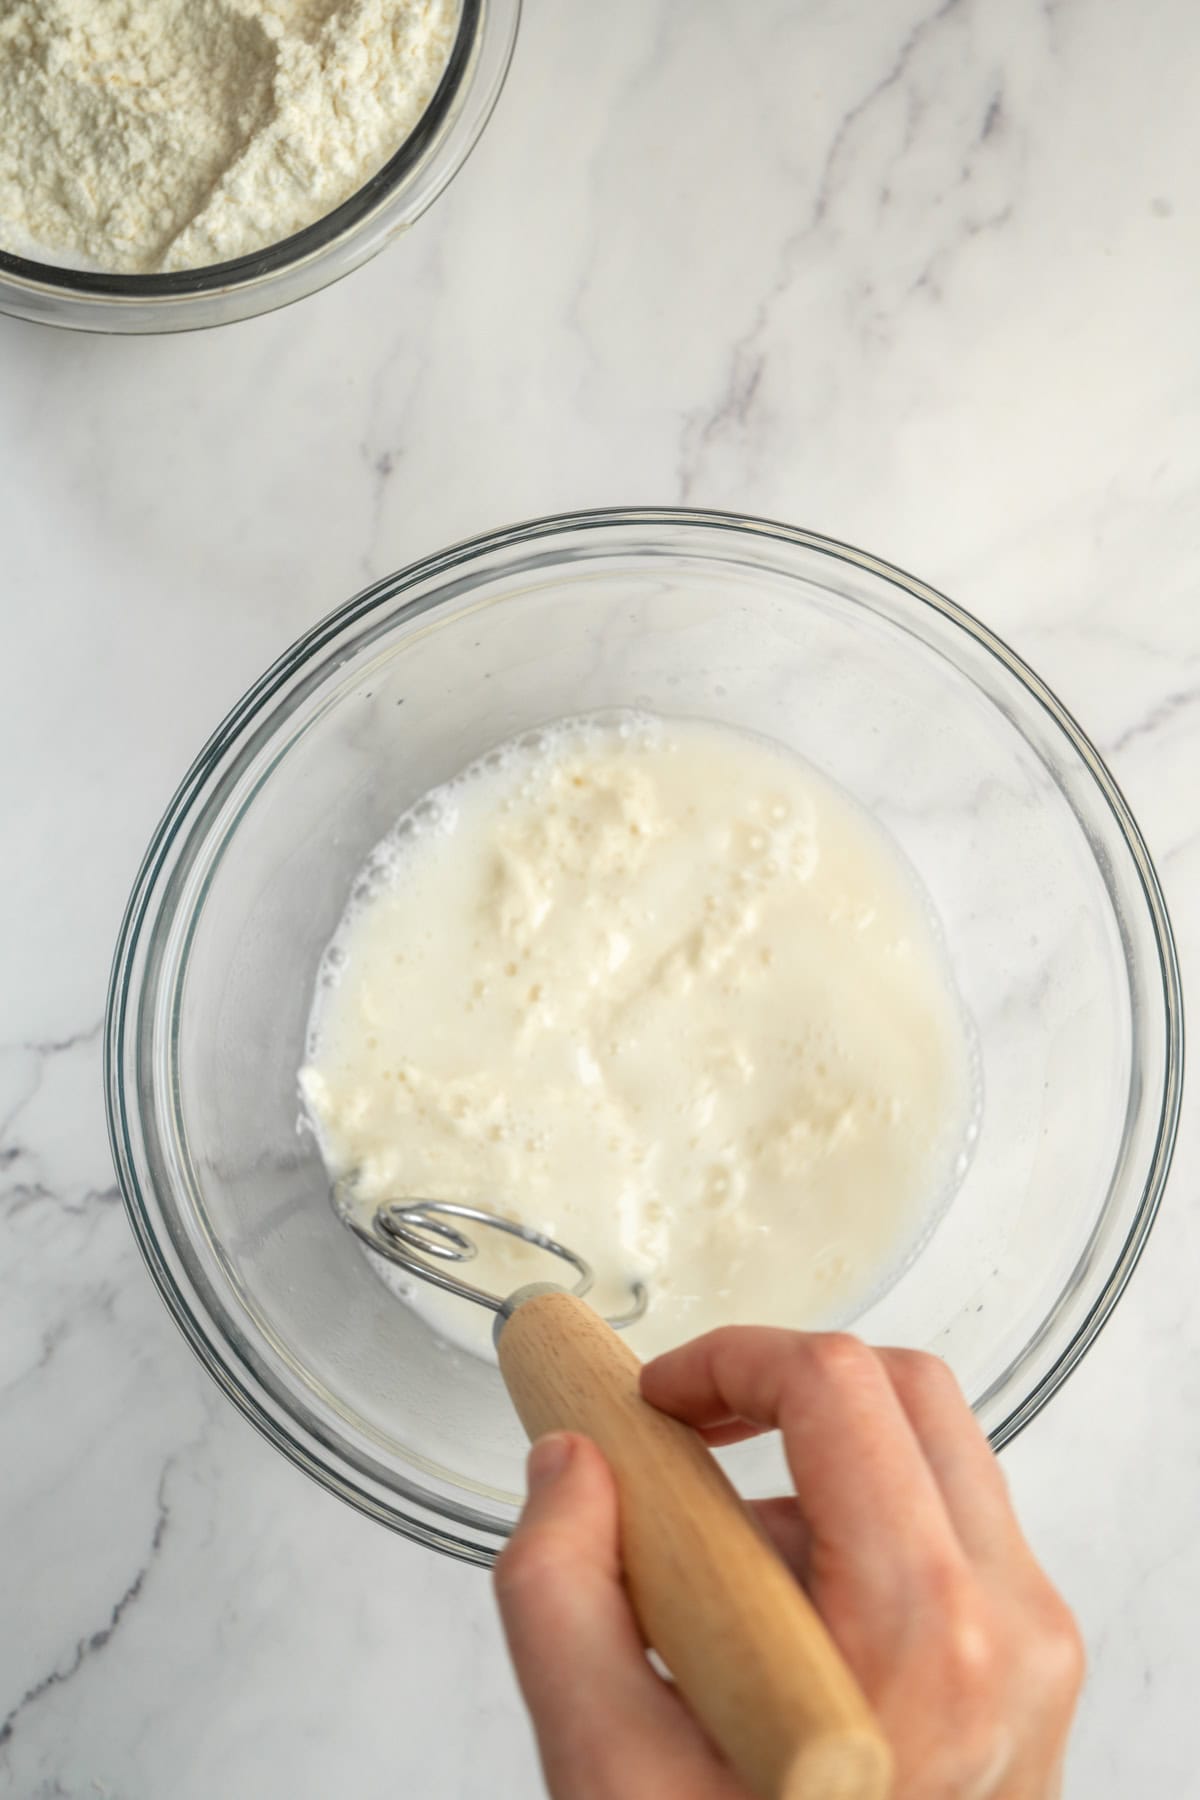
- Whisk water and sourdough starter.
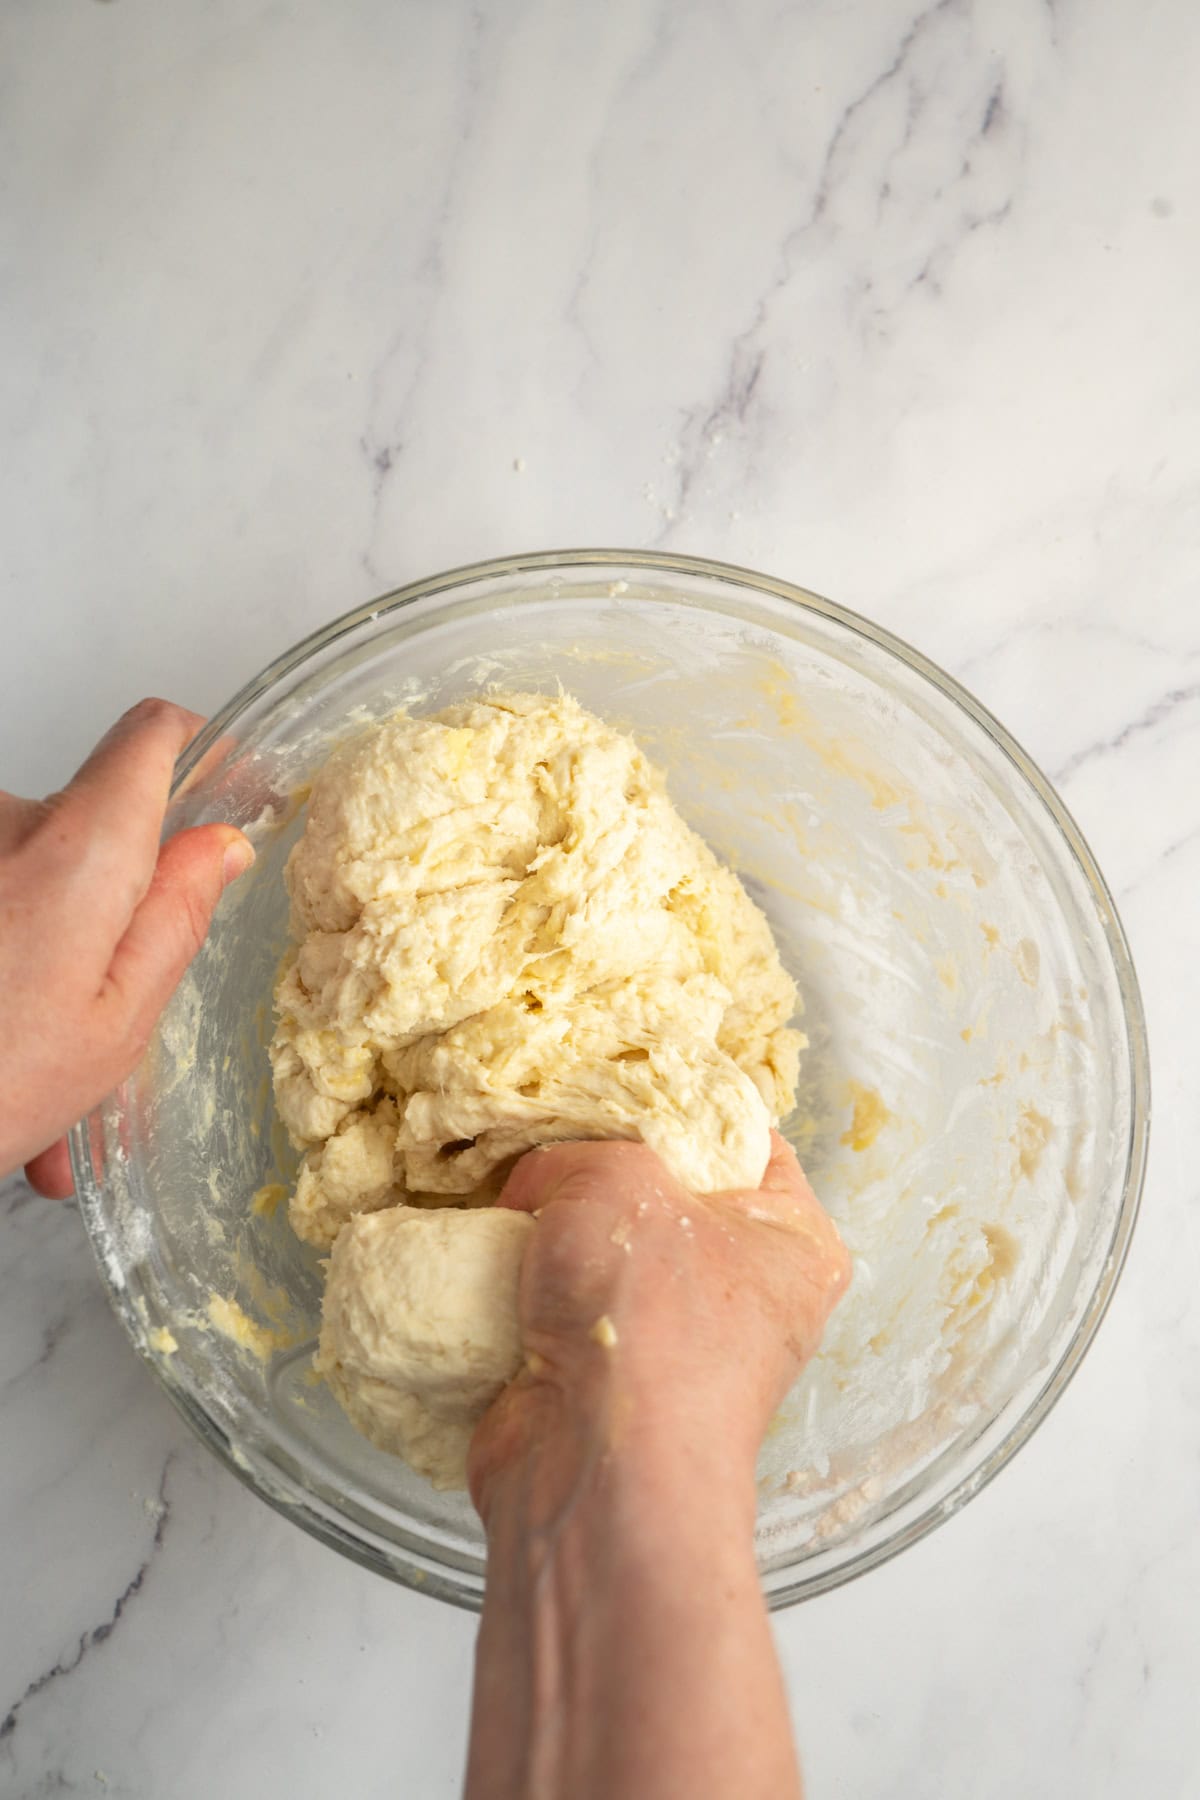
- Add the flour, sugar, salt, sourdough starter, and butter to the bowl. Mix by hand into a sticky ball of dough, then work it further on the bench until smooth.
- Place the dough in a greased bowl, cover, and leave to ferment for 3-4 hours at 24 to 25°C ( 75 to 77°F) until the dough has risen by around 20-40%. It doesn’t need to double.
- Shape the dough into a flat rectangle, then wrap it tightly or place it in an airtight container. If following Schedule 1, refrigerate overnight. If following Schedule 2, refrigerate for 2 to 3 hours before laminating. Shaping the dough into a rectangle now means less rolling later, which helps keep the dough cold and relaxed.
The butter packet
The butter packet is the thin slab of butter you fold into the dough. There are two ways to make it, and which you choose comes down to your kitchen and your butter.
The flour method: Mix room-temperature butter with a little flour (around 1½ tablespoons for 250g butter) until smooth, then roll it between two sheets of baking paper into a rectangle of about 15 x 20cm (6 x 8 inch), then chill it. The flour stabilises the butter to make it a little bit easier to handle.
The just-butter (bashing) method: Slice cold butter and lay the pieces side by side on a sheet of baking paper. Fold the paper into a rectangle to give you clean edges and a size guide, cover with the top sheet, and pound with a rolling pin to soften, then press it out to fill the rectangle evenly. No flour. This gives cleaner layers and a better flaky texture, so it’s my preferred method when I can keep things cool.
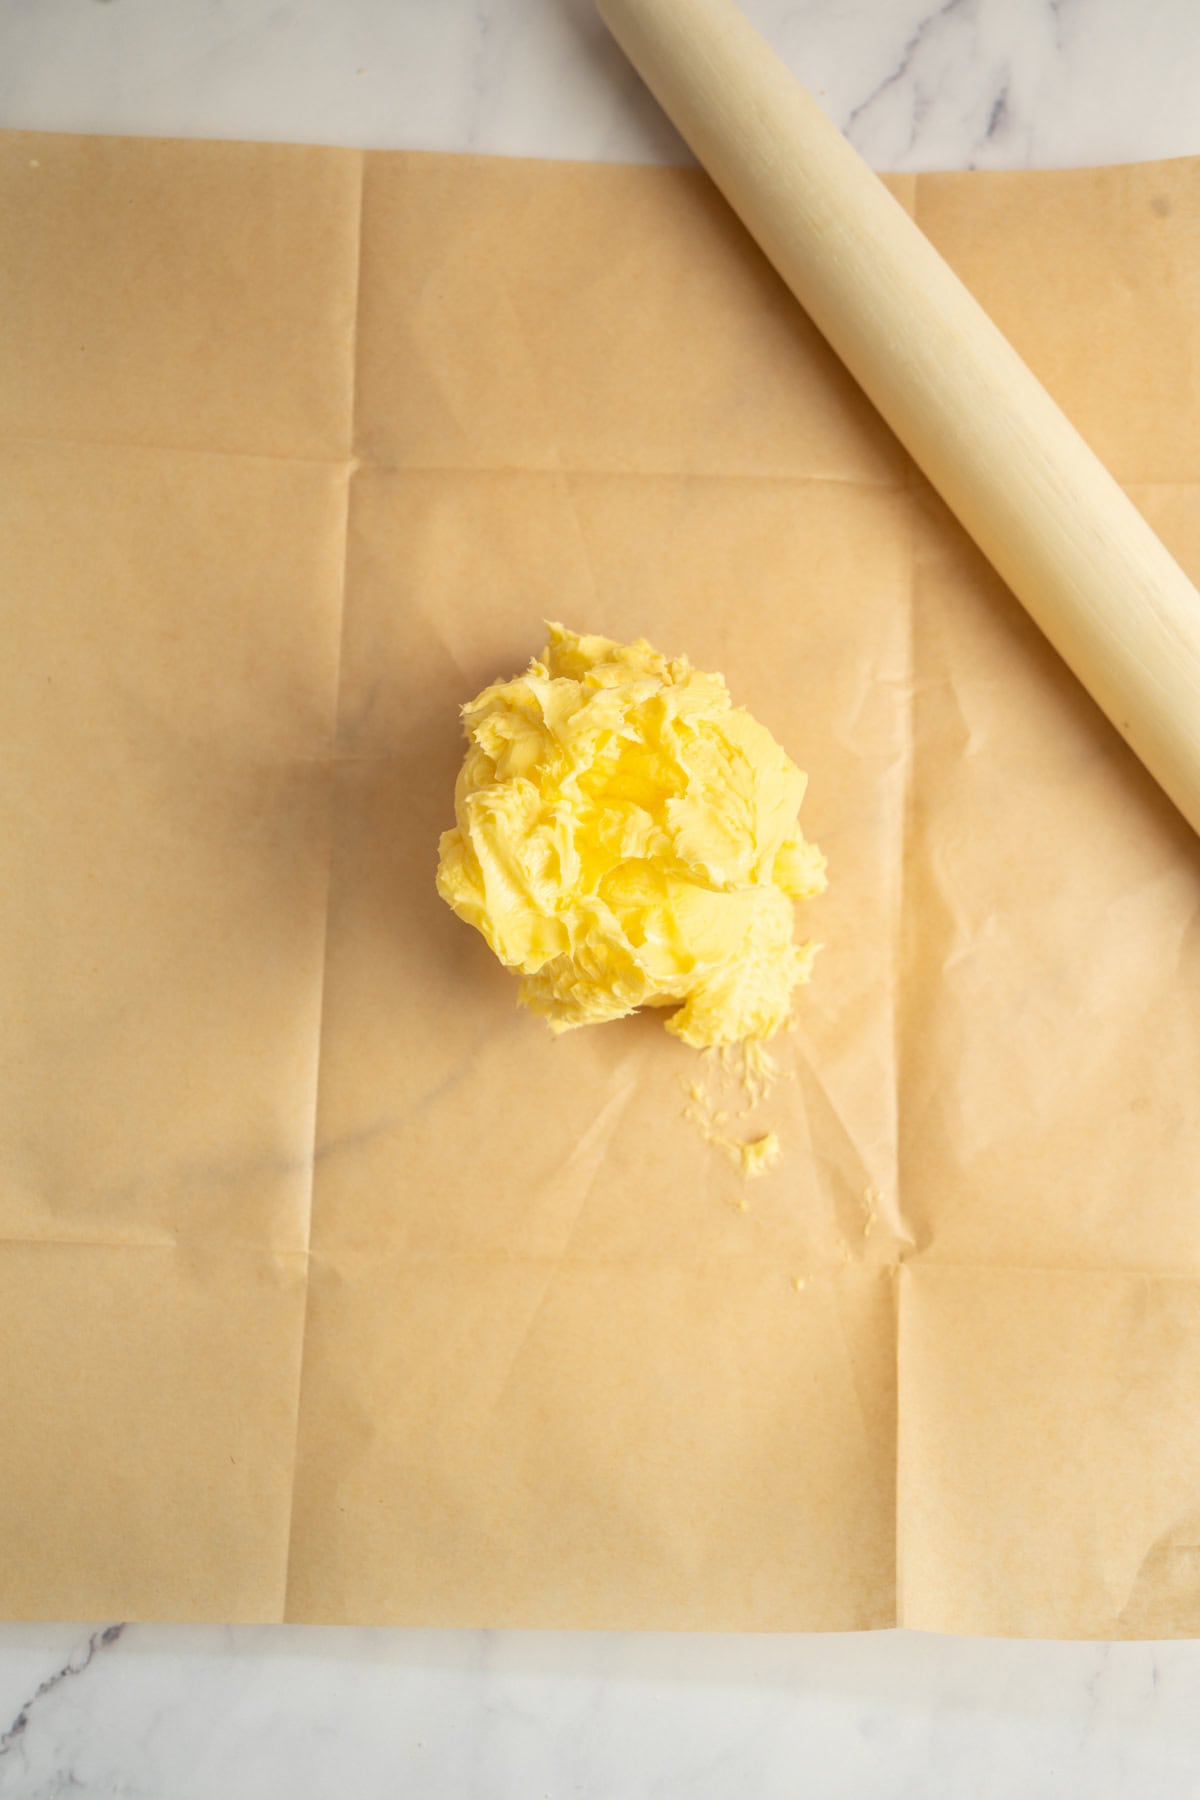
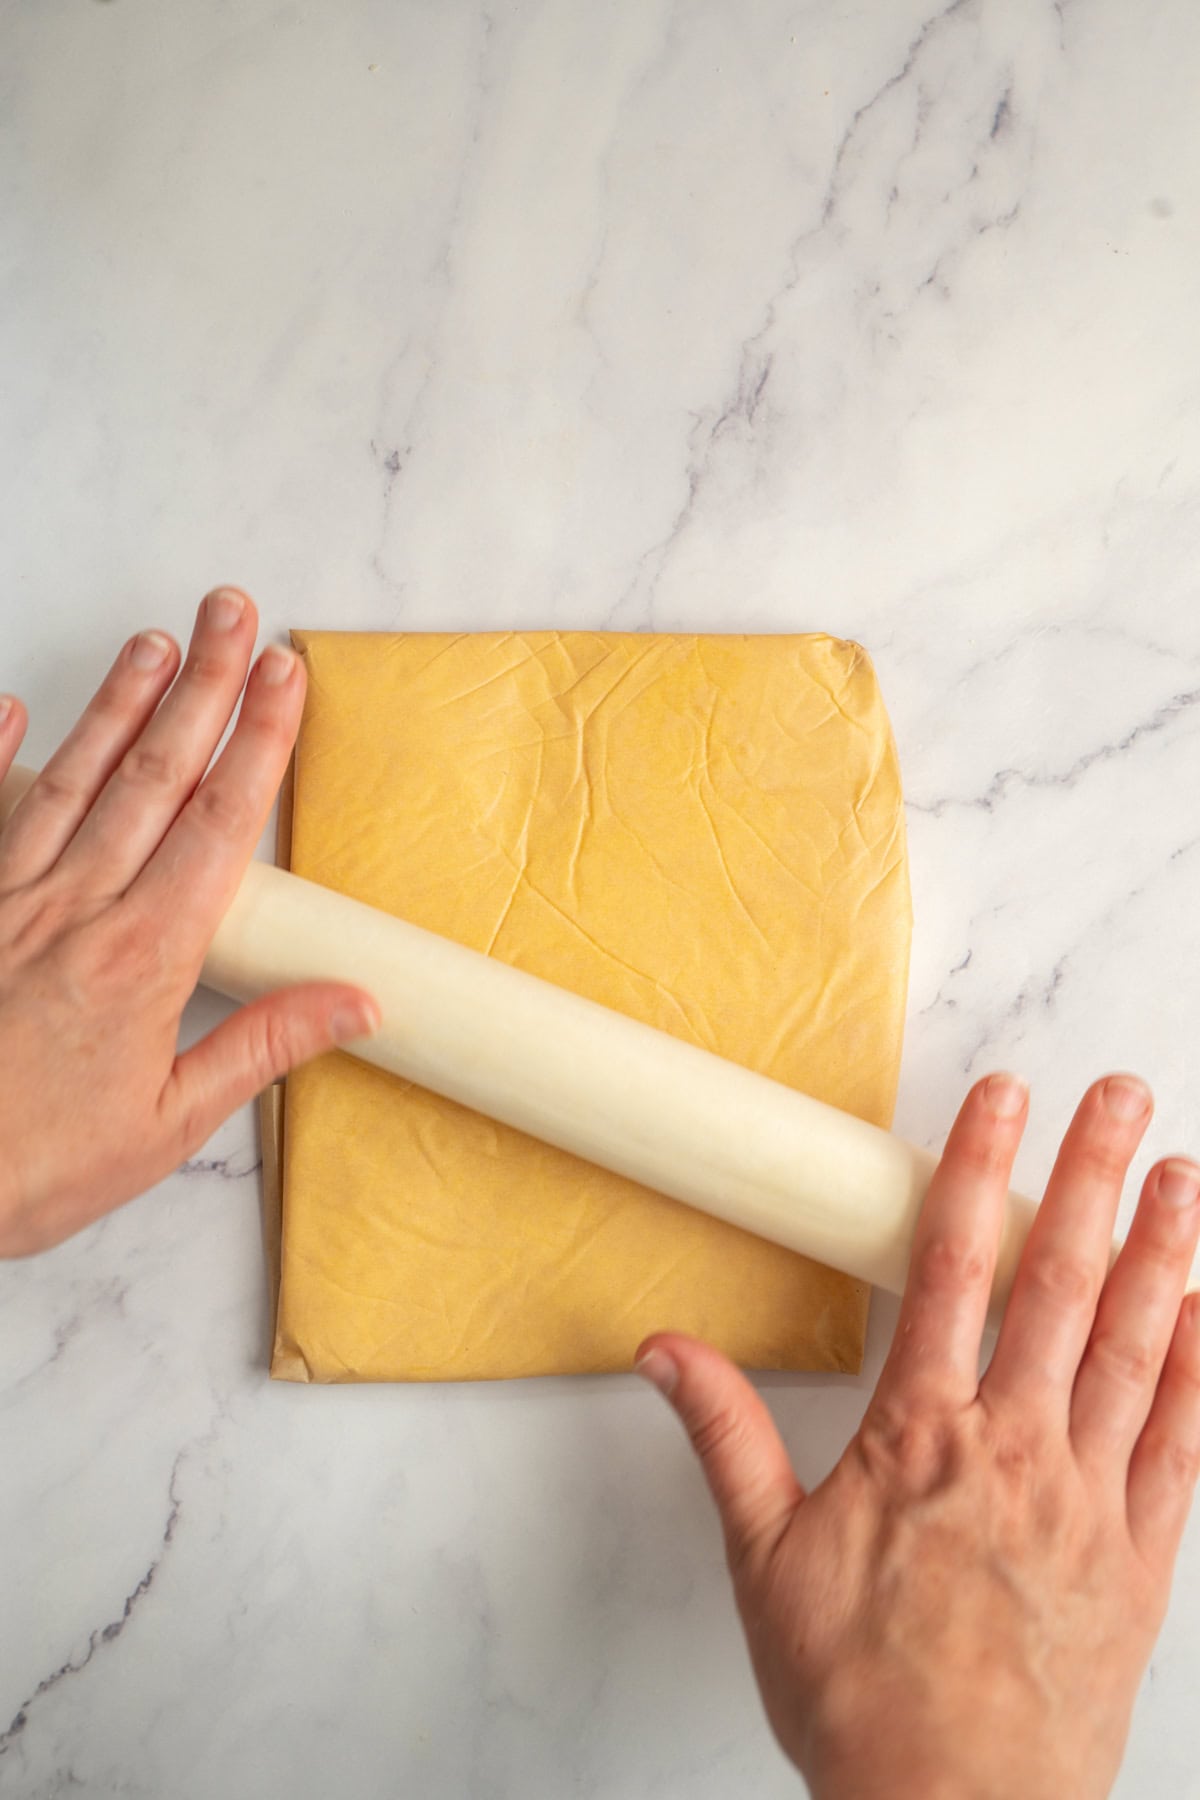
Whichever method you use, you then chill the packet until firm. Just before laminating, you bash it with the rolling pin, which breaks up and rearranges the firm fat crystals that set in the fridge and works them into a smooth, pliable mass without warming the butter. This is what gets the butter to that cold but bendy state, about the same firmness as the chilled dough. Matching those two consistencies is the single most important thing in lamination. Too cold and stiff, and the butter shatters inside the dough; too warm, and it smears in and you lose the layers. Gauging this gets better with practice.

Tip: The two methods want different starting butter. For bashing, keep the butter cold from the fridge. For the flour method, soften it to room temperature first so the flour mixes through easily, then chill it afterwards until firm.
Laminating
Encasing the butter
- Take the butter packet from the fridge and give it a few bashes with the rolling pin to bring it back to a workable, bendy state. You’re aiming for the dough and butter to be a similar consistency, with the dough being cold and firm and the butter cold but bendy.
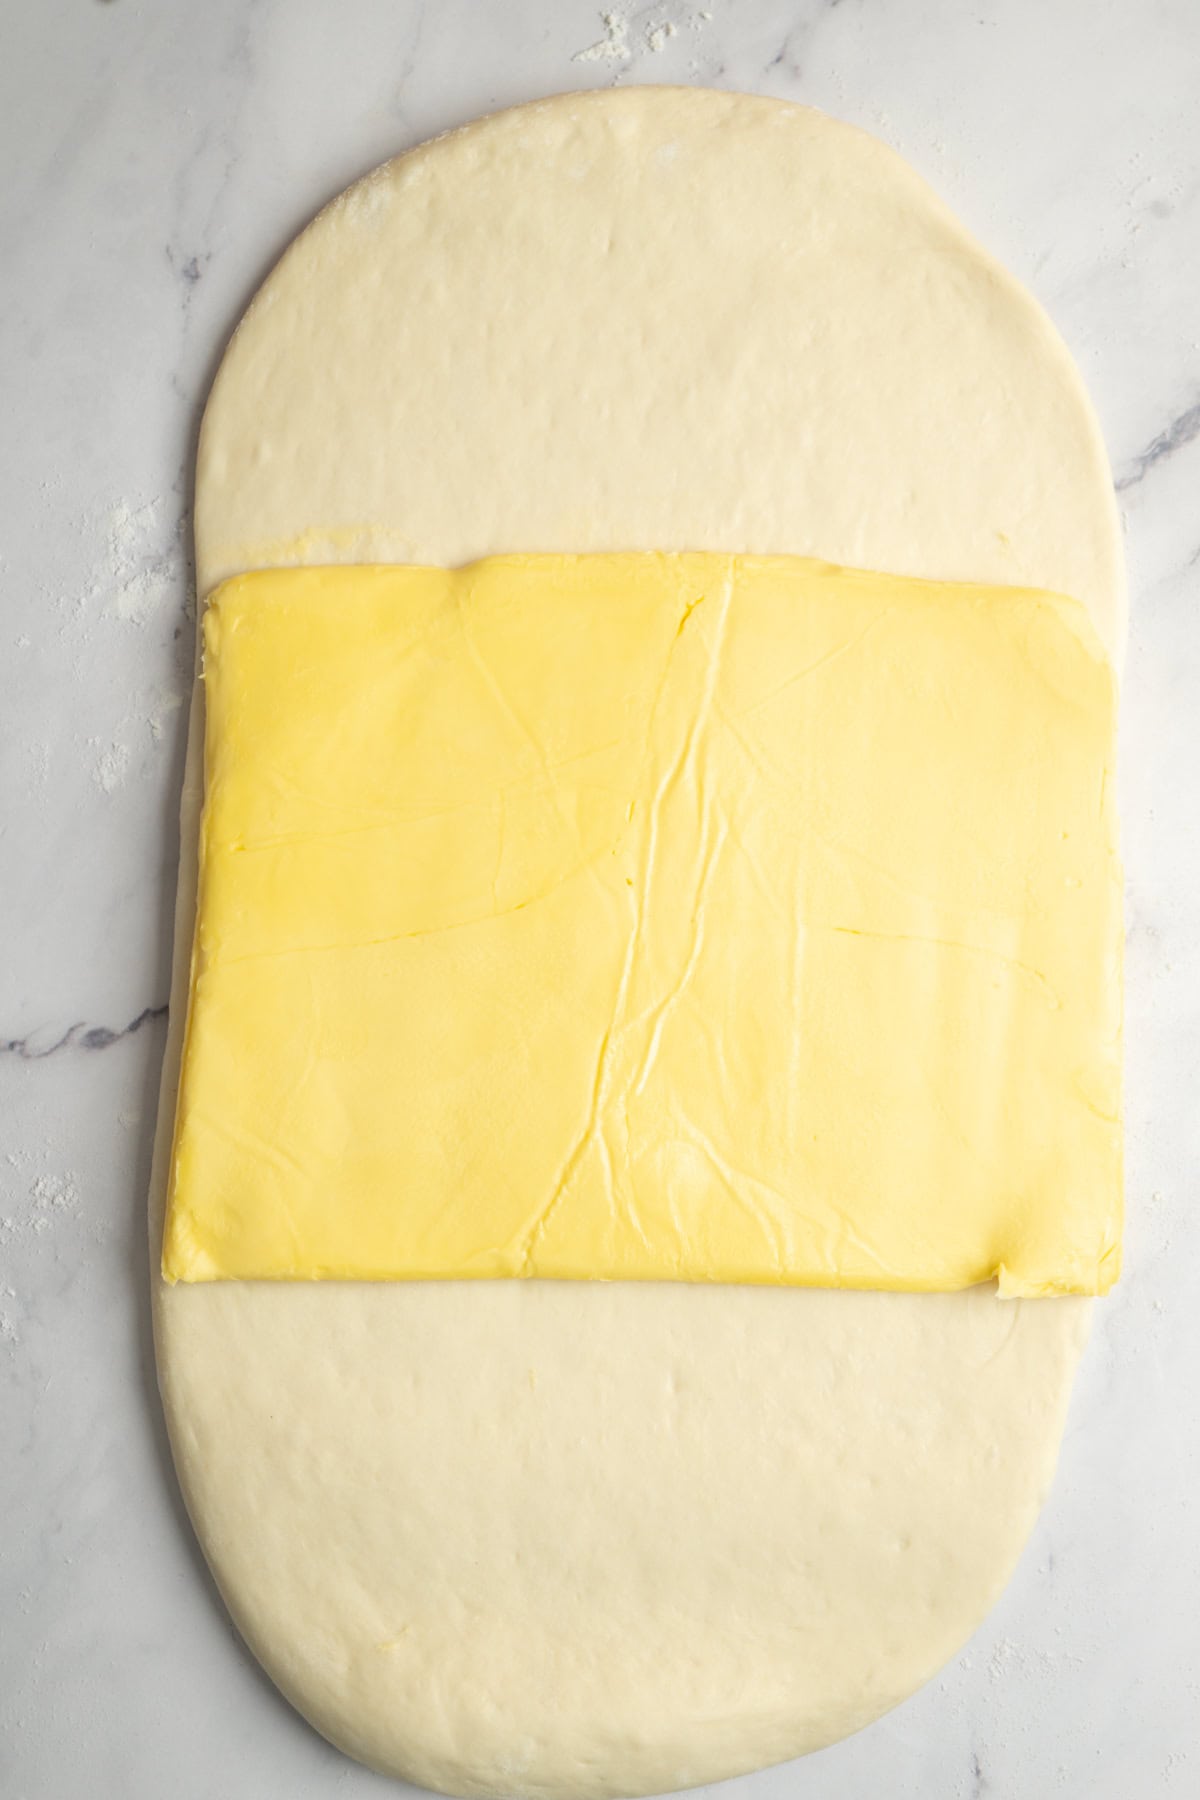
- On a floured bench, roll the chilled dough into a 20 x 40cm (8 x 16 inch) rectangle. Place the cool butter packet in the middle of the dough.
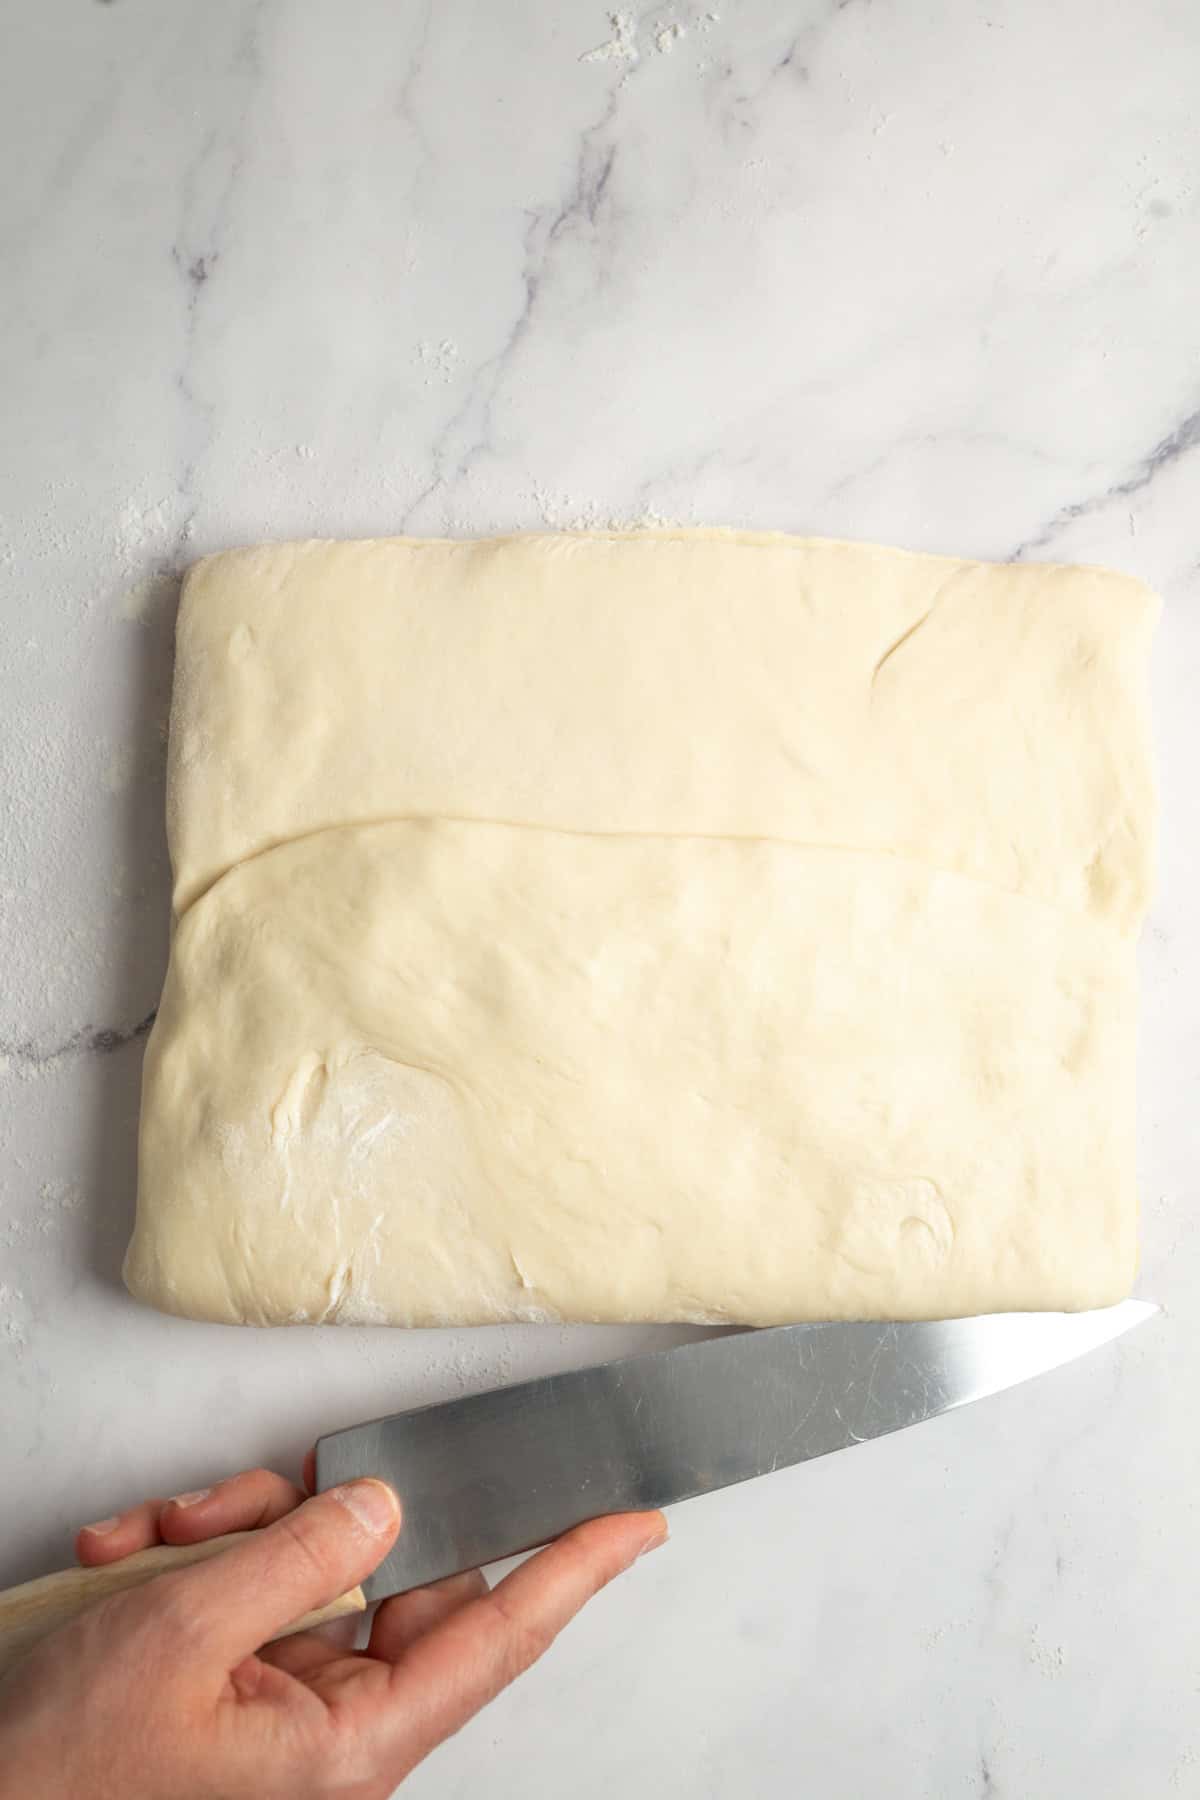
- Bring the top of the dough down and the bottom up to meet in the middle, tucking the butter inside. Use a sharp knife to make a shallow slit along the long edges of the dough, to prevent excessive tension in the dough. Turn the dough a quarter turn.
Fold 1
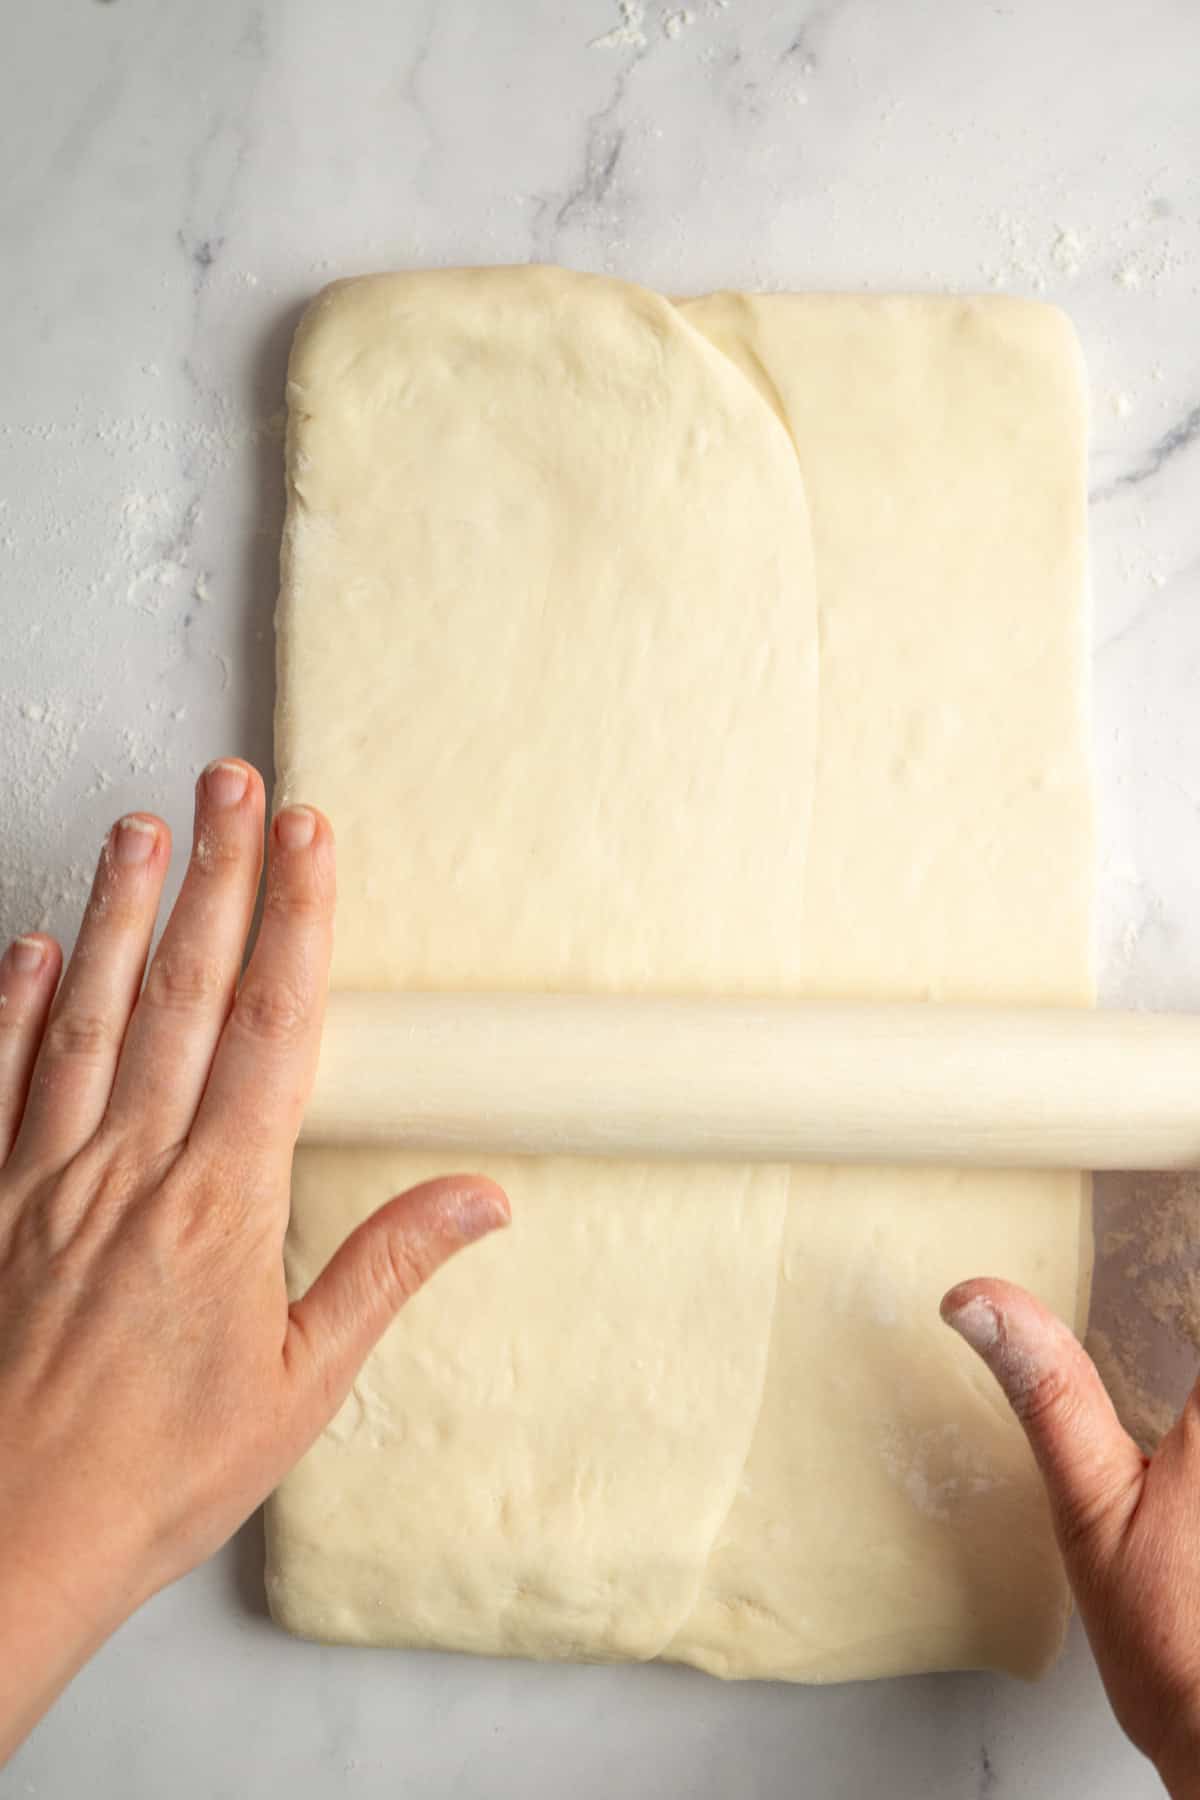
- Use the rolling pin to gently press along the length first to start dispersing the butter, then roll out into rectangle, around 8mm thick, focusing on lengthening rather than widening. Always roll in one direction, away from you, lifting the pin and starting again rather than rolling back and forth, which drags the layers against each other and smears the butter. Dust with flour if it sticks.
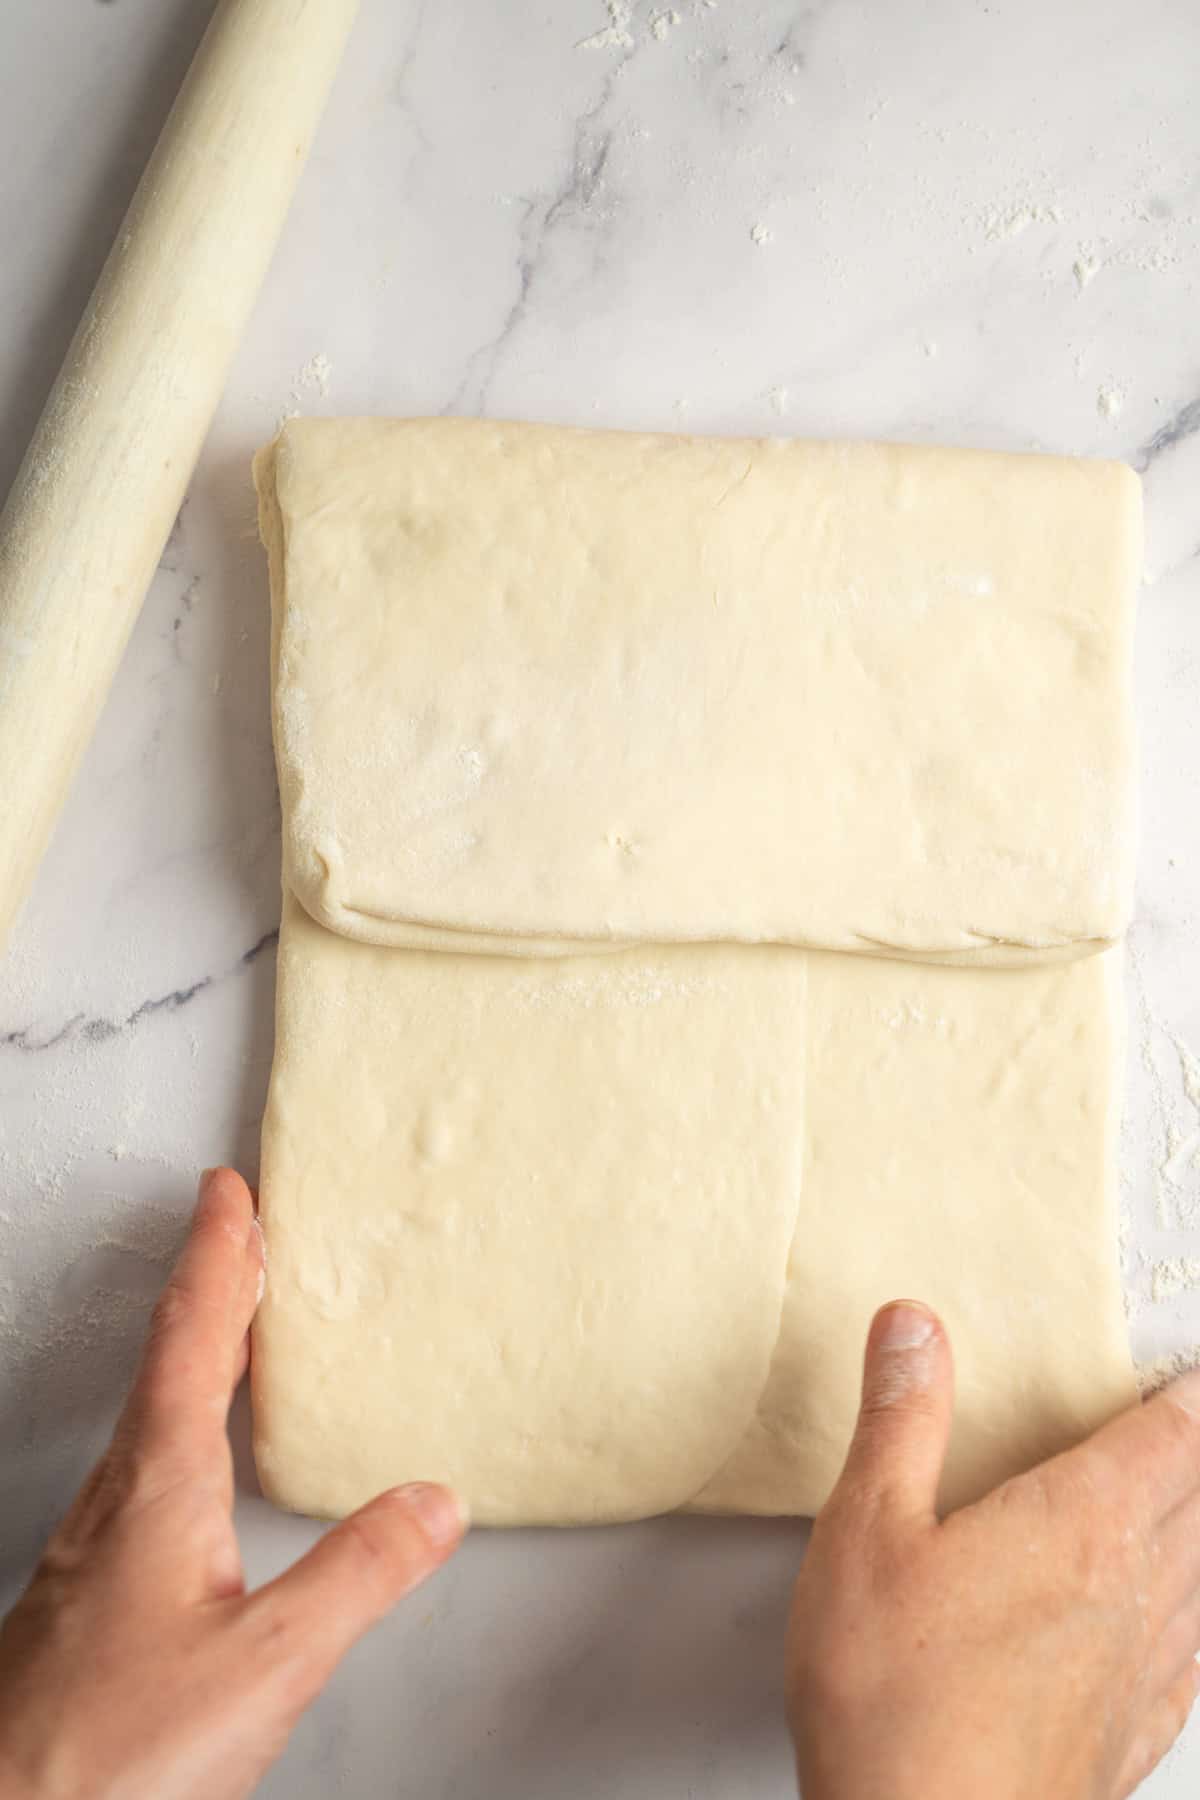
- Fold the dough like a pamphlet, bringing the top third down to the middle and the bottom third up over the top. Wrap tightly or place in an airtight container and rest in the fridge for 30 minutes.
Fold 2 & 3
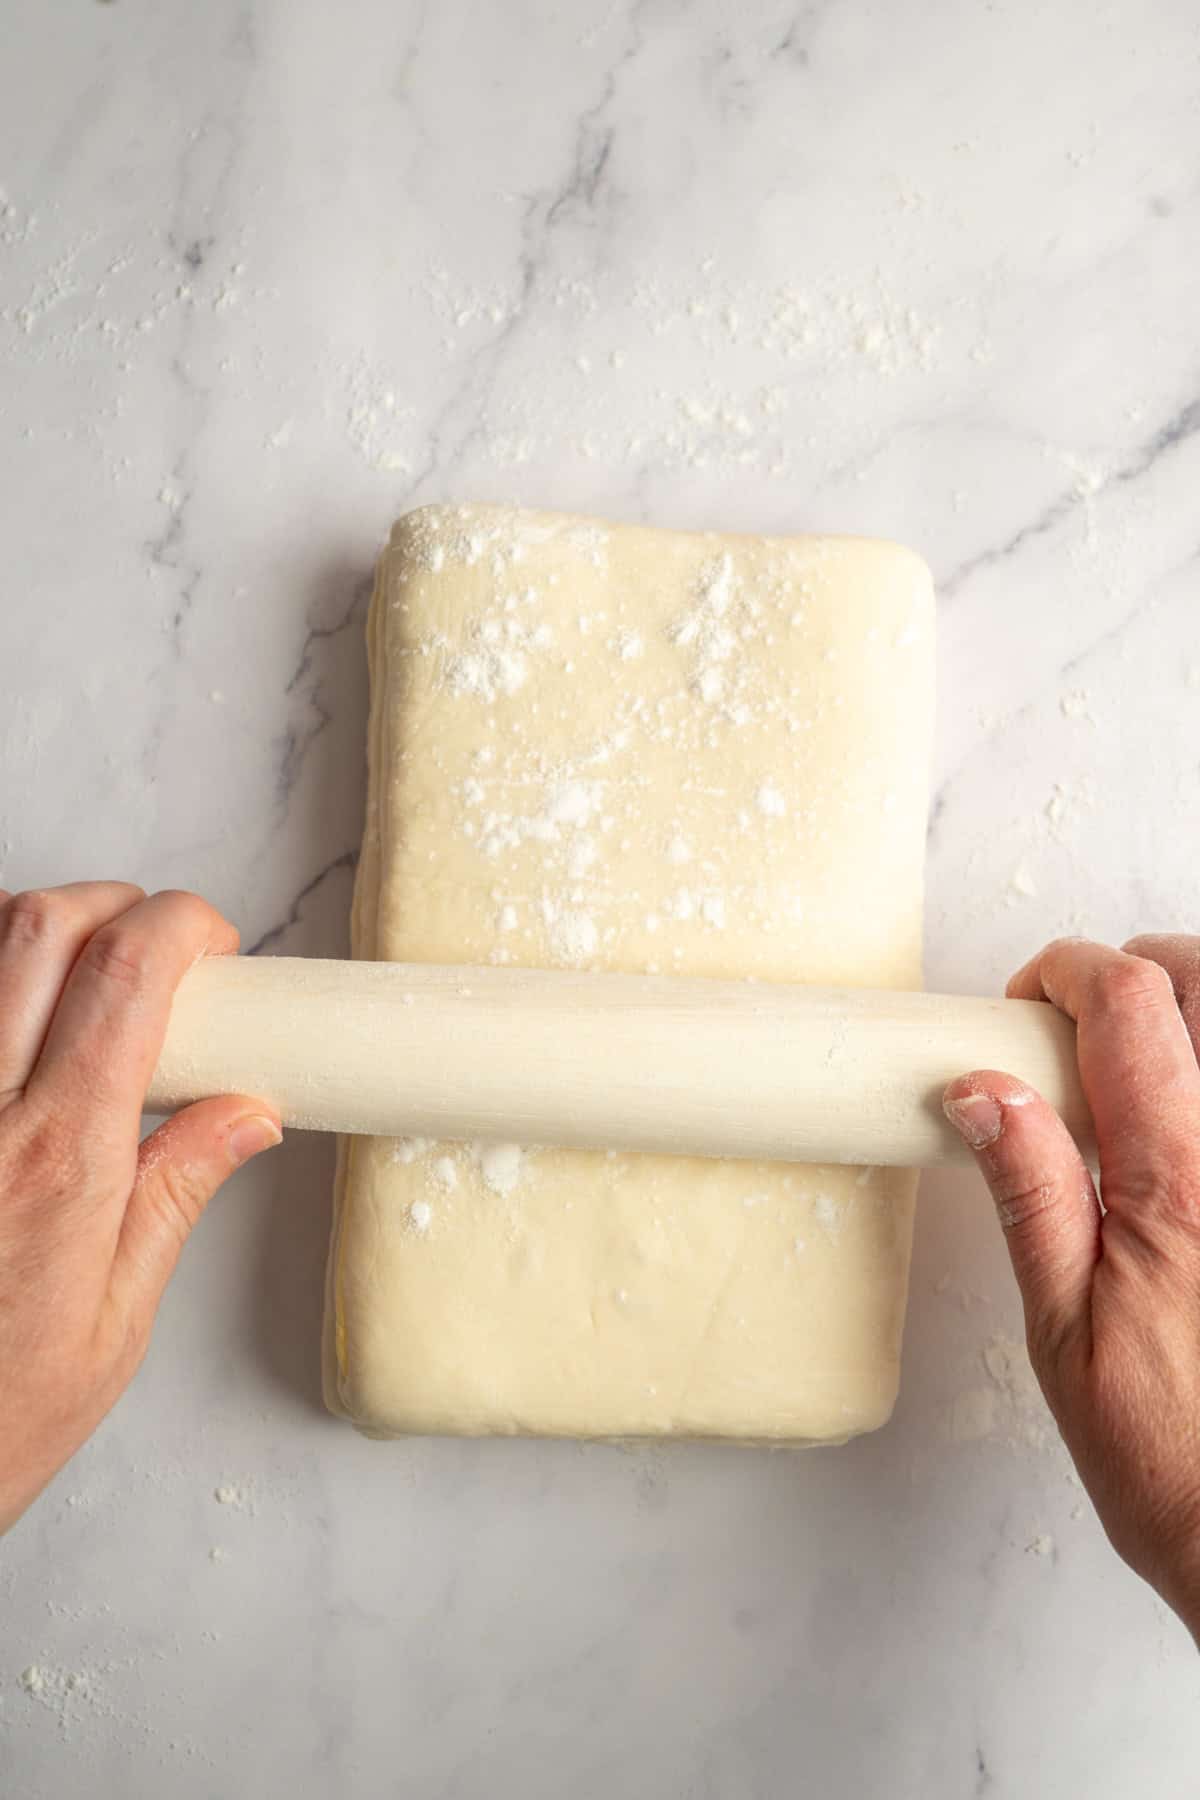
- Turn the chilled dough 90 degrees and roll it out into another rectangle, around 8mm thick. Trim off any scraggly edges to help give you more even layers later. Repeat the pamphlet fold and chill for 20 to 30 minutes.
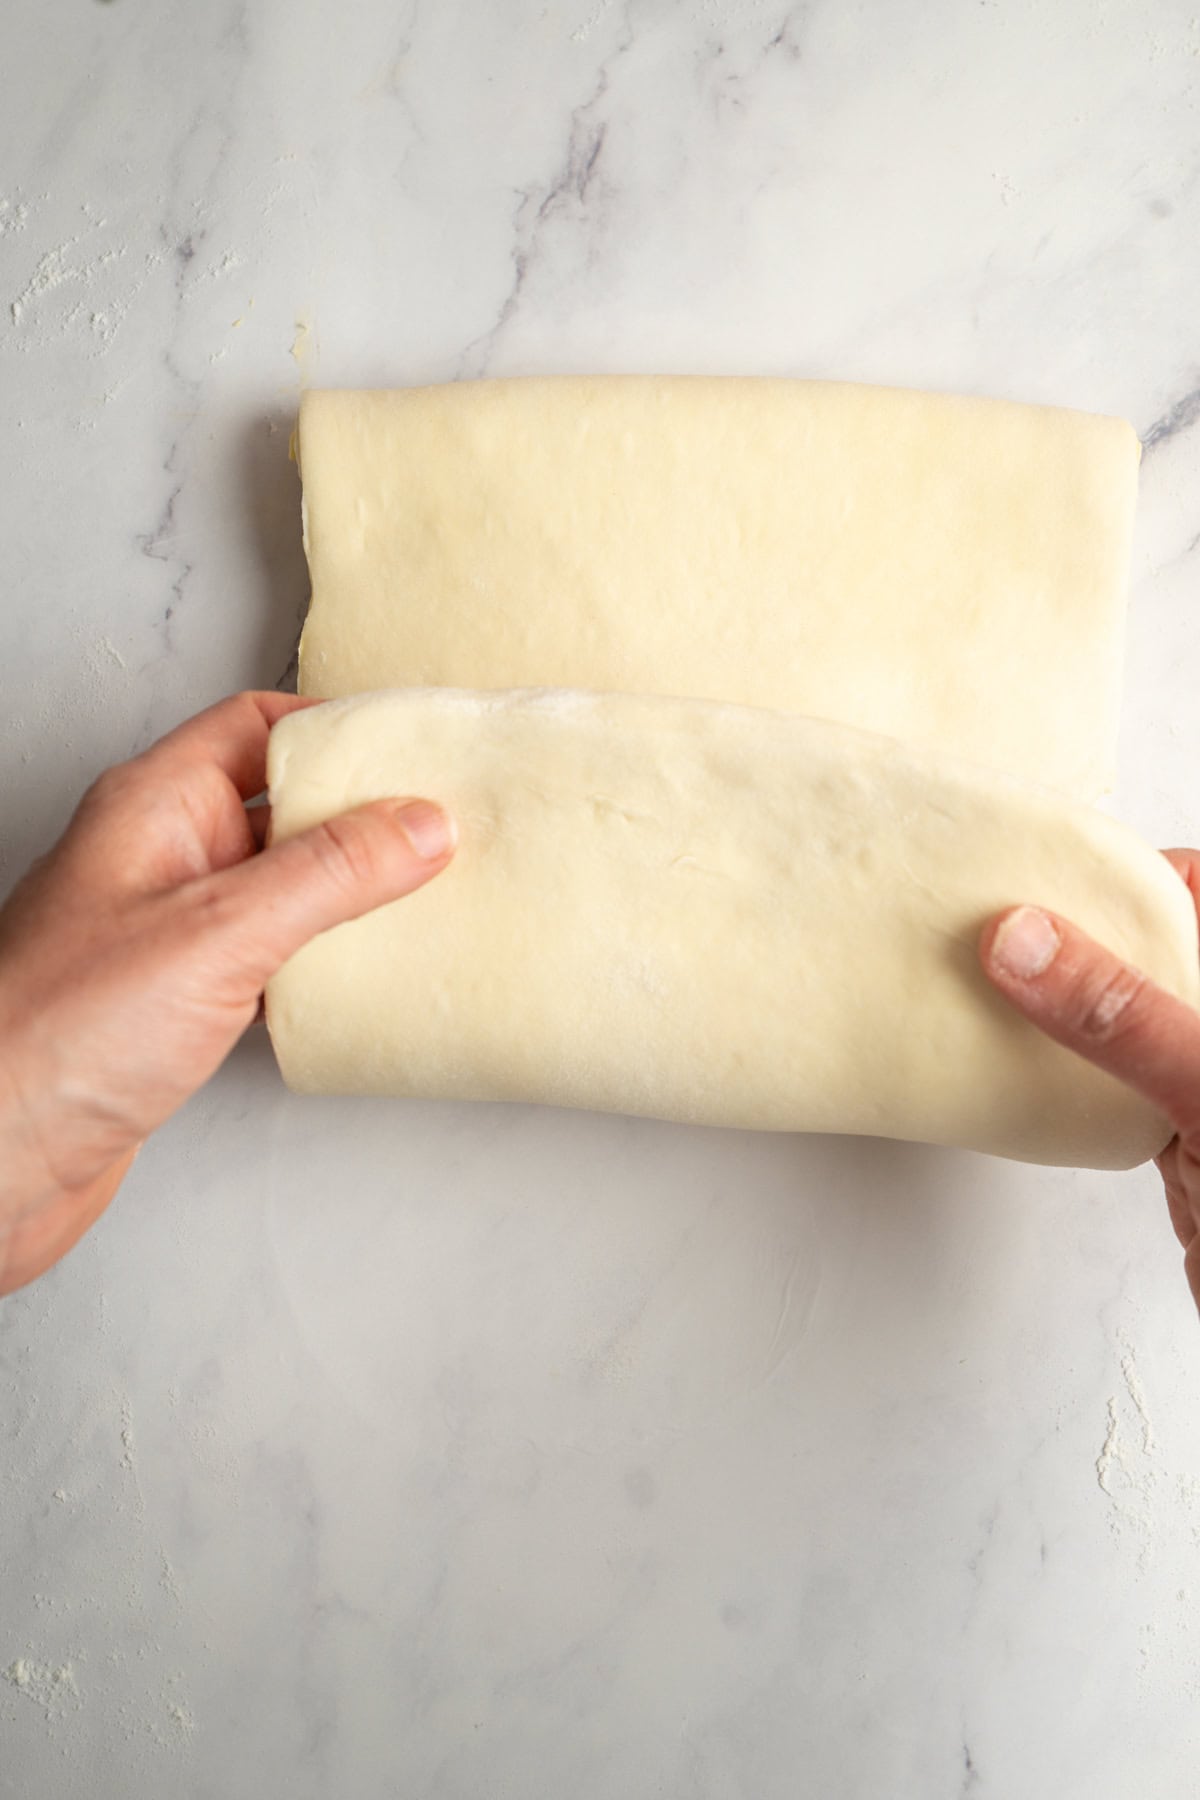
- Repeat the rolling and folding once more. After this third fold, chill the dough for at least 2 hours, tightly covered.
Cutting and shaping
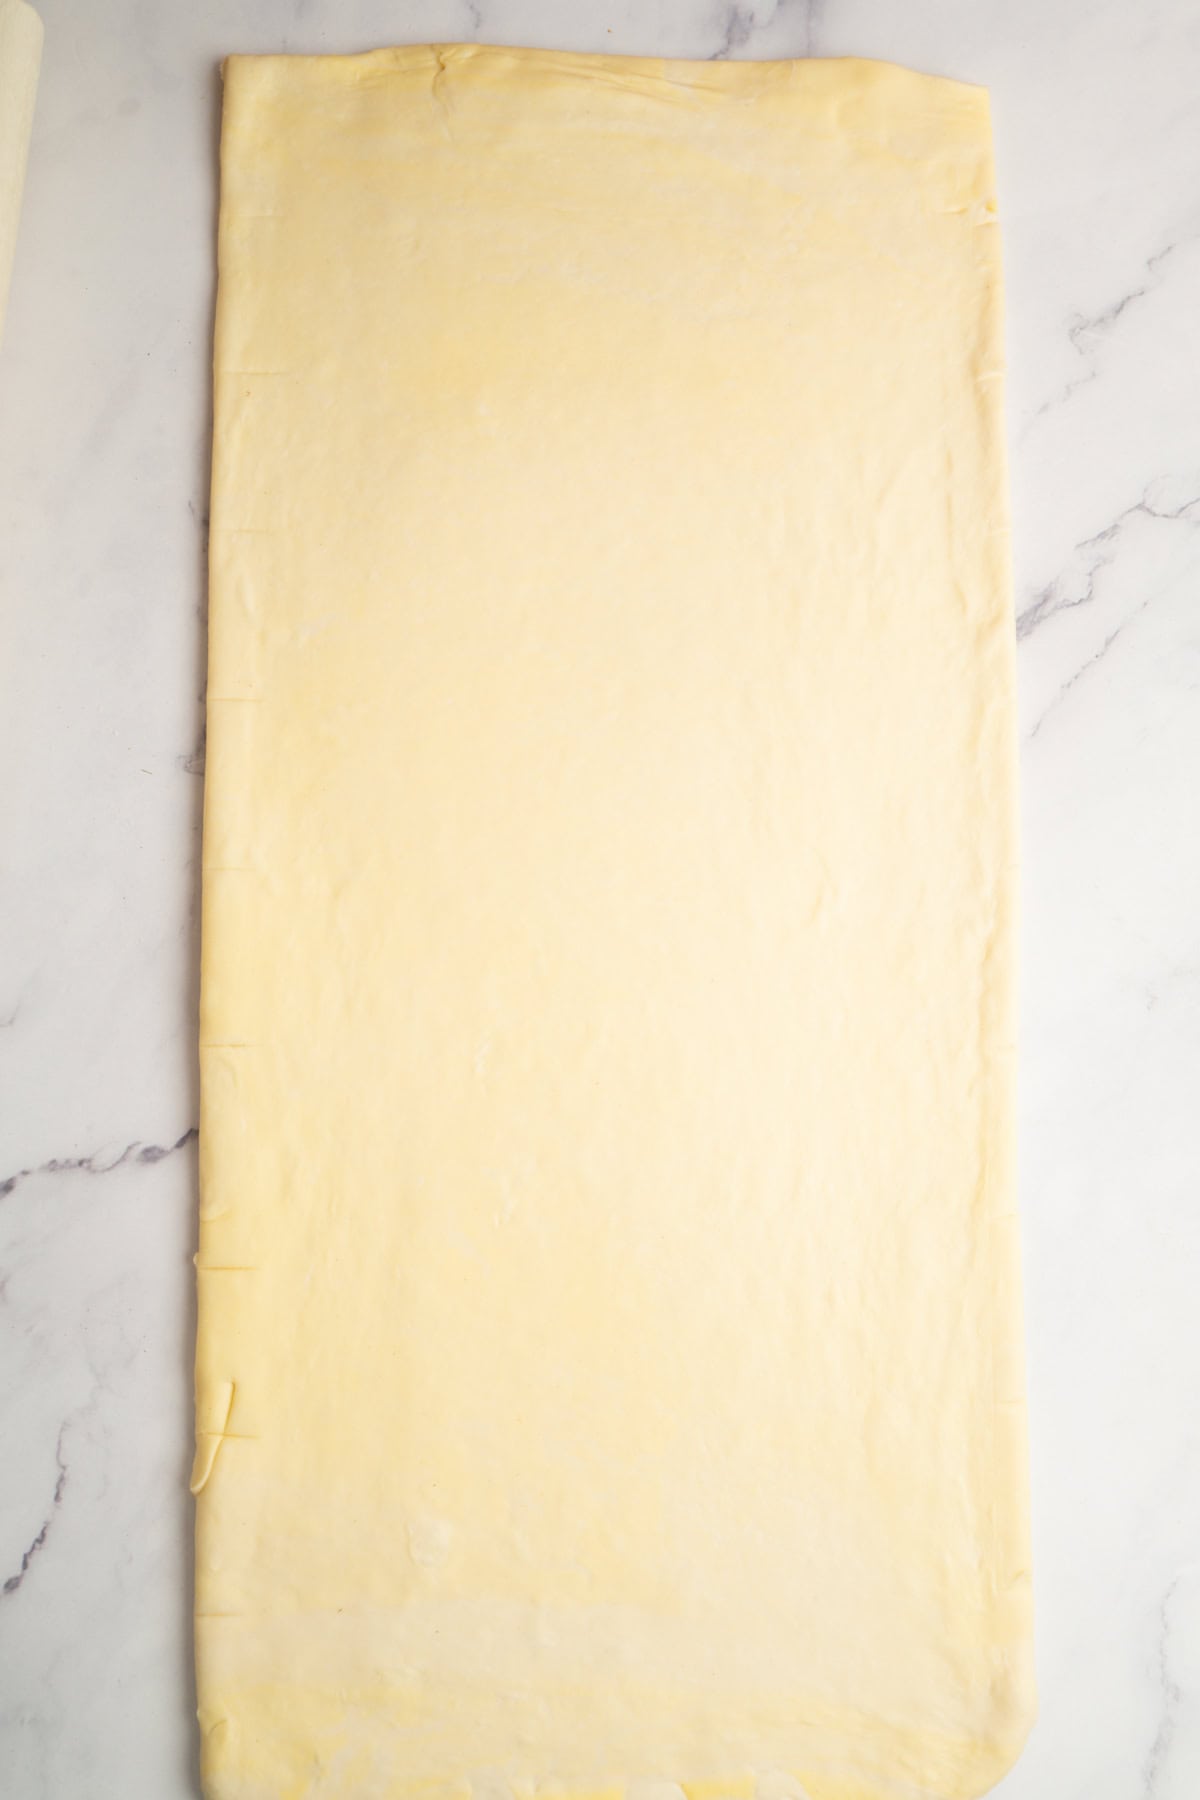
- Roll the chilled dough into a 28 x 60cm (11 x 24 inch) rectangle, around 4mm thick.
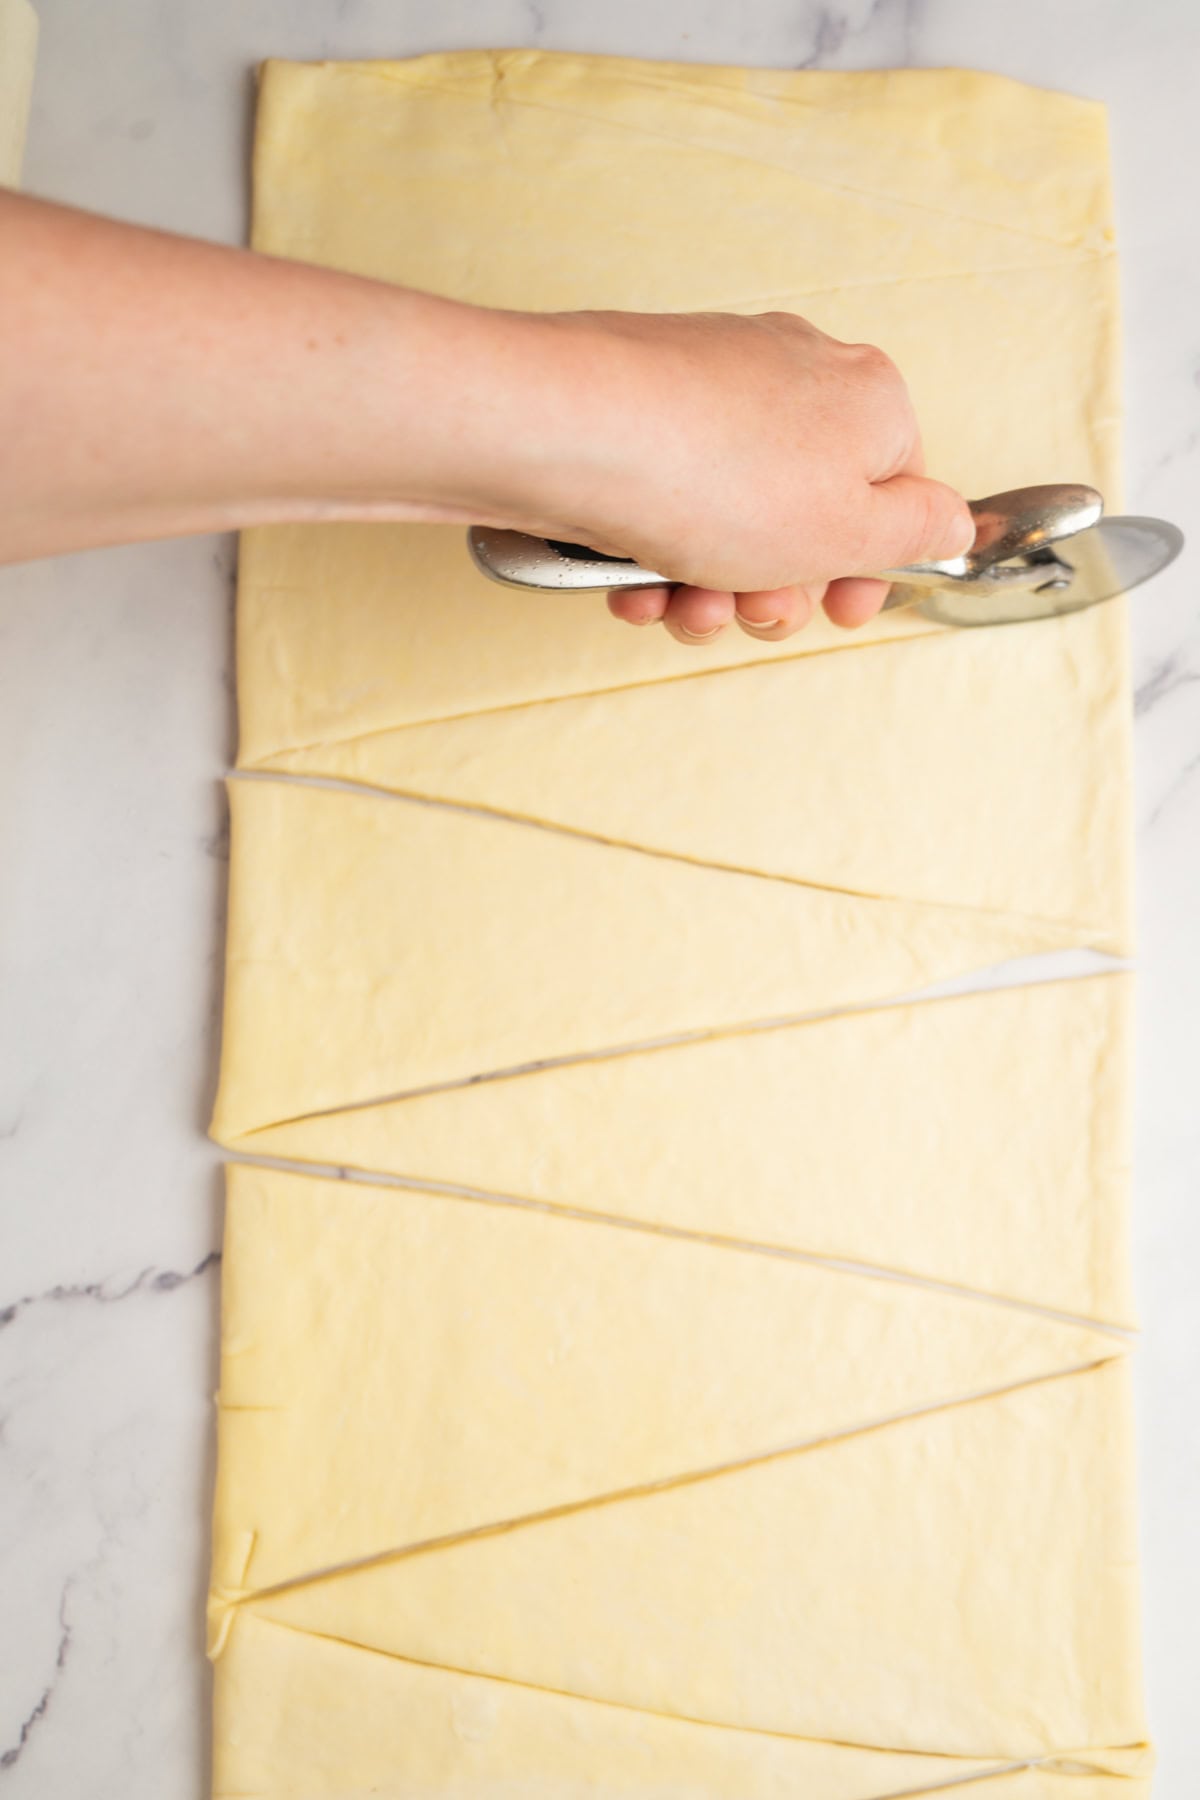
- Mark 5cm (2 inch) intervals along both long edges of the rectangle, with the marks directly opposite each other. Use a pizza cutter or large knife to cut diagonally between the marks, skipping every second mark along each edge to create alternating triangle.
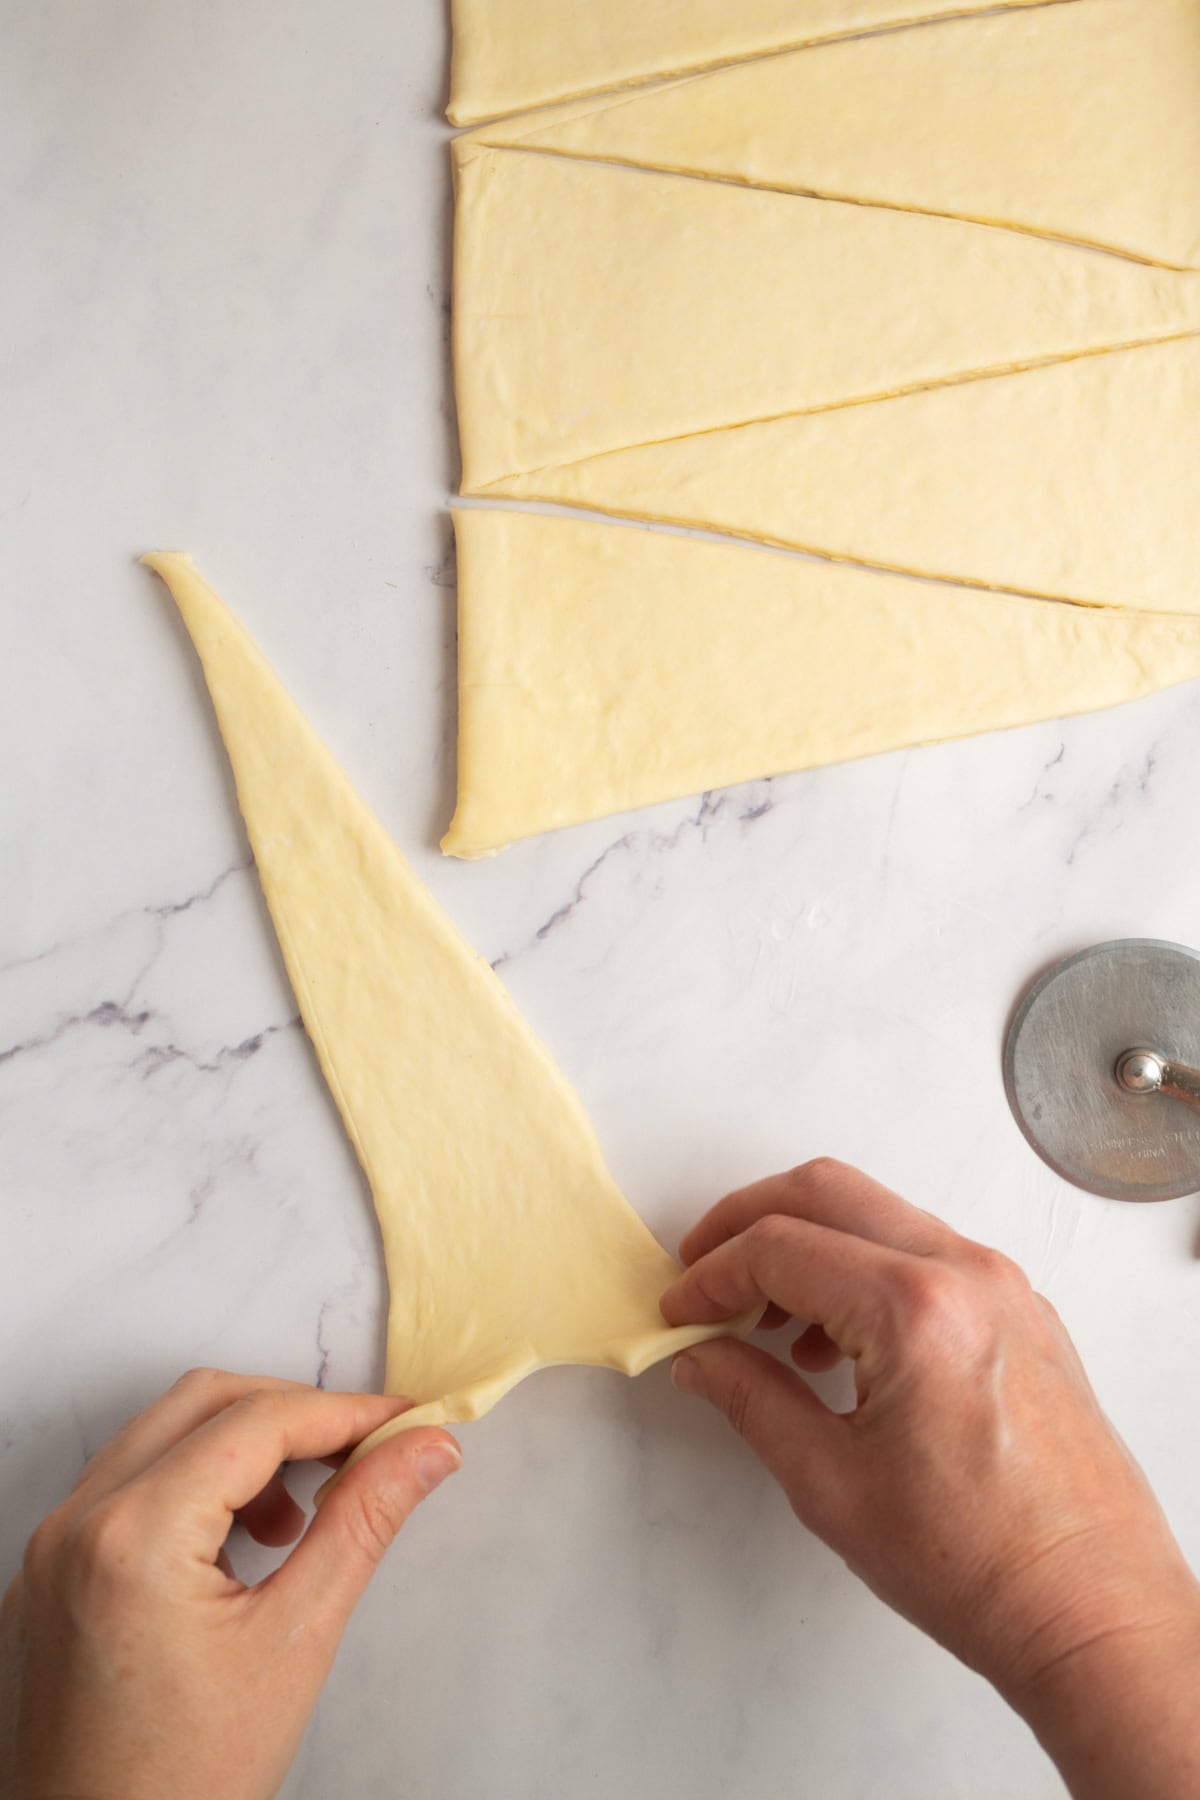
- Stretch the cut at the base of each triangle out a little.
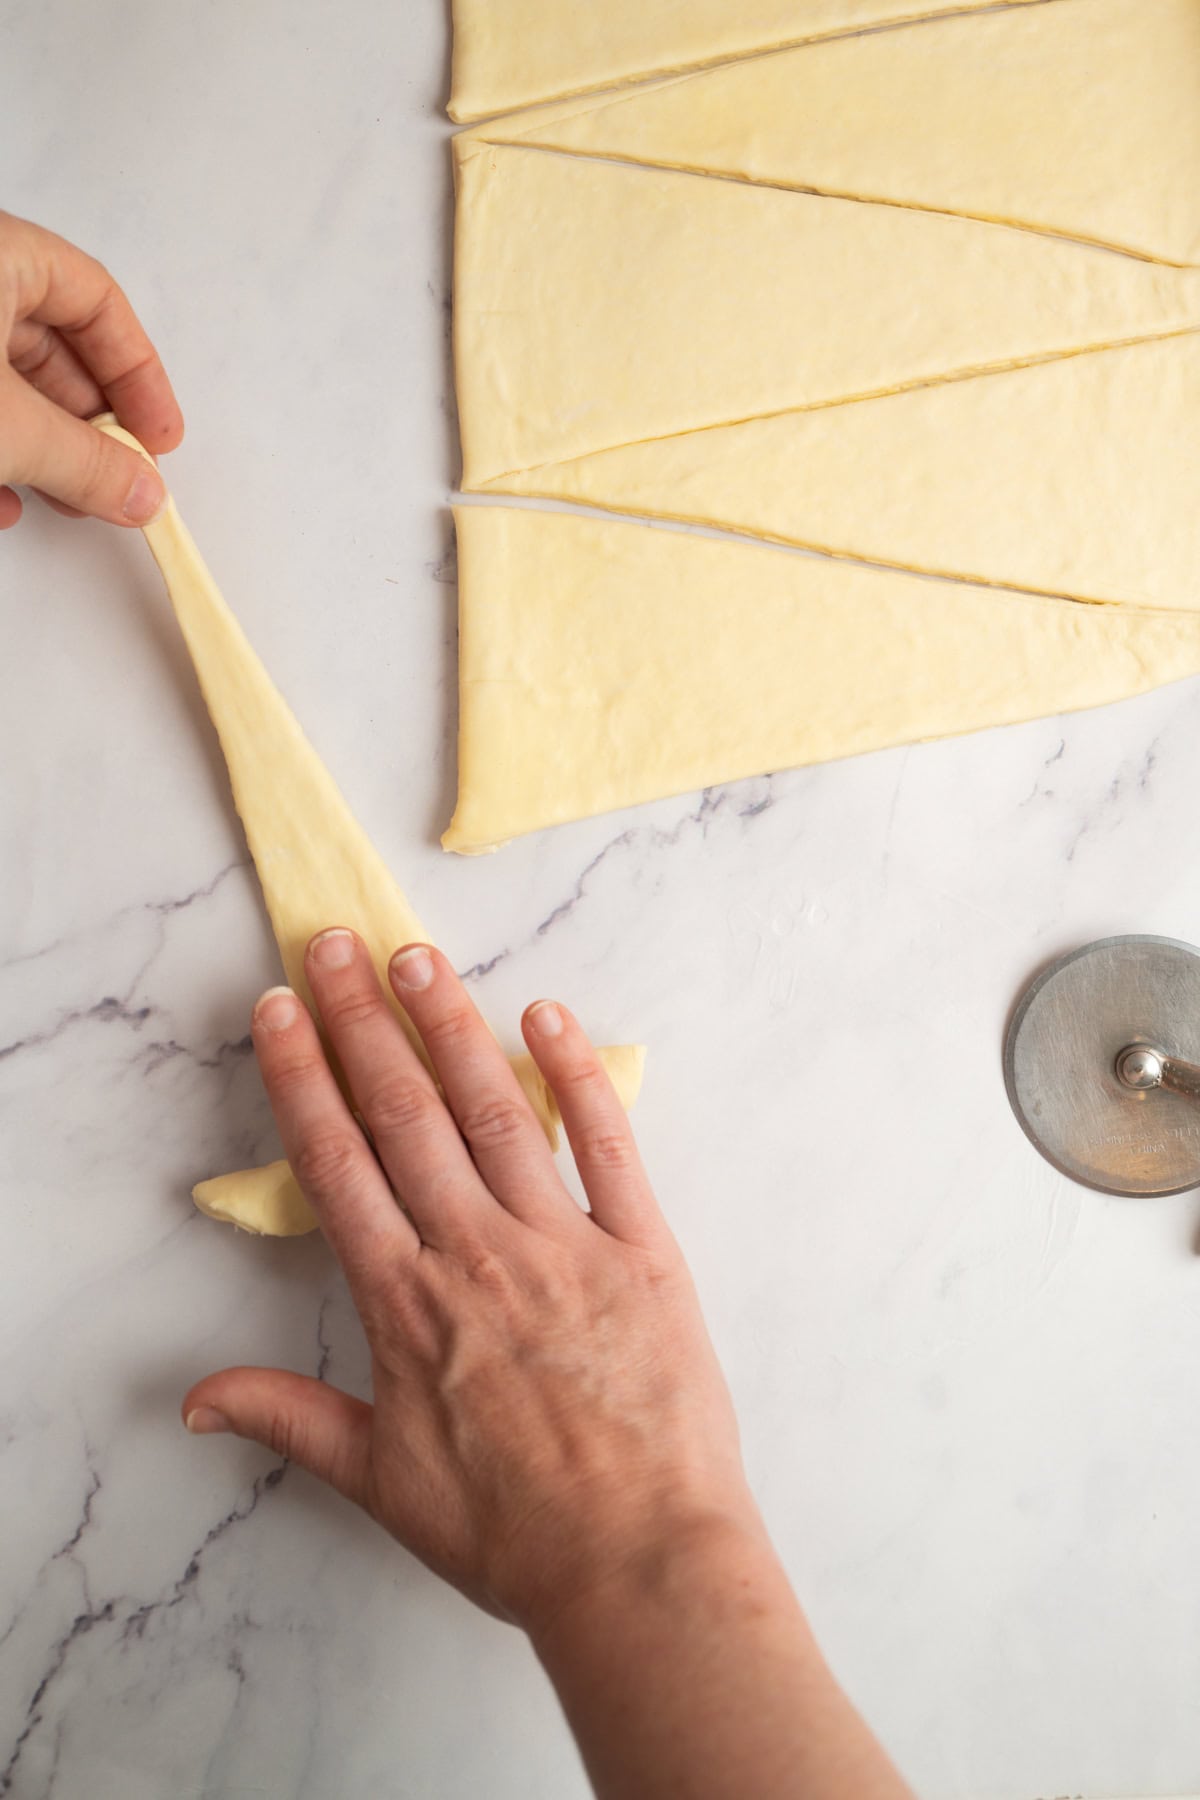
- Roll the triangle up tightly from the base to the tip.
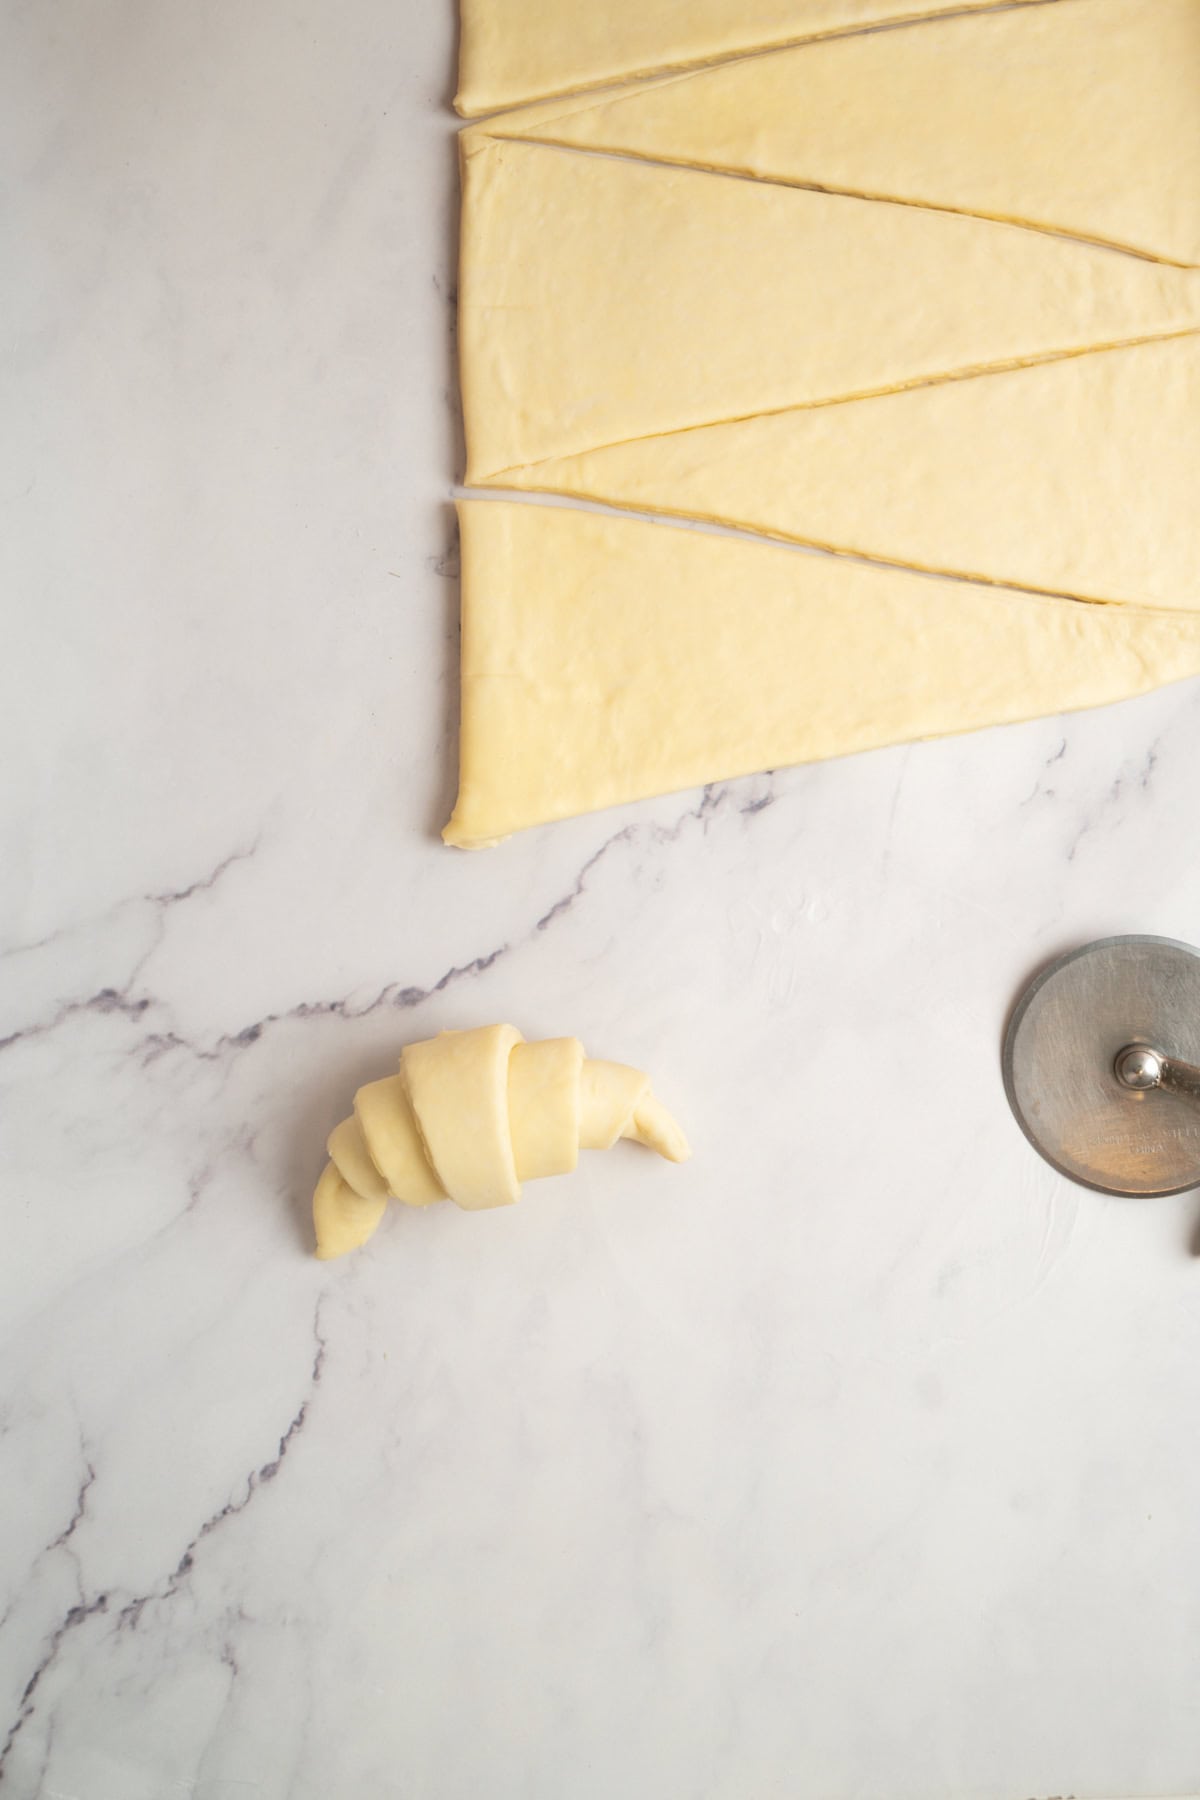
- Bend the ends in slightly to make a crescent, or leave them straight.
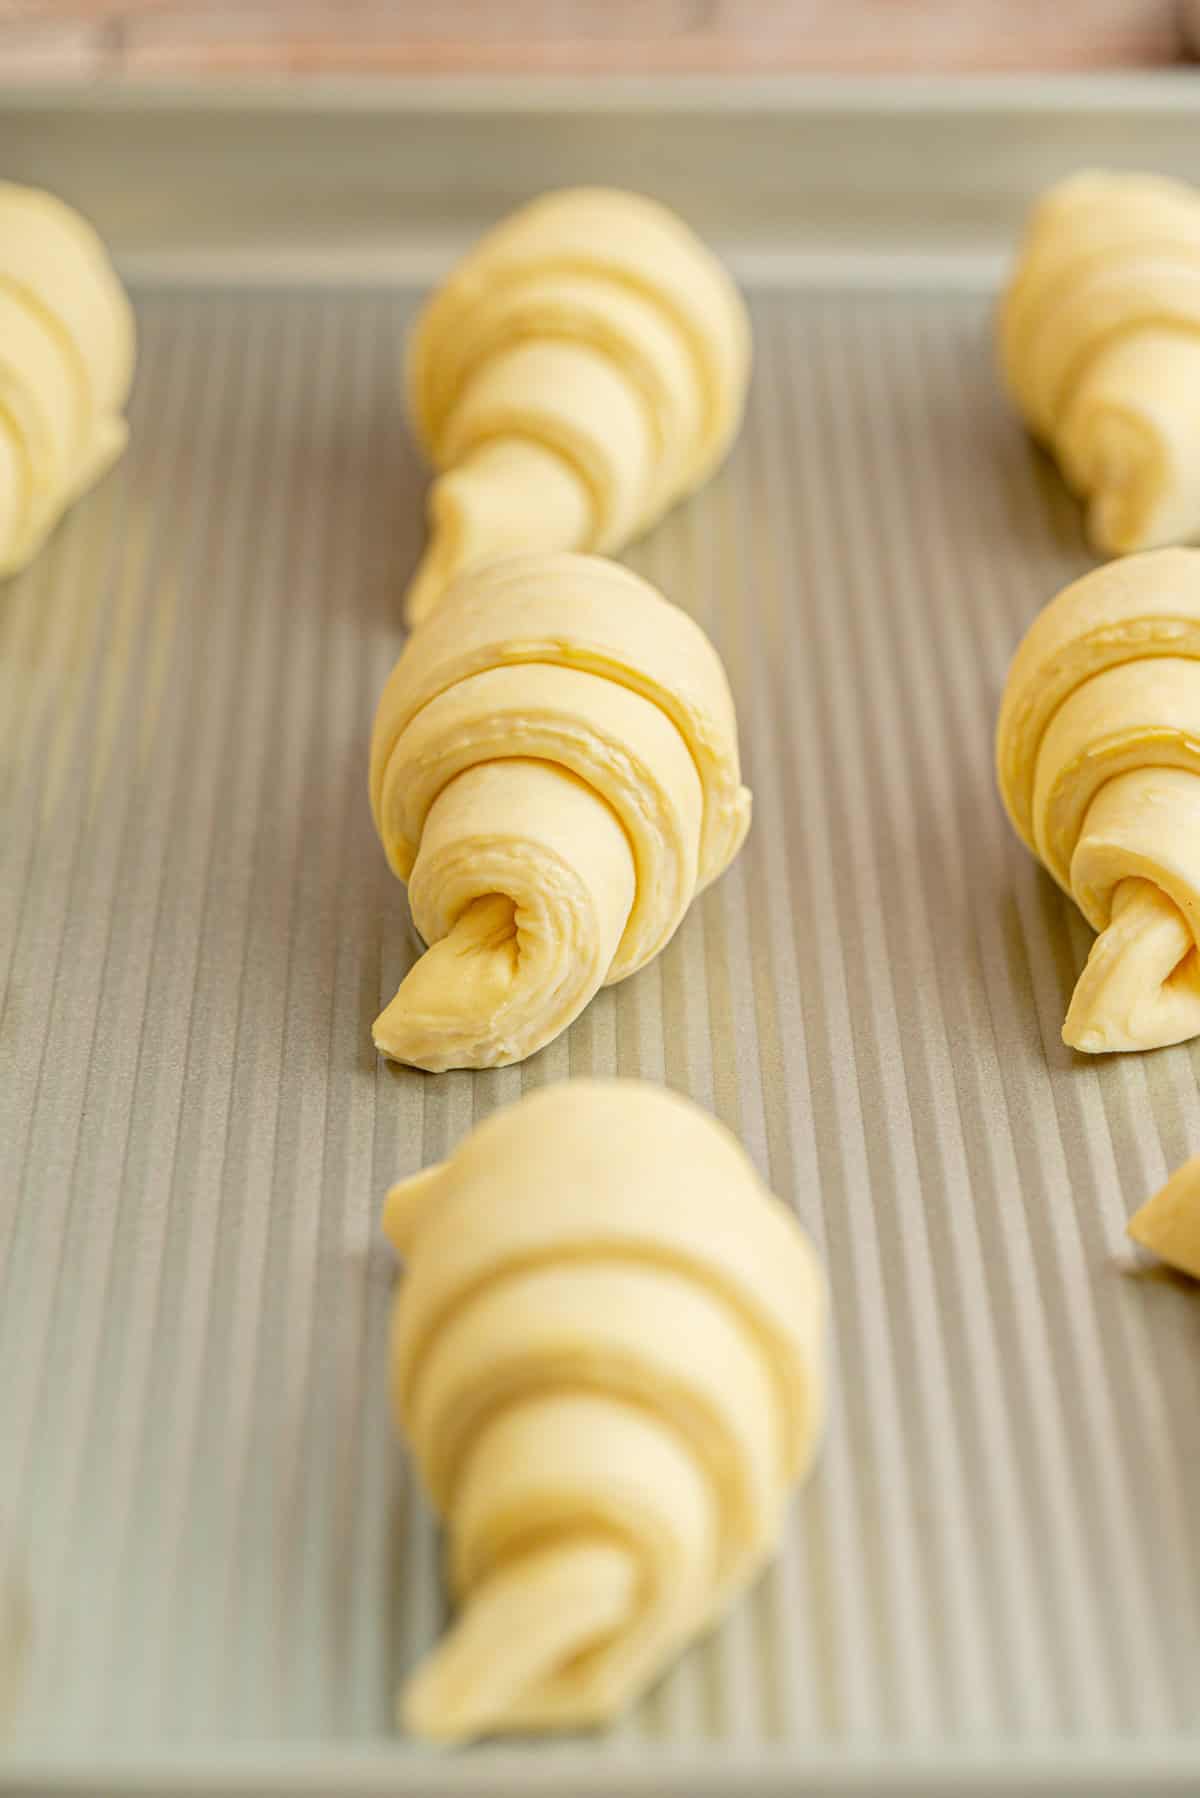
- Place the shaped croissants on parchment-lined trays and proof in a warm spot at around 24 to 25°C
until they are puffy, lighter, and jiggle when the tray is gently shaken.
Proofing: The layers in the proofed croissants should be visible. This can take anywhere from 4 to 7 hours depending on your room temperature, so go by the look and feel of them rather than the clock. To stop them drying out, spritz them gently with water, or create a warm, humid spot by placing them in a cold, turned-off oven next to (not above) a cup of hot water. Just make sure the spot doesn’t get too hot, or the butter will melt and ruin your layers.

- Brush the proofed croissants with egg wash.

- Bake at 205°C / 400°F for around 20 minutes, until deeply browned. If they are browning too quickly, turn the oven down a little.
Tips for success

Other ways to use this dough
This same laminated dough is endlessly useful. You can turn it into:
- Sourdough pain au chocolat, with batons of dark chocolate rolled inside
- Sourdough cruffins, twisted into a muffin tin and rolled in sugar
- Sourdough Danish pastries, shaped and filled with custard, fruit, or jam
- Sourdough kouign-amann, caramelised in muffin tins with sugar
Storage and freezing
Croissants are best served fresh on the day they’re baked, and the layers will be most prominent once the croissant has cooled to room temperature before slicing.
Leftover croissants can be stored in an airtight container at room temperature for up to 4 days, or frozen for up to 3 months.
Freezing unbaked croissants: I’m currently retesting the best ways to freeze sourdough croissants, including different freezing durations, thawing methods and proofing temperatures.
While you can freeze shaped, unproofed sourdough croissants, the results can be a little unpredictable. Freezing can affect the activity of the wild yeast, which means the croissants may take considerably longer to rise or may not rise as well as freshly made ones.
For now, I’ve removed my original freezing instructions while I do some more testing. I’ll be updating this section with clearer instructions, photos and results from my experiments so you can see exactly what works best. In the meantime, my recommendation is to bake the croissants first and freeze them once completely cooled. They can then be thawed and refreshed in the oven when you’re ready to eat them.
Watch this space!

FAQs about sourdough croissants

Related recipes
Try these other sourdough recipes:
- Easy sourdough focaccia
- Chocolate sourdough bread
- Sourdough garlic knots
- Sourdough cruffins
- Sourdough fougasse
Love lamination? Try this inverse puff pastry, or if you’re short on time, here’s a rough puff pastry.

Step by Step Sourdough Croissants
Ingredients
Levain
- 30 g starter
- 60 g all-purpose flour
- 60 g water
Dough Ingredients:
- 450 g all-purpose flour
- 8 g salt
- 40 g sugar
- 230 g water
- All the levain or around 140g active sourdough starter, 100% hydration
- 50 g unsalted butter room temperature
Butter packet:
- 250 g unsalted butter room temperature or cold depending on method used, see notes
- 1 1/2 Tablespoons all-purpose flour (only for the flour method, see notes)
Egg Wash
- 1 egg + 1 tbsp water
Instructions
Levain
- Feed your levain by combining the starter, flour and water in a jar and mixing well. Leave it until bubbly, doubled or tripled in volume, and at or near its peak. Feed it in the morning for Schedule 1, or the night before for Schedule 2, adjusting the feeding ratio or temperature if needed so it's ready when you want to mix the dough.
The dough
- Mix all the dough ingredients together by hand to form a sticky dough ball. Knead on the bench for 5 to 8 minutes until smooth. It will still be a bit sticky, which is fine. 450 g all-purpose flour, 8 g salt, 40 g sugar, 230 g water, All the levain, 50 g unsalted butter
- Place the dough in a greased bowl and cover. Let the dough ferment for around 3-4 hours at 24 to 25°C / 75 to 77°F, until puffed by around 20 to 40%. It doesn't need to double.
- Shape the dough into a flat rectangle, wrap tightly or place in an airtight container, and chill in the fridge. If following Schedule 1, refrigerate overnight. If following Schedule 2, refrigerate for 2 to 3 hours before laminating. Shaping the dough into a rectangle now means less rolling later, which helps keep the dough cold and relaxed.
The butter packet
- Make the butter packet using either the bashing method or the flour method (see notes below). Roll it into a rectangle of about 15 x 20cm (6 x 8 inch) between two sheets of baking paper, then chill it in the fridge. 250 g unsalted butter, 1 1/2 Tablespoons all-purpose flour
Encasing the butter
- Take the butter packet from the fridge and bash it firmly all over with the rolling pin, then give it a roll to bring it into a workable, bendy state. Bashing the cold butter with the rolling pin works the fat into a smooth, pliable state without warming it, so it bends like cold clay instead of cracking.
- On a floured bench, roll the chilled dough into a 20 x 40cm (8 x 16 inch) rectangle. Place the butter packet in the middle. Bring the top of the dough down and the bottom up to meet in the middle over the butter, then pinch the seam where they meet to seal.
- Make a shallow slit along each of the folded long edges (the closed sides where the butter is sealed in, not the open ends), to relieve the tension. Then turn the dough a quarter turn.
Fold 1
- Gently press along the length of the dough with the rolling pin to start dispersing the butter, then roll out to around 8mm thick, focusing on lengthening rather than widening. Always roll in one direction, away from you, lifting the pin and starting again rather than rolling back and forth, which smears the butter. Dust with flour if it sticks.
- Brush off any excess flour, then fold the dough like a pamphlet, bringing the top third down to the middle and the bottom third up over the top. Wrap tightly and chill for 30 minutes.
Fold 2 and 3
- Turn the chilled dough 90 degrees and roll out again to around 8mm thick. Trim off any scraggly edges for more even layers. Brush off excess flour, repeat the pamphlet fold, and chill for 20 to 30 minutes.
- Repeat the rolling and folding once more. After this third fold, chill the dough, tightly covered, for at least 2 hours.
Cutting and shaping
- Roll the chilled dough into a 28 x 60cm (11 x 24 inch) rectangle, around 4mm thick.
- Mark 5cm (2 inch) intervals along both long edges of the rectangle, with the marks directly opposite each other. Using a pizza cutter or large knife, cut diagonally from one edge to the other, skipping every second mark to create alternating triangles with bases approximately 10cm (4 inches) wide. You should get around 12 croissants. See the photo above for the cutting pattern.
- Gently stretch the base of each triangle out a little, then roll it up snugly from the base to the tip without squashing the layers. Bend the ends in slightly to make a crescent, or leave them straight.
- Place the shaped croissants on parchment-lined trays and proof in a warm, humid spot, ideally around 24 to 25°C (75 to 77°F), until noticeably puffy, light and jiggly when the tray is gently shaken. The layers should be clearly visible. This can take around 4 to 7 hours, or much longer in a cooler kitchen. Go by how the croissants look and feel rather than the clock, and keep the temperature below 26°C (79°F) so the butter doesn't melt.
- To stop them drying out, spritz them gently with water or create a warm, humid spot by placing them in a cold, turned-off oven next to a cup of hot water. Don't put the cup directly under the croissant tray, and don't let the spot get too hot, or the butter will melt and ruin the layers.
Baking
- Brush the proofed croissants gently with egg wash. 1 egg + 1 tbsp waterBake at 205°C (400°F) in a conventional oven for around 20 minutes, until deeply golden brown, including around the sides. If they're browning too quickly, turn the oven down a little.
- Let the croissants cool to room temperature before slicing so the interior has time to set.
Notes
Baker’s schedule (2 ways)
Schedule 1: Laminate on day 2. Feed the levain in the morning of day 1 and let it reach its peak (around 6 hours for mine). Mix and ferment the dough, then chill it overnight. On day 2, make the butter packet and laminate with three folds, chilling for 20 to 30 minutes between each. Chill for at least 2 hours after the final fold, then shape, proof and bake. Schedule 2: Laminate on day 1. Feed the levain the night before so it’s at its peak and ready first thing. You may need to use a higher feeding ratio or a cooler spot overnight so it doesn’t peak too early. Mix and ferment the dough, chill it for 2 to 3 hours, then laminate with all three folds that afternoon, chilling between each fold. Rest the laminated dough overnight in the fridge. Day 2 is then just shaping, proofing and baking, so you can have fresh croissants around lunchtime, depending on how quickly they proof.A note on feeding the levain
The levain in this recipe uses a 1:2:2 feeding ratio, which takes around 6 hours to peak in my kitchen at 21 to 23°C (70 to 73°F). If you’re following Schedule 2 and feeding it the night before, you may need to increase the feeding ratio so it takes longer to peak, or keep it somewhere cooler overnight. For example, you could use 15g starter, 75g flour and 75g water (1:5:5). This will generally take longer to peak, but the exact timing depends on your starter and room temperature. These timings are a guide, so adjust them to suit your kitchen and how quickly your starter and dough ferment.The butter packet (2 methods)
Option 1: The bashing method (my preferred method). Slice 250g cold butter and arrange the slices side by side on a sheet of baking paper. Fold the paper into a 15 x 20cm (6 x 8 inch) rectangle to create a frame, then bash the butter firmly with a rolling pin to flatten it. Roll it out to fill the rectangle evenly, then refrigerate until firm. Option 2: The flour method. Mix 250g room-temperature butter with 1½ tablespoons of all-purpose flour until smooth. Place between two sheets of baking paper and roll into a 15 x 20cm (6 x 8 inch) rectangle. Refrigerate until firm. Before laminating: Remove the butter packet from the fridge and give it a few firm bashes with the rolling pin to make it pliable again. The butter should be cold but bendy, around the same firmness as the chilled dough. If it’s too hard, it can crack during rolling, and if it’s too soft, it can smear into the dough.Tips for success
- Keep everything cold. Cold butter is what gives croissants their flaky layers. When you bash the butter packet, you’re making it pliable without warming it too much. If the butter or dough feels soft, greasy or sticky during lamination, chill it for 20 to 30 minutes before continuing. If the butter melts into the dough, you’ll lose some of the separation between the layers, which can give the croissants a denser, more bread-like texture.
- Roll in one direction. I prefer to roll away from me, lifting the pin and starting again rather than rolling back and forth. This gives me more control over the dough and helps avoid dragging the butter layers against each other.
- Don’t rush the final proof. Proof the croissants at around 24 to 25°C (75 to 77°F), keeping the temperature below 26°C (79°F) so the butter doesn’t melt. They should be noticeably puffy, light and jiggly when the tray is gently shaken, with visible layers. This can take around 4 to 7 hours, or considerably longer in a cooler kitchen. Underproofed croissants can leak butter during baking and have a dense, gummy centre, though butter leakage can also happen if the layers have been damaged during lamination or proofing.
- Keep the croissants from drying out. The long proofing time can cause a dry skin to form on the dough, which restricts expansion. You can create a warm, humid environment by placing the tray in a turned-off oven with a mug of hot water nearby. Just keep an eye on the temperature.
- Storage. Croissants are best on the day they’re baked. Store leftovers in an airtight container at room temperature for up to 4 days, though they’ll lose their crispness sooner. You can refresh them in the oven before serving, or freeze baked croissants for up to 3 months.




Hi! I made these and they were amazing. Only problem is I did not understand the directions on cutting them. Is it possible to put a video up of those they’re cut? It said to make marks every two inches on both sides and then cut to connect them? But in my head that makes a rectangle instead of a triangle. So anyways they tasted good after my mess up but they were all different sizes and I think I made them too small because it made like 17 croissants. So all that to say if I could get some more verbal directions on how to cut them or a video would be amazing. Thanks so much for sharing this recipe!
Reply from Elien: Hey it is a bit confusing re connecting, but there is a photo of the cut croissant dough in the post that might help. Starting from one corner of the dough cut a diagonal line to the first mark on the opposite edge. Continue cutting diagonal lines from each mark on one side to the next mark on the opposite side. You should end up with a series of triangles. 🙂
Hi I was wondering if after I shape them could they sit on the counter overnight so that I can bake them in the morning?
Thanks
Hi, is it okay to do the first mix in a Kenwood mixer using a dough hook?
Yup! 🙂
Hi I have made these and loved them I am trying to make them for a breakfast that I am hosting and wondering if they can be in the fridge over night after laminating them?
Heya, you can do that but just ensure they’re in an airtight container or well wrapped so they don’t dry out 🙂
Do you have a recipe without sourdough?
Not yet! But I plan to soon 🙂
Made fabulous croissant loaf! I cut recipe in half since I was testing wether or not i could make a loaf. Mixed all the dough ingredients added 2 tsp instant yeast. Let rise 1 hour then put it in fridge overnight. Next day laminated 3 turns – rolled into loaf, cut into 5 pieces and placed in pan about an hour to rise b4 baking! I’m already planning more as I type!
Really great recipe that was easy to follow and turned out perfectly. I made half into pain au chocolat and those needed a couple extra minutes in the oven.
Thank you for the recipe!!
Just wondering if you can use vegan butter in this recipe?
Hey Tasha I’ve never tried it!
Hi!
I have a question about the temp of the butter pamphlet and the dough. When I was doing my rolls and folds I noticed the butter was not smoothly creating layers, instead it was almost like the butter pamphlet cracked and I just have little butter slivers. I’ve just cut and rolled them but when I look I don’t see the distinctive layers. Could my dough have been to cold for my butter?
Hey Ashley, it sounds like the butter was too cold if it cracked. If you have a digital thermometer, the dough temperature should be around 40 F (4 Celsius), and the butter around 54 F (12 celsius). However not everyone has one, so I usually gauge it by feel. The butter should be bendy but not snap when you first laminate it into the dough. If it cracks while rolling, you can let it sit at room temperature for a bit to soften it slightly.
Hopefully you will still get some layers in your croissants despite the butter cracking though, they should show more once the croissants have proofed.
Hi! I am wondering what the dough is supposed to look like? Is it supposed to be sticky, or do you continue to knead until the stickiness starts to go away? Also, is the dough supposed to double before putting it into the fridge?
Thank you!!
Hey! it’s sticky when it’s first mixed, so knead it until it smoothens :). It doesn’t need to double before going into the fridge, just bulk out by around 40-50%
I’m excited to try these this week. All purpose flour? Not bread flour? Just plain flour? (I’m in Europe).
You want flour with around 11-12% protein so that might be bread flour where you are 🙂
Hi! Looking forward to trying this. If I want to add some chocolate inside (nutella?), what would be your recommendation? Can I just add a thin layer before I roll them up? Thanks!
Yup that’s what I would do too! 🙂