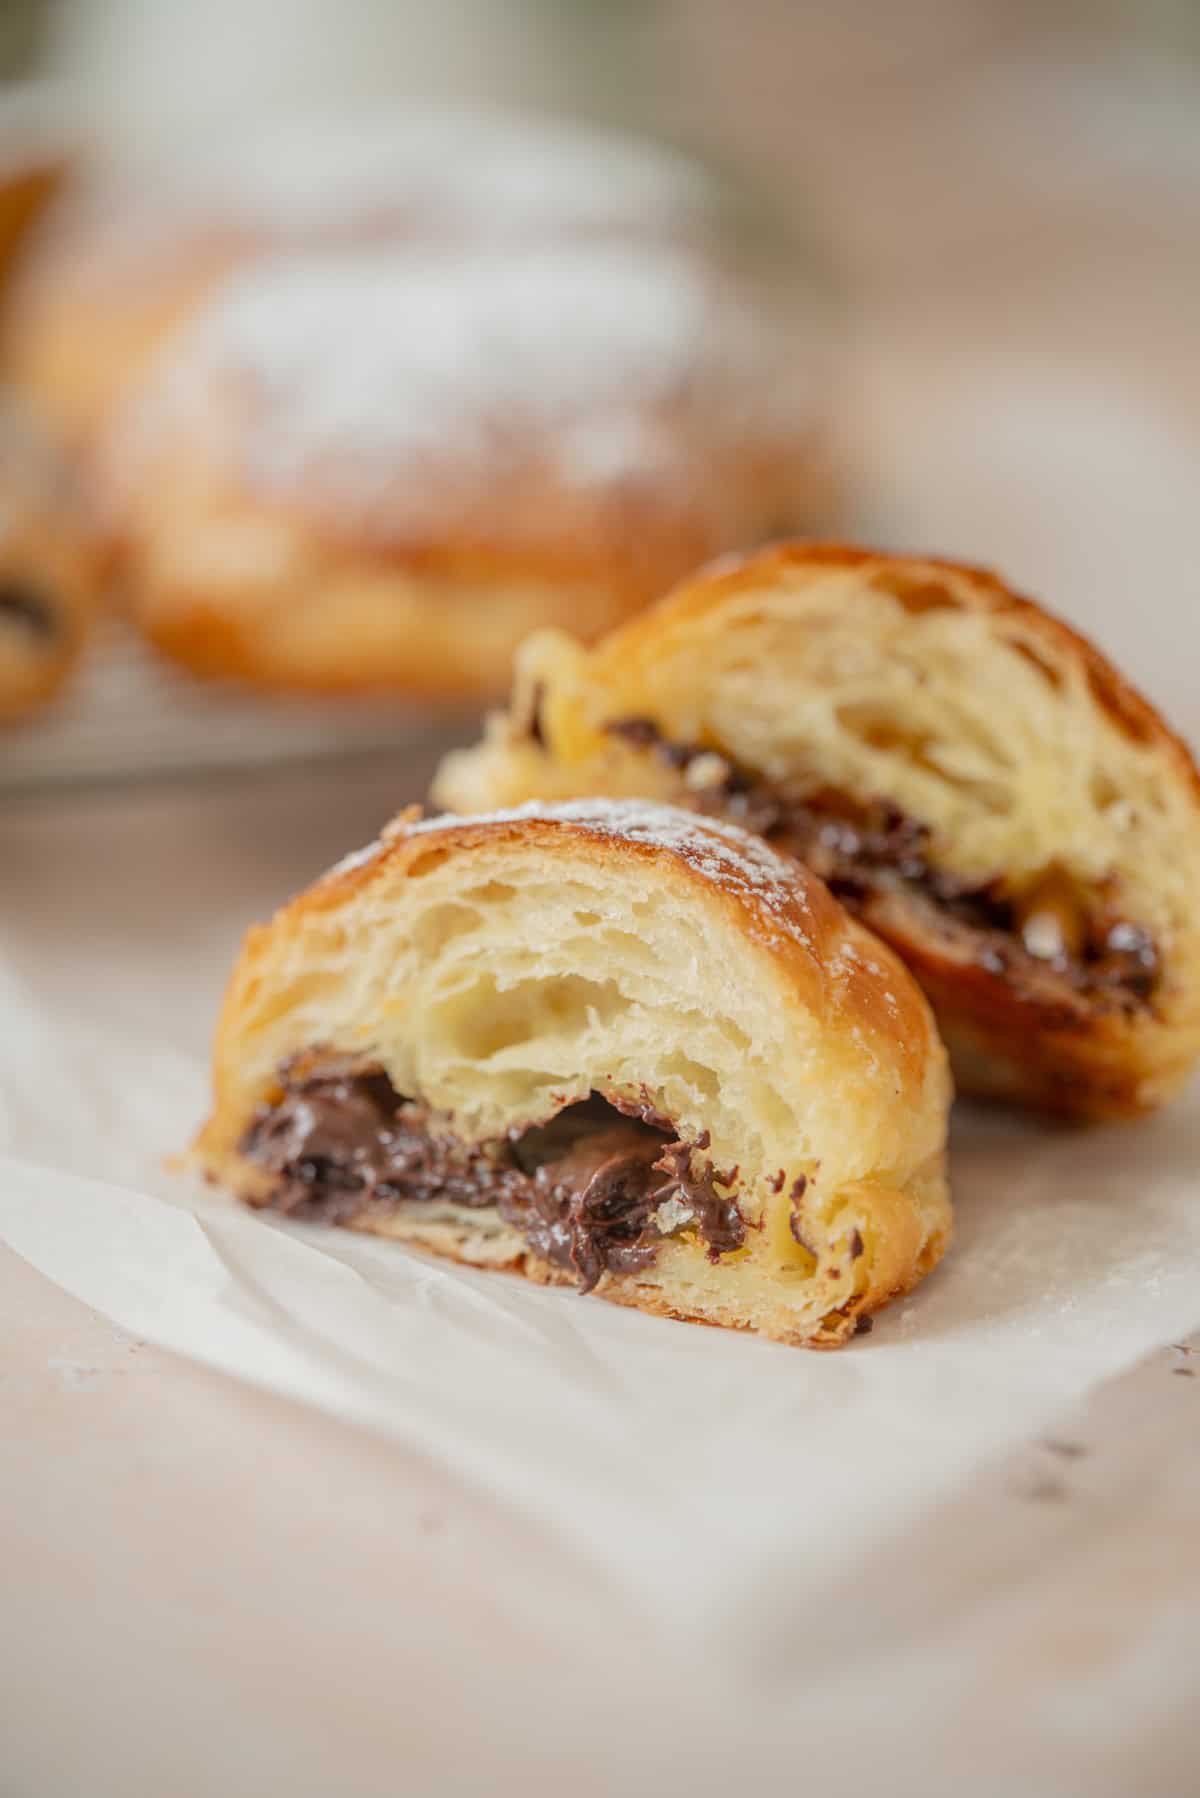
Sourdough Pain au Chocolat
These sourdough pain au chocolat are buttery, flaky, and filled with pockets of dark chocolate. They’re made from laminated sourdough dough, naturally leavened with active starter. A labour of love for sure, but worth it, I promise!

The dough here is slightly different from my sourdough croissants, with a lower hydration that gives a firmer, more structured dough that holds the chocolate filling neatly during baking. The process follows the same schedule as my sourdough cruffins which is, the starter fed the night before, dough mixed and bulk fermented in the morning, then chilled and laminated in the afternoon. The dough rests overnight after the folds, so the process spreads across two days with most of the time being hands-off.
For the chocolate, I use good quality dark chocolate chopped into pieces. You can use chocolate batons if you have them, but chopped chocolate works just as well and gives you more flexibility with how much you use. A good quality chocolate with 60-70% cocoa is my preferred choice because the slight bitterness means the pastries don’t become too sweet.
The sourdough starter
These rely entirely on your sourdough starter for leavening, so it needs to be active and bubbly. Feed it the night before at a 1:3:3 ratio (1 part starter, 3 parts flour, 3 parts water) so it rises slowly overnight and is at peak rise by morning. If your kitchen is warm, go up to 1:4:4 or 1:5:5 so it doesn’t peak too early.
By the time you’re ready to mix the dough, the starter should have at least doubled, look bubbly and airy, and smell yeasty rather than sharp. Use it before it starts to collapse.
Baker’s Schedule
The night before: Feed your starter
Day 1
- Morning: Mix the dough and bulk ferment for 3-5 hours.
- 1pm: Press dough flat, wrap, and chill for 2 hours. Make the butter packet.
- 3pm: Fold 1, refrigerate 30 minutes.
- 3:35pm: Fold 2, refrigerate 30 minutes.
- 4:10pm: Fold 3. Place the dough in the fridge overnight.
Day 2
- Morning: Roll, cut, and shape. Leave to proof for 4-6 hours.
- Afternoon: Egg wash and bake.

The Butter Packet
Getting the butter packet right is one of the most important parts of this recipe. You want a cold, evenly shaped block that’s pliable enough to bend without shattering but firm enough that it won’t melt into the dough when you start rolling. There are two ways to prepare it.
Method 1: Bashing cold butter (my preference)
Slice 250g of cold butter and arrange the pieces in a grid on a sheet of parchment paper so they sit snugly together. Place a second sheet on top and use a rolling pin to bash and roll the butter into an even, flat block. Fold the parchment edges in to create a neat 15x20cm (6×8 inch) frame and press the butter to fill it evenly. Chill until cold.
This gives cleaner, more defined layers because there’s nothing in the butter to interfere with how it separates from the dough in the oven. When you work cold butter like this, the fat crystals soften and reorganise, making it behave like firm clay rather than crumbling.
Method 2: Softened butter with flour
Leave 250g of butter at room temperature until softened. Mix in 1½ tablespoons of flour until combined, then roll between two sheets of parchment into a 15x20cm (6×8 inch) rectangle. Chill until cold.
The flour makes the butter a little more stable and forgiving in a warm kitchen. Good option if you’re newer to lamination and want more margin for error.
In both cases, once the butter has chilled, give it a few firm bashes with the rolling pin before using it. It will have firmed back up in the fridge and needs to be worked back to that cold but bendy consistency. If it cracks when you press it, it’s too cold. Leave it on the bench for 5 minutes and try again. If it’s soft or greasy, it needs more time in the fridge.
Method
The dough
- Feed your starter so it rises overnight and is at peak rise by morning.
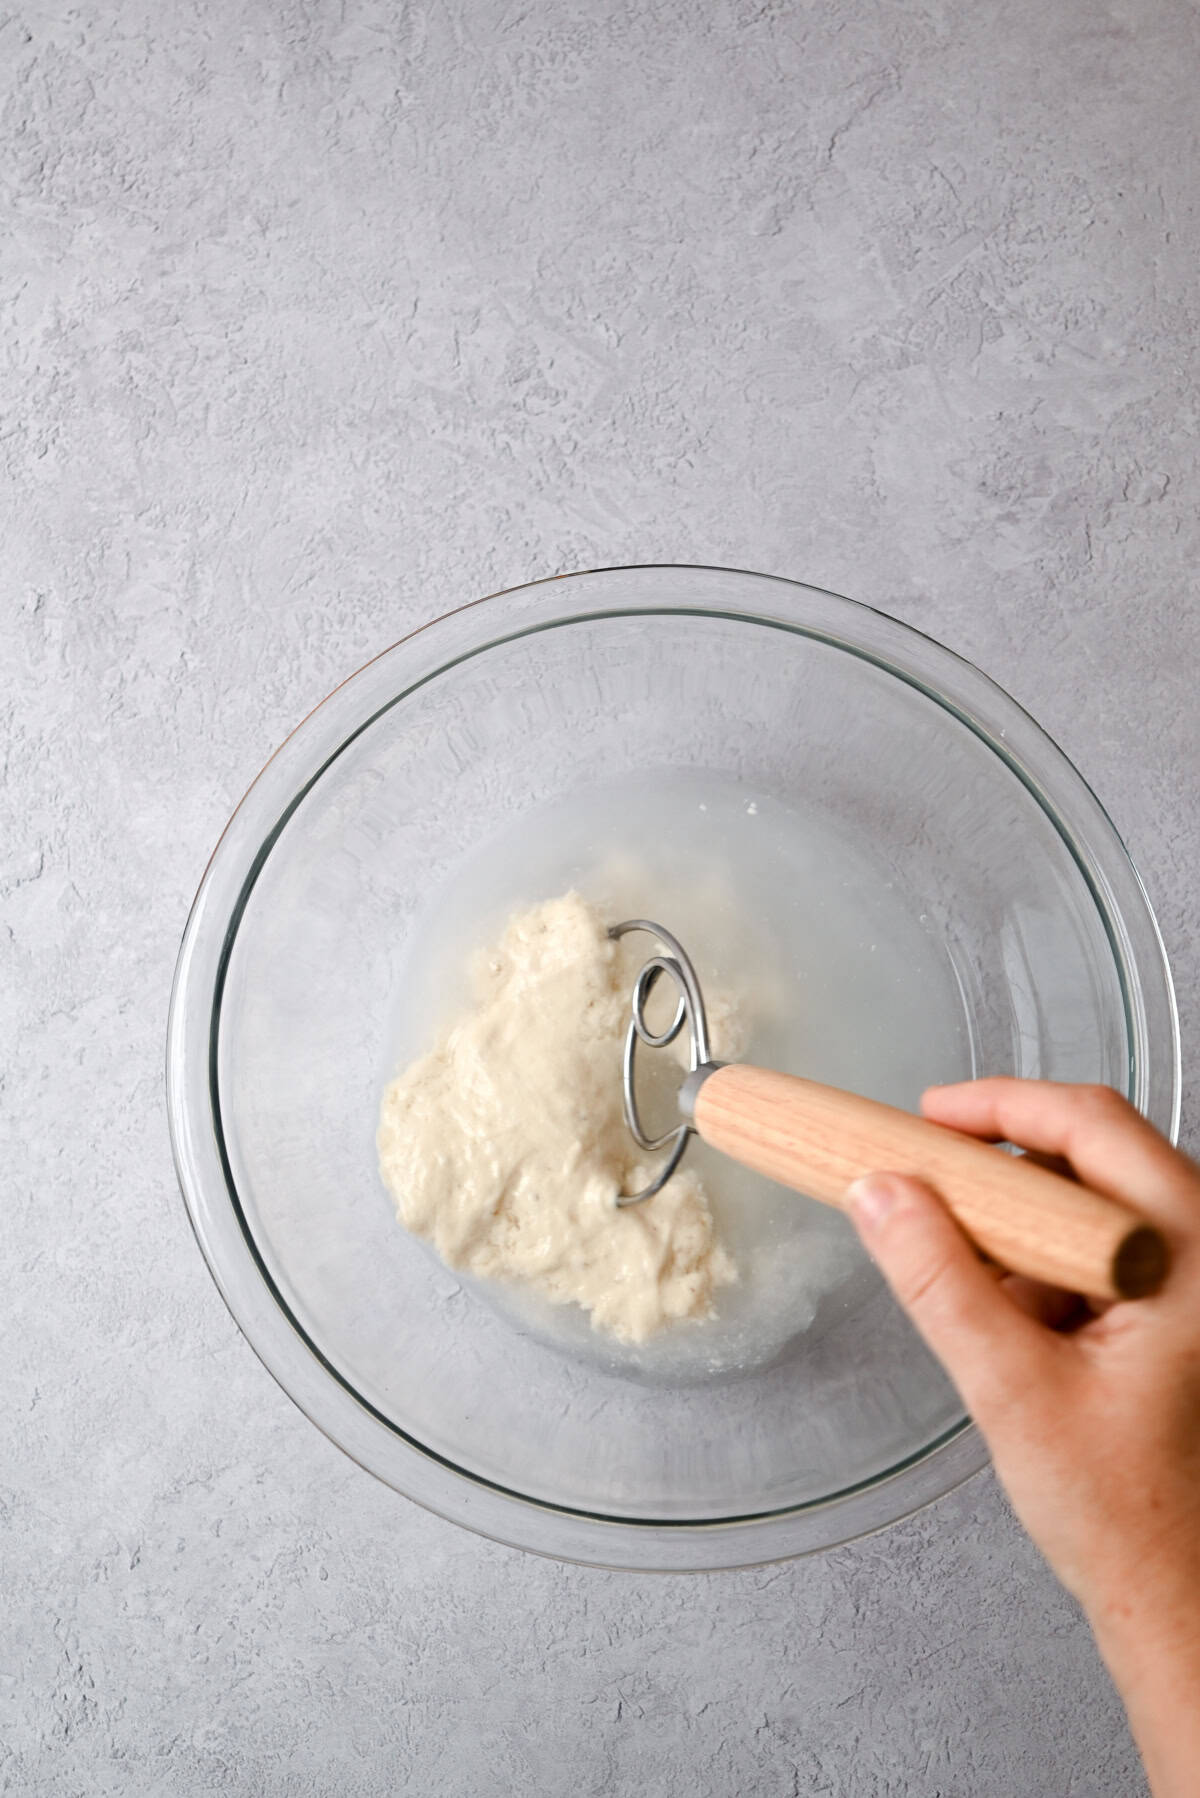
- Whisk the active starter into the water in a large bowl until loosened. Add the flour, sugar, and salt and mix until a dough forms, about 3-4 minutes.
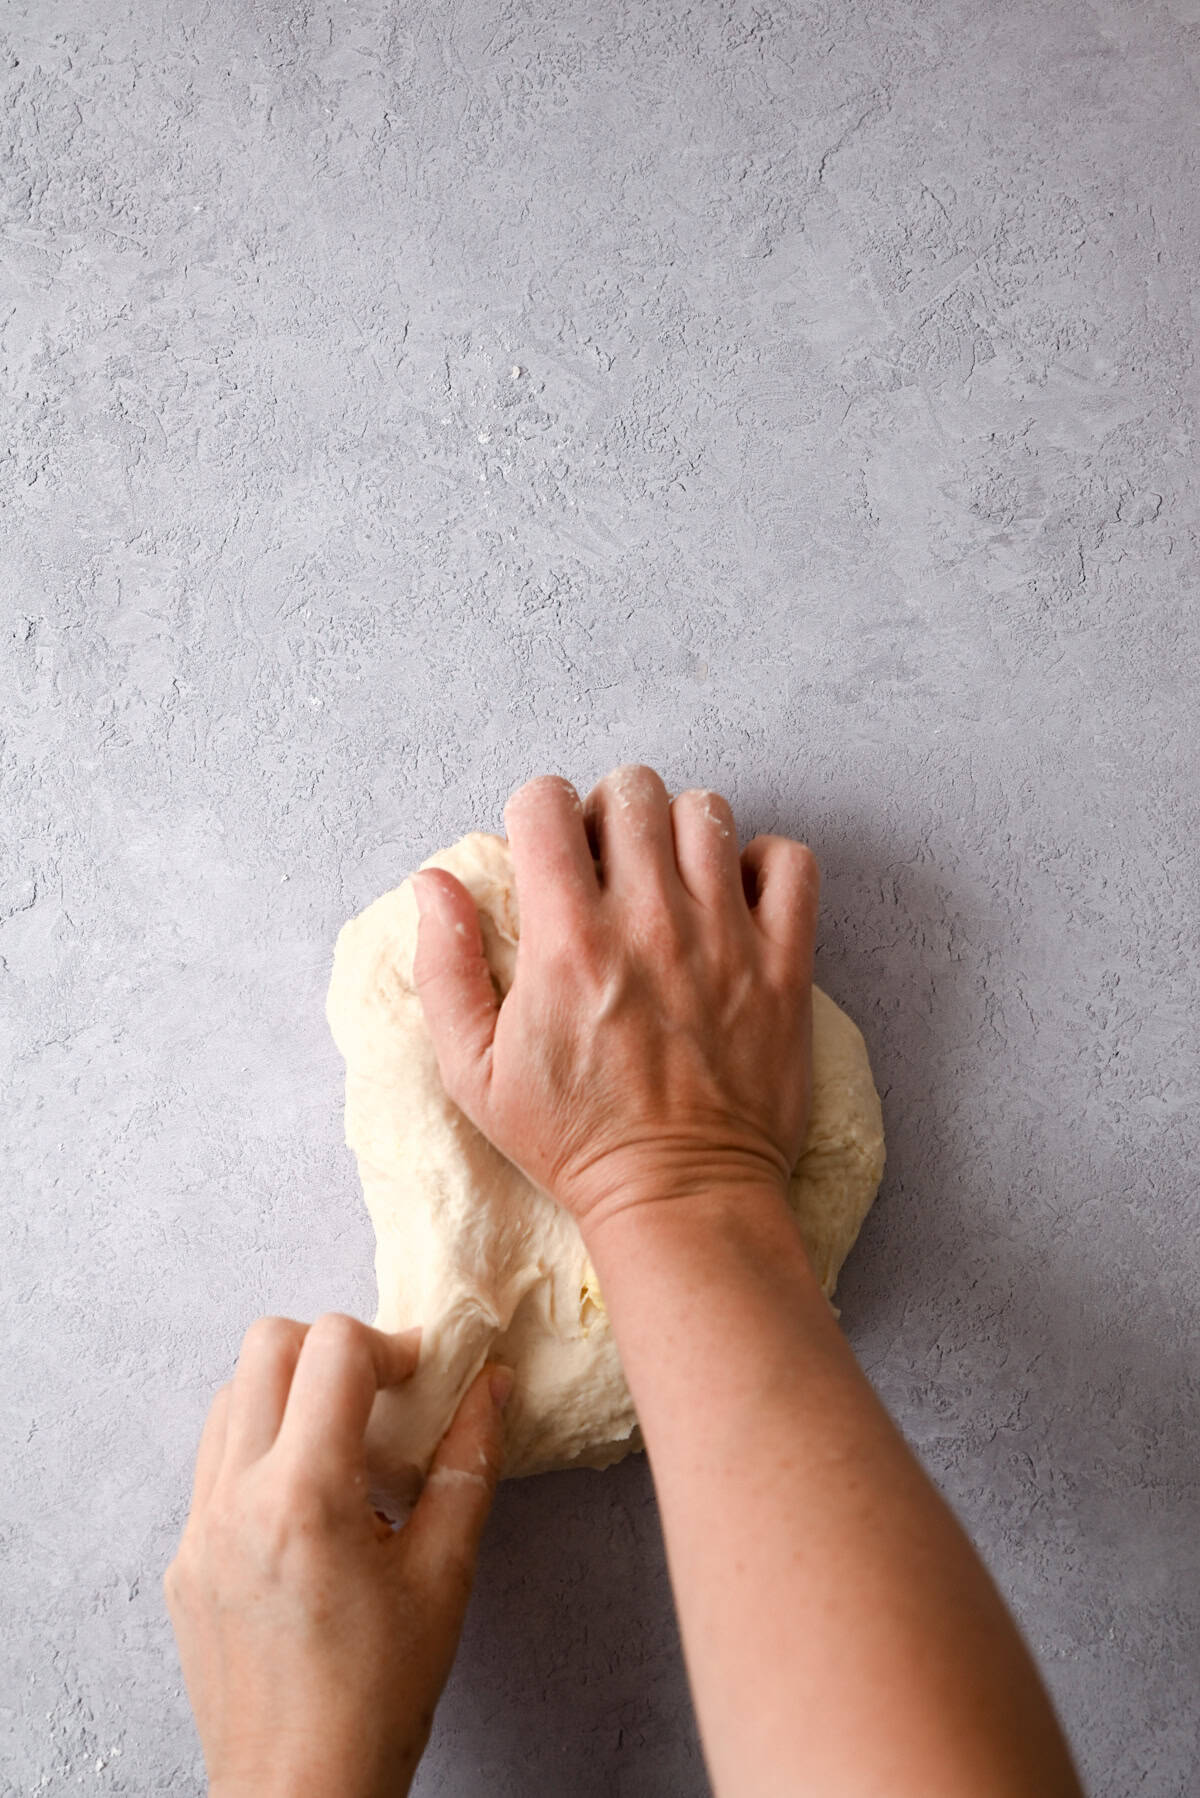
- Tip onto the bench, add the softened butter, and knead until smooth.
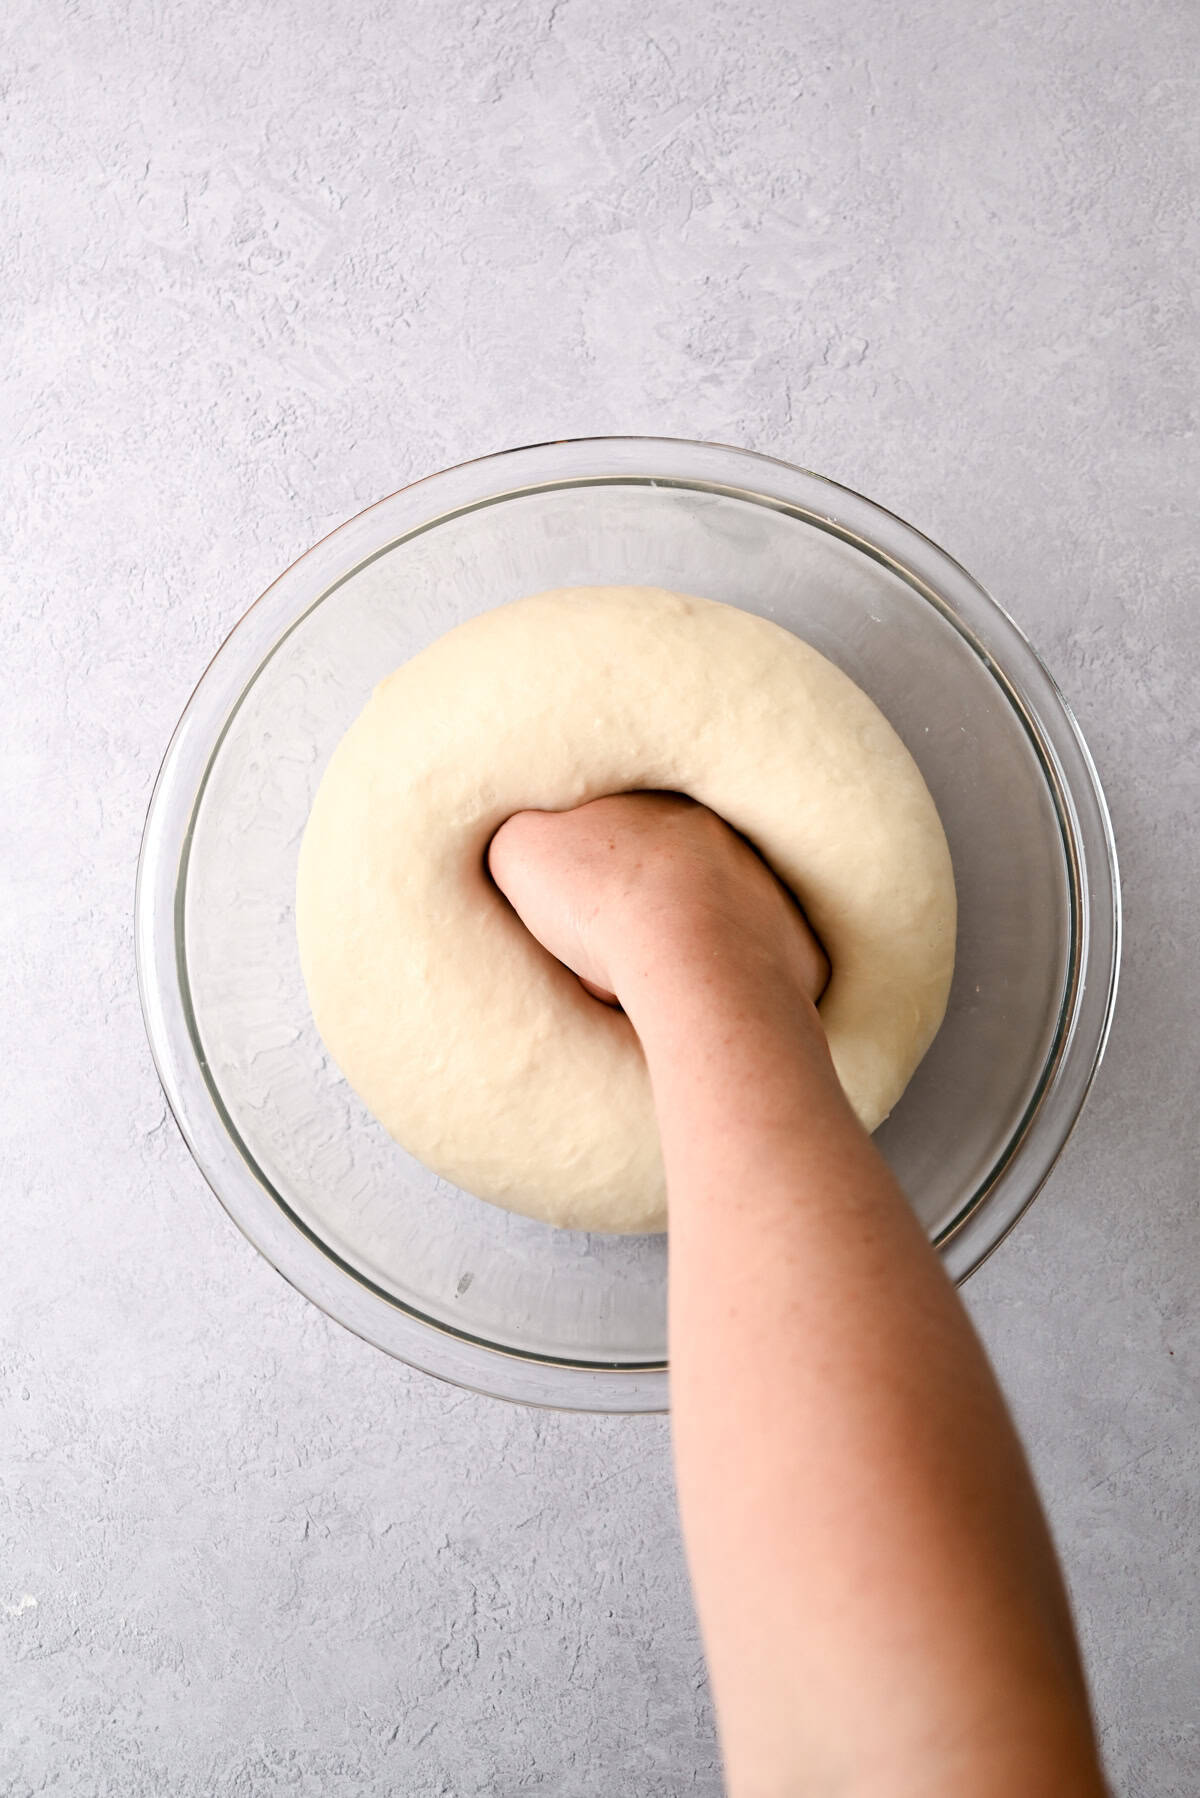
- Add to a bowl and ferment for 3-5 hours until risen by 30-40%.
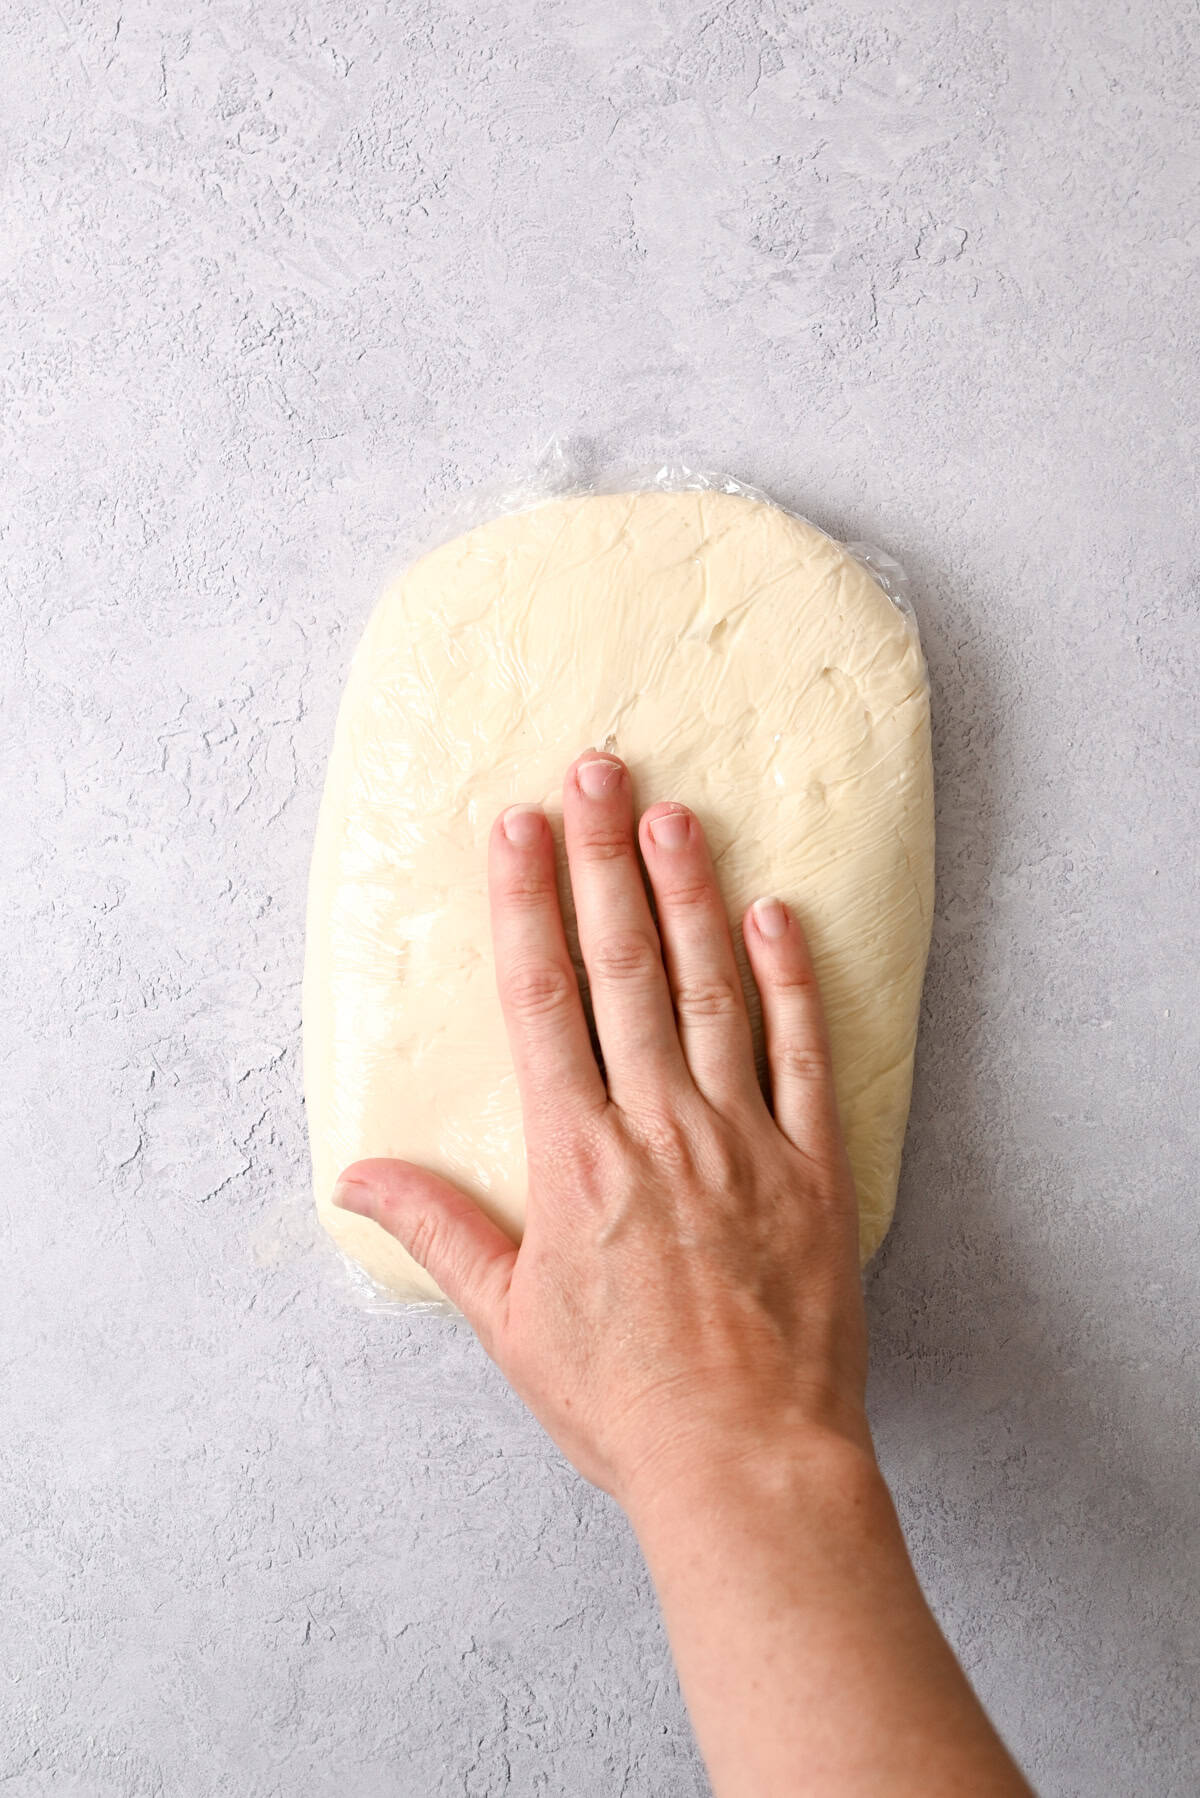
- Press the dough into a flat rectangle, wrap tightly, and refrigerate for at least 2 hours. This firms the dough so it matches the consistency of the cold butter.
Butter packet

- Slice the cold butter and arrange in a grid on parchment. Place a second sheet on top and bash and roll into an even block.
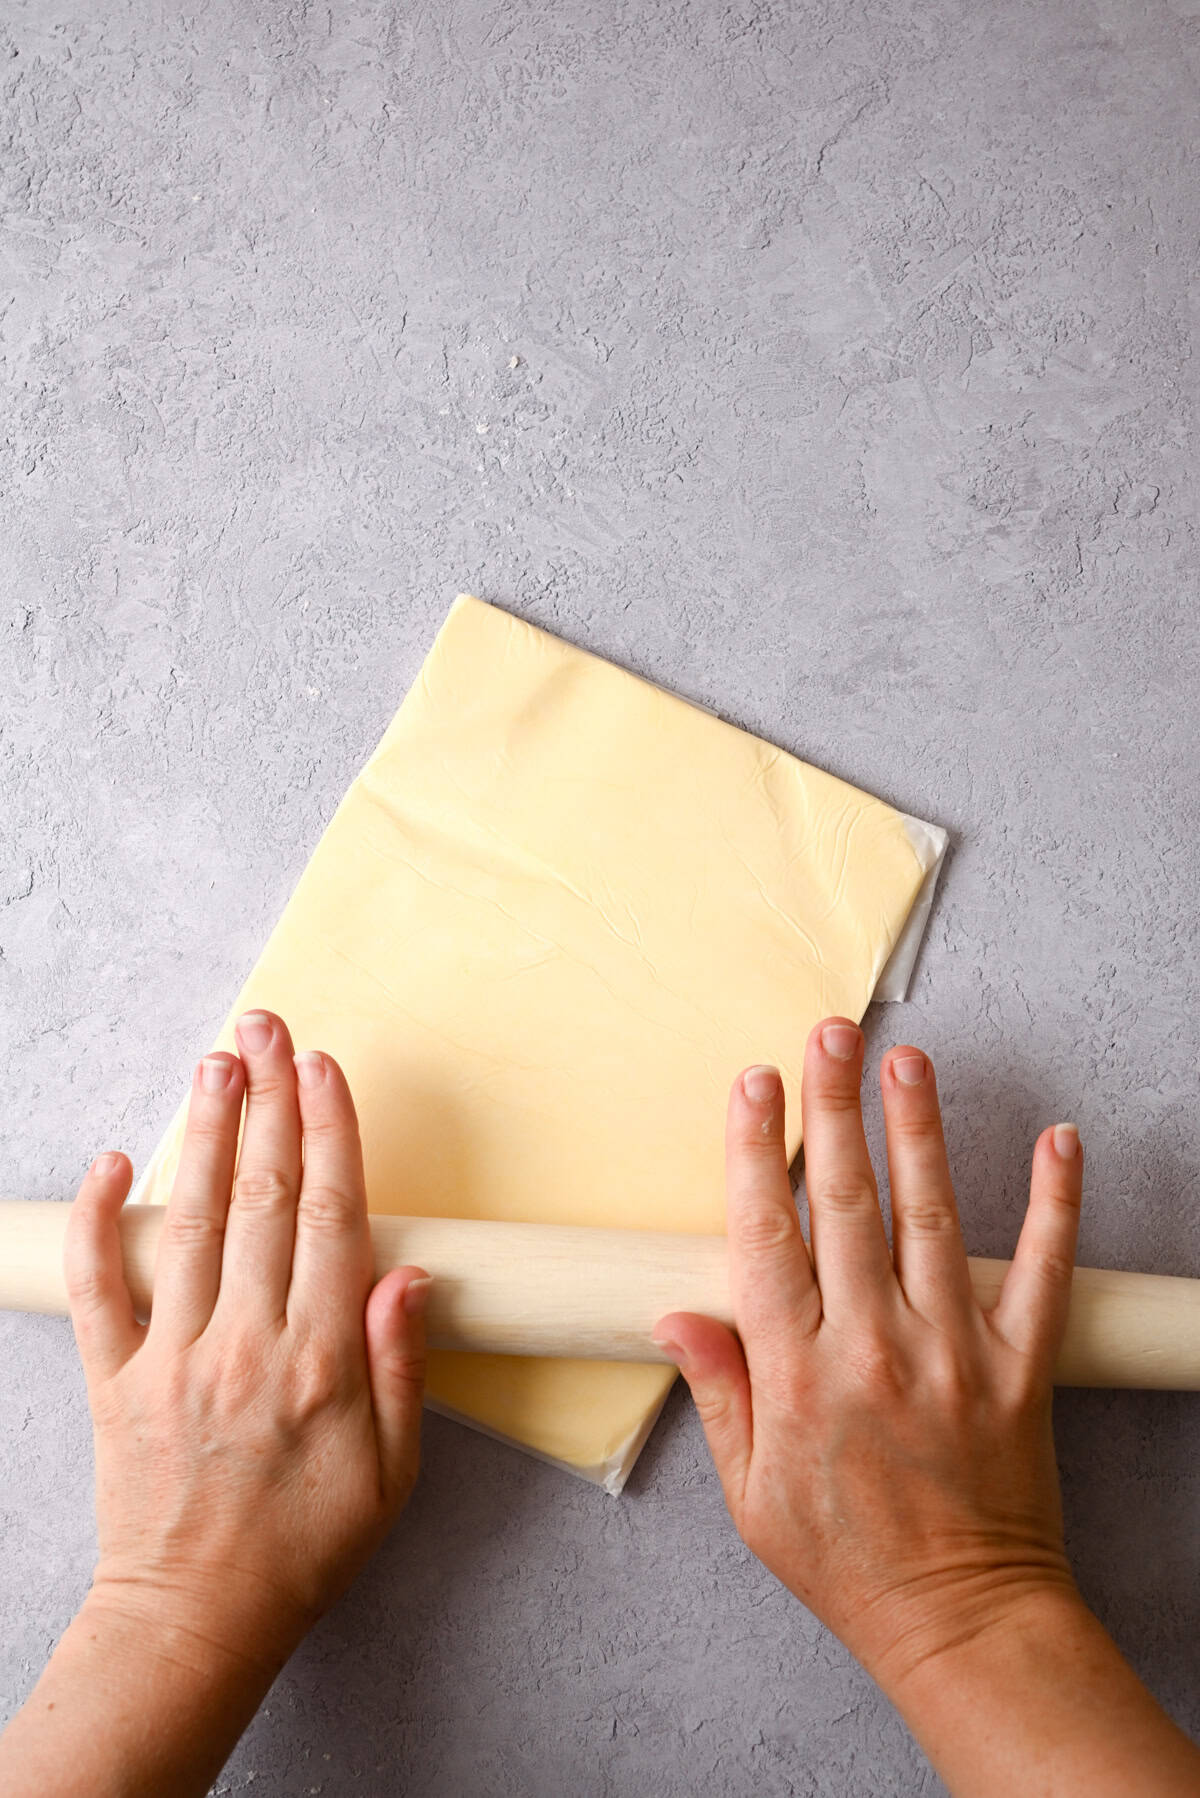
- Fold the parchment edges into a 15x20cm frame and roll it out. Chill until cold, then bash again before using to make it pliable.
Laminating
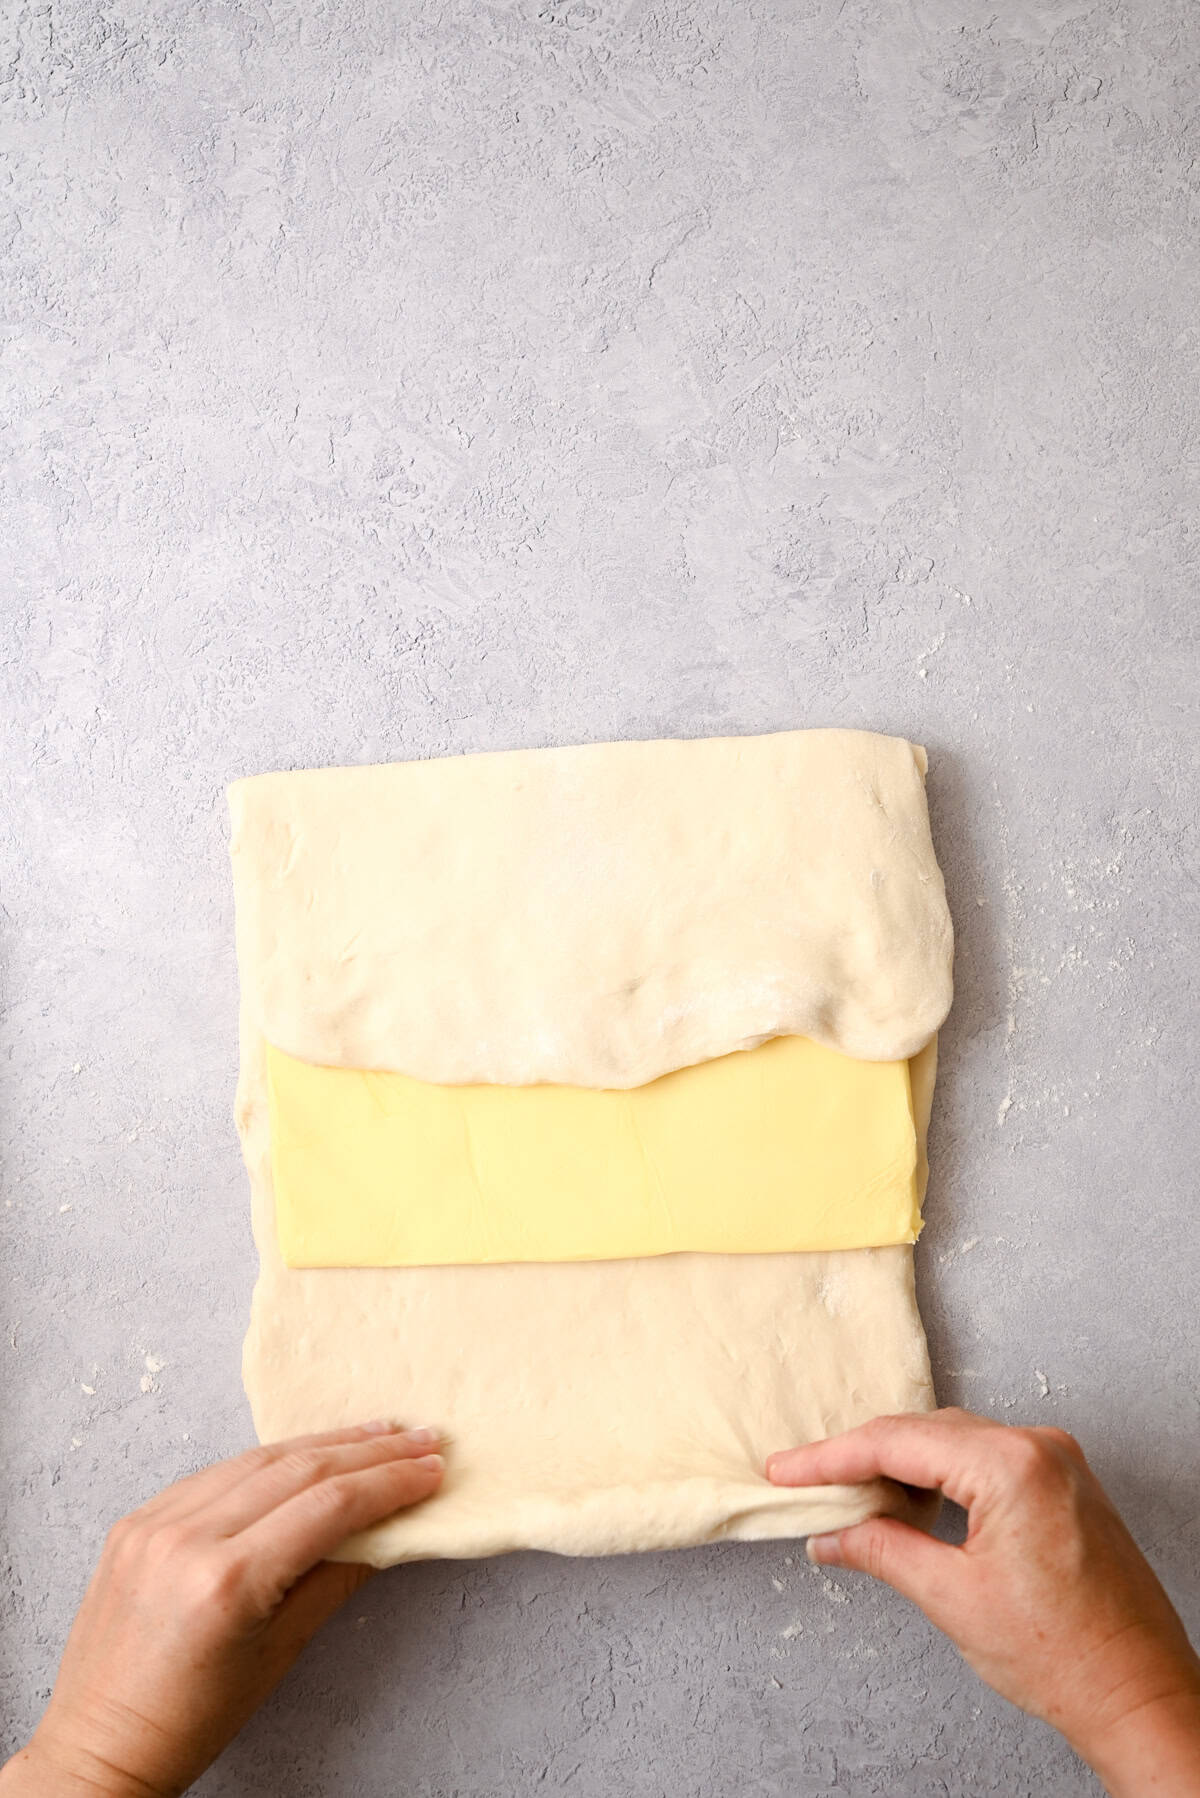
- Roll the chilled dough into a 20x30cm (8×12 inch) rectangle. Place the butter in the centre, fold the dough edges over to encase it completely, and pinch firmly to seal.
- Turn the dough 90 degrees and score a shallow slit along each long edge to relieve tension.
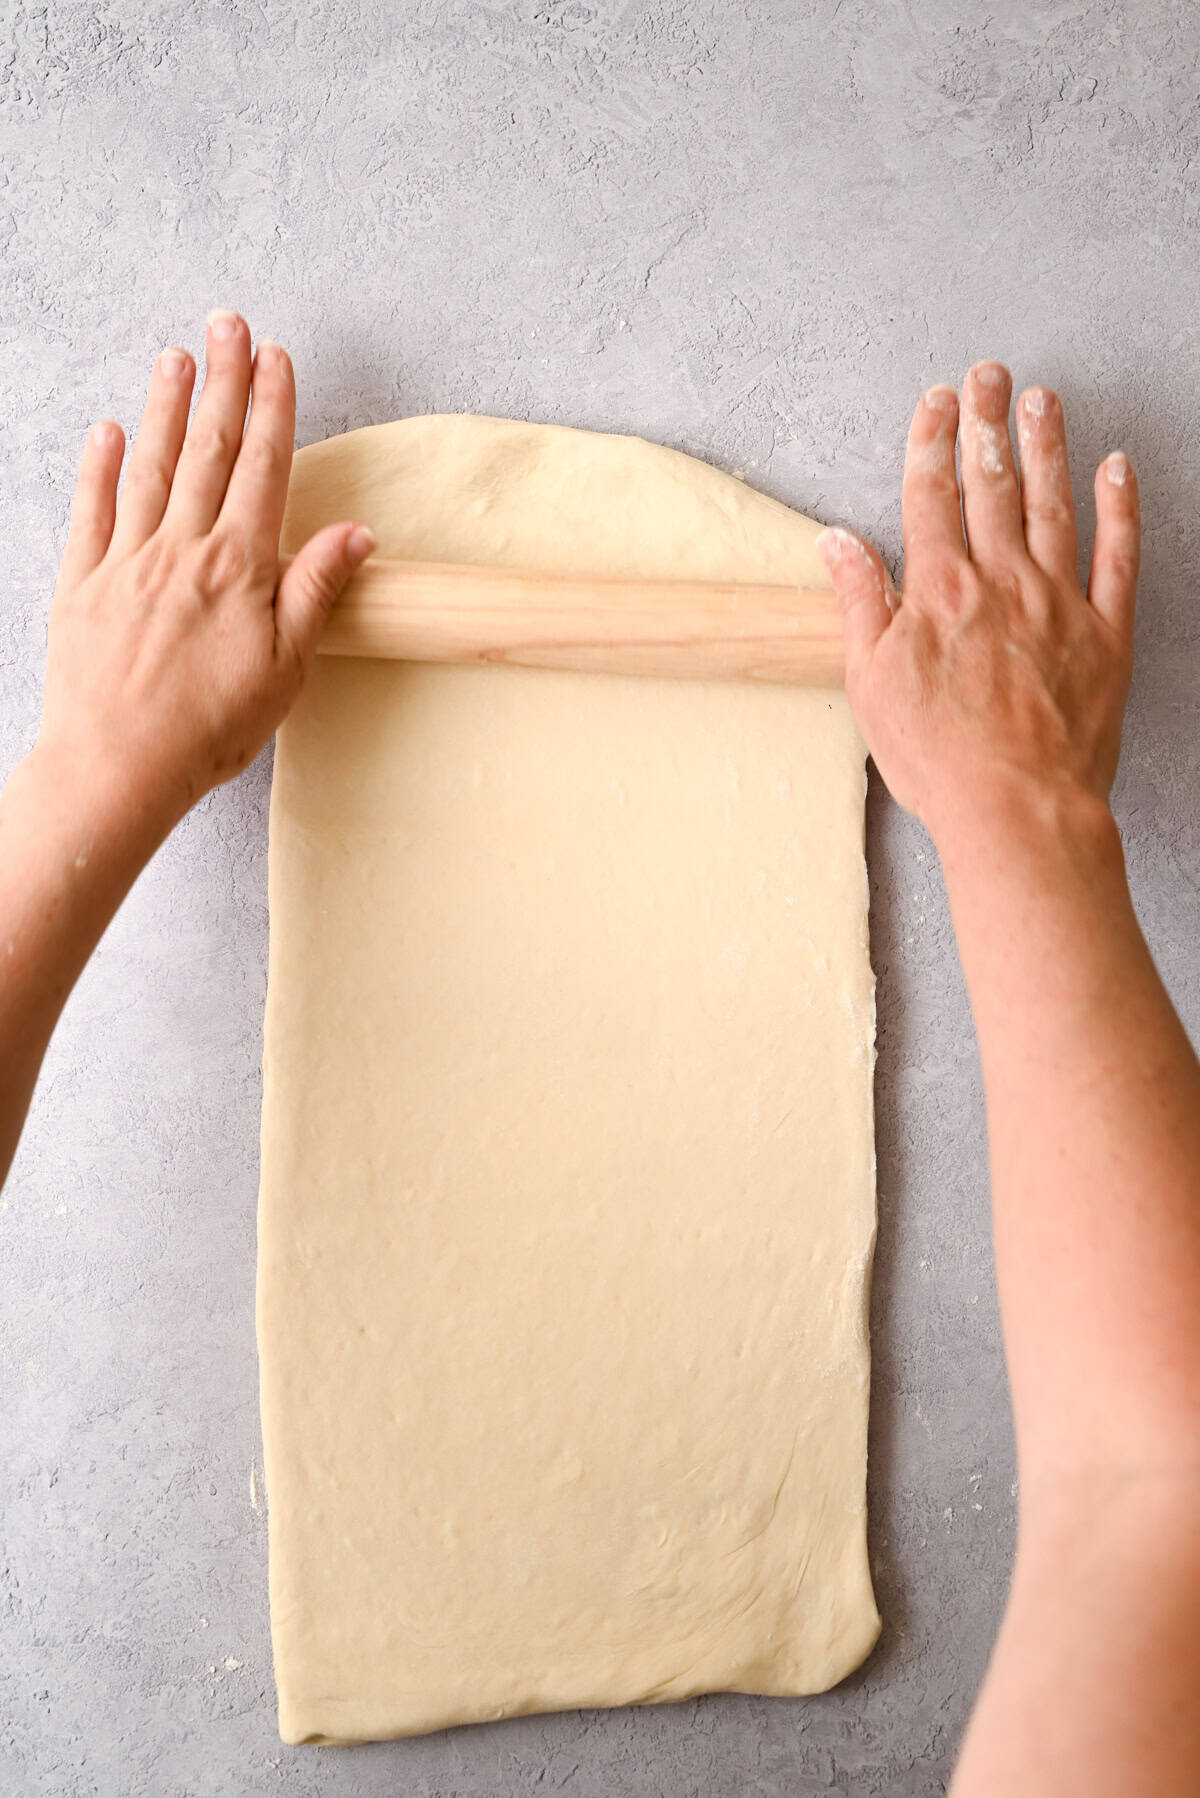
- Press across the dough first to start dispersing the butter, then roll it out to around 8mm thick, focusing on length rather than width. Always roll away from you in one direction because rolling back and forth drags the layers in opposite directions and smears the butter rather than keeping it in clean sheets.
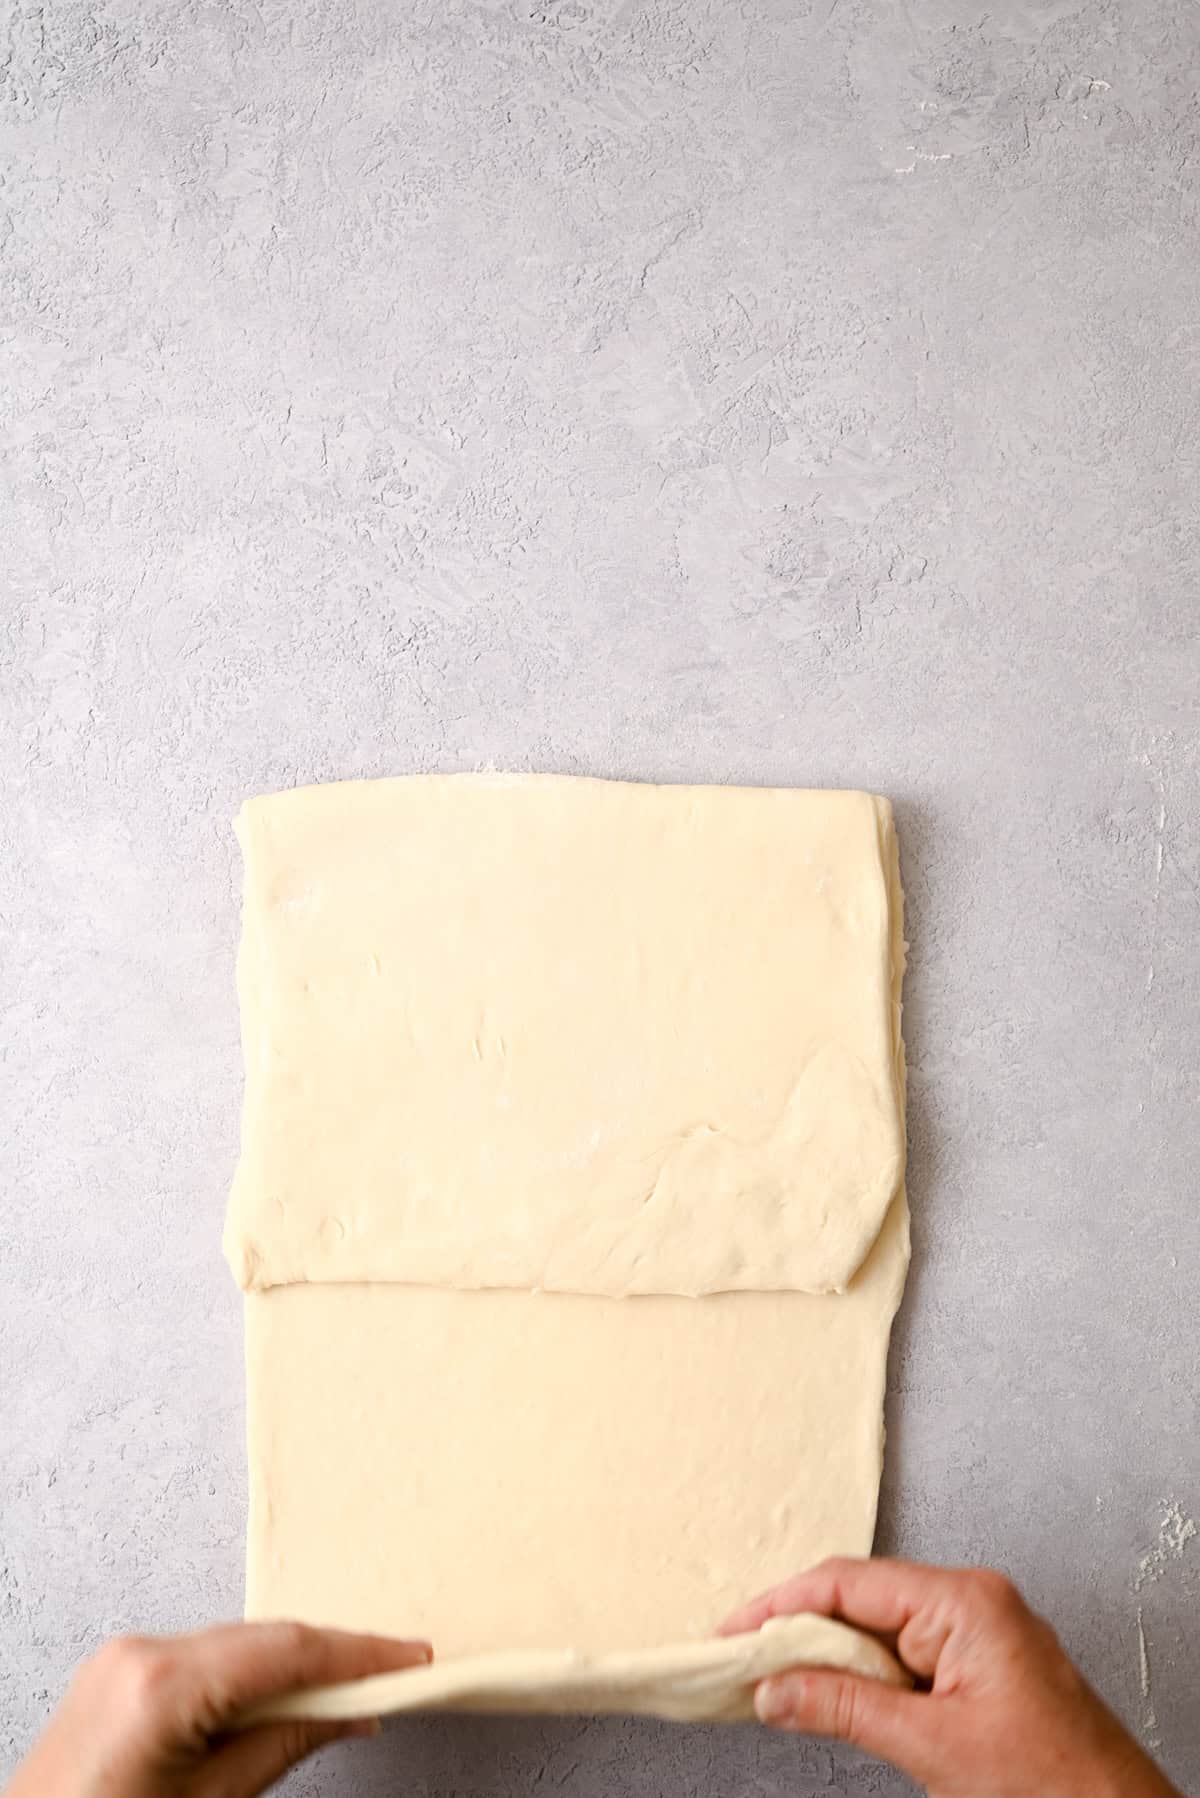
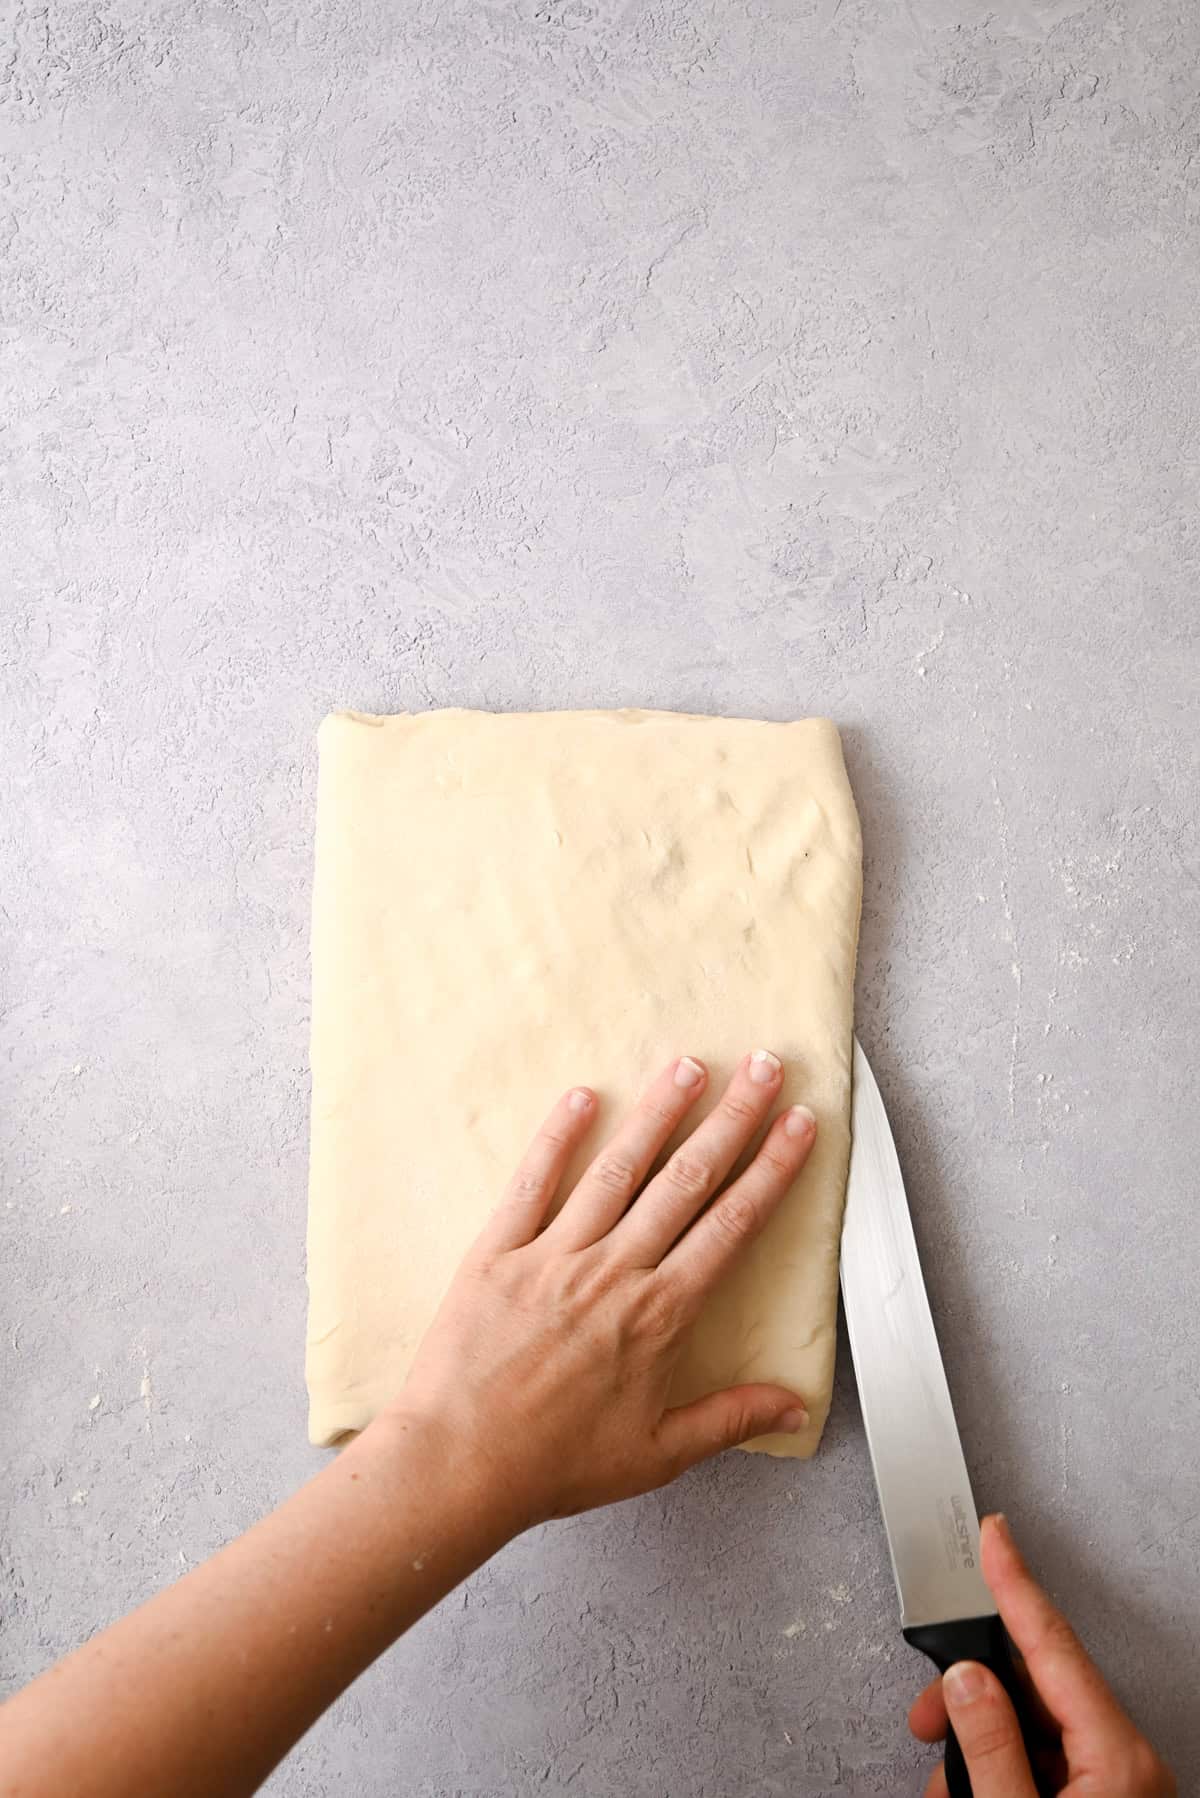
- Trim the uneven short ends, brush off excess flour, and fold into thirds like a letter. Wrap and refrigerate 30 minutes.
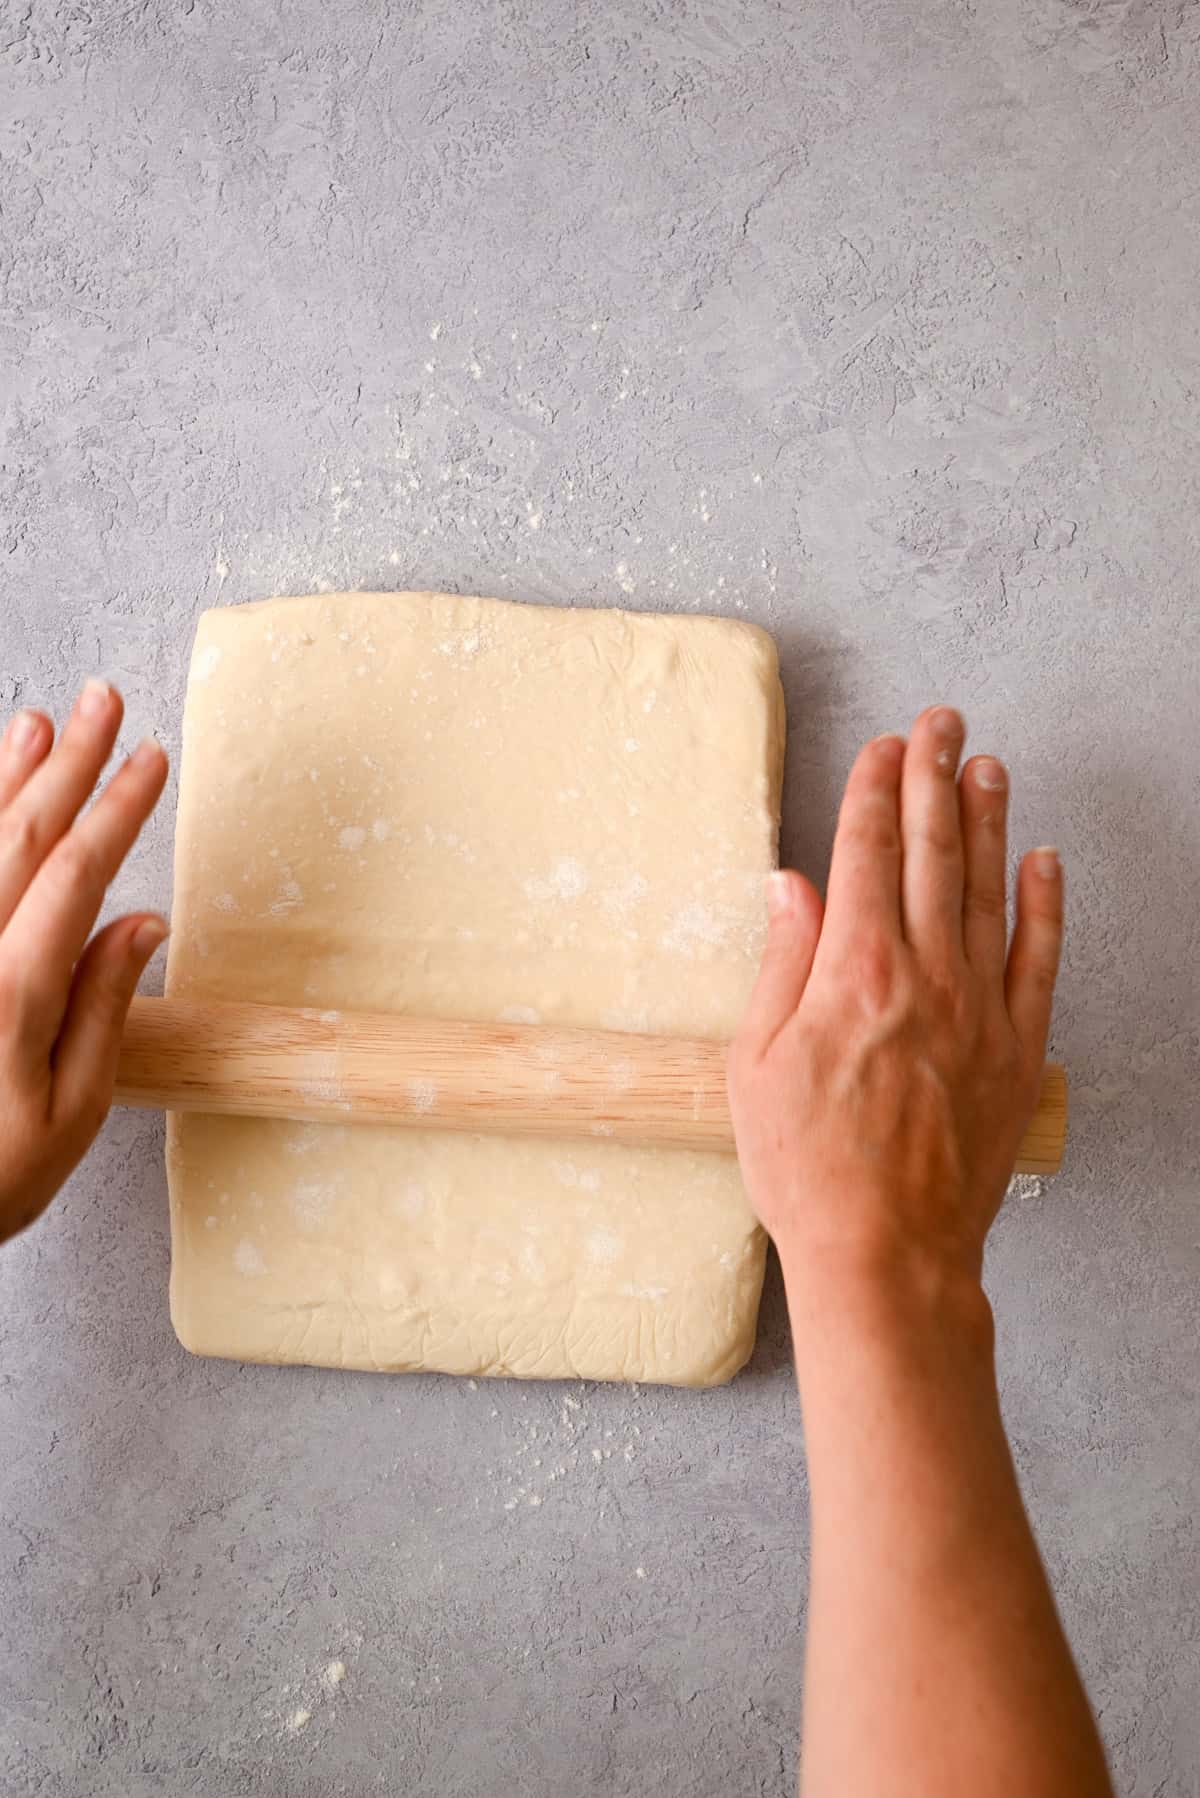
- Rotate the dough 90 degrees from how it was last folded. Roll to 8mm thick.
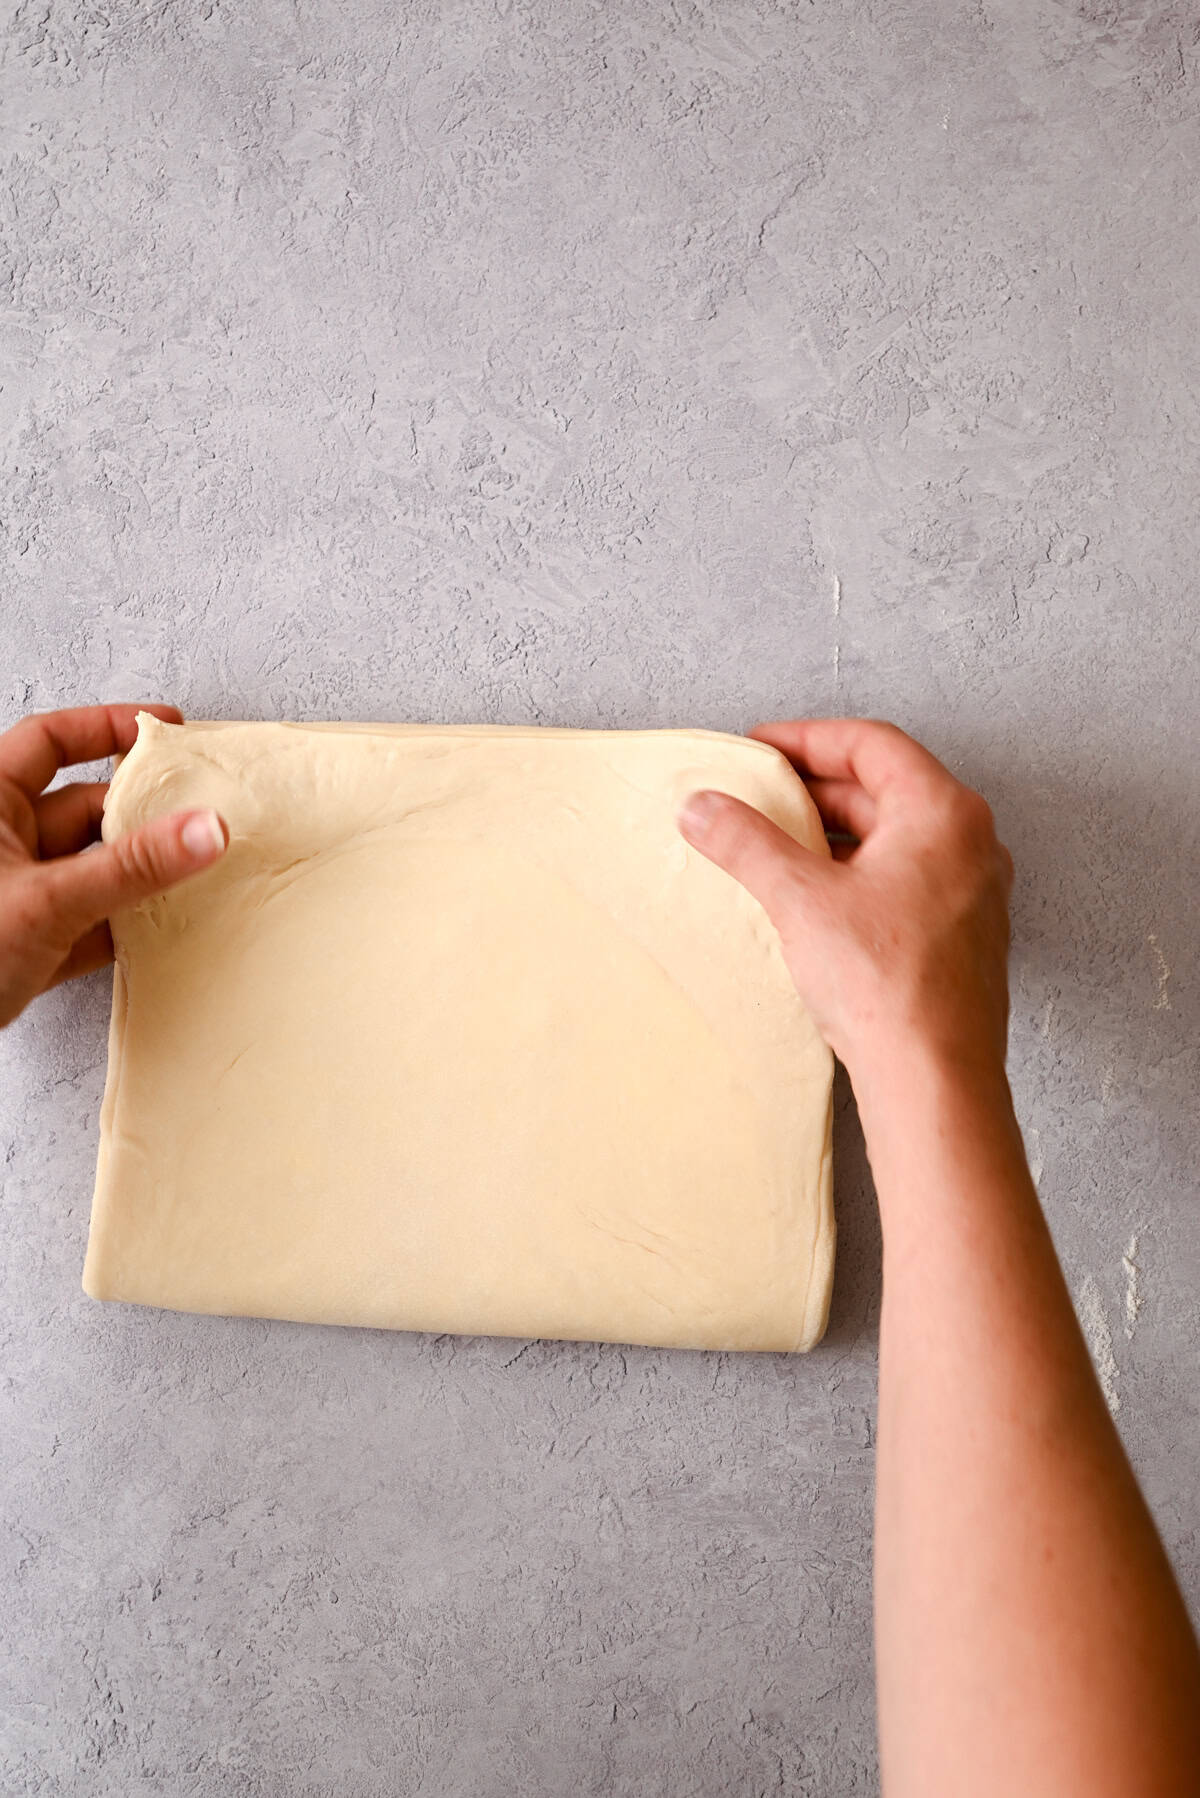
- Brush, and letter-fold again and refrigerate 30 minutes. Repeat one final time for three folds total. After the third fold, wrap tightly and refrigerate overnight
Shaping
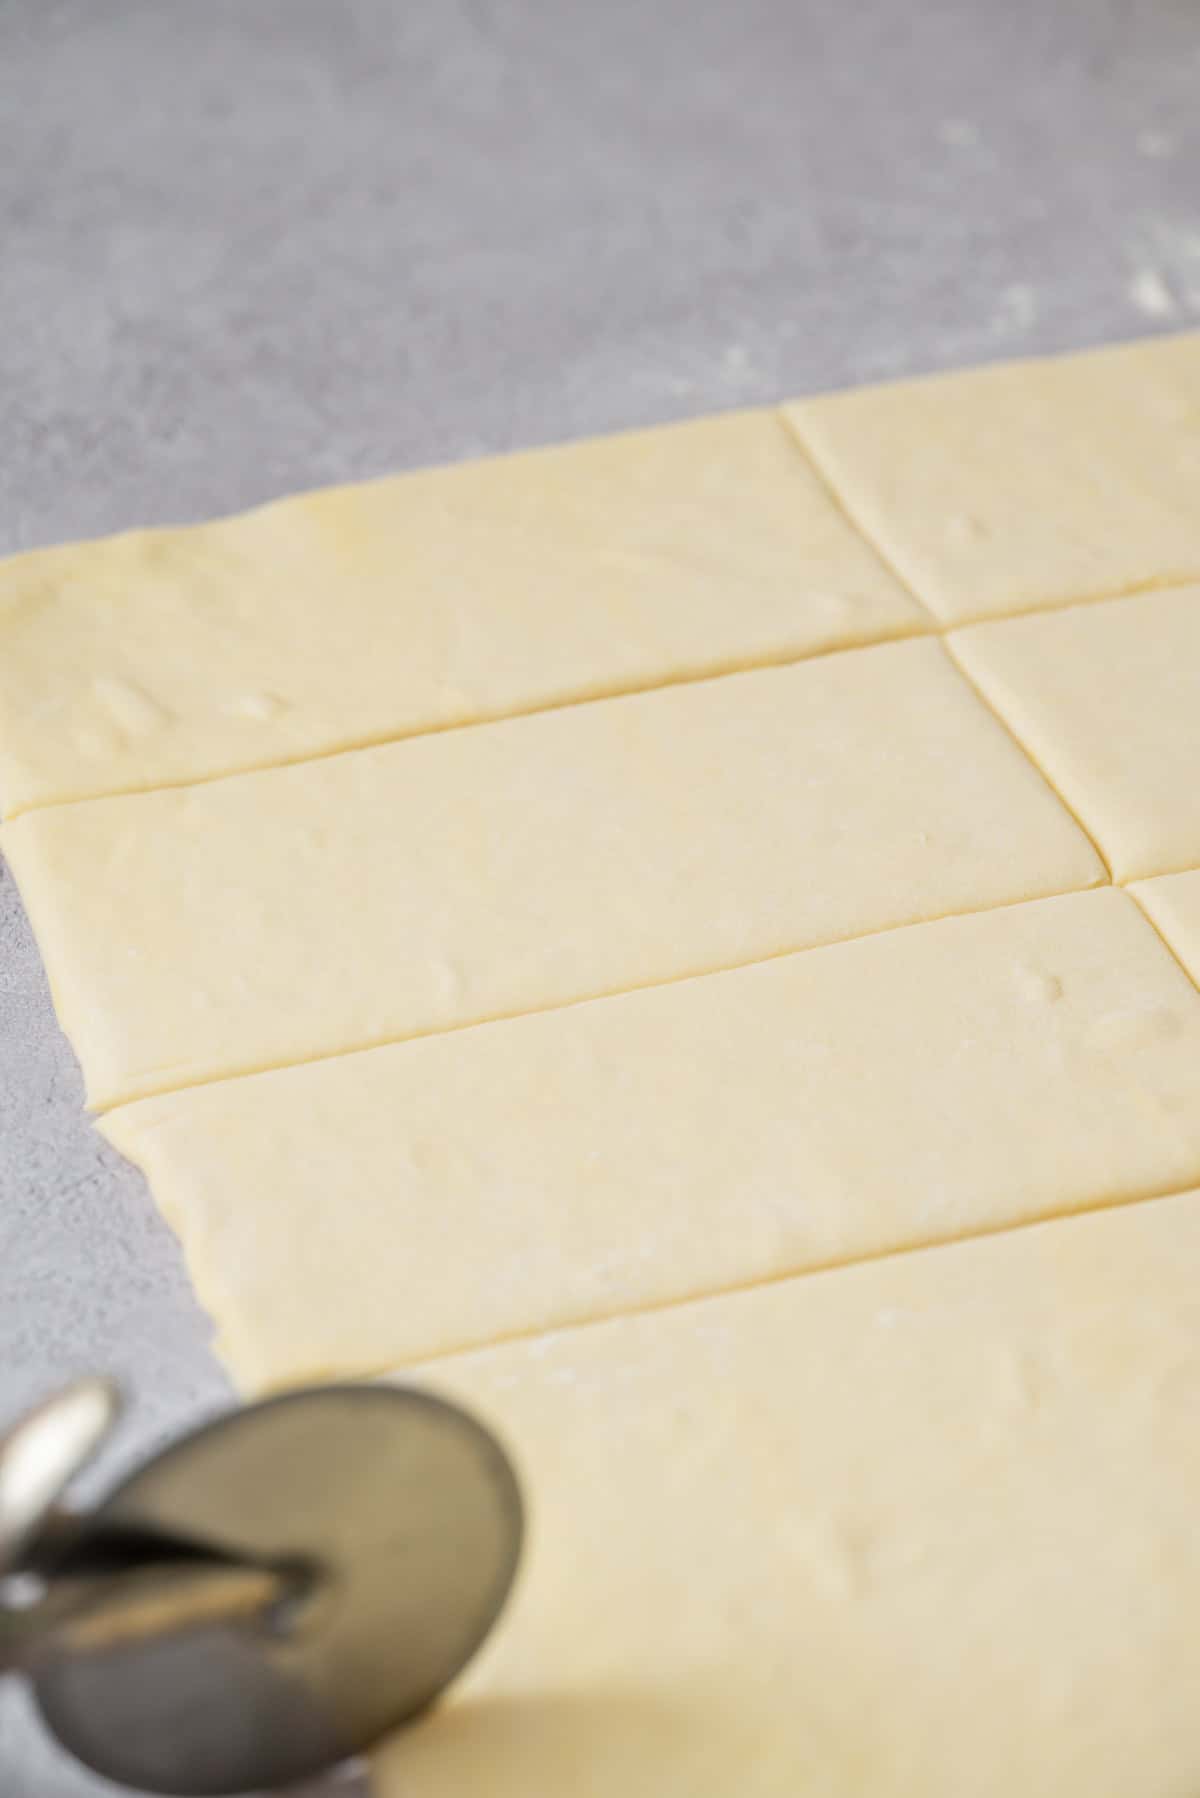
- Remove the dough from the fridge. Roll it into a large rectangle, roughly 4mm thick and about 35x50cm (14×20 inch). Cut the dough widthwise into 10 strips, each about 7x25cm (3×10 inch).
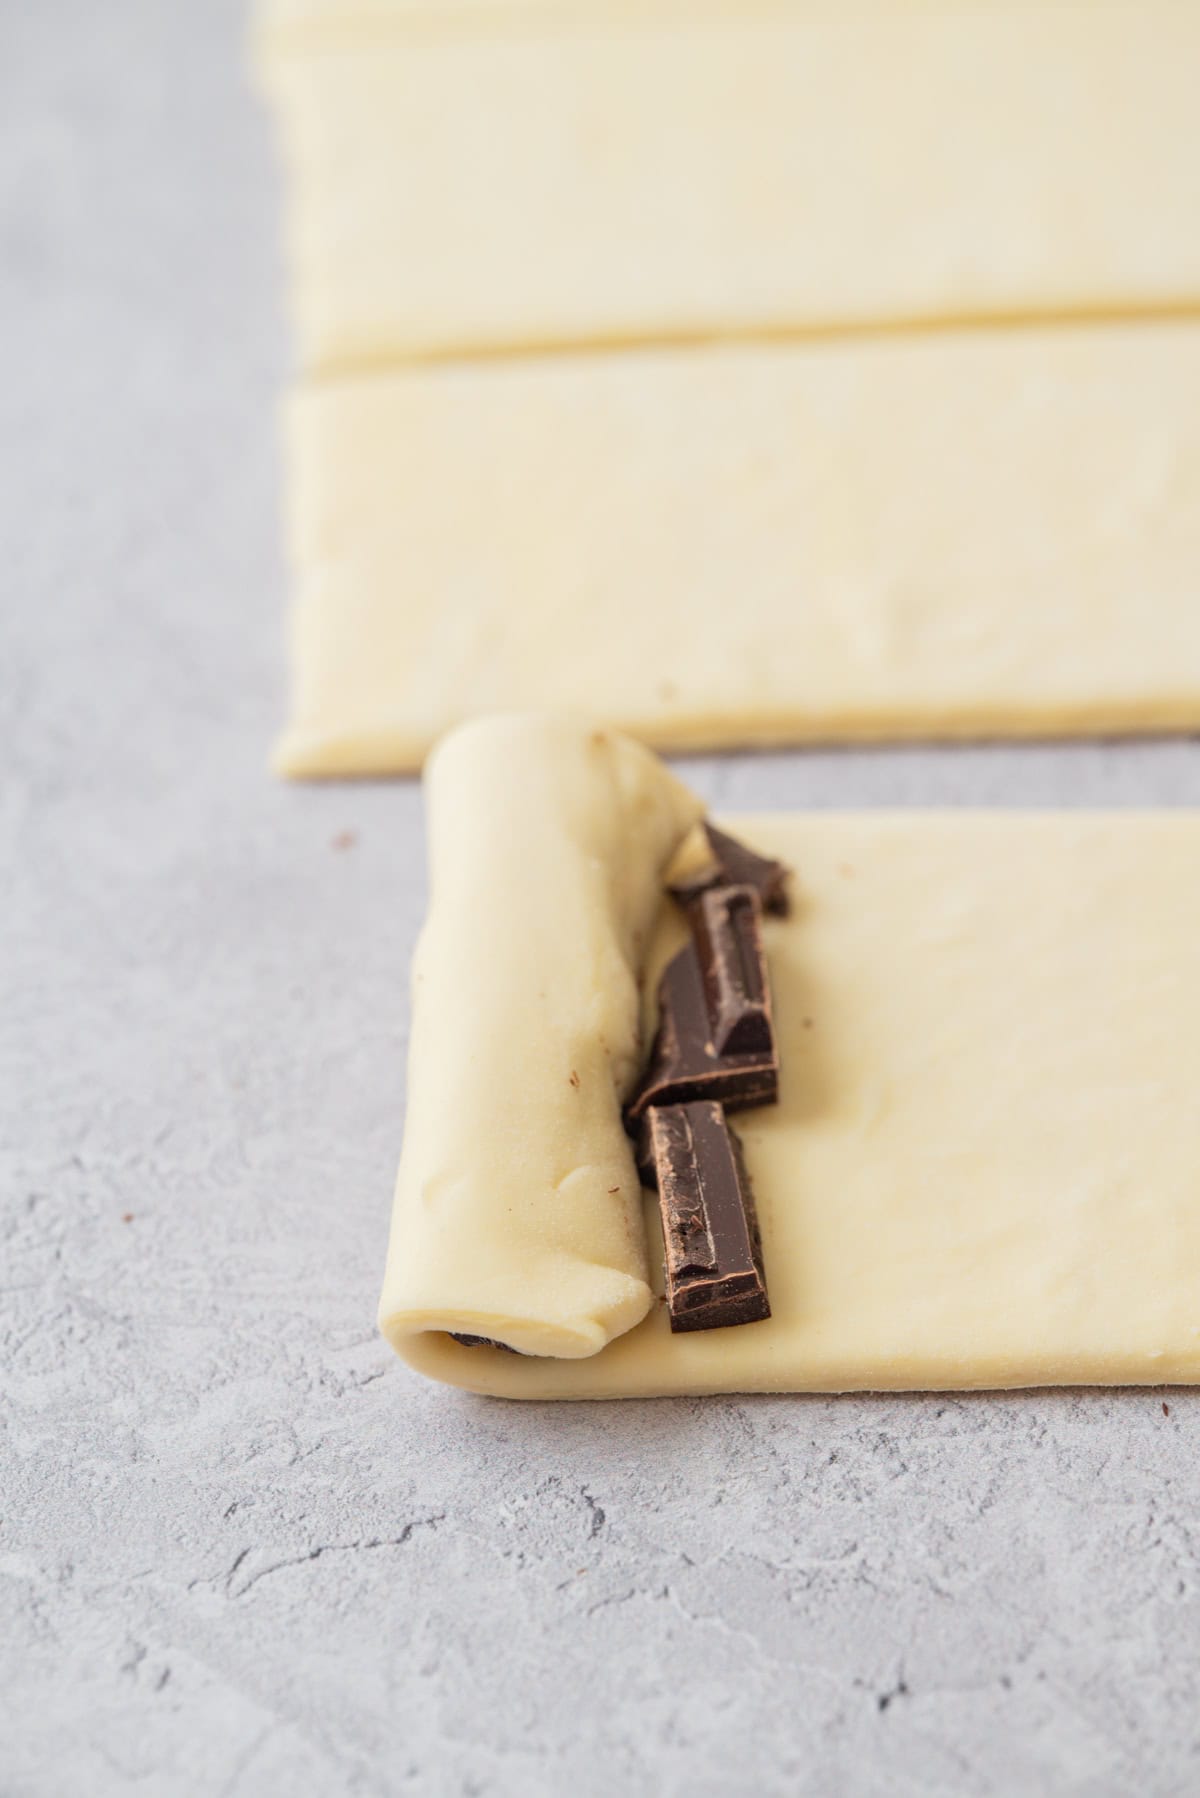
- Place a line of chocolate pieces across one short end of each strip. Roll the dough over once to enclose the chocolate, then place a second line of chocolate pieces directly in front of the roll.
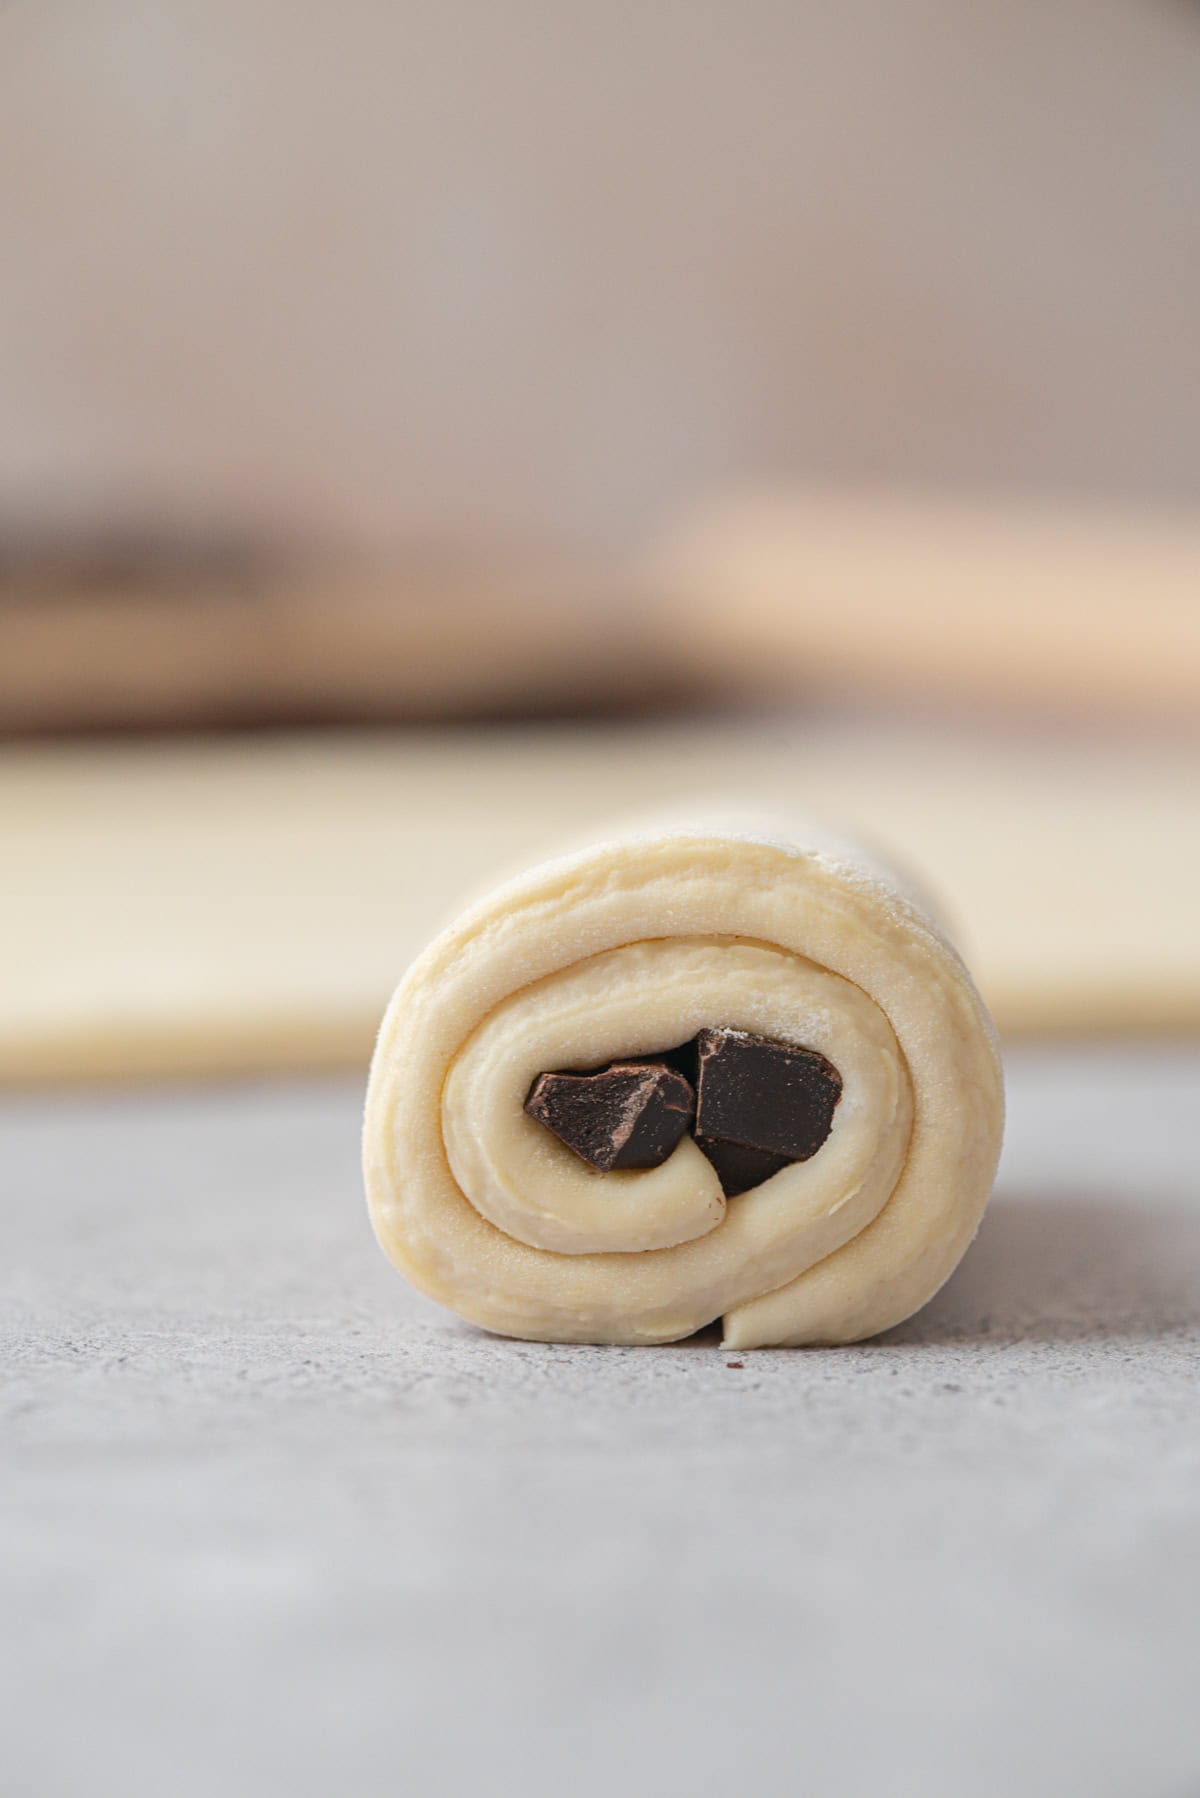
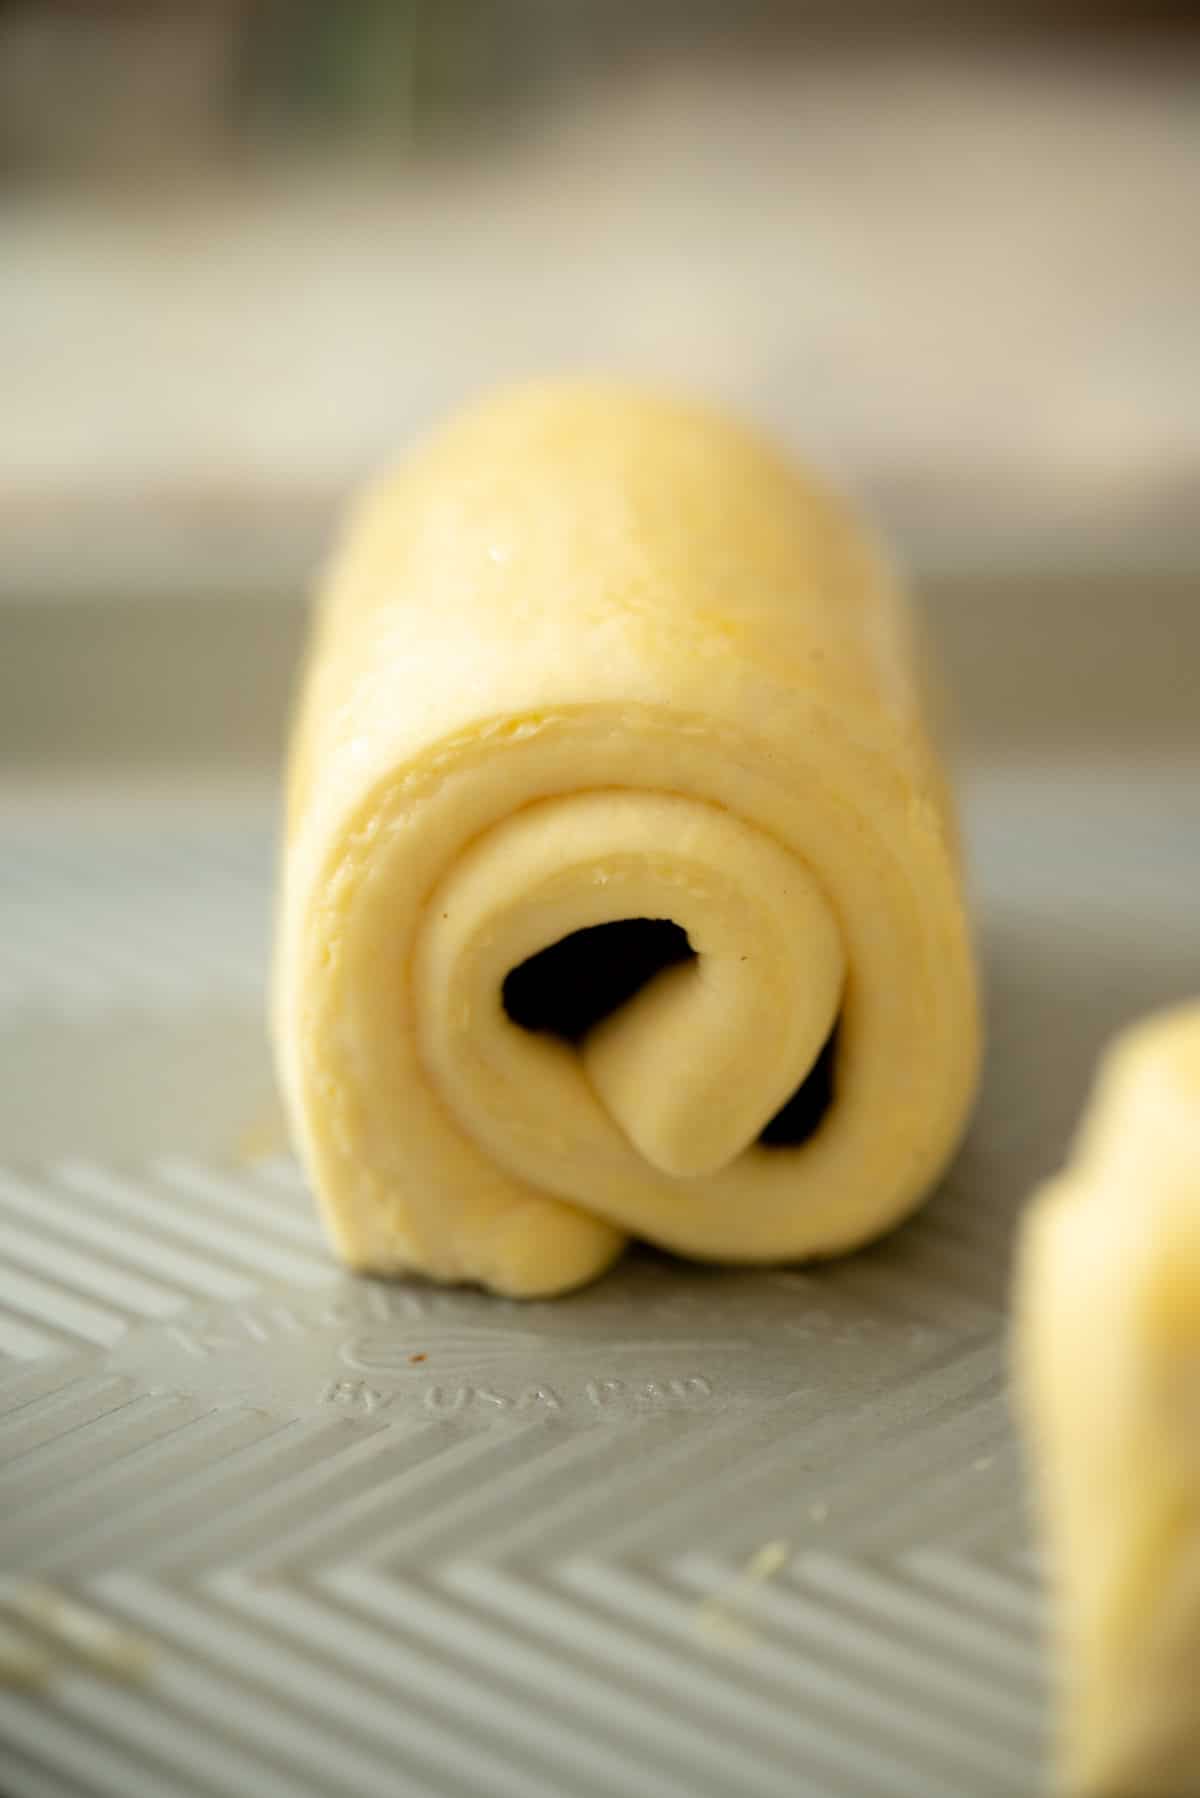
- Continue rolling up to the end, enclosing the second layer of chocolate as you go. Place seam-side down on a lined baking tray.
- Leave at room temperature (23-25°C/74-77°F) for 4-5 hours until visibly puffier and jiggly when the tray is gently moved. Brush carefully with egg wash


Tips for success
Storing and freezing
- Same day: Best on the day they’re baked, slightly warm.
- 2-4 days: Store in an airtight container at room temperature. Rewarm in a 160°C/320°F oven for 5-8 minutes.
- Freezing baked: Freeze completely cooled pastries for up to 3 months. Reheat directly from frozen at 170°C/340°F for 10-15 minutes.
- Freezing unbaked: Shape the pastries, freeze flat on a tray until solid, then transfer to a bag. Freeze for up to 2 months. To bake, place from frozen on a lined tray and leave to thaw and proof at room temperature for 6-8 hours before baking as normal.

Sourdough Pain au Chocolat
Ingredients
Sourdough starter
- 20 g starter
- 60 g all-purpose flour
- 60 g water
Dough
- 220 g water
- all the sourdough starter or around 120g active starter
- 450 g all-purpose flour
- 50 g sugar
- 8 g salt
- 40 g unsalted butter room temperature
Butter packet:
- 250 g unsalted butter
Chocolate Filling
- 200 g semi-sweet chocolate chopped, or chocolate batons
Egg Wash
- 1 egg + 1 Tbsp water
Instructions
The evening before
- Feed the starter. Mix the starter, flour, and water at a ratio of 1:3:3 in a small jar until combined. Leave at room temperature overnight until doubled and bubbly. If your kitchen is warm, use 1:5:5 so it rises more slowly. 20 g starter, 60 g all-purpose flour, 60 g water
- Day 1
- Mix the dough. Whisk the active levain into the water in a large bowl until loosened. Add the flour, sugar, and salt and mix until a dough forms, about 3-4 minutes. 220 g water, all the sourdough starter, 450 g all-purpose flour, 50 g sugar, 8 g salt
- Tip onto the bench, add the softened butter, and knead until fully incorporated and smooth. Shape into a ball, place in a lightly greased bowl, cover, and ferment at room temperature (ideally 23-25°C/74-77°F) for 3-5 hours until risen by 30-40%. 40 g unsalted butter
- Chill the dough. Press the dough into a flat rectangle. Wrap tightly in parchment or plastic wrap and refrigerate for at least 2 hours.
- Make the butter packet. Slice the cold butter and arrange the pieces in a grid on a sheet of parchment paper. Place a second sheet on top and bash and roll into an even, flat block. Fold the parchment edges in to create a neat 15x20cm (6×8 inch) frame and press the butter to fill it evenly. Refrigerate until cold. If using the flour method, soften the butter first, mix in 1½ tablespoons of flour, then roll between the parchment sheets into the same size rectangle. 250 g unsalted butter
- Encase the butter. Remove the butter from the fridge and give it a few firm bashes with the rolling pin to make it pliable again. Check that it's cold but also nice and bendy and doesn't break.
- Roll the chilled dough on a lightly floured bench into a 20x30cm (8×12 inch) rectangle. Place the butter in the centre. Fold the top third down and the bottom third up to encase it. Pinch the edges firmly to seal. Score a shallow slit along each long edge to relieve tension. Turn the dough 90 degrees.
- Roll and fold. Using a rolling pin, press across the dough first to start dispersing the butter, then roll to around 8mm thick, focusing on length rather than width. Always roll away from you in one direction; rolling back and forth drags the layers in opposite directions and smears the butter. Check it's not sticking and dust lightly with flour if needed. Trim the uneven short ends to expose the layers, then brush off any excess flour. Fold the bottom third up and the top third down (a letter fold). Wrap and refrigerate 30 minutes.
- Repeat twice more. Take the dough from the fridge and rotate it 90 degrees from how it was last folded. Before rolling, gently press the rolling pin across the surface of the dough to test how it responds. You are not trying to flatten it, just checking whether it gives slightly. If it feels completely solid, leave it on the bench for 5 minutes before continuing.Roll to 8mm thick, trim uneven edges, brush off flour, and letter-fold again. Wrap and refrigerate 30 minutes. Repeat one final time for three folds total. Note: if the butter shatters when you start rolling, it's too cold; leave the dough on the bench for 5-10 minutes. If the butter feels soft or greasy, refrigerate it immediately. After the third fold, wrap tightly and refrigerate for at least 8 hours, or overnight.
Day 2
- Roll and cut. Remove the dough from the fridge. On a lightly floured bench, roll the dough to around 4mm thick into a 35x40cm (14×16 inch) rectangle. Cut it in half across the length to give two 35x20cm pieces. Then cut each piece into 5 strips by cutting every 7cm along the 35cm side. You should have 10 strips in total, each about 7x20cm (3×8 inch).
- Shape. Place a line of chocolate pieces across one short end of each strip. Roll the dough over once to enclose the chocolate, then place a second line of chocolate pieces directly in front of the roll. Continue rolling up to the end, enclosing both layers. Place seam-side down on a baking-paper-lined tray, spaced well apart. 200 g semi-sweet chocolate
- Proof. Leave at room temperature (23-25°C/74-77°F) for 4-6 hours until visibly puffier and jiggly when the tray is moved. The layers should be visible. If drying out, brush lightly with water. If your kitchen is cool, place in a turned-off oven with a cup of hot water to the side, not directly underneath, as the heat can melt the butter layers.
- Egg wash and bake. Preheat the oven to 205°C/400°F. Mix the egg and water, then brush the top surface of each pastry carefully. Avoid letting egg wash drip down the cut sides. Place an extra tray on the rack below to catch butter drips. Bake for 18-22 minutes until deeply golden brown. Cool for at least 20 minutes. Dust with icing sugar to serve. 1 egg + 1 Tbsp water
Notes
- Levain: If you’re using an existing active starter, use 120g of fed, active starter at peak rise.
- Bulk ferment visual cue: In the initial dough rise you’re looking for a 30-40% rise, not a full double. The dough should look noticeably puffier. In a cooler kitchen this may take up to 5 hours.
- Chilling before laminating: After the bulk ferment the dough will be soft and warm. Chilling it first so it matches the butter’s firmness is what gives you clean, even layers.
- Chocolate: Good quality dark chocolate with 60-70% cocoa gives the best result. Chopped bar chocolate melts better than chips.
- Final proof: Don’t rush this. Underproofed pastries will seem dense and gummy inside even if they look baked on the outside.
- Temperature: If your kitchen is warmer than 25°C/77°F, work quickly and refrigerate the dough for an extra 10-15 minutes between folds if you feel it warming up.
- Freezing: Baked pastries freeze well for up to 3 months. Reheat directly from frozen at 170°C/340°F for 10-15 minutes. You can also freeze shaped but unproofed pastries; thaw and proof at room temperature for 6-8 hours before baking.


Hi, thanks for a great website. I have several of the sour dough recipes with success! Including the pain an chocolate. What i would like to know timing wise is how can you have them ready to cook in the morning for breakfast? Do you do the last 4-6 hrs once shaped in the fridge?
Thanks
Hi! I’ve tried making croissants a couple times and the first time, the butter was too cold and shattered like you said, and the second time it was too warm and melted into the dough. I’m thinking the type of butter may also have had an effect – all the recipes I’ve seen recommend European-style butter which have a higher butterfat content than NZ butters. What type of butter do you recommend, or is it possible to use regular NZ butter and I just have to get the temperature right?
Hey, I just use regular NZ butter and if the temperature is right it works well. The butter melting into the dough is worse than the butter shattering, so erring on the side of too cold is better. Butter shattering mainly just give uneven layers. It’s very important to give adequate proofing time too. If you found the butter melted out in the oven this can be due to underproofing, not shattered butter.
I did an extra overnite with my laminated dough layer leaving it in the fridge flat, as 2 by 20×30 cm rectangles.
As a result it looked quite lively with 2 or 3 bubbles forming in each rectangle by morning.
After carefully smoothing these bubbles out it seems the rolling into the 12 pains has gone fine.
It’s now in the oven with a slightly heated water tray underneath and has been proving quite well for an hour or so.
My guess is that I won’t need anything like the min 4 hours you suggested due to the extra night I’ve taken.
Any advice please?
Hey i think the extra fridge proof will have helped. As for the 4 hours it’s always best to gauge the dough and see how it looks rather than the time specified for proofing 🙂 you may need less like you say