Sourdough Cruffins Step by Step
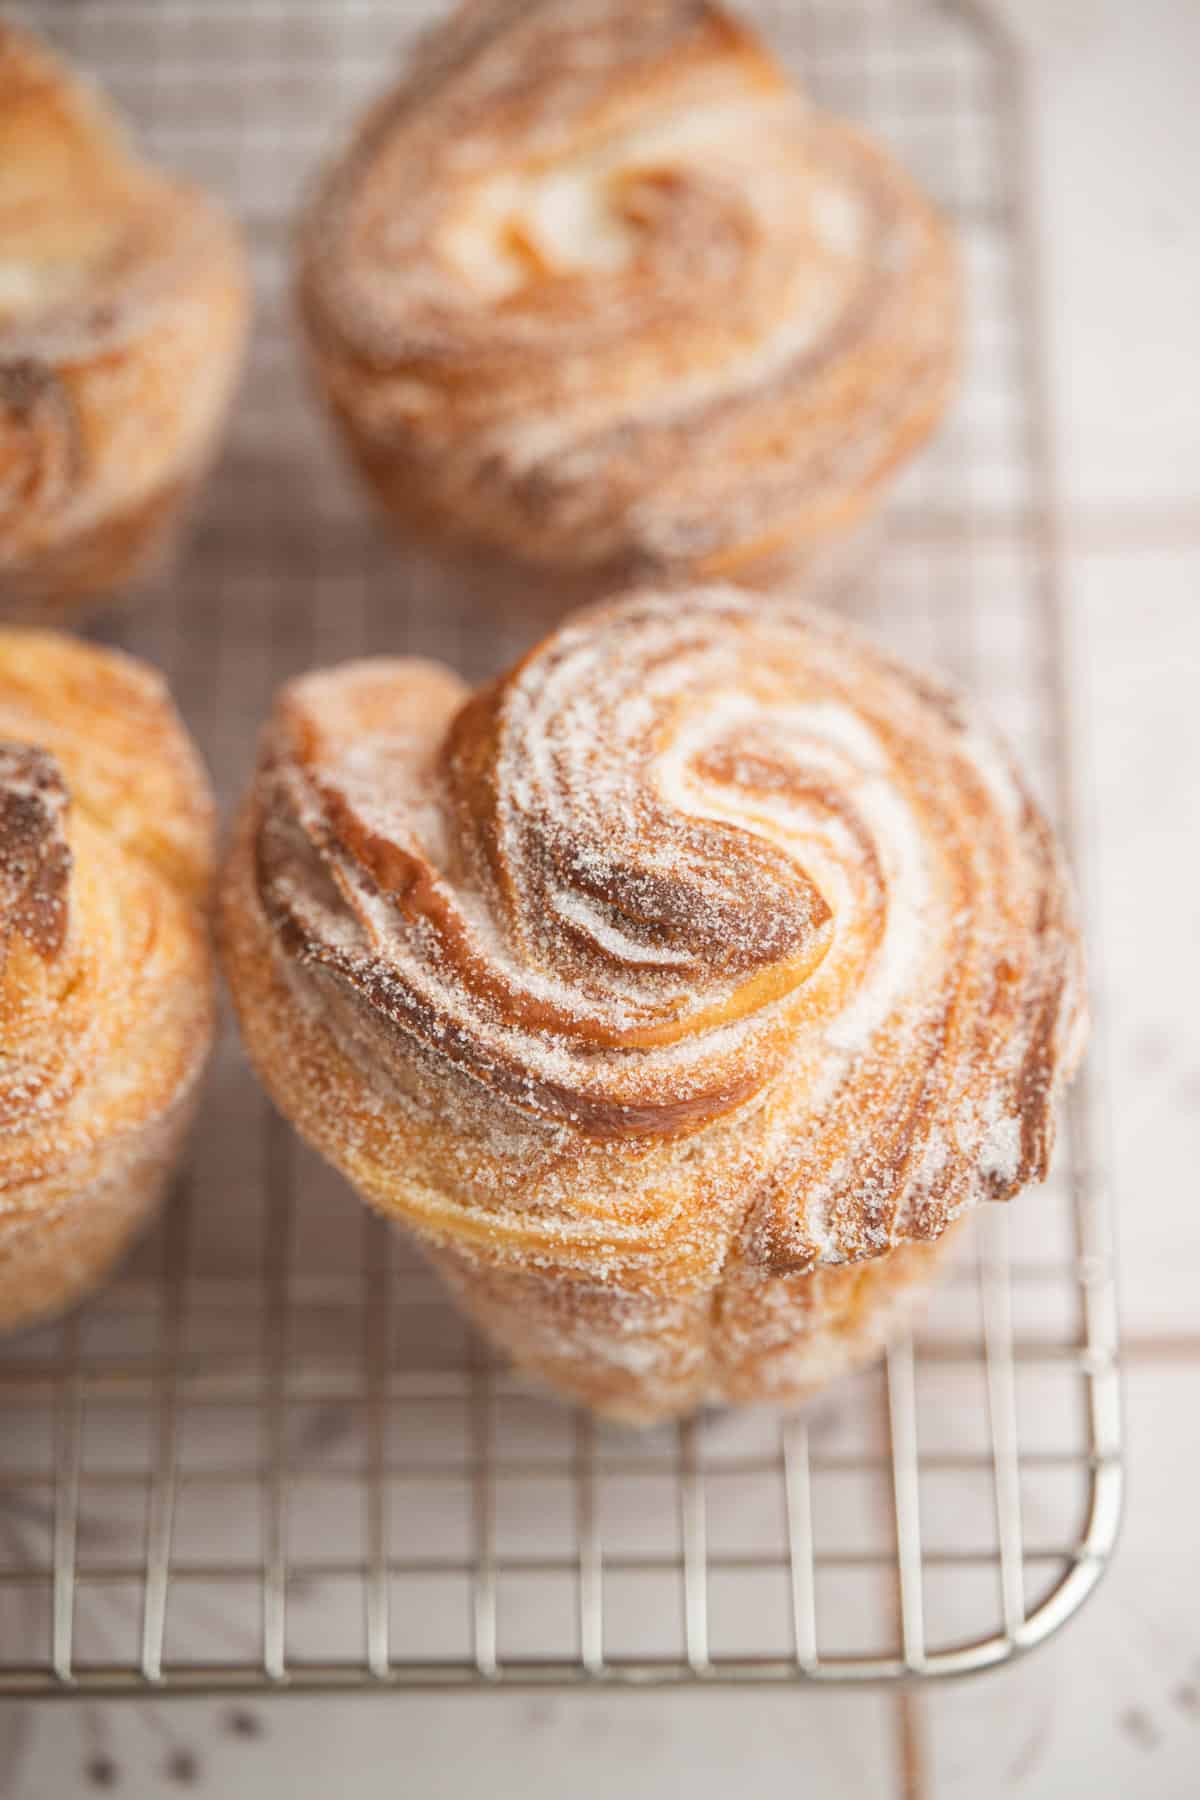
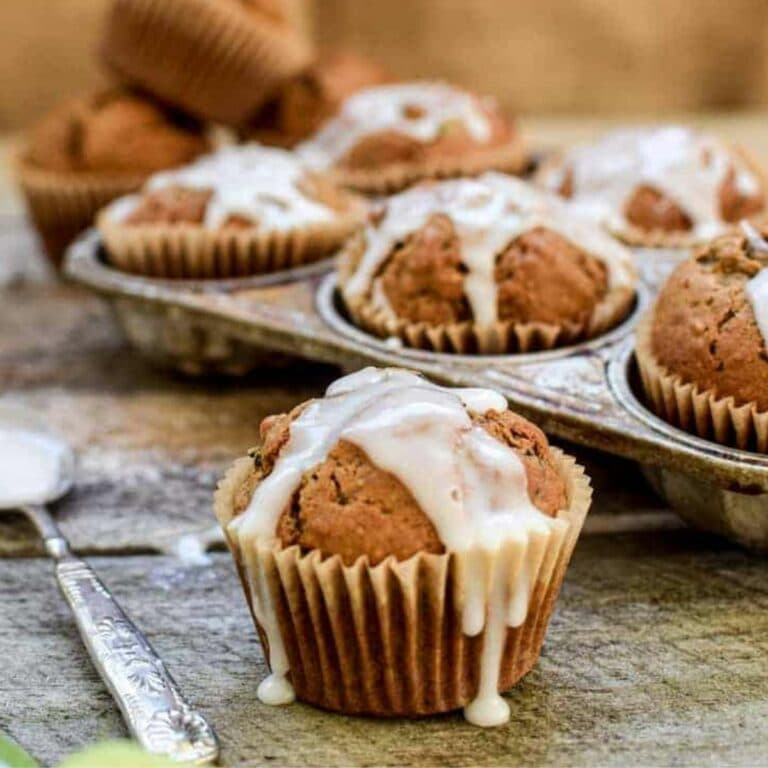
Move over sourdough croissants, sourdough cruffins are in town now. These are light, flaky pastries made from laminated sourdough dough and baked in a muffin tray. The outside is crisp and shattery, the inside is soft and layered, and the whole thing is rolled in crunchy sugar. You can keep them plain, or hide a surprise in the middle with lemon curd, pistachio spread, jam, or nutella.

About these cruffins
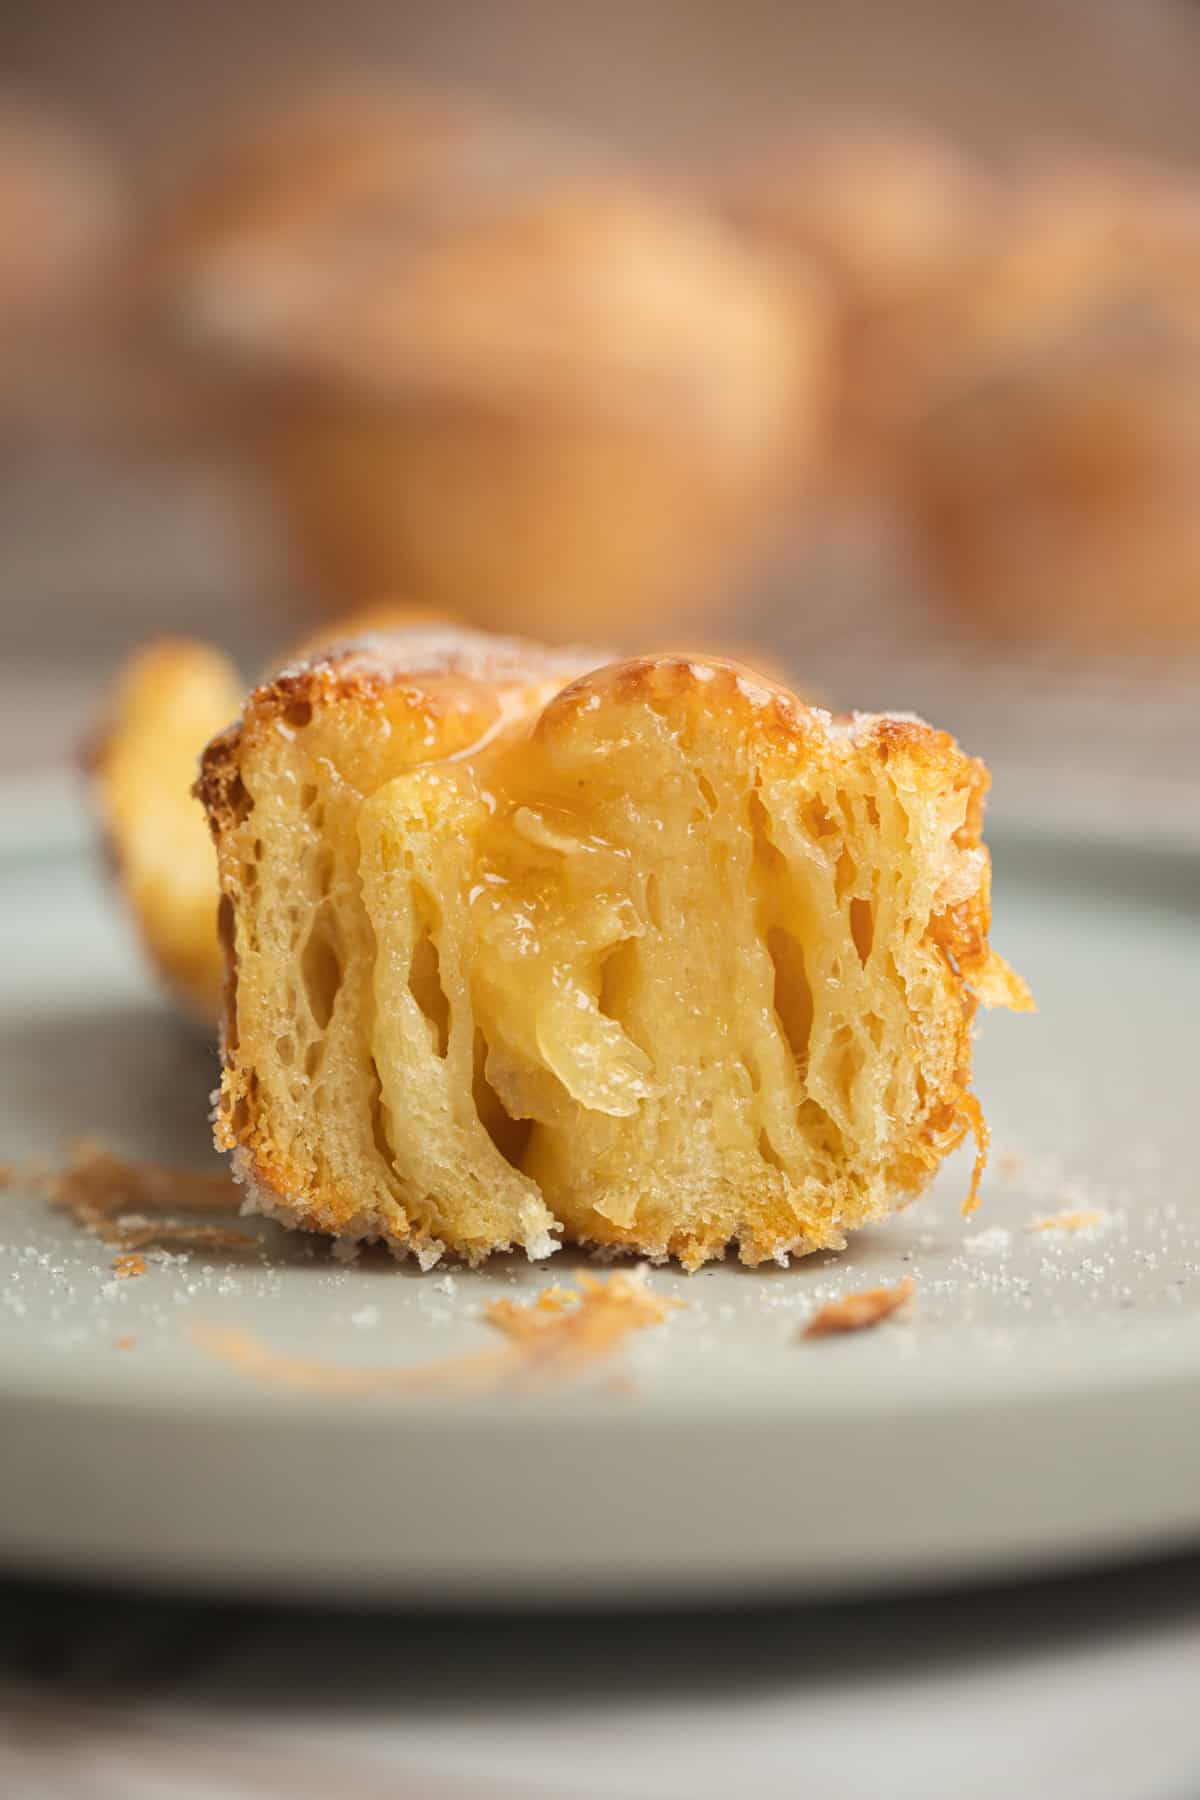
These sourdough cruffins are everything I love about laminated dough, but in a fun, twisty muffin shape. They are a hybrid of a croissant and a muffin. The outside is crisp and flaky, the inside is soft and layered, with that gentle sourdough flavour running through. They are made from an enriched sourdough dough, so you still get buttery richness, a little sweetness, and just a hint of tang, but not a strong sour flavour.
They are a weekend baking project, but the steps are simple and repeatable. The dough is mixed on day one, laminated with butter, then chilled. On day two, you roll, cut, and twist the strips into tall spirals, proof and bake them in a muffin tin. You can keep them simple, roll them in sugar, or fill them.
Cruffins are best made in an environment where the temperature is not too hot. The trick to flaky layers in the dough is to keep the butter cool as it is rolled into the dough. If it melts into the dough, it won’t be laminated correctly. If your room temperature exceeds 25°C / 77 °F, you will struggle to keep the dough and butter cool.
The sourdough starter
These cruffins rely only on your sourdough starter, so it needs to be active and bubbly. A weak or sleepy starter will give you slow, flat cruffins that do not rise properly.
A few starter tips for this recipe:
- Feed it the night before so you’ve got it ready to go, with a higher ratio of flour and water to starter, for example, a 1:4:4 feed. This lets it rise slowly and be at its peak in the morning.
- By the time you are ready to bake, it should have at least doubled, look airy and bubbly on top
Good lamination starts with strong dough. A well-fed, active starter will build that strength and give you a dough that can hold all those butter layers.
Baker’s Schedule
Sourdough cruffins fit very well into an overnight schedule.
On day one, you mix and knead the dough, let it rise, then chill it and laminate it with the butter with three simple folds. After the folds, the dough chills overnight. On day two, you roll, cut, shape, and proof the cruffins, then bake and sugar them.
Chilling the dough overnight does two important things:
- It relaxes the gluten so the dough is easier to roll out without shrinking.
- It keeps the butter firm so you can roll neat layers instead of smearing the butter into the dough.
Here is a rough schedule you can use and then tweak to your room temperature.
Night before
Feed your sourdough starter so it rises overnight.
Day 1
- 9 am: Mix the dough and leave it to rise in a warm spot until bulked out by around 40%
- 1 pm: Chill the dough for 2-3 hours. Make the butter packet.
- 4 pm: Fold 1
- 4:35pm: Fold 2
- 5:10pm: Fold 3.
- Place the dough in the fridge overnight.
Day 2
- Roll the dough and cut into strips and shape into cruffins.
- Let them rise until puffed and doubled in size.
- Bake, then roll them in sugar while still hot.
- Let them cool, then fill them with your fillings.
Method
The dough
- The night before, feed your sourdough starter so it is bubbly and active by morning.
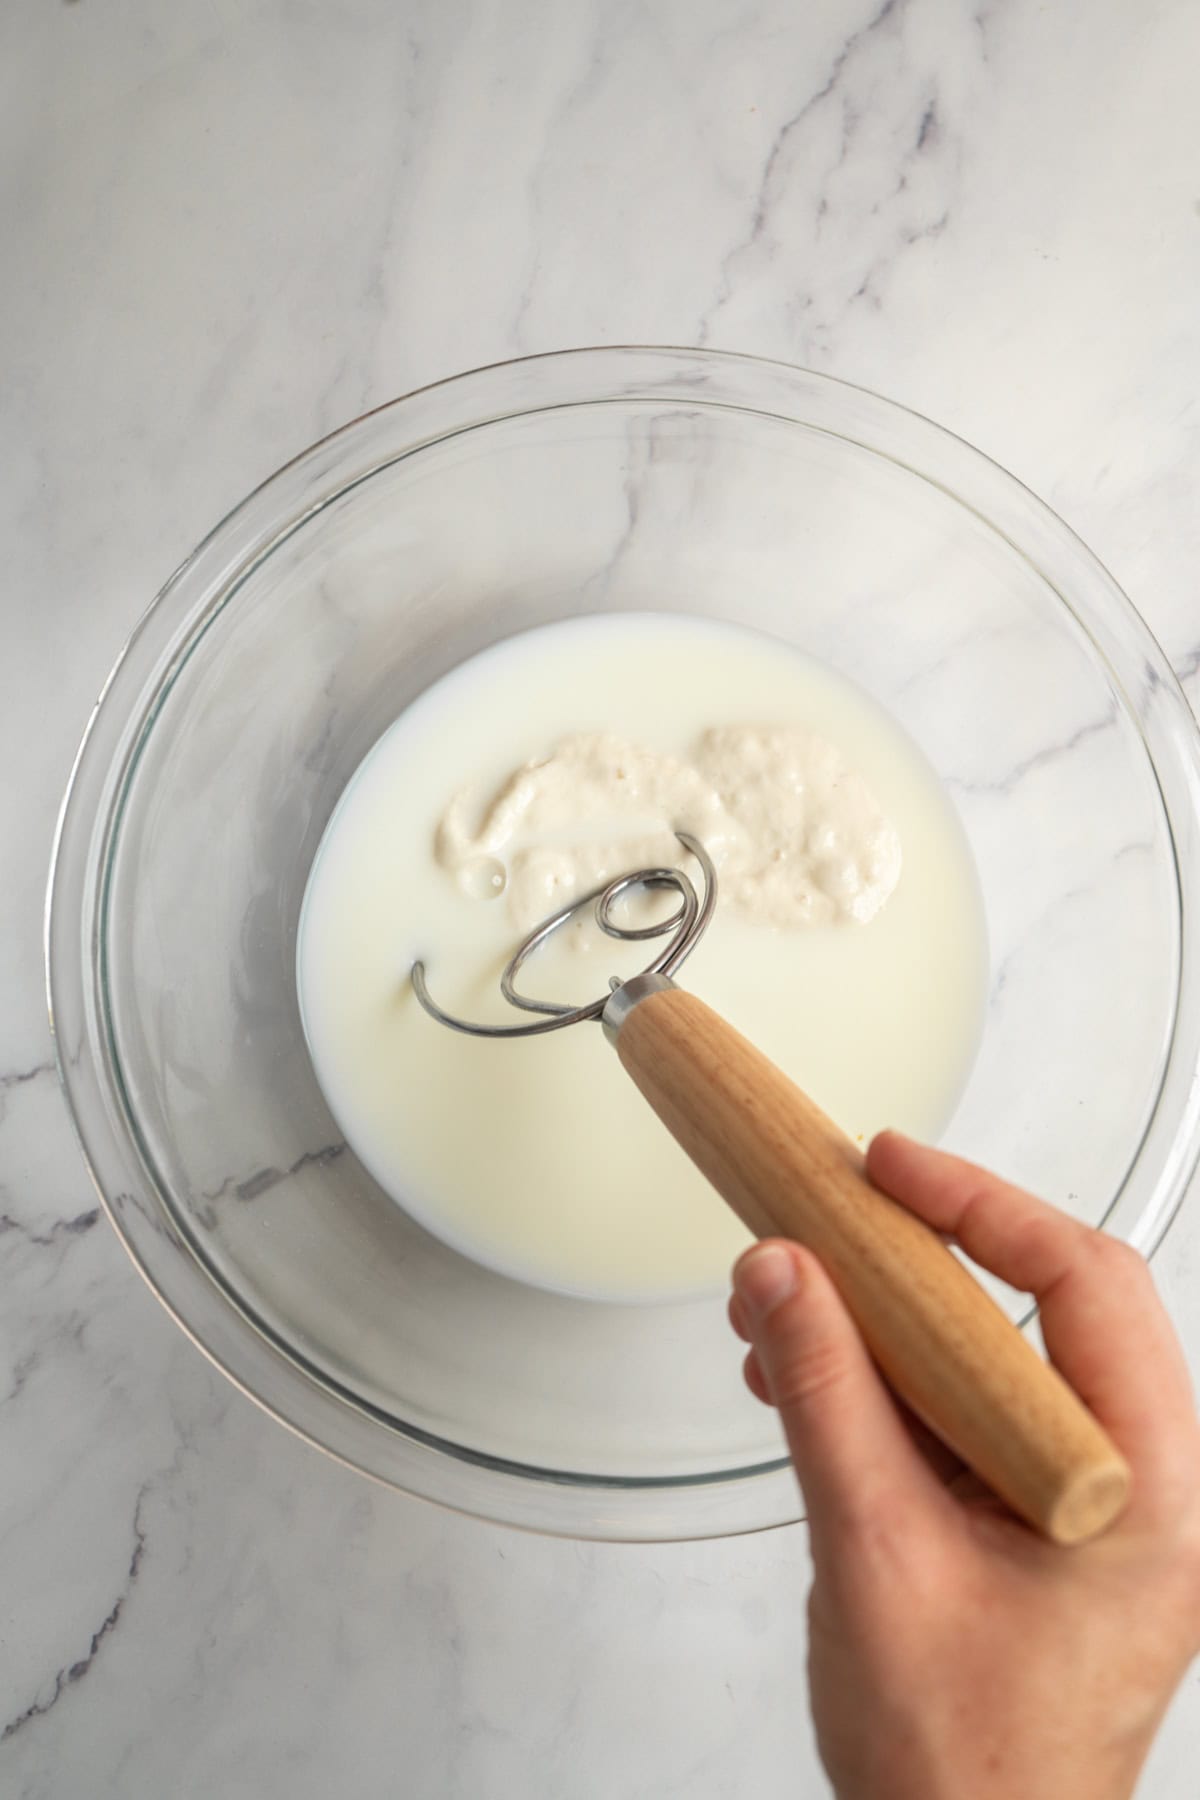
- Whisk milk, water and sourdough starter.
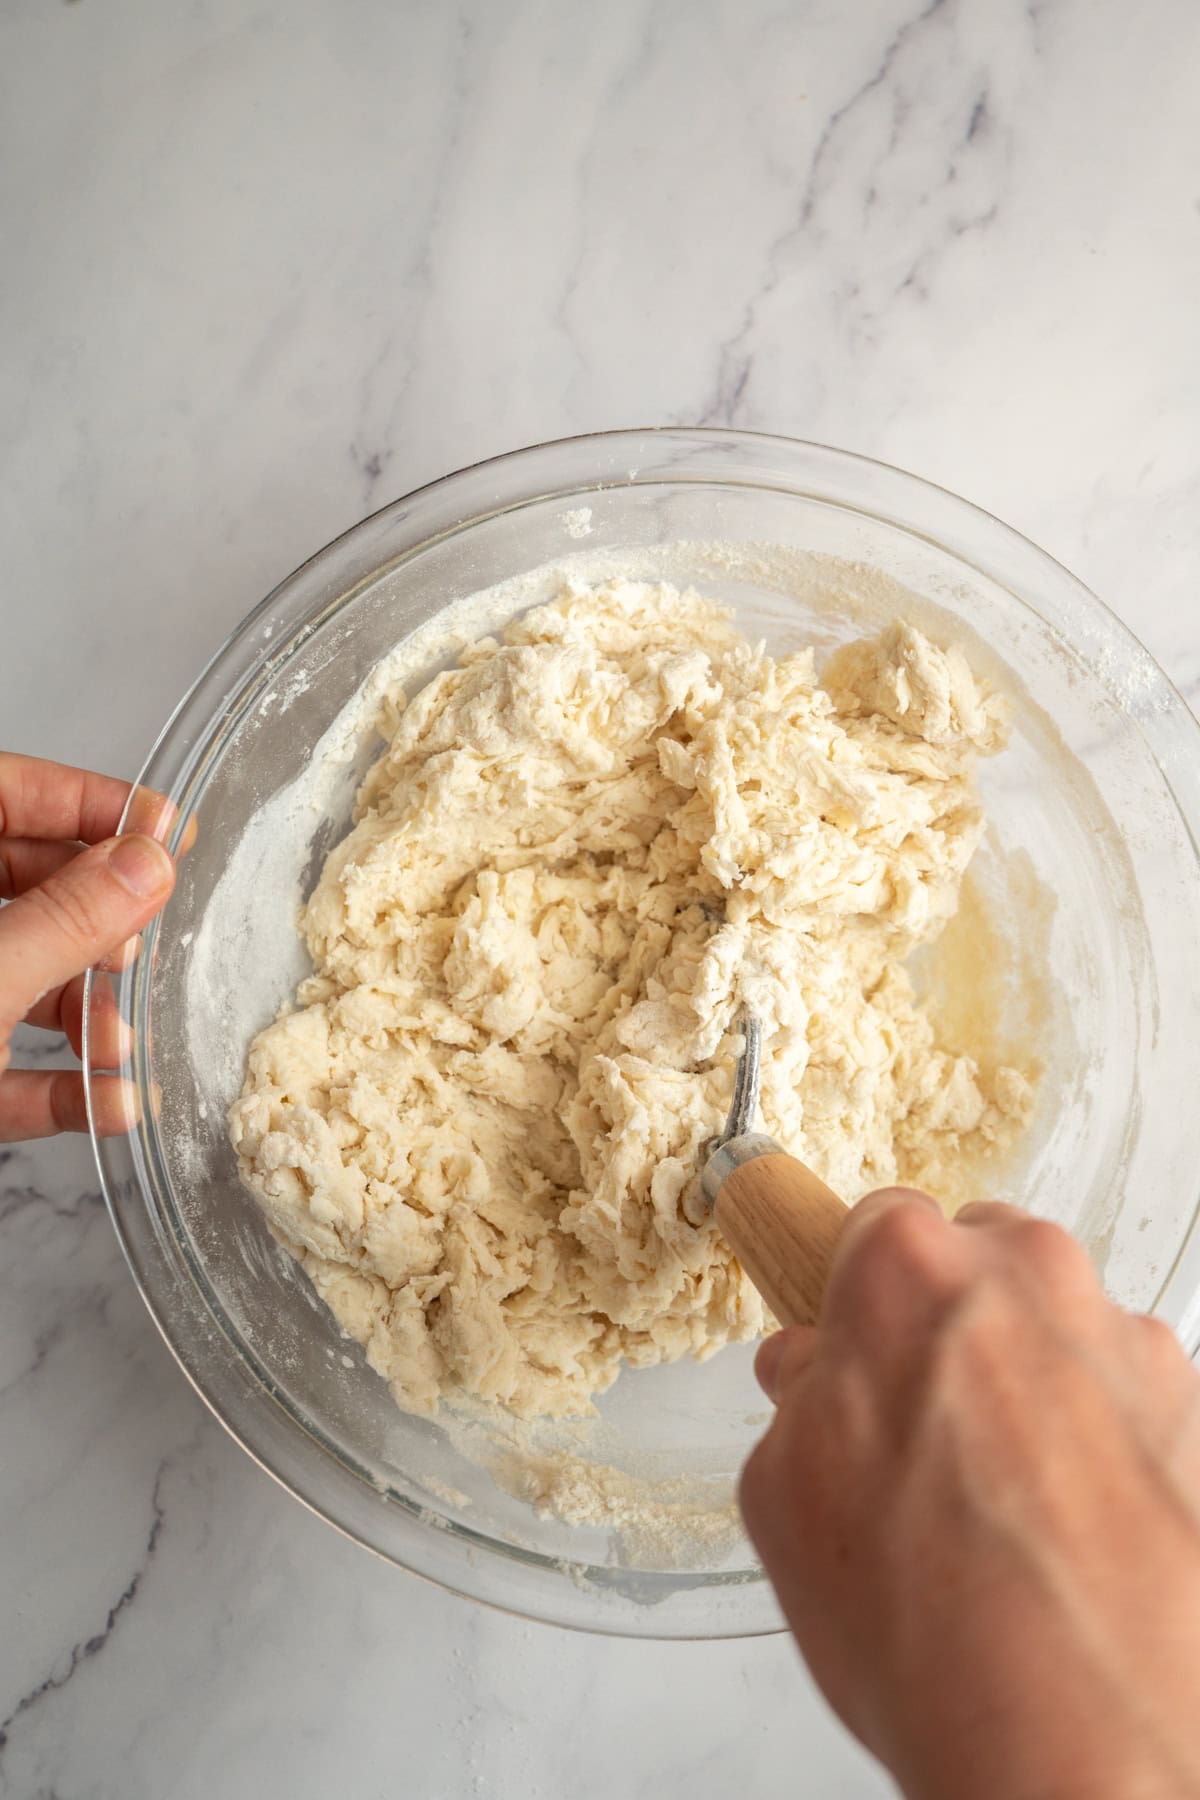
- Add flour, sugar and salt and combine into a shaggy dough.
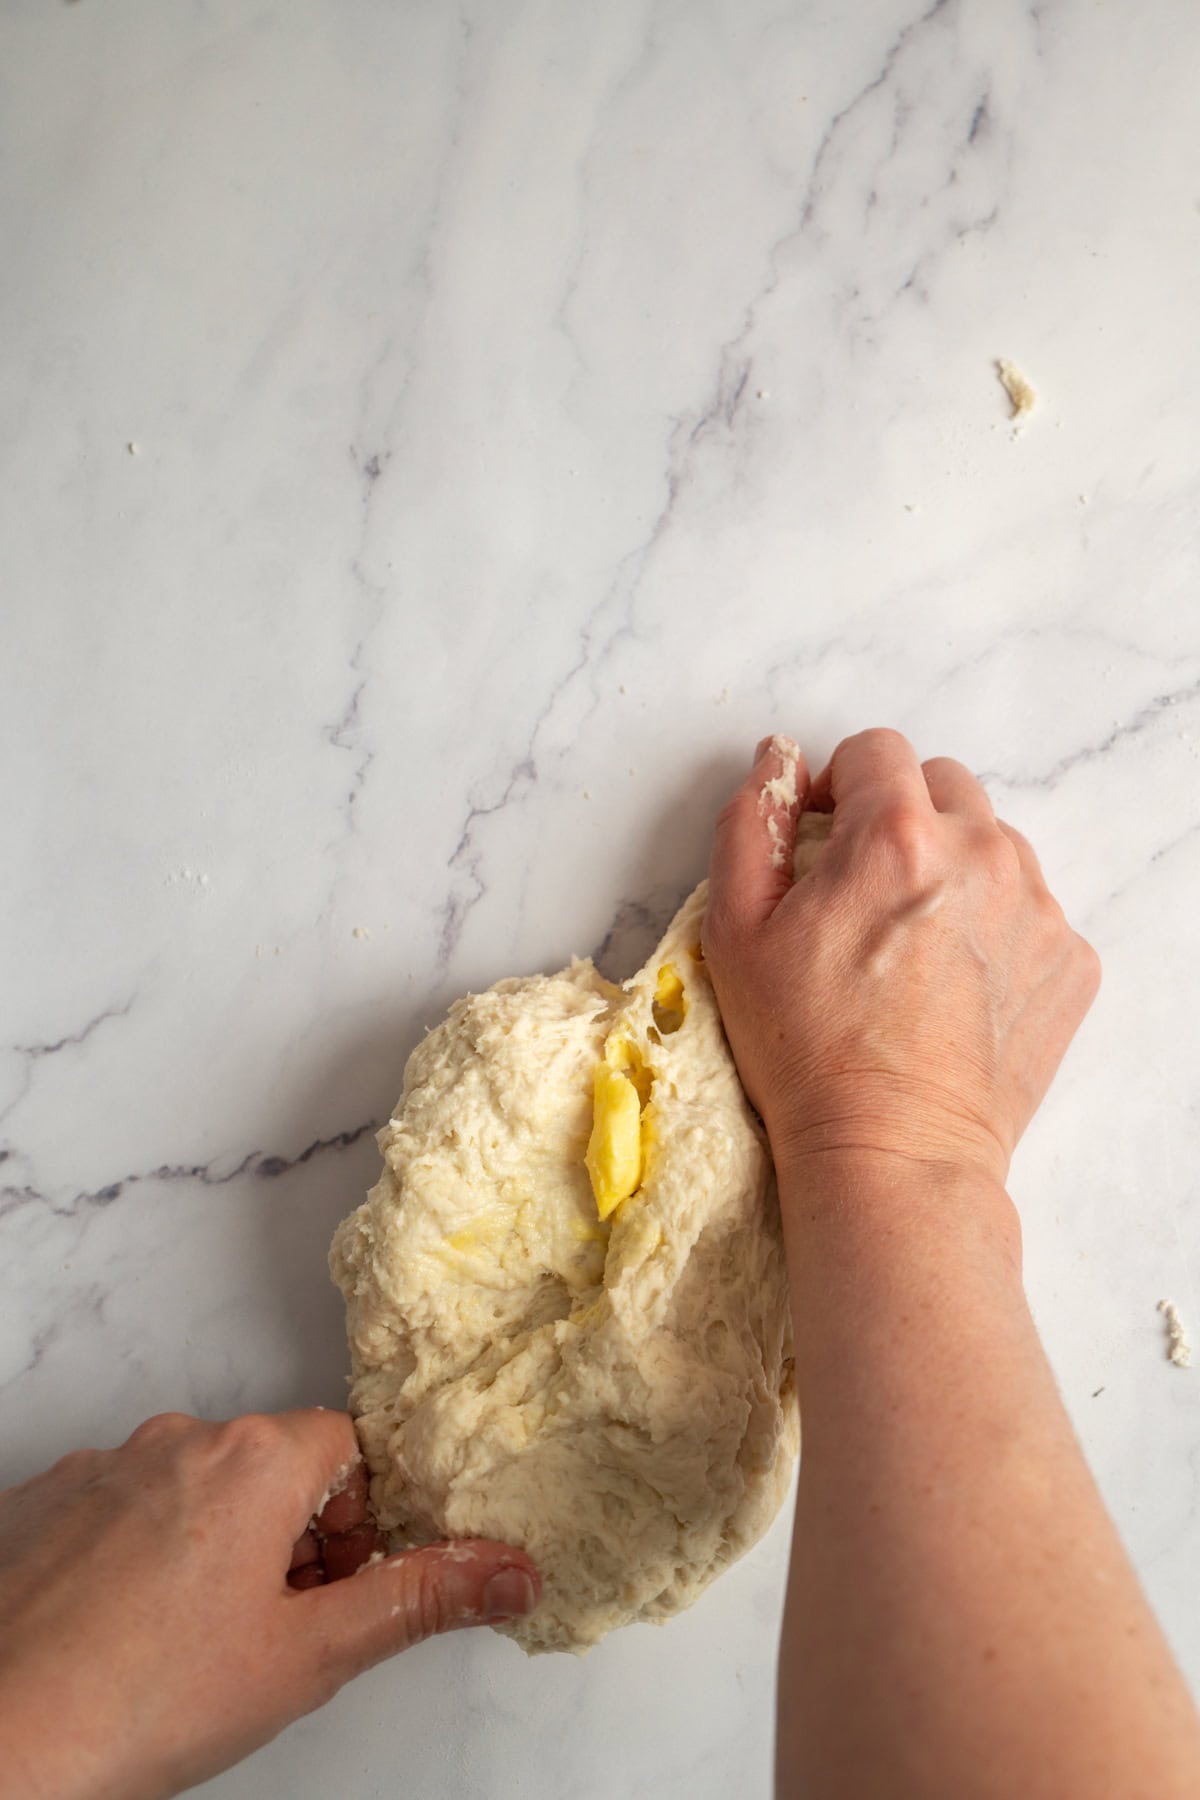
- Knead in the butter. This will make it really sticky but keep working it in.
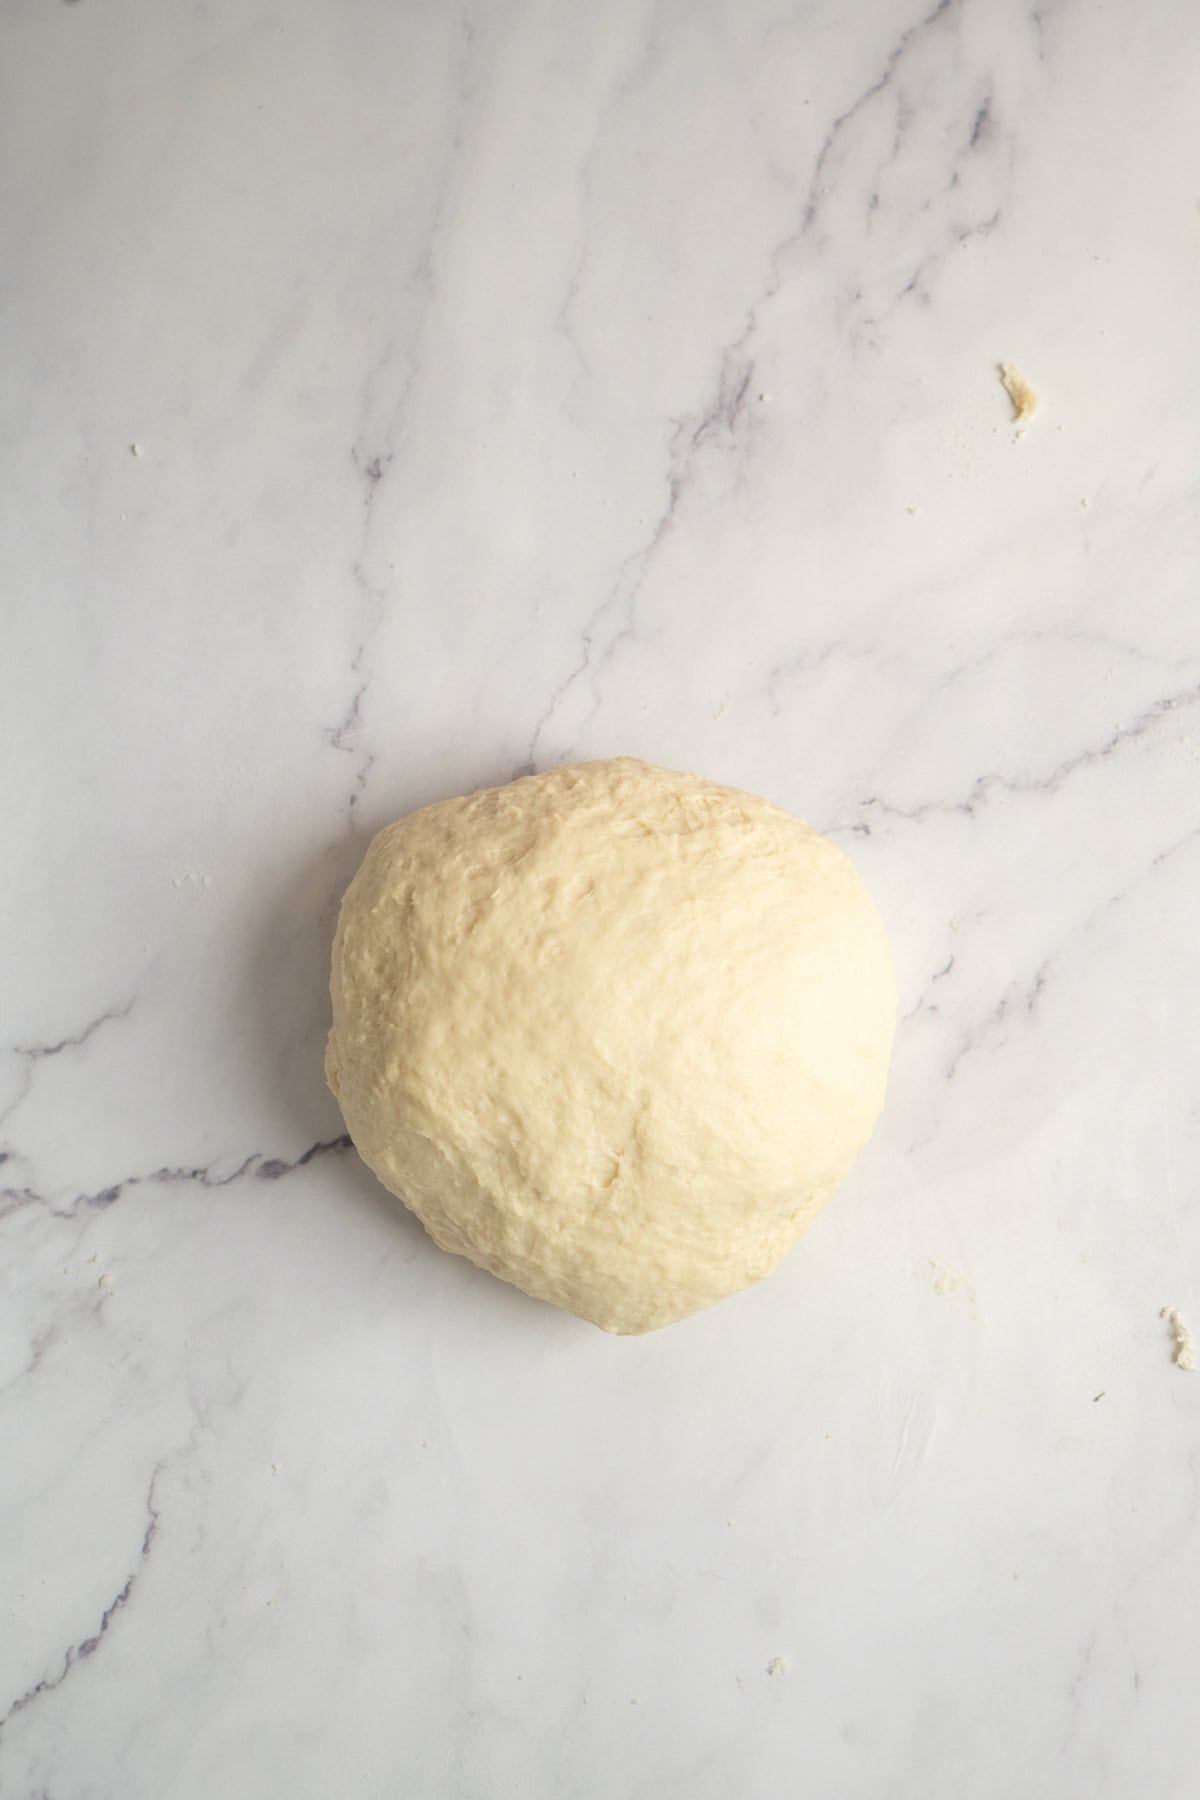
- Keep kneading til the dough is smooth, then place in a bowl and let it rise.
- Pat the dough into a flat rectangle, wrap it and chill it for 2-3 hours.
The butter
For the butter block, I slice cold butter and lay the pieces side by side on a sheet of baking paper. I fold the baking paper into a rectangle to give me clear edges and a guideline for the size, then I cover the butter with the top layer of paper and pound it with a rolling pin to soften it. Then I press it out until it fills the square in an even layer. The butter should end up cold but malleable, not rock hard or greasy, and about the same firmness as the chilled dough.
Sometimes I mix a little flour into the butter to make it more pliable, especially if the butter is very brittle, but for these sourdough cruffins, I really prefer this just butter method. It gives cleaner layers and a better flaky texture.
When butter turns malleable, the fat crystals inside it soften and reorganise, making it more like soft clay. You will chill the butter packet again, it will firm up again so it will get hard again, but it keeps that thin, even shape. Because it is so thin, it quickly softens back to its cold, bendy state once it comes out of the fridge.
Laminating
Before you start laminating, check that your dough and butter have similar consistencies. The dough should be cold and firm, and the butter should be cold but bendy. Give it another pound with the rolling pin when you take it from the fridge to bend it again.

- Roll the dough into a rectangle twice the height of the butter.
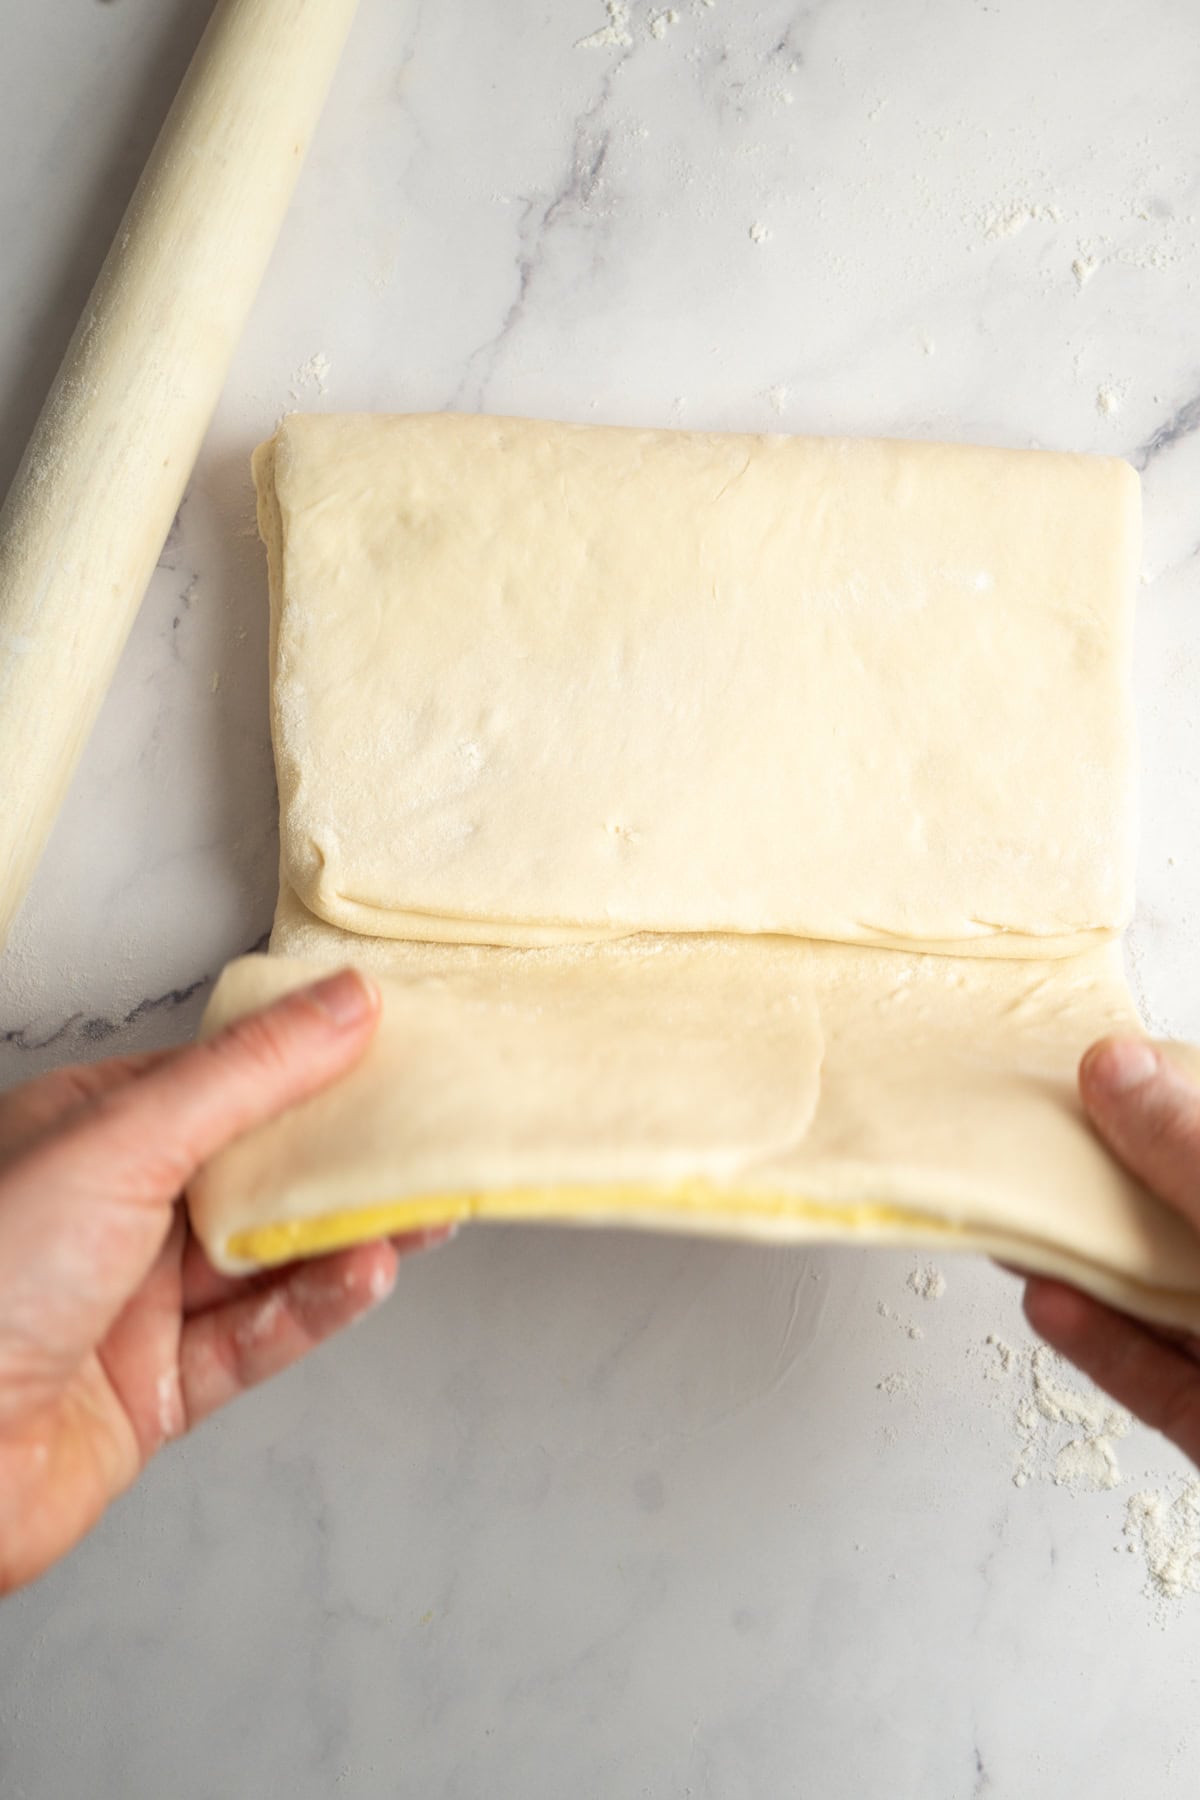
- Enclose the butter block inside the dough.
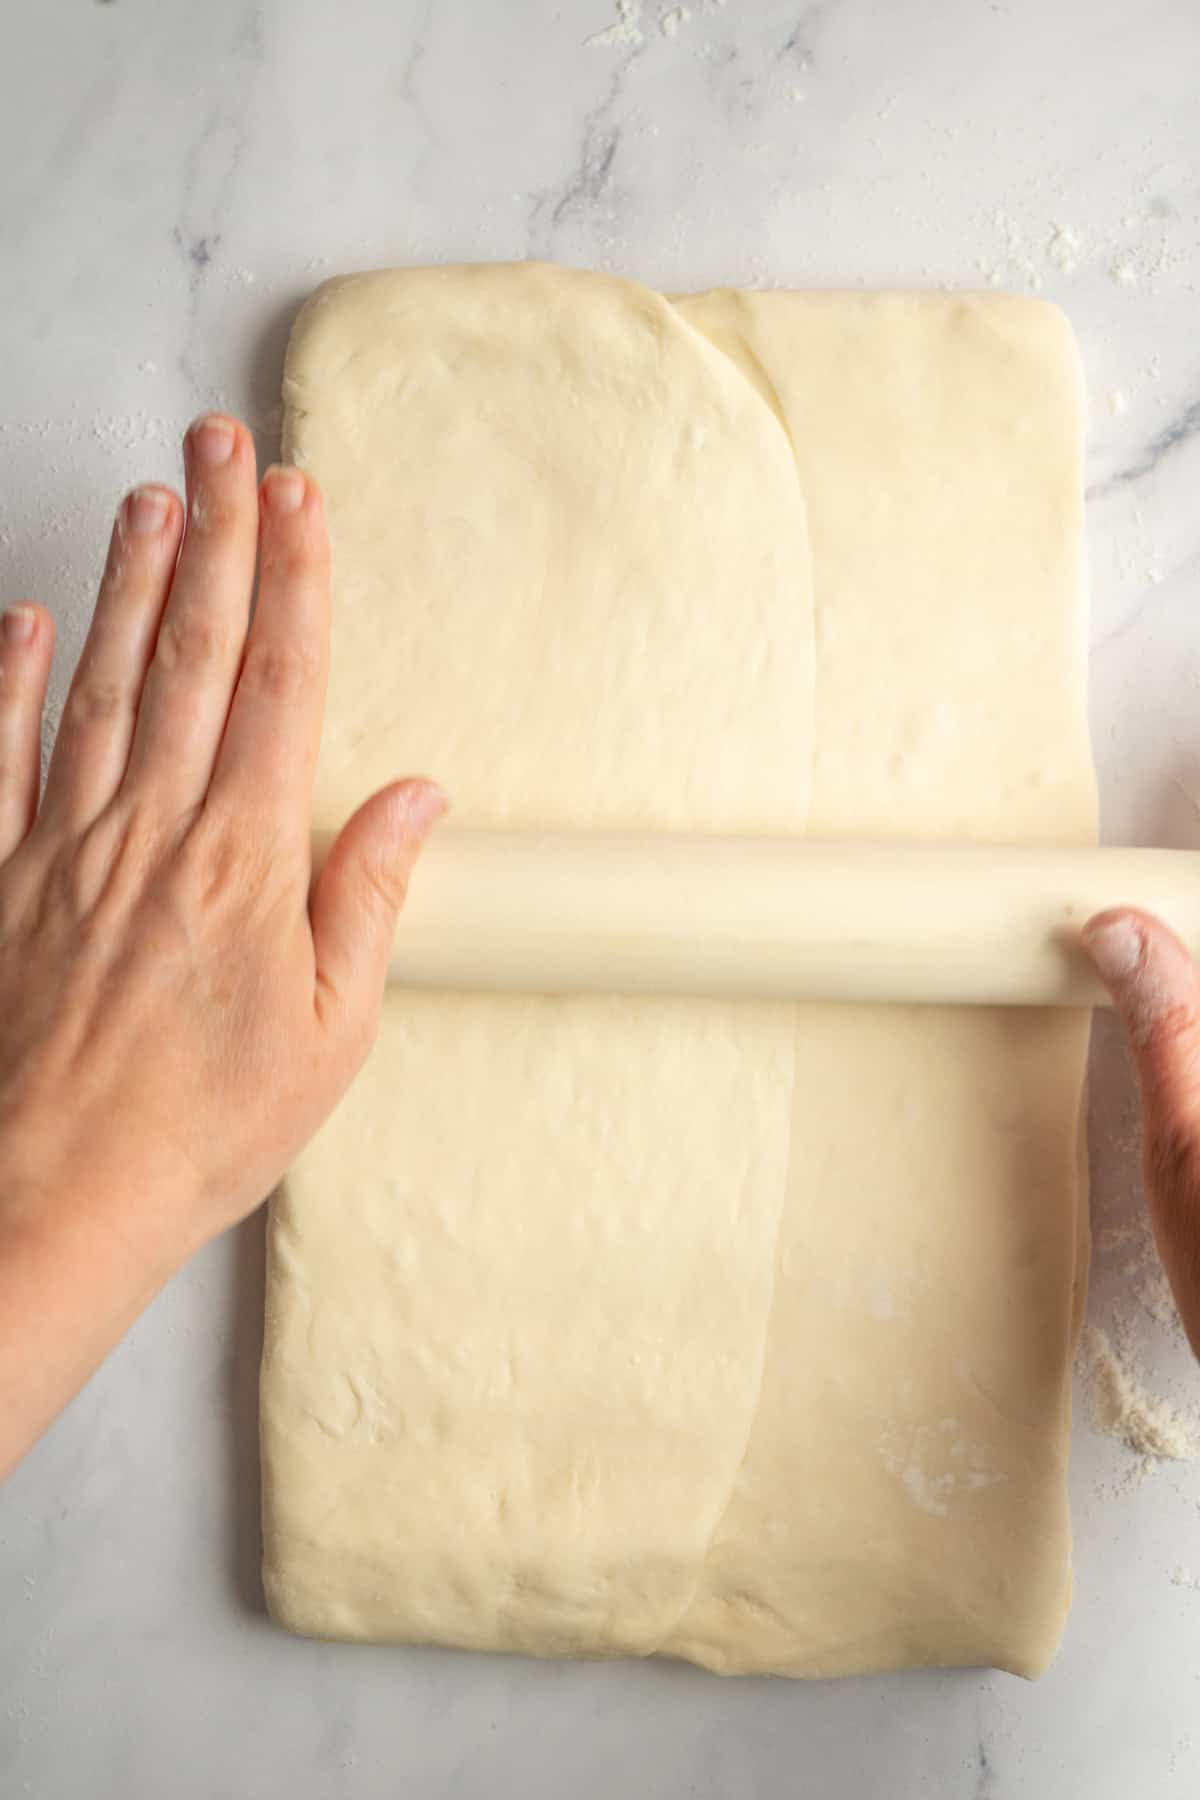
- Turn the dough so the seam is vertical in front of you. Gently press the rolling pin up the length of the dough to start stretching it, then roll it into a long rectangle.
- Fold the dough into thirds like a pamphlet.
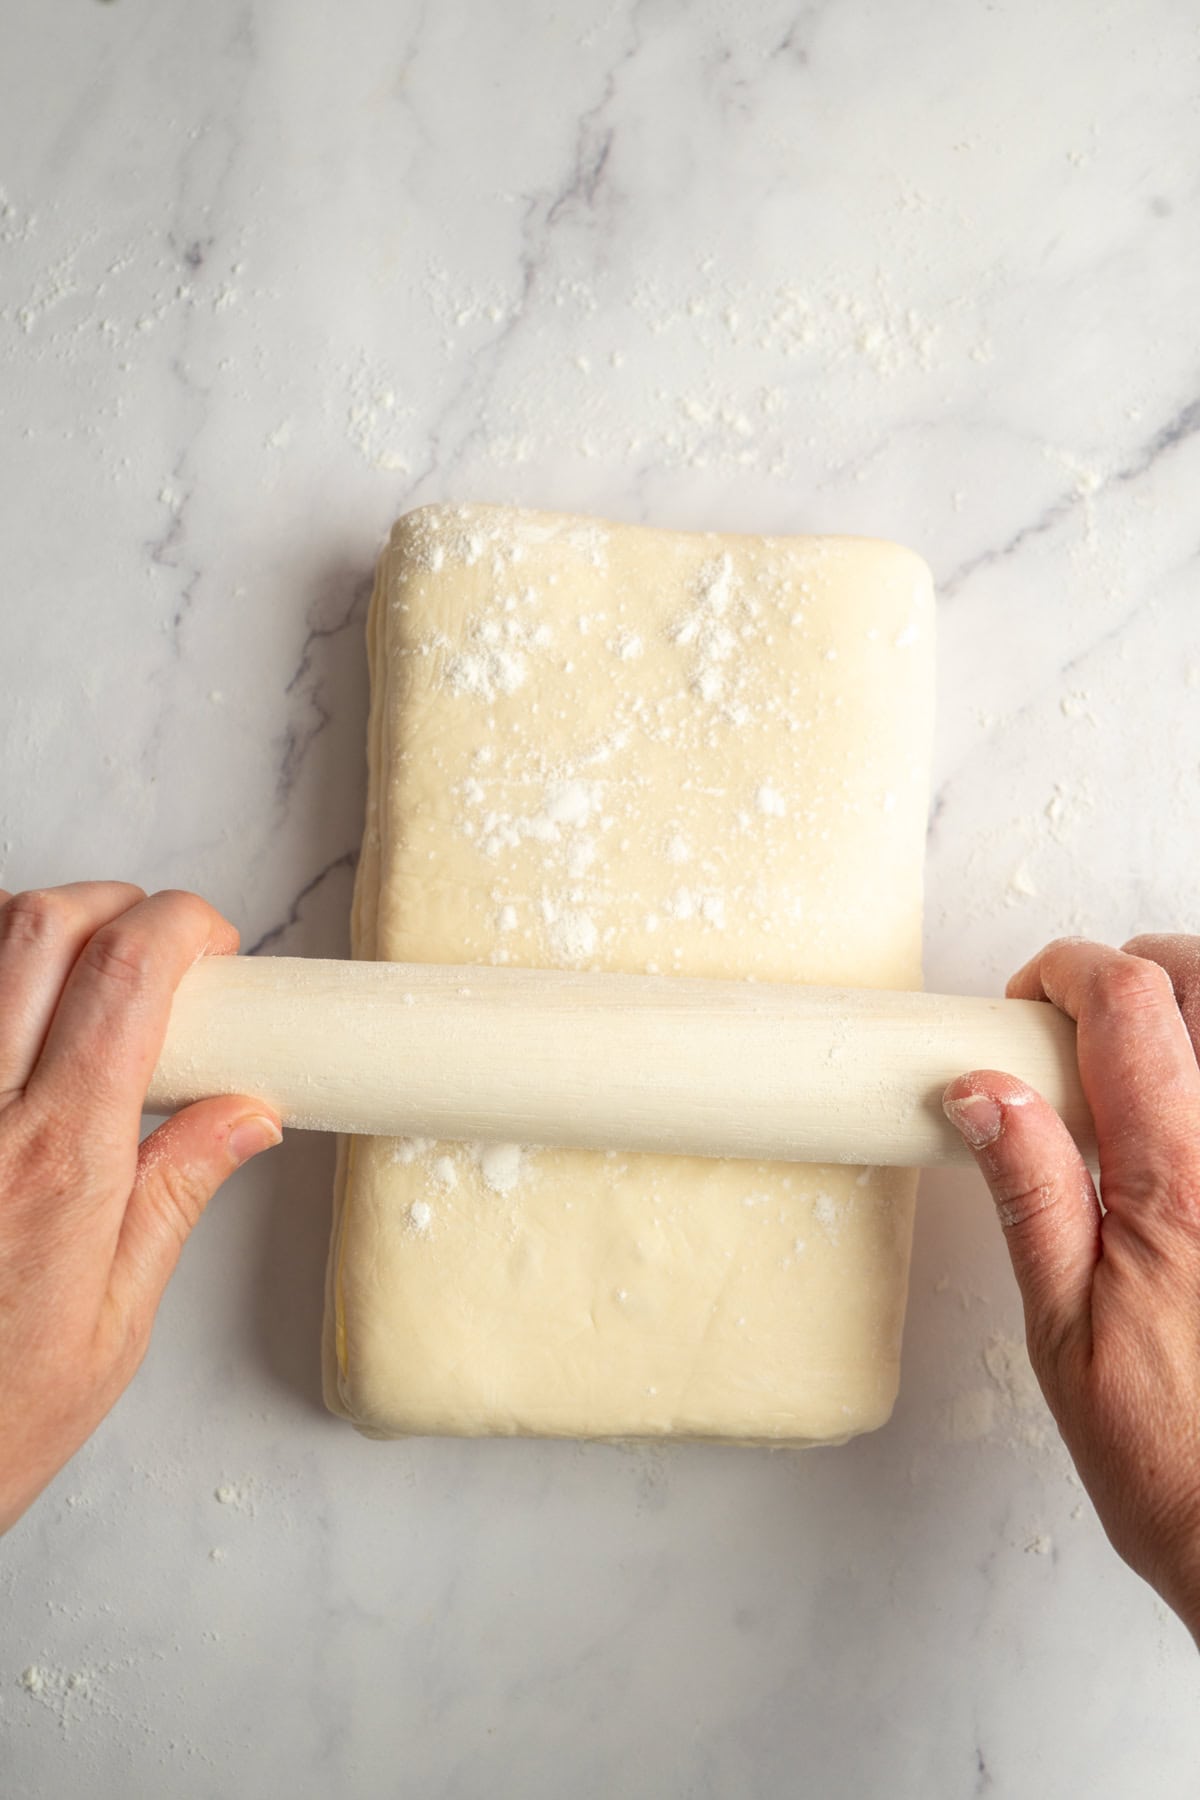
- Chill the dough, then repeat the rolling and folding two more times.

- After the last fold, chill the laminated dough for at least 2 hours or overnight
Shaping
- Roll the cold laminated dough into a large rectangle.
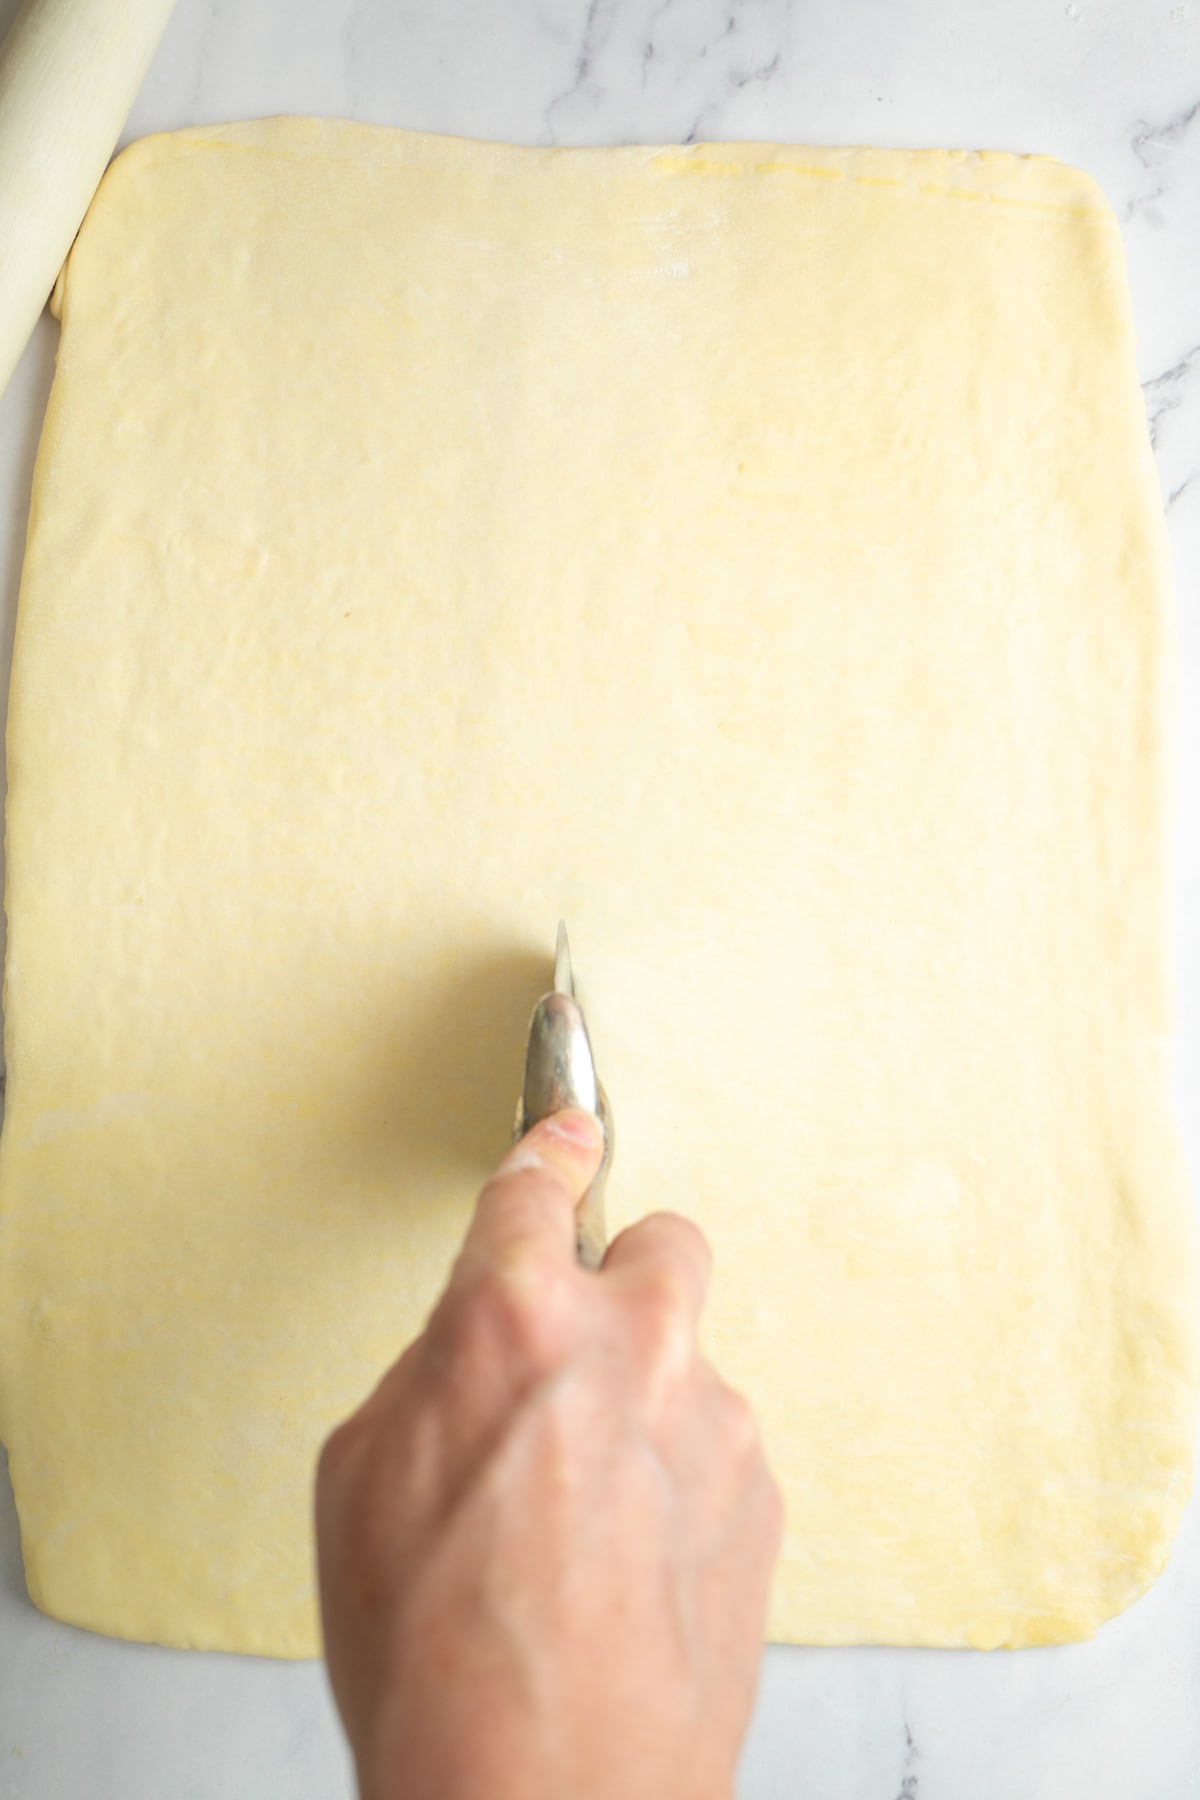
- Cut the dough lengthwise down the middle.
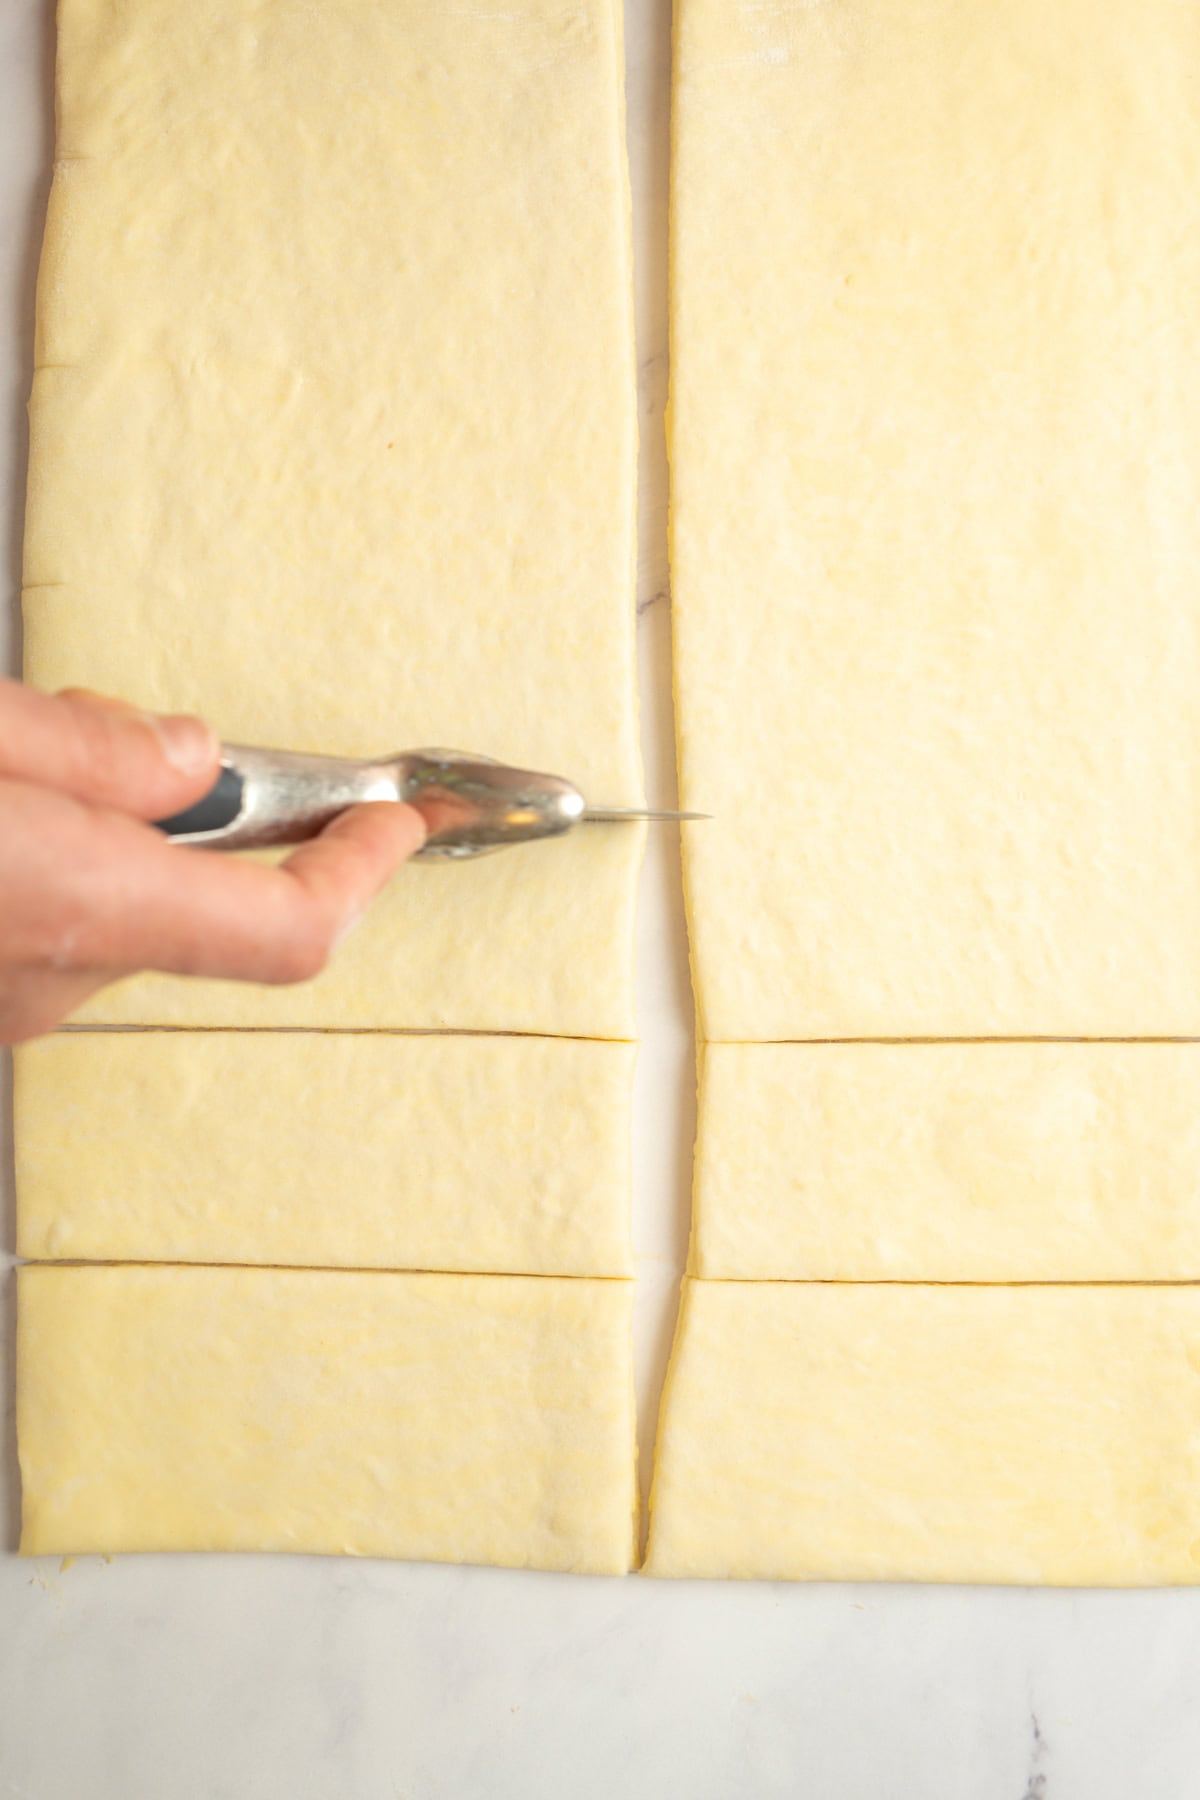
- Cut it into 16 smaller strips.
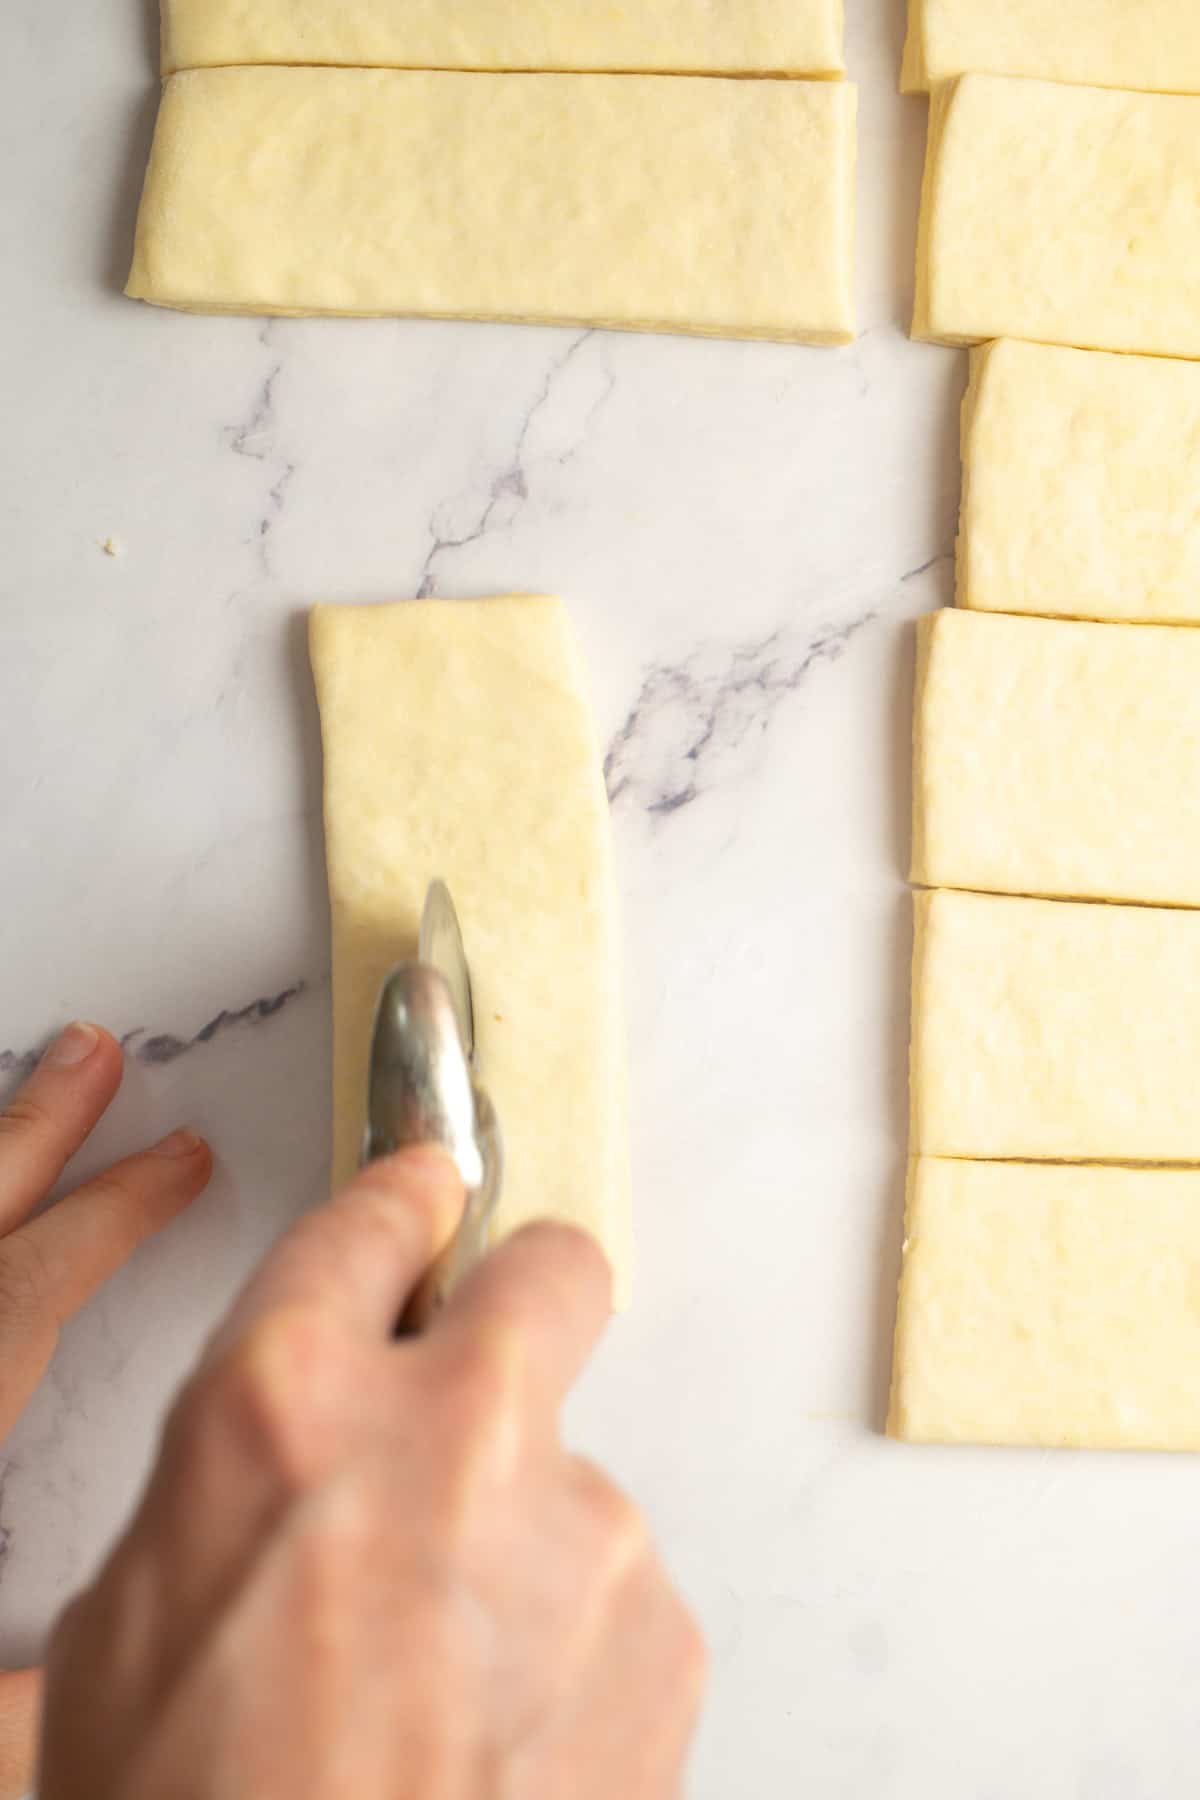
- Take one strip and cut it lengthwise down the middle to create two thinner pieces
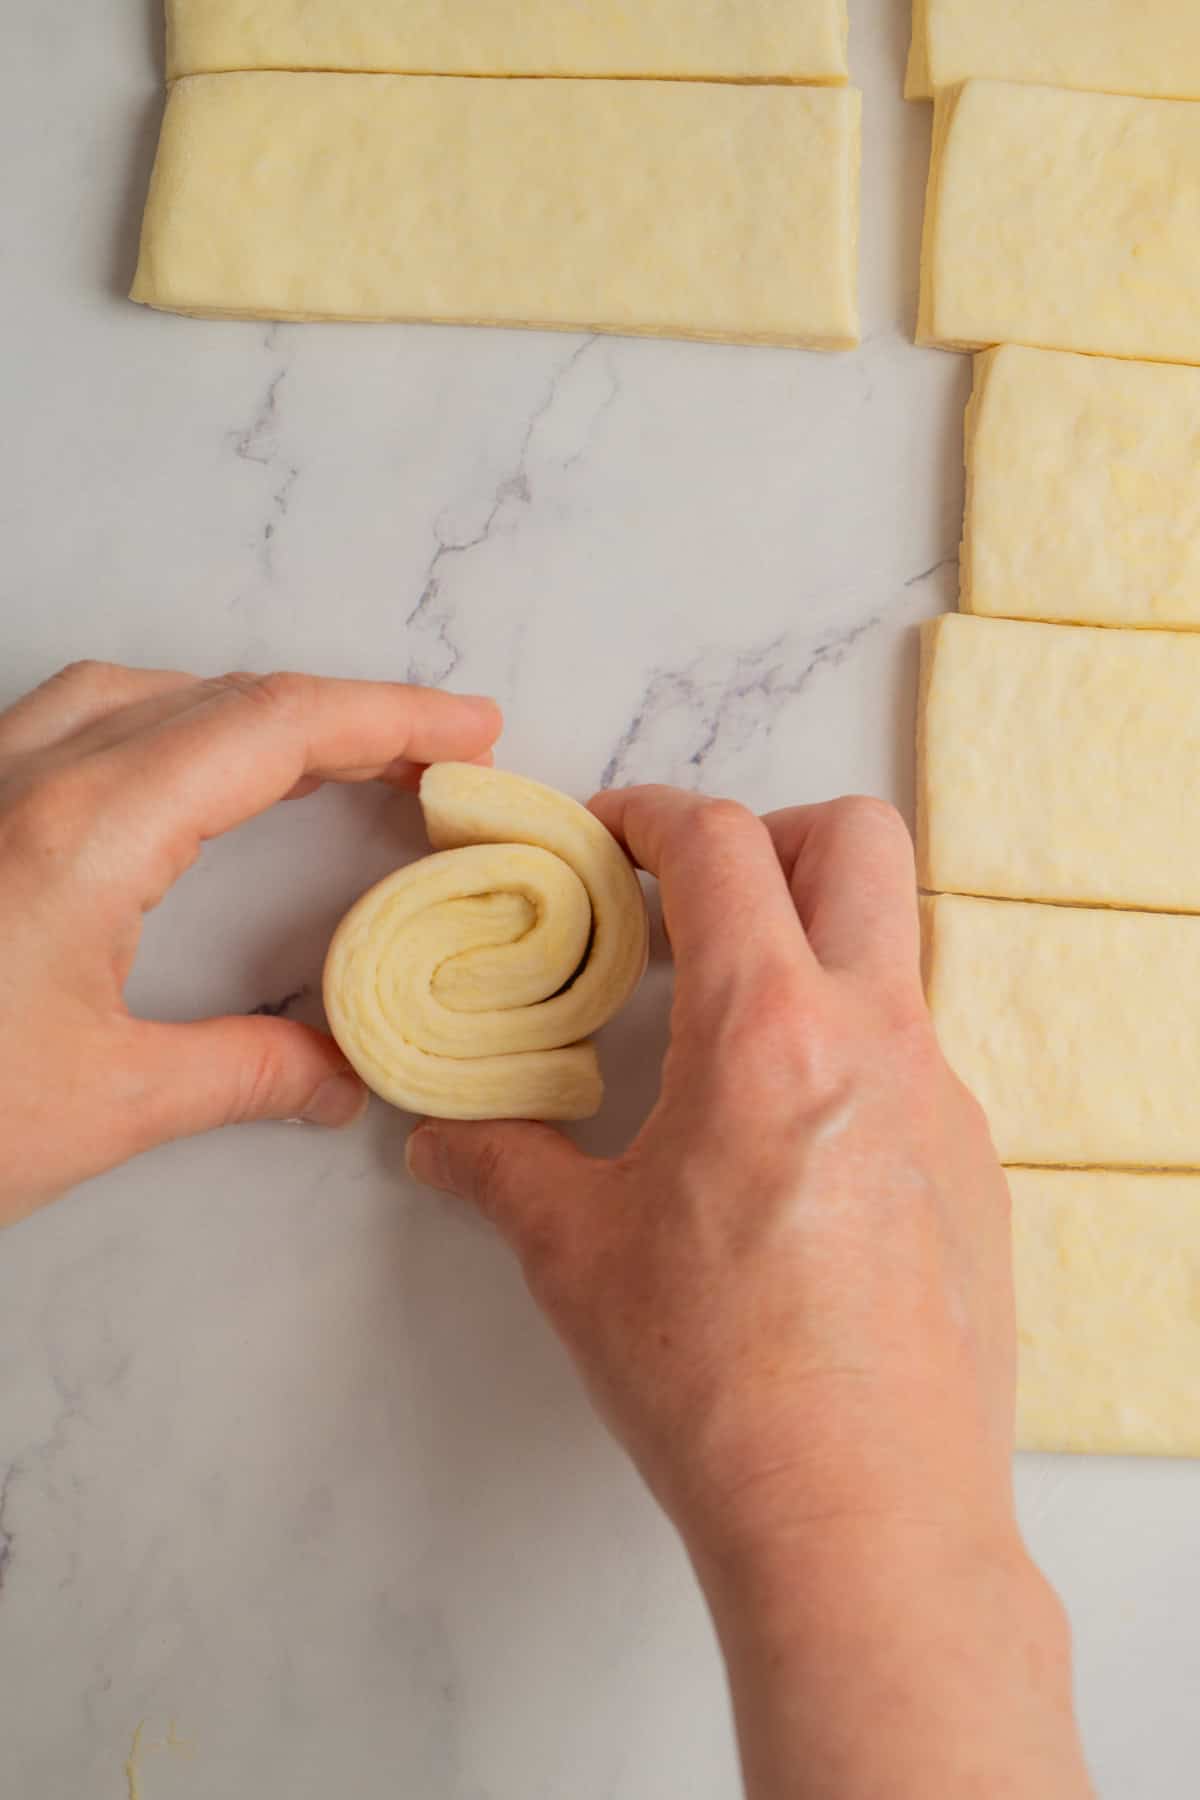
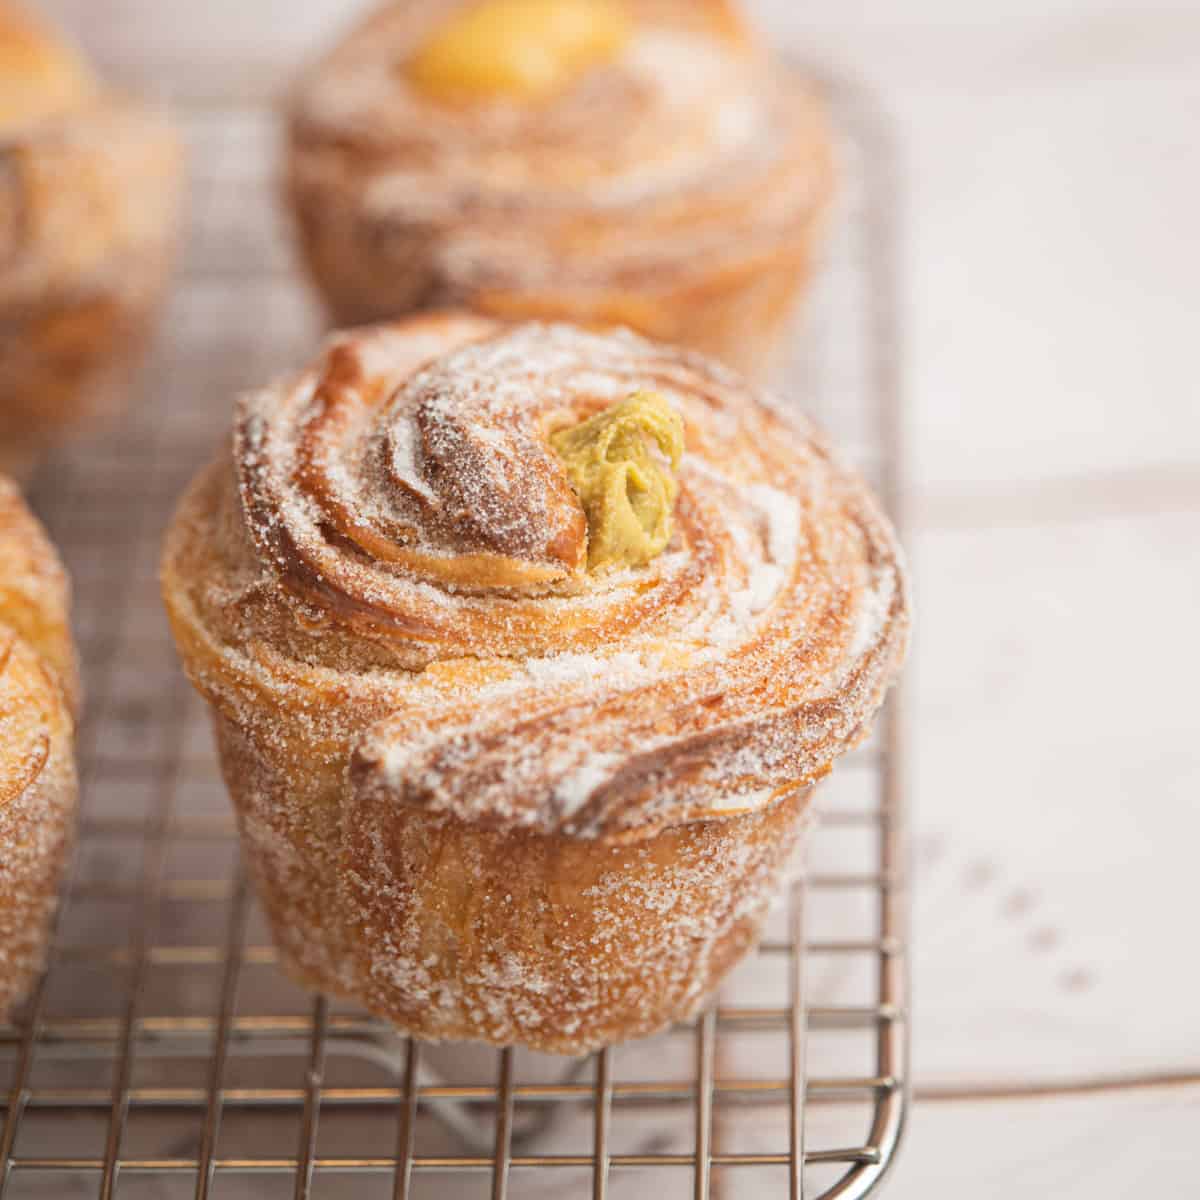
- Spiral the strips together and roll them into tight coils.
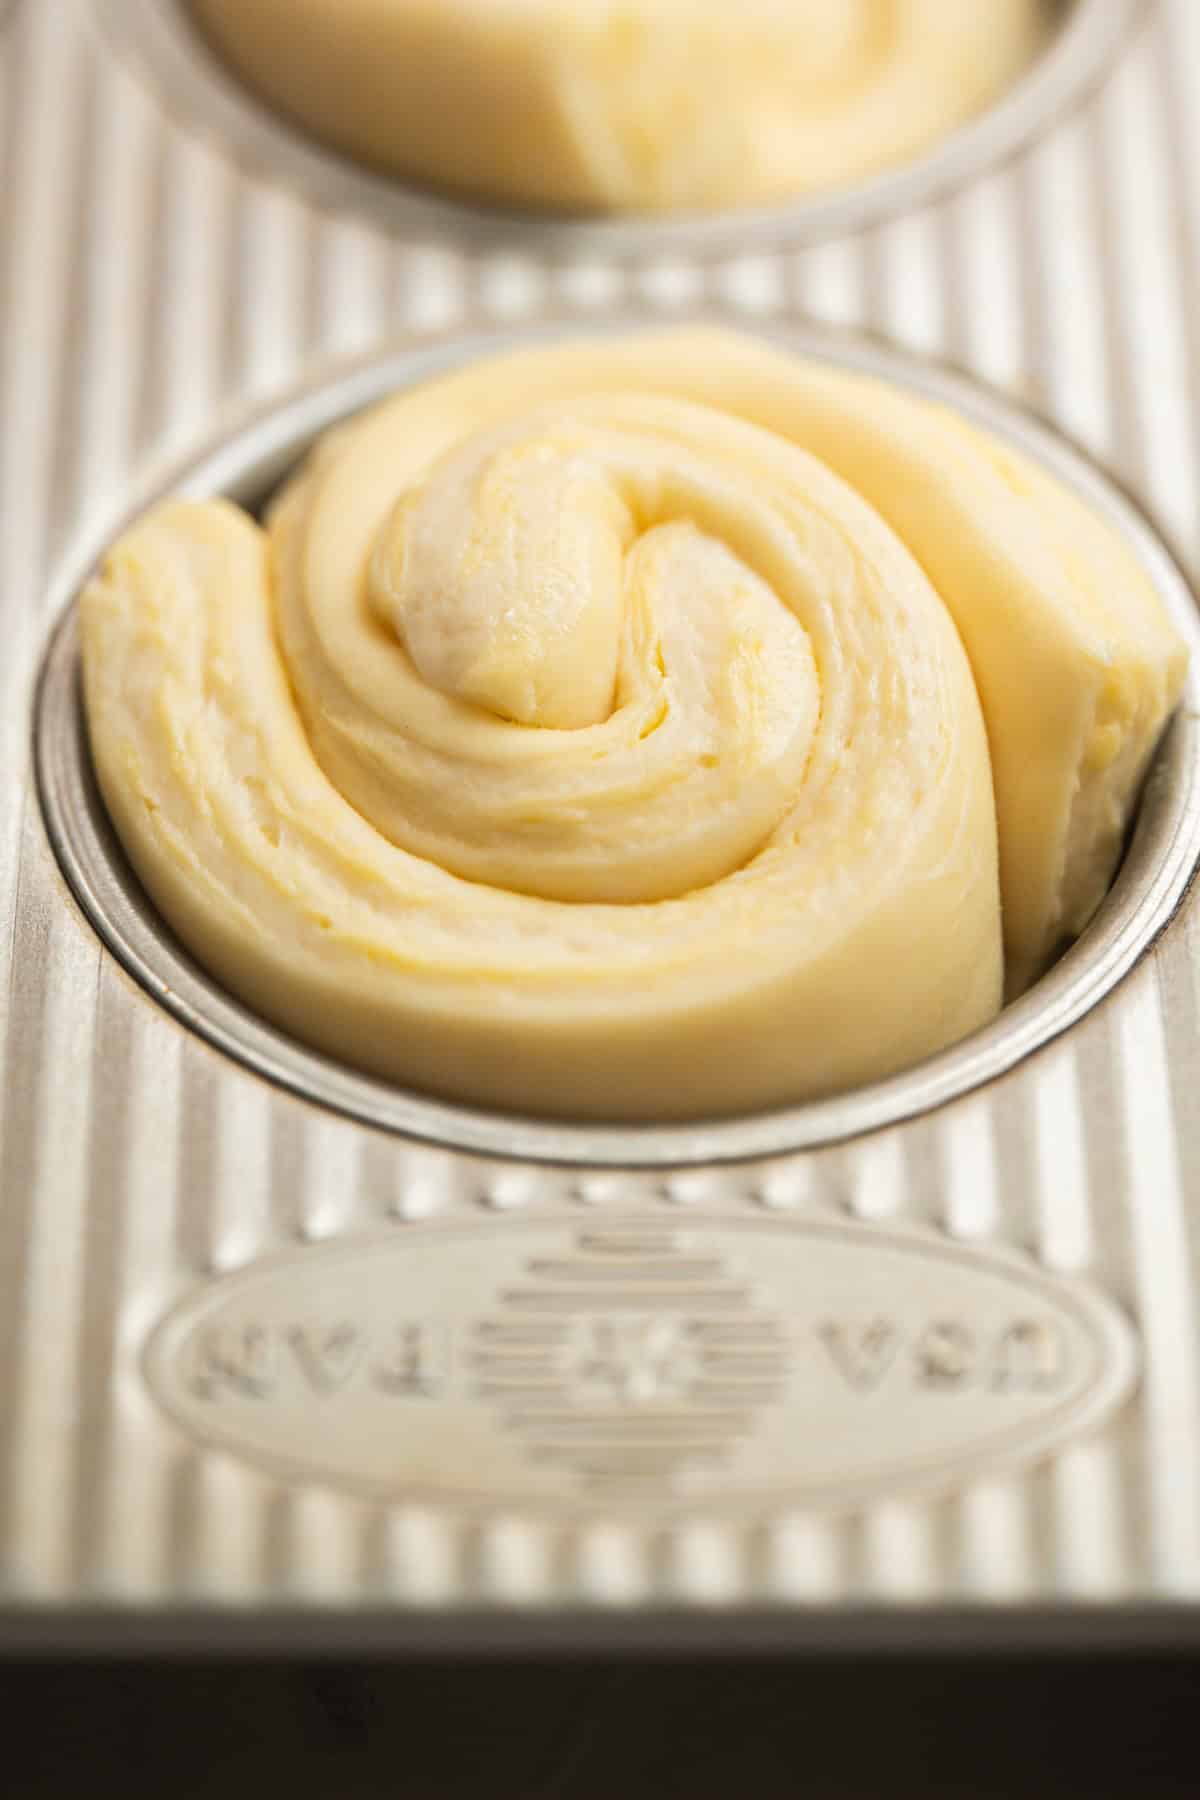
- Place each coil into a greased muffin cup with the spiral facing up and let them rise in a warm but not hot spot until they are puffy, lighter and jiggly.
This can take around 4-7 hours, depending on room temperature. Ensure the proofing spot doesn’t get too hot or all the butter will melt and ruin your lamination.
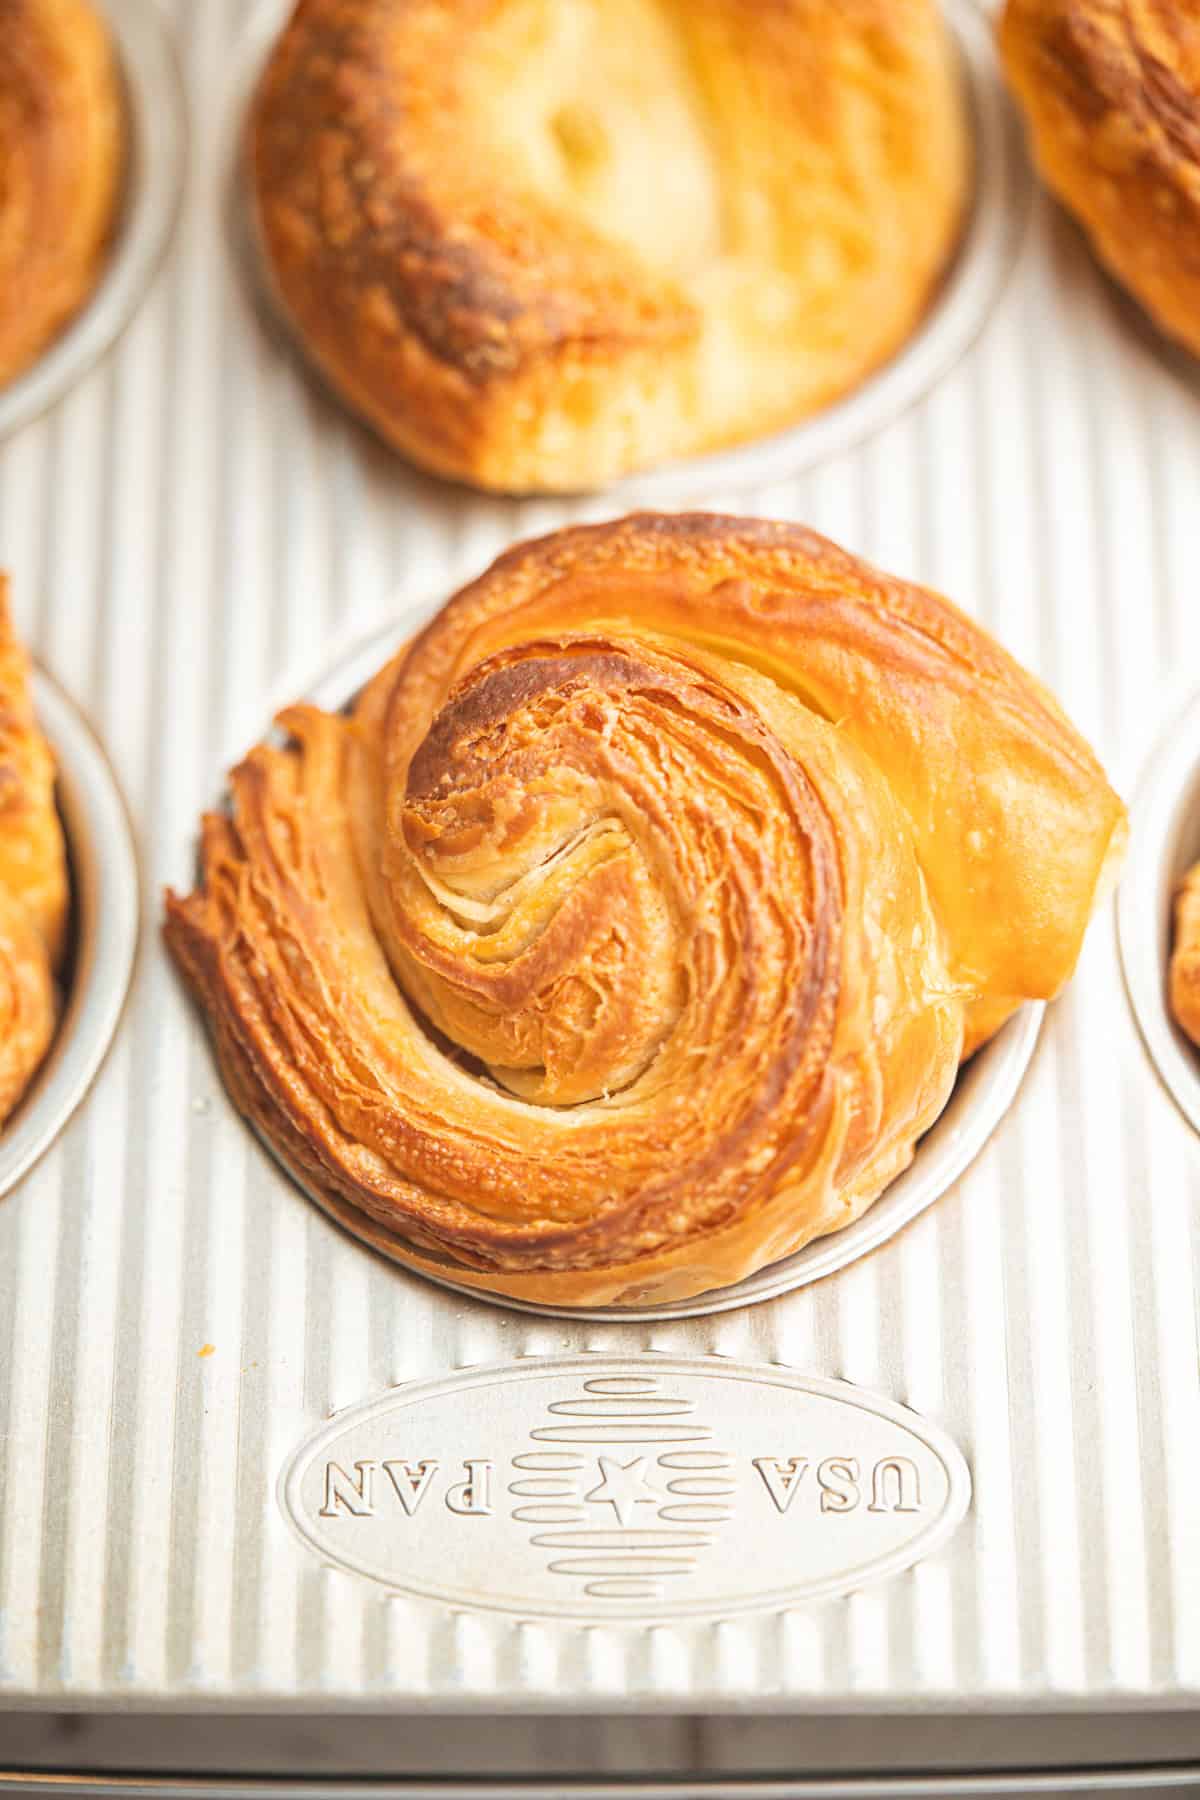
- Bake the cruffins in a hot oven until they are deep golden brown, crisp on the outside and well risen.
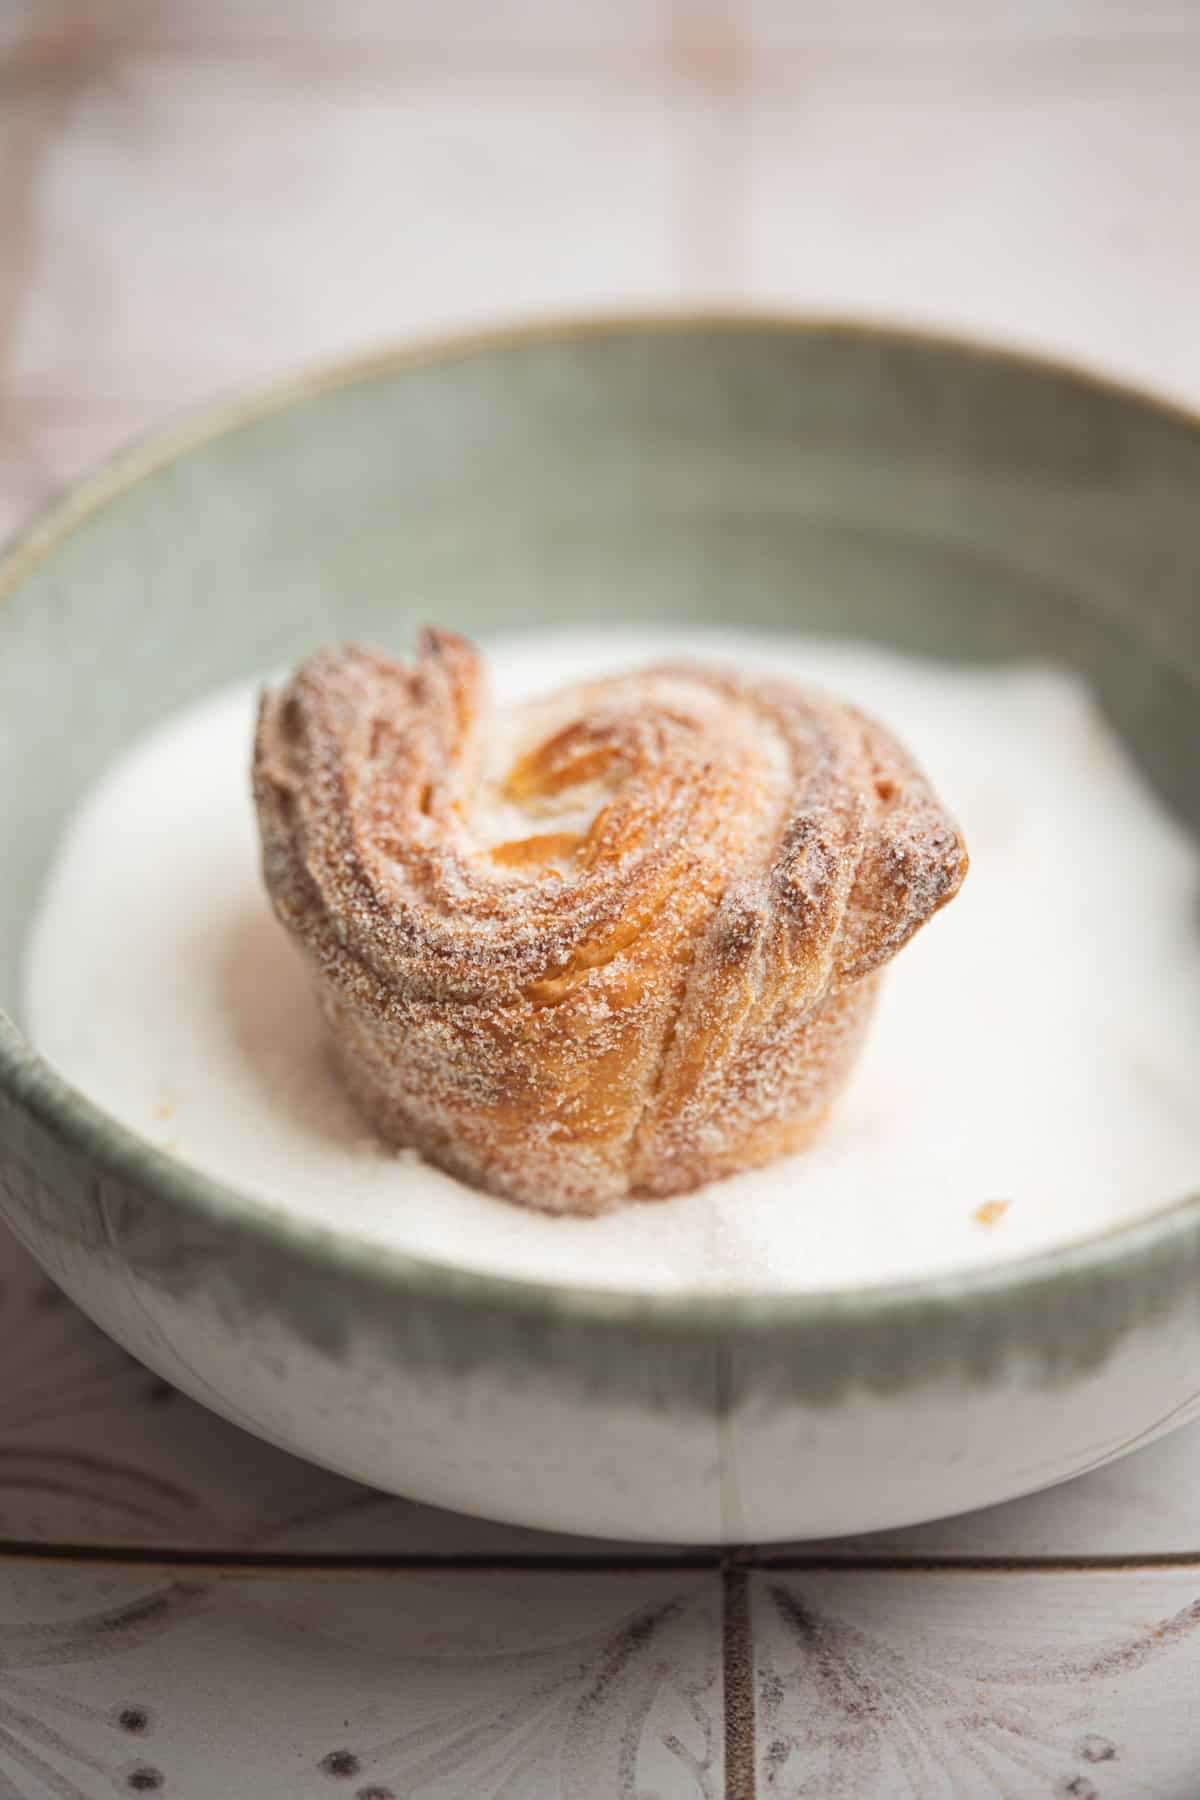
- Let them cool for a few minutes, roll in sugar while still warm.
When baking, placing a large tray underneath the pans is a good idea to catch any butter that might leak. Though proper proofing can limit butter leakage, the fact that the dough is squished into a small space means some leakage will still likely occur. The tray will catch any butter run-off and prevent it from smoking at the bottom of the oven.
Filling
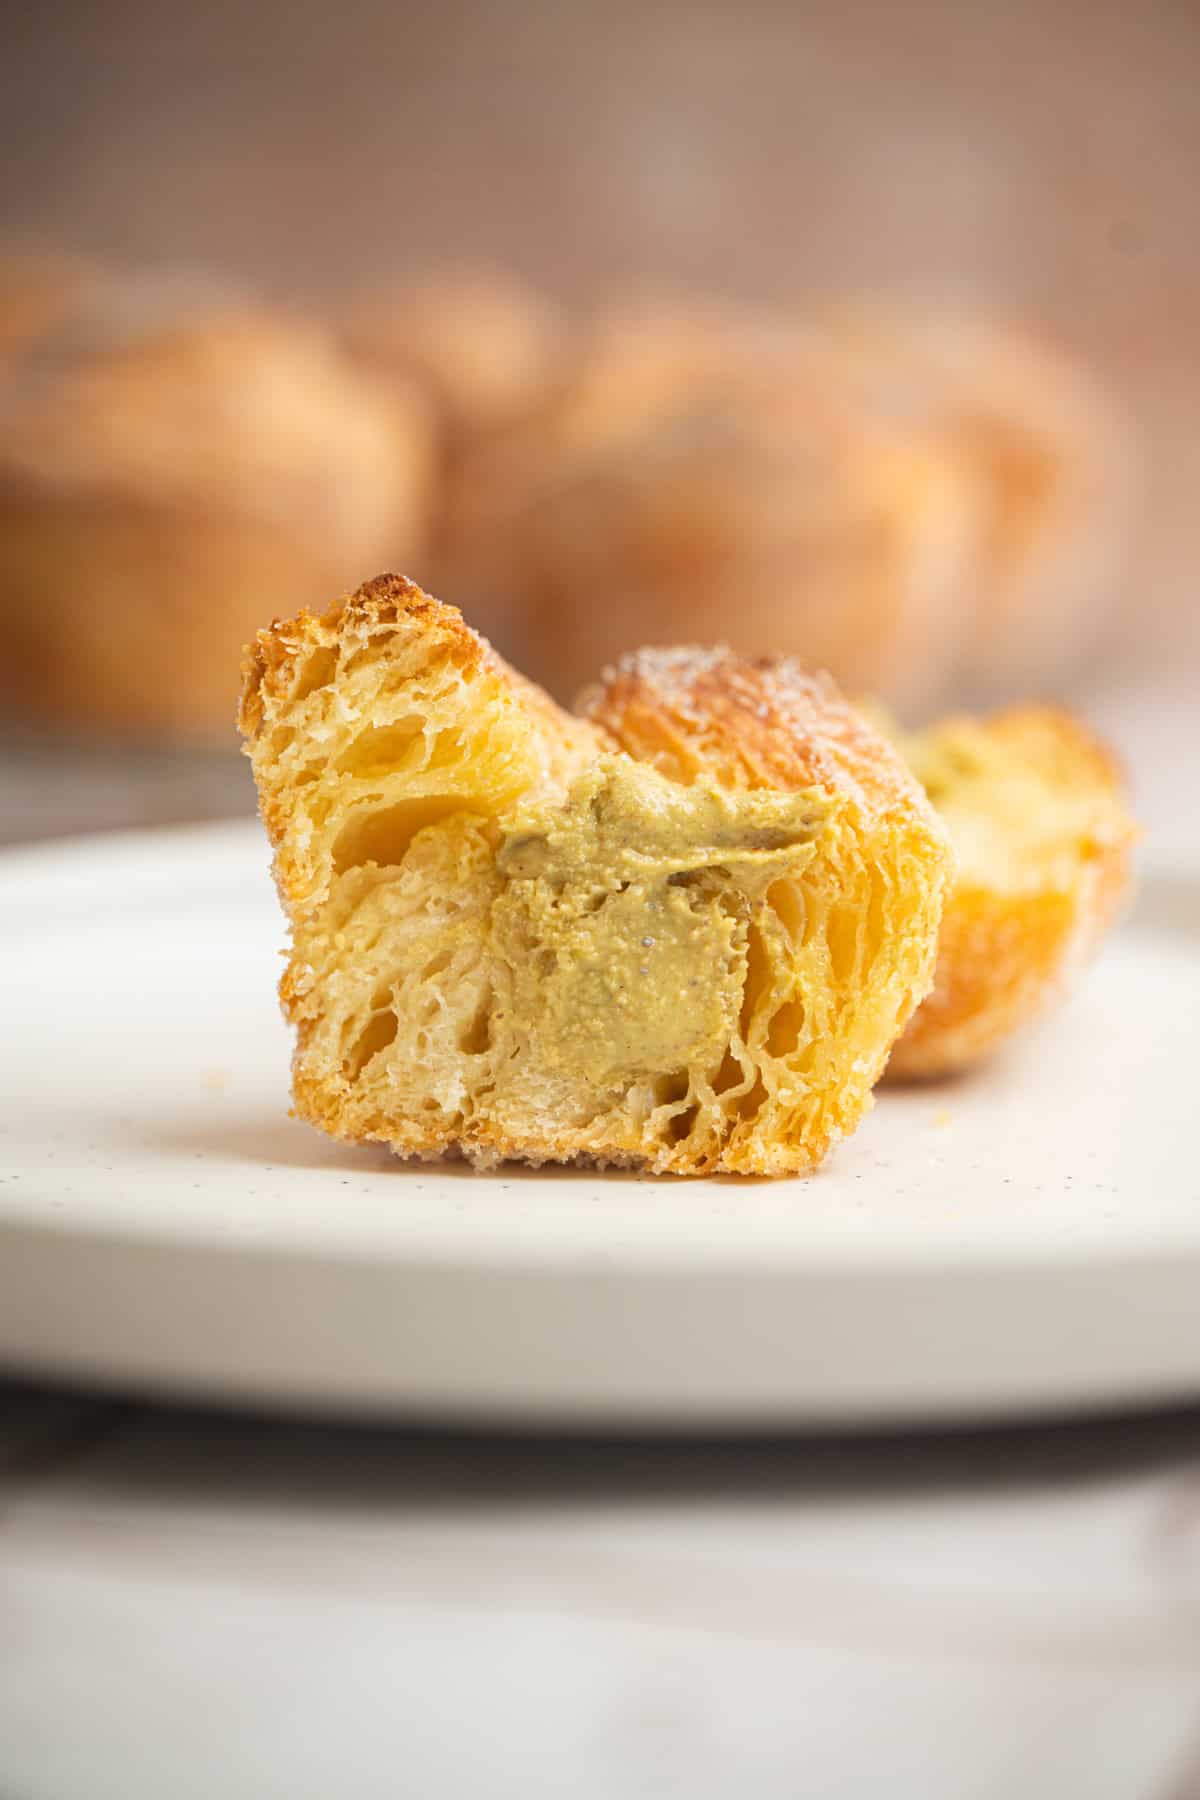
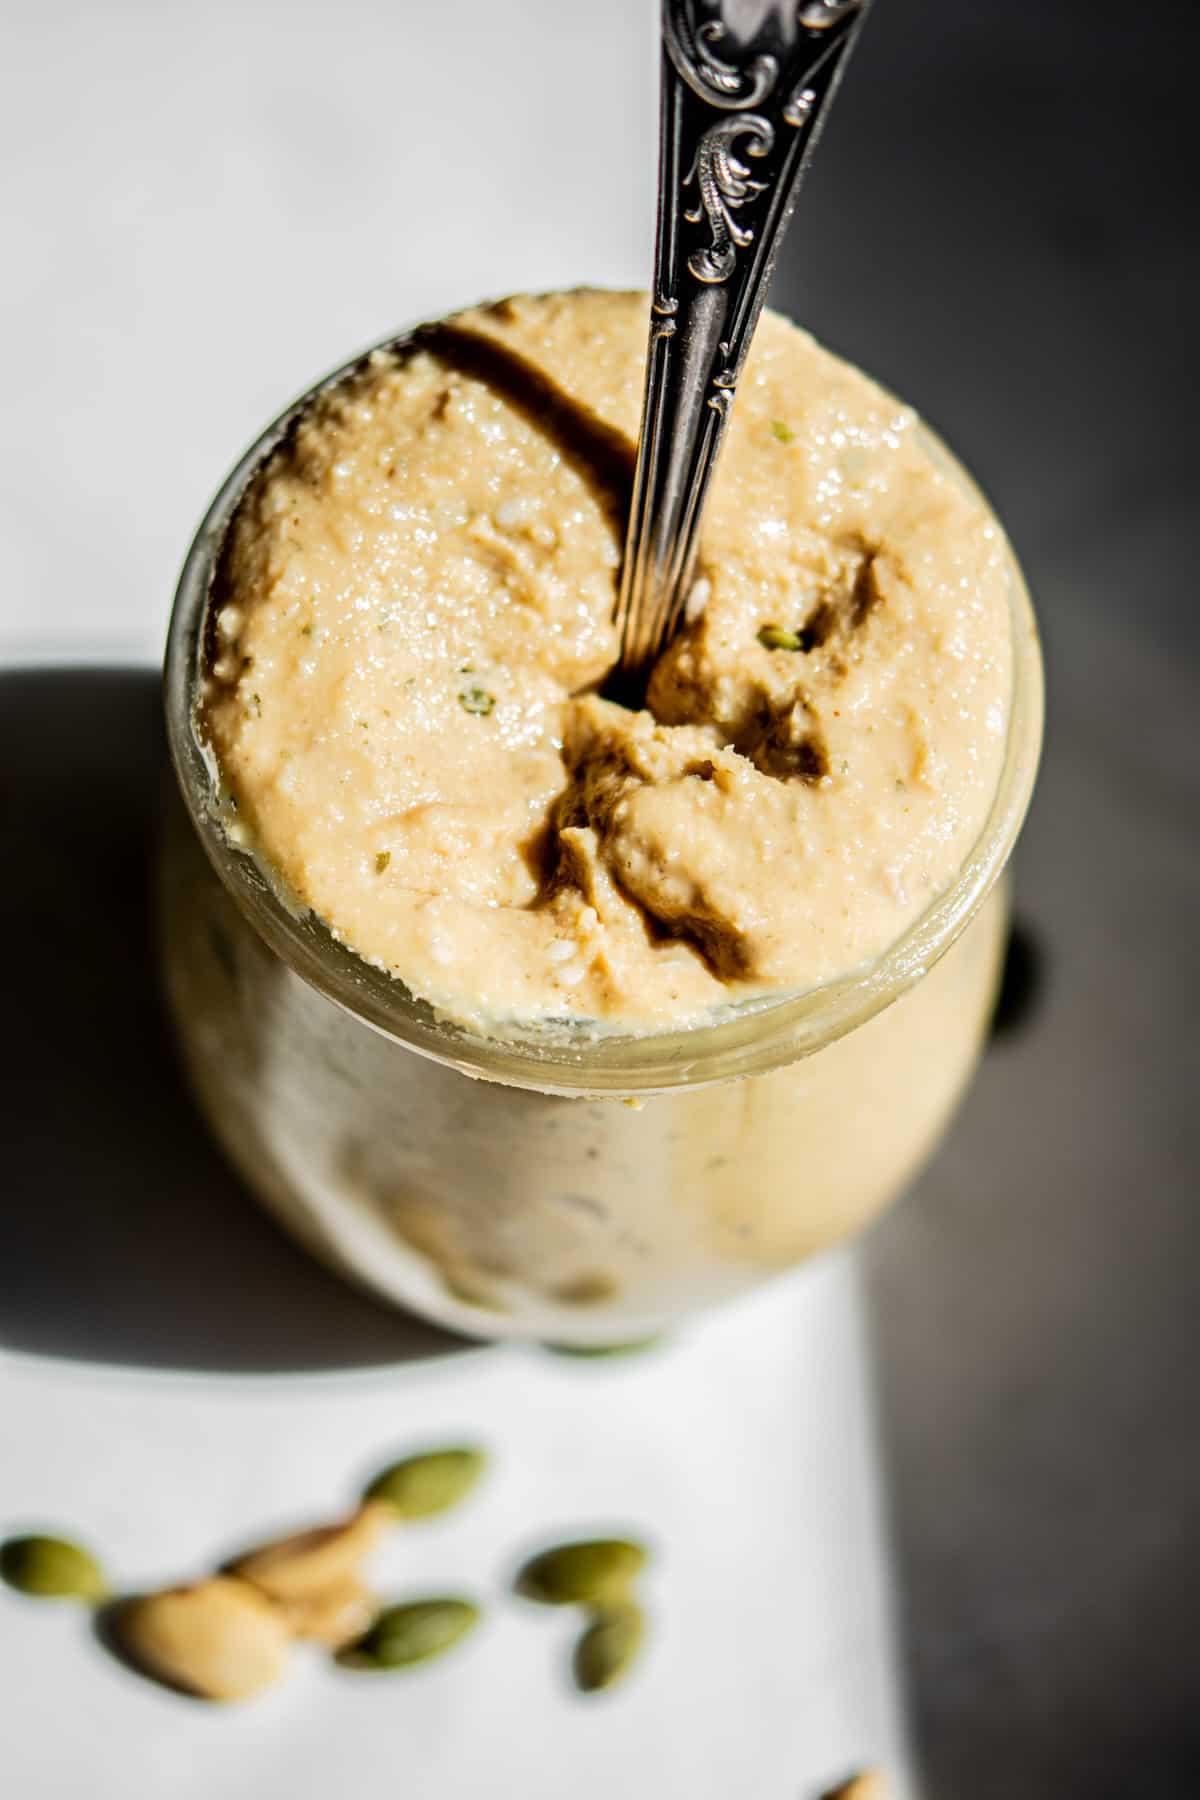
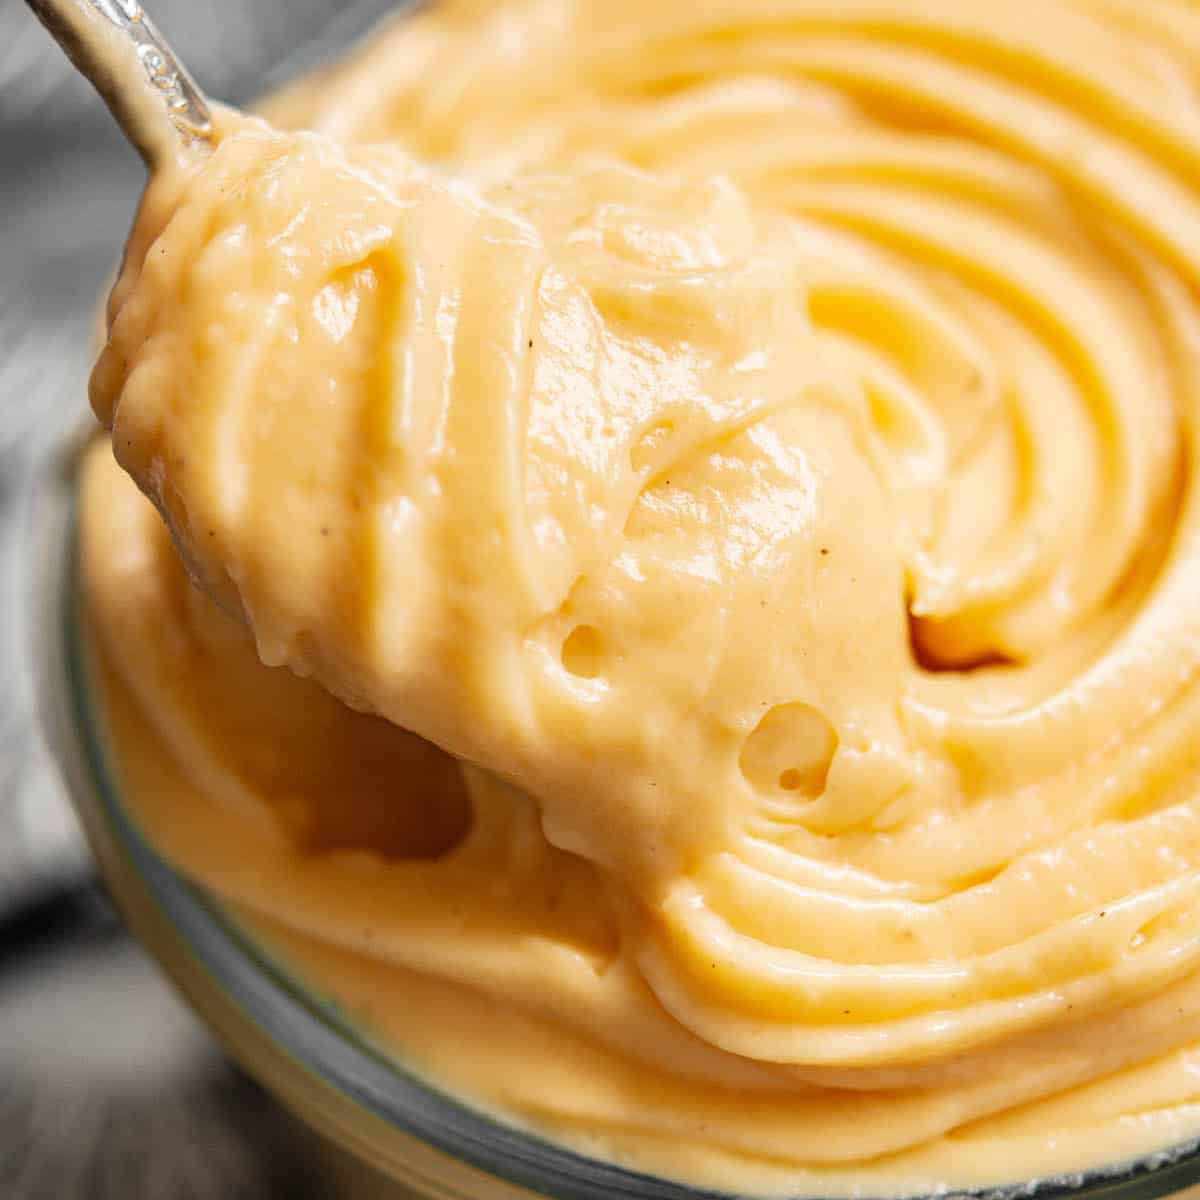
You can leave the cruffins plain, or fill them. Make a small hole in the top and pipe in your favourite fillings.
Storage
Store the cruffins in an airtight container at room temperature for up to 3 days or freeze them for up to 3 months.
Related recipes
You might like these too!
- Sourdough Hot Dog Buns
- Sourdough Discard Sandwich Bread Recipe
- Sourdough Puff Pastry made With Discard Starter
- Sourdough Danish Pastries
- Sourdough Kouign Amann
Sourdough Cruffins
Ingredients
Levain
- 15 g starter
- 60 g flour
- 60 g water
Dough
- 120 g milk room temperature
- 120 g water
- All the levain
- 455 g all-purpose flour
- 50 g granulated sugar
- 6 g salt
- 50 g unsalted butter room temperature
Butter packet
- 250 g unsalted butter
Coating
- 100 g granulated sugar
Instructions
The evening before
- Feed your sourdough starter to make the levain so it's active by morning. 15 g starter, 60 g flour, 60 g water
Day 1
- In the morning, add the levain, milk, and water to a large bowl and whisk them together to loosen the starter. 120 g milk, 120 g water, All the levain
- Add the flour, sugar, and salt, and use a fork to mix everything into a sticky, shaggy mound. 455 g all-purpose flour, 50 g granulated sugar, 6 g salt
- Tip this onto a clean bench and knead in the butter, and continue kneading for about 5 to 7 minutes until the dough becomes smooth. It will feel quite sticky at first, but keep pulling, folding, and pushing it back and forth, and the stickiness will ease as the gluten develops. 50 g unsalted butter
- Place the dough in a bowl, cover it, and let it rise in a warm place until it has puffed up by about 30-40%. If your kitchen is very cold, you can place the dough in a turned-off oven with a mug of boiled water next to it, and replace the water as it cools.
- Once the dough has puffed up, gently press out the air and pat it into a rough rectangle. Either wrap it in plastic wrap or place it in a rectangular container with a lid, then chill it until it firms evenly before laminating, around 2-3 hours.
Butter packet
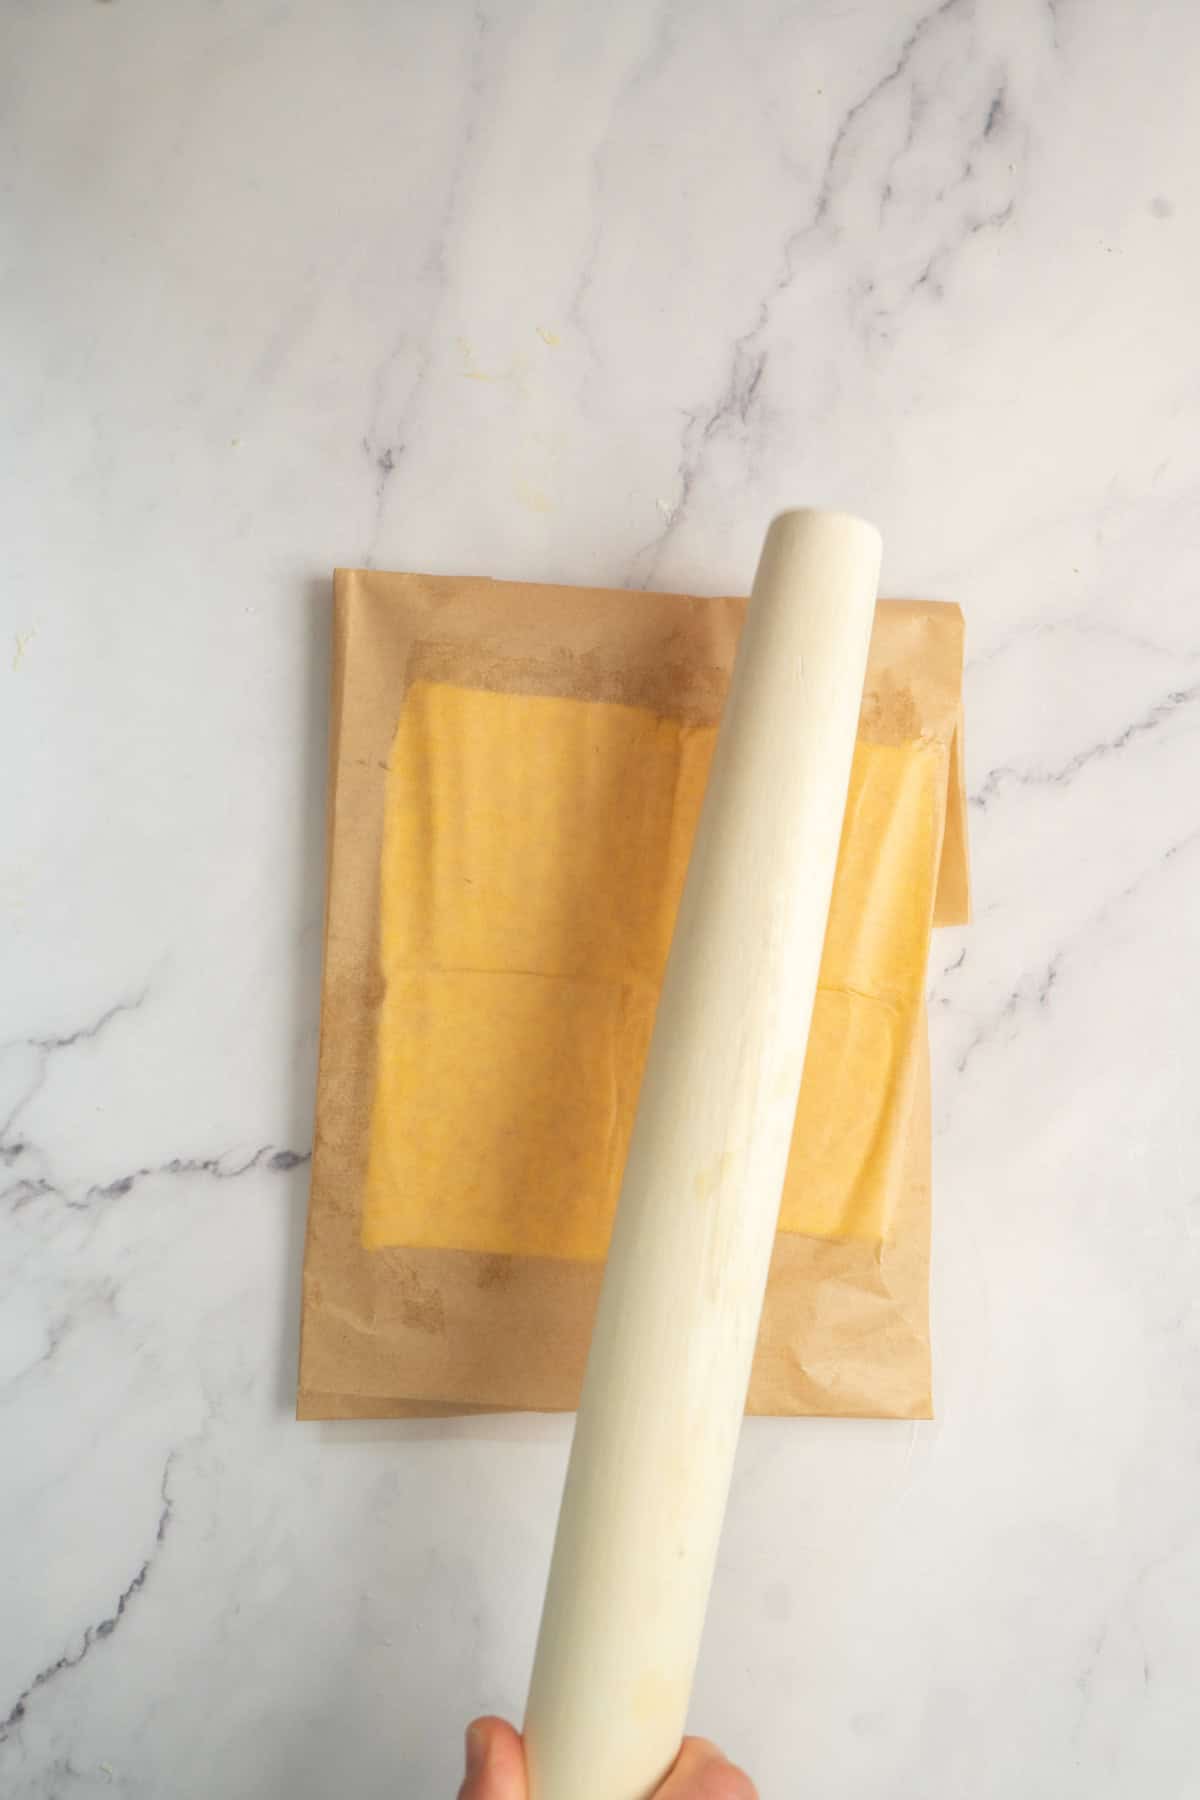
- Slice 250g cold butter and lay the pieces side by side on a sheet of baking paper. 250 g unsalted butter
- Place another sheet of baking paper on top and use a rolling pin to gently pound and press the butter into a 20 x 15 cm (8 x 6 inch) rectangle, about 0.5 cm (1/4 inch) thick. To get clean, straight edges, fold the baking paper around the butter to make a neat frame, then press the butter so it fills the frame evenly.
- Refrigerate the butter block until it is firm.
Laminating
- Remove your butter block from the fridge and use a rolling pin to pound it in the parchment paper a bit to make it pliable and mouldable. It should be cold but still bendable.
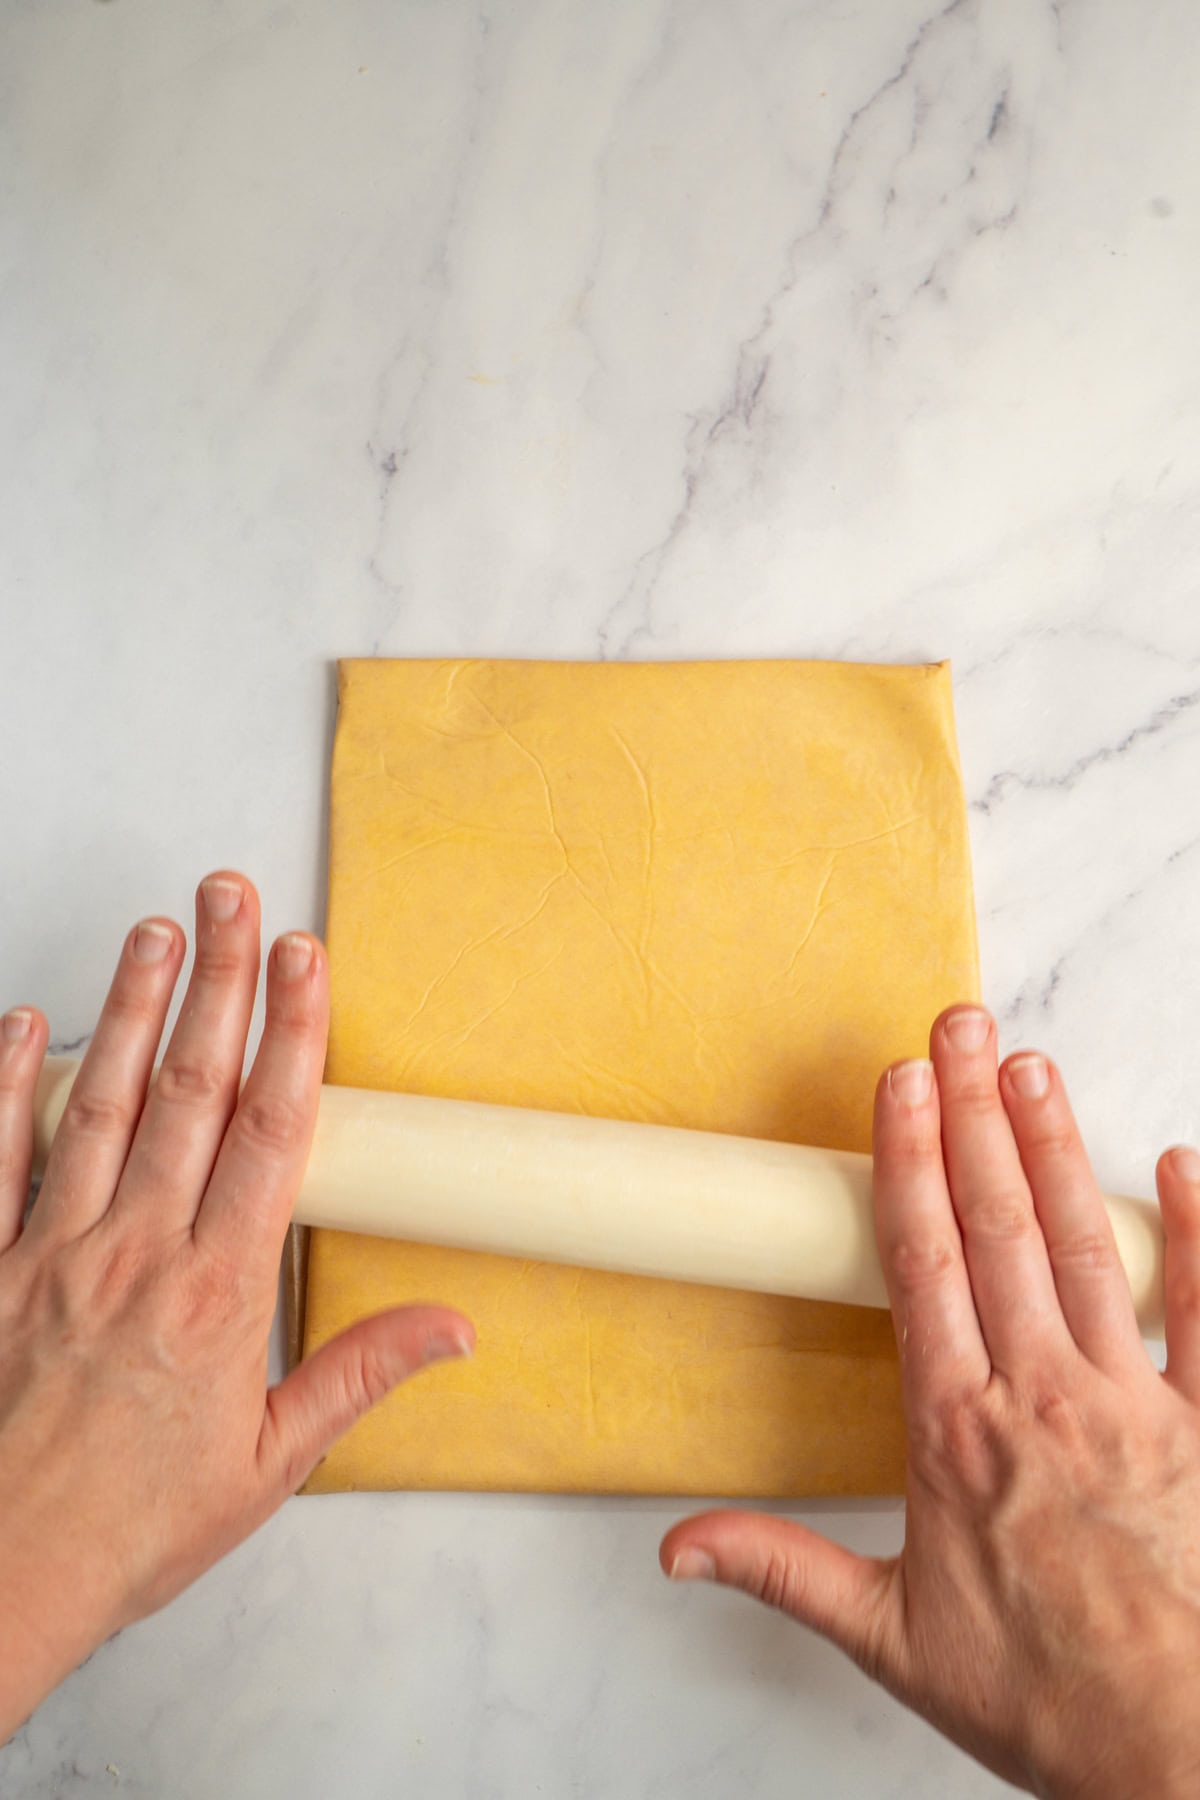
- On a floured surface, roll the chilled dough into a 20×32 cm (8×12.5 inch) rectangle. The dough should be twice as tall as the butter and about the same width.
- Place the butter block in the center of the dough, folding the top and bottom edges over the butter to fully encase it like a letter. Press this seal closed with your fingertips. Use a sharp knife to make a really shallow slit along the long edges of the dough, not too deep. This helps prevent excessive tension in the dough, especially if it's slightly too tight around the butter block.
- Turn it 90 degrees so the crease where you encased it is vertically in front of you.
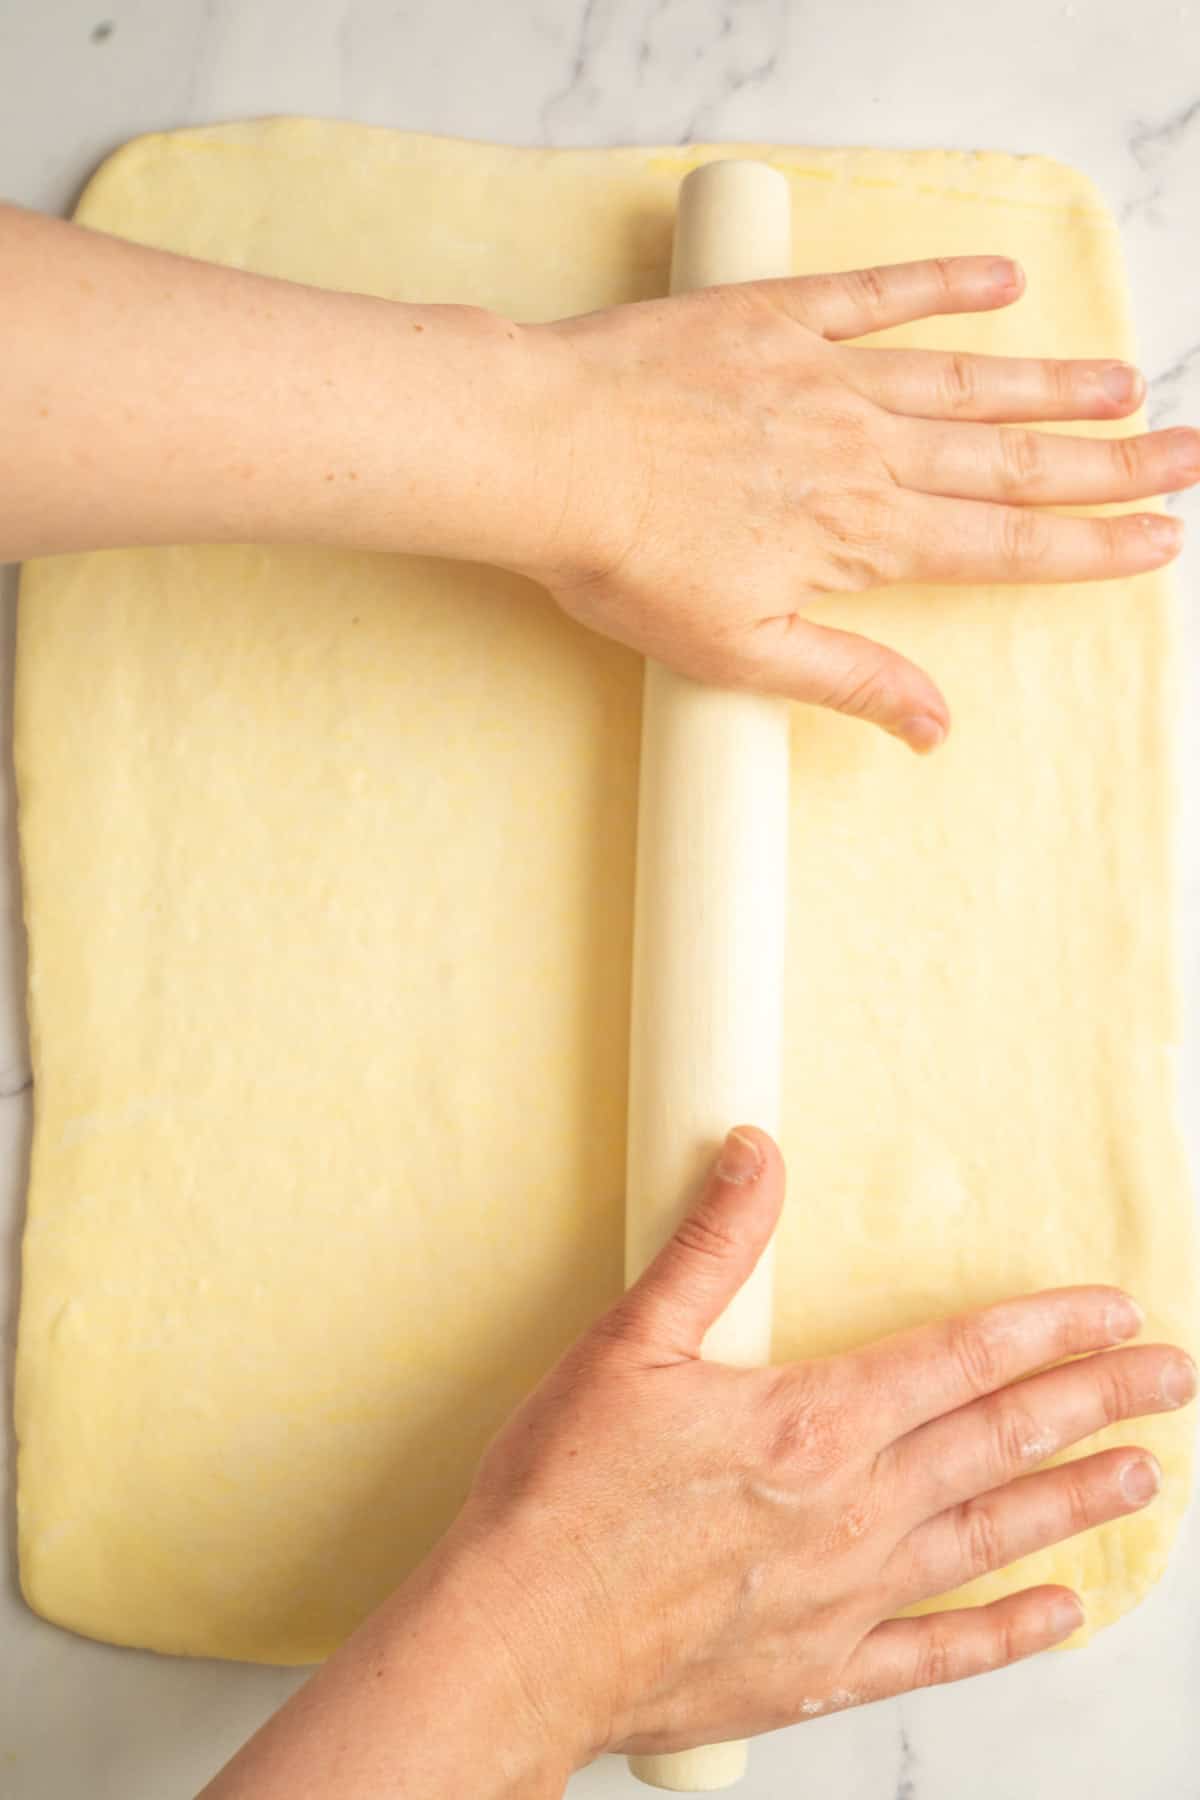
- First fold: Apply gentle pressure and roll the dough into a long rectangle about 7-8mm thick. Aim for it to be about 3 times as long as it is wide. Always roll forward with gentle, even pressure and focus on length, not width. Avoid pushing too hard, which can tear the dough and crack the butter layers. Ensure the dough is not sticking to the bench, and dust with more flour if needed.
- If the butter cracks when you tap it out, leave it on the bench for a couple of minutes and try again.
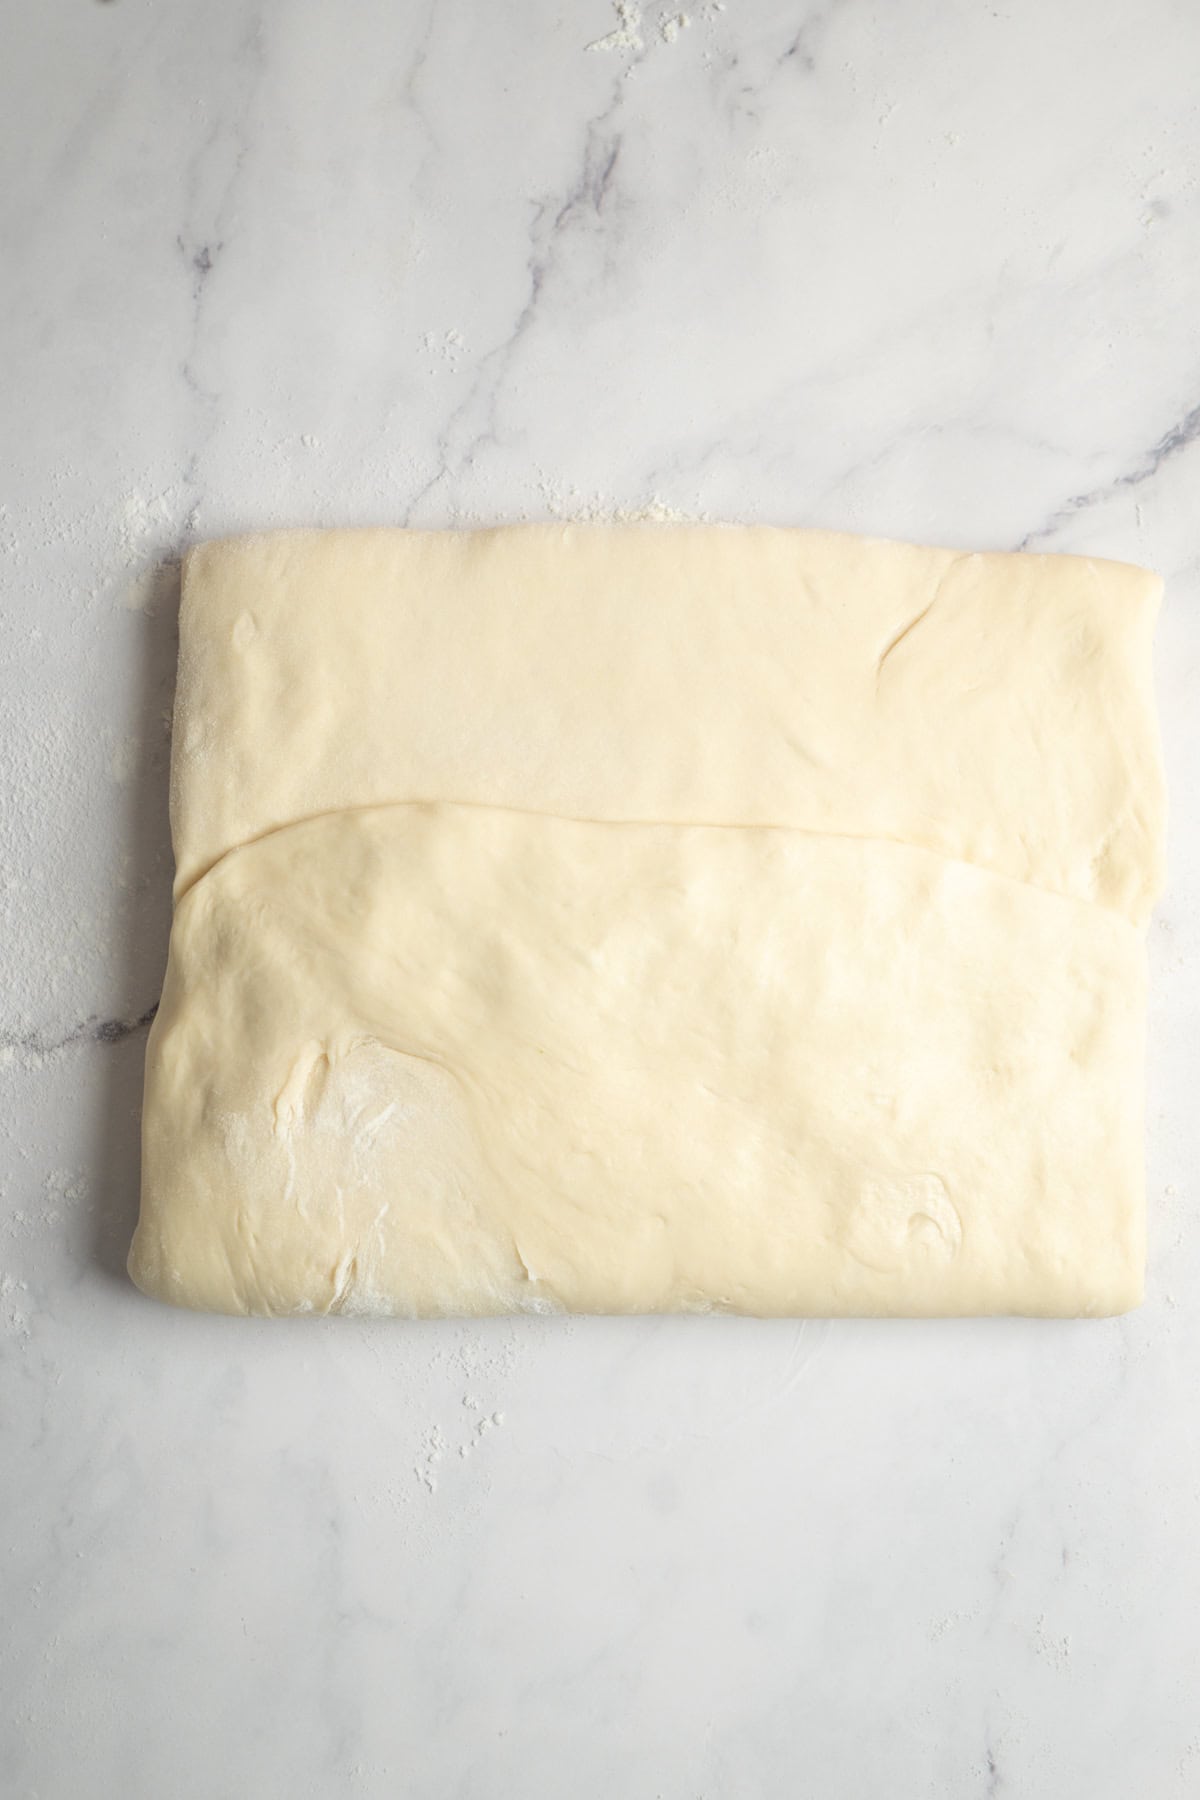
- Once rolled, cut off the uneven top and bottom edges. Brush away excess flour on the dough. Fold the top third of the dough down and the bottom third up, like folding a letter. Wrap in plastic, and refrigerate for 30-60 minutes.
- Second fold: Place the dough vertically in front of you. Repeat the rolling process as before. Cut off scraggly or uneven bits of dough to maintain clean, sharp edges. Fold into thirds, turn, wrap, and refrigerate for 30-60 minutes.
- Third fold: Repeat the folding process one more time, then refrigerate for at least 2 hours or overnight.
Shaping
- Once the dough has chilled, roll it into a large rectangle, approximately 30cm x 40cm (12 inches x 15 inches) and 4mm thick. Cut the dough in half lengthwise to create two long strips, each measuring 15×40 cm (6×15 inch).
- Cut the dough horizontally into 16 strips, each approximately 5 x 15 cm (2 x 6 inches).
- Take one strip and cut it lengthwise down the middle to create two thinner pieces, around 2.5cm (1 inch) wide.
- Take two strips and lay them horizontally next to each other. Overlap the ends by around 1/2cm (1/4 inch) to create one long strip. Now, beginning from the center, roll it up into a coil. It's hard to explain, so please see the post for a visual guide.
- Place the rolled dough into a muffin pan so the spiralled layers are visible at the top. Make sure they are tucked in well, or else they can get a bit misshapen in the oven later.
- Let them rise until doubled in size. It can take 4-7 hours, but the timing will depend on your room temperature. Don't rush this step. Once they are risen, you should clearly be able to see the layers.
- Preheat the oven to 200°C/400°F.
- Place the cruffins in the oven and bake for about 20-25 minutes until they’re deep golden brown.
- Let the cruffins to cool in the pan for a few minutes before removing them and roll in granulated sugar. 100 g granulated sugar
- Once they are completely cooled, insert a knife into the middle to create a small hole and then pipe in your favourite fillings.
Notes
- Starter ratio: I feed my starter at 1:3:3 the night before (1 part starter, 3 parts flour, 3 parts water). In a warm kitchen (above 23°C/74°F) this may peak too quickly overnight. If your kitchen is warm, use a higher ratio such as 1:4:4 or 1:5:5 so it rises more slowly and is at peak by morning rather than already past it.
- Bulk ferment visual cue: You’re looking for a 30-40% rise, not a full double. The dough should look noticeably puffier. In a cooler kitchen, this may take longer.
- Chilling before laminating: This step is important. After the bulk ferment the dough will be soft and warm. Chilling it first brings it to a similar consistency to the cold butter, which is what gives you clean, even layers.
- Butter leakage during baking: Some leakage is normal since the dough is pressed into a small tin. Place a tray on the rack below to catch any drips. Good proofing significantly reduces leakage, so don’t rush the final proof.
- Final proof: Don’t skip or rush this step. Underproofed cruffins will seem gummy and dense inside, even if they look baked, and are more likely to leak butter.
- Freezing: Freeze baked cruffins for up to 3 months. Reheat directly from frozen at 170°C/340°F for 10-15 minutes. You can also freeze shaped but unproofed cruffins; thaw and proof at room temperature for 6-8 hours before baking.

Light yet indulgent
Thank you for the longer fermentation tip. I think for the pesto ones it would be ok but not for my next batch I’m going to add a rose tea pastry cream so I’ll stick to the shorter version to keep the sour more subtle. Really appreciate your response as a new baker I have lots to learn.
I’ve made these twice, larger ones and regular size. They have been perfect. I put a bit of pesto on bottom piece before rolling and then sprinkled Parmesan after baking. They were amazing! I was trying to figure out best way to time it to bake in the morning. Should I proof then put in fridge overnight. Take out and bake or should I put them in the fridge after shaping, take out proof and bake? Also was wondering… could I proof, freeze and bake from frozen if I only wanted 1 or 2?
This makes me so happy to hear, Kathy, thank you! And pesto with parmesan sounds absolutely delicious. For morning baking, if your kitchen is fairly cool overnight (around 18°C/65°F or under), you can shape them and leave them to proof at room temperature, then bake in the morning. Just make sure they are well covered so they don’t dry out. The thing to know though is that a long overnight room temp proof will likely make them quite a bit more sour, as the longer fermentation time means more acid develops. If you prefer a milder flavour, the fridge plus a warm room temp proof the next morning is the better option as the cold slows fermentation right down. Pop them in the fridge after shaping, then in the morning let them rise at around 24-26°C/75-79°F until puffy before baking. Either way, go by how they look and feel rather than a set time. As for freezing, yes you can! Shape them, freeze before proofing, then thaw in the fridge overnight and proof and bake as normal the next morning.
I’ve made these twice larger ones and regular size. They have been perfect. I put a bit of pesto on layer before rolling and then sprinkled Parmesan after baking. They were amazing! I was trying to figure out best way to time it to bake in the morning. Should I proof then put in fridge overnight. Take out and bake or should I put them in the fridge after shaping, take out proof and bake? Also was wondering… could I proof, freeze and bake from frozen if I only wanted 1 or 2?
These look amazing. I’m in the dough resting stage now. I was going to make 8 larger using 3 slightly longer strips for each one vs 16 regular size. Should I adjust the bake time?
Hey 🙂 Yes, they may need a little longer to bake since they’re bigger. I’d start checking at the normal time, then give them an extra 5 minutes of so if needed. They should be a deep golden brown on top and feel set in the centre. If they’re browning too quickly, you can loosely tent them with foil for the last few minutes.
They turned out SO great. Definitely going to be on repeat here.
So happy you loved the recipe! thank you for your review!!
if I cut the recipe in half, what size should my dough and butter packet be please? I made half batch once and can’t remember what I did. Thank you.
Hey you could do the butter at about 6×7 inches and the dough at about 7×10 🙂
Hi, super excited to try this recipe! Is the starter made with active or inactive starter ?
Very easy recipe for a very intimidating process! I do have one question, if you are supposed to have 14 strips total but each cruffin takes two strips to make, wouldn’t you only have 7 cruffins?
Hey if you see under the ‘Day 2’ step 1, I cut the dough in half before rolling into the strips, so in total there are 2 lots of 14 strips, to make 14 Cruffins in total 🙂
I’m making these right now! I was confused when I ended up getting 6 pieces when I cut the 5×9” rectangles into 1.5” strips…then I did the math. 7 strips into a 9” length yields 1.25” strips. I hope my cruffins turn out, because they’re bigger than the recipe (I got 12 instead of 14 due to the strip width situation). But I’m excited about these! The lamination is so pretty, even before baking!
Hey Katie, yeah as I wrote I cut my strips into about 1.2inches, not 1.5 🙂 but all in all i don’t go for exact sizes, it’s just an average so it doesn’t matter if yours are slightly bigger! I hope you love them! ☺️