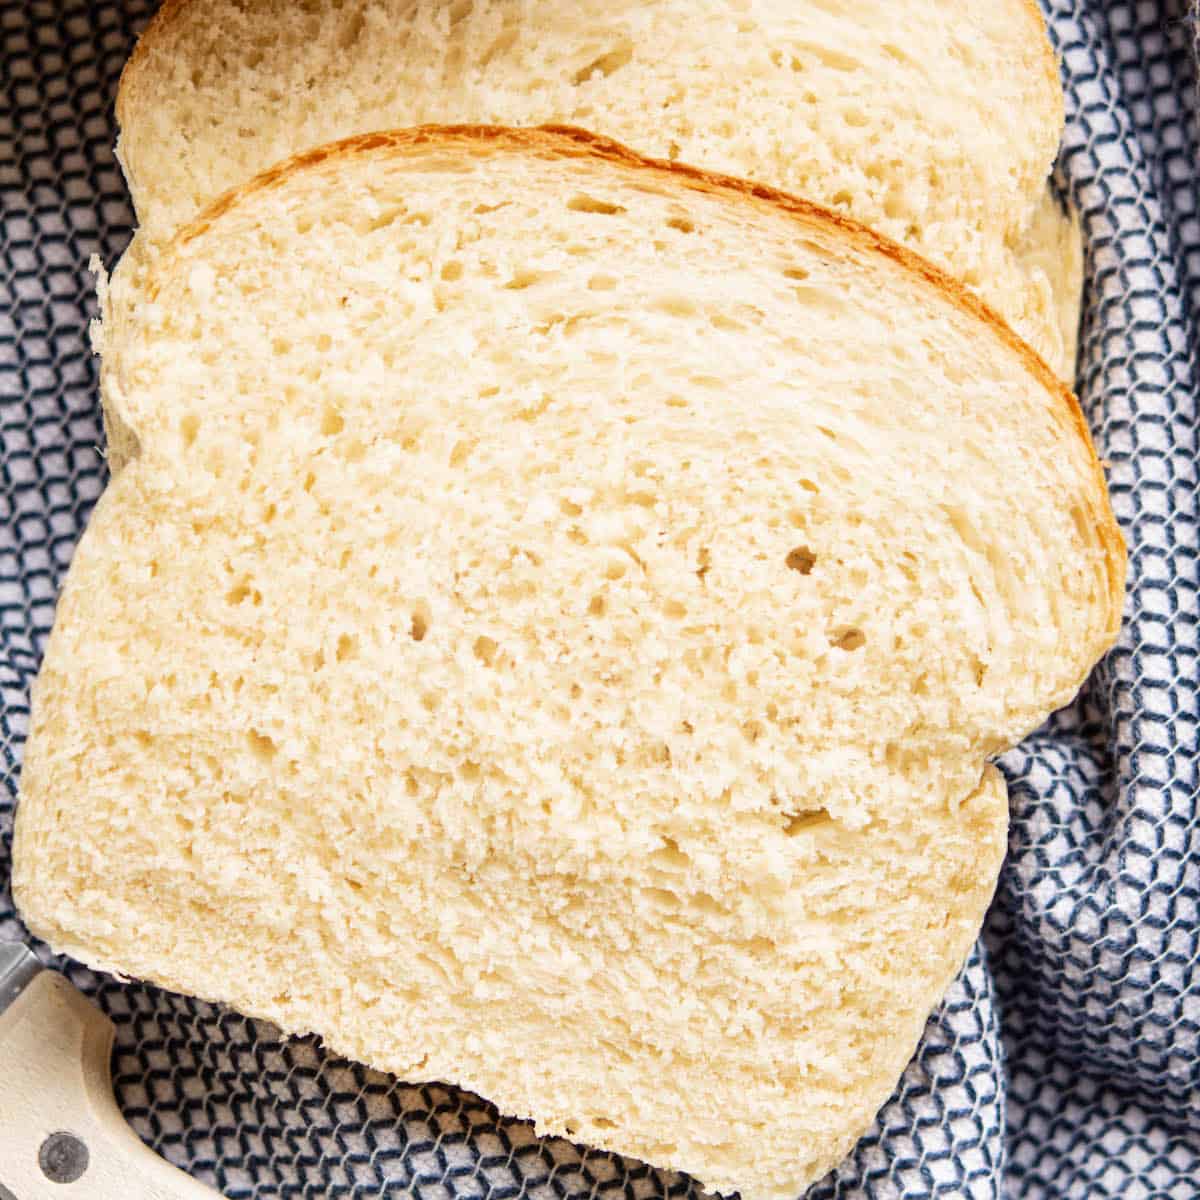
Sourdough Discard Sandwich Bread Recipe
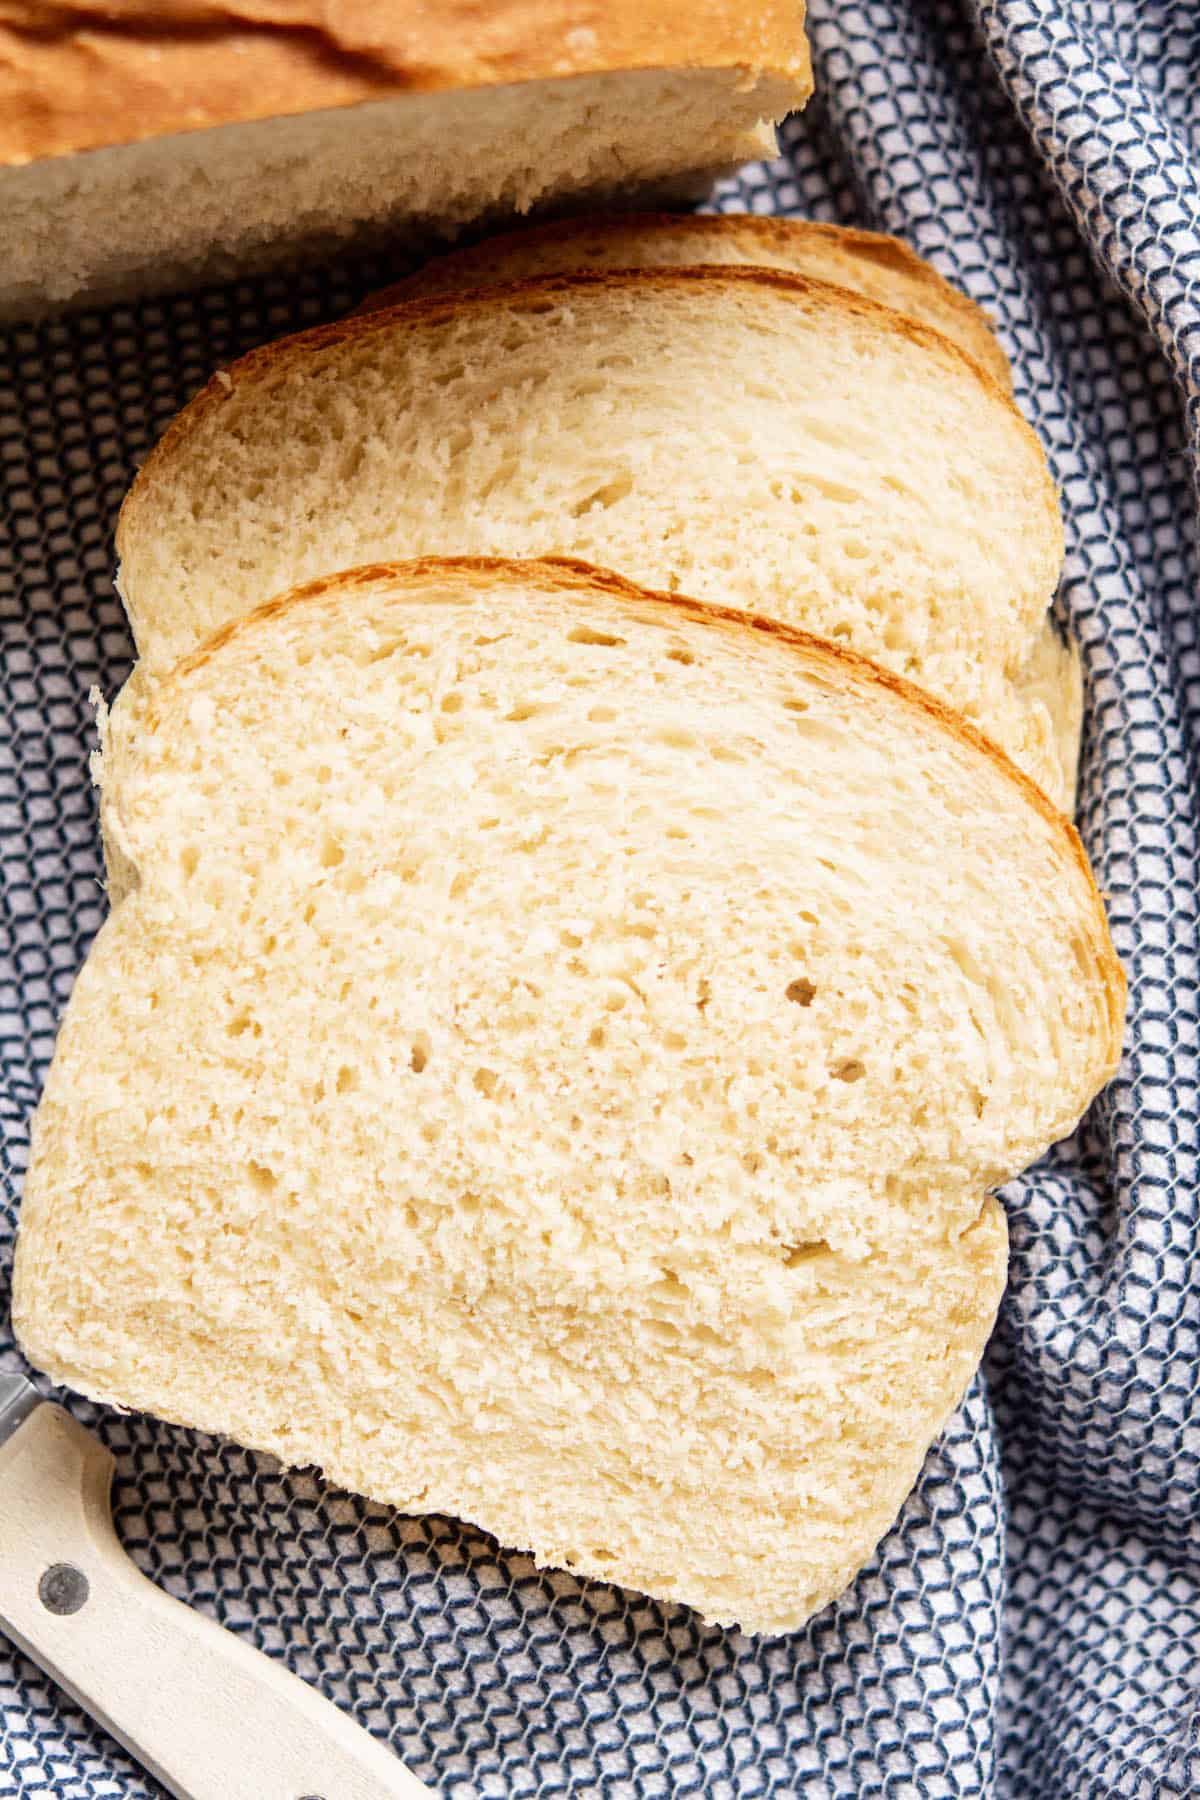
This easy sourdough discard sandwich bread recipe uses leftover starter and commercial yeast to create a soft, tender bread loaf. It makes a standard white bread with a soft crust that’s perfect for slicing for sandwiches and a great way to use up leftover starter!
Sometimes, you need bread fast, and this discarded sourdough bread is exactly that! It can be ready in as little as 3 hours. It’s a very easy dough to work with, too, so it can be made by hand (which is what I do) or in the stand mixer. It’s a great recipe to have as a base, and you can add in mix-ins like seeds and spices to make it your own!
This sourdough discard bread recipe uses discard from a 100% hydration starter. This was fed equal parts (in weight) of water and flour.
You might like this multigrain sourdough sandwich bread too!

Ingredients
Here’s what you need for this sourdough discard sandwich loaf. Find the ingredient amounts listed in the printable recipe card at the bottom of this post.
- Bread flour or strong all purpose flour – With a protein content of at least 11%
- Granulated sugar or brown sugar – A little to feed the yeast
- Active dry yeast or instant yeast
- Sourdough starter discard or active sourdough starter – It doesn’t matter if you use an unfed or recently fed starter.
- Water and milk
- Softened butter – Salted or unsalted butter
- Salt
Equipment
- A large mixing bowl
- A 9 x 5-inch loaf pan for baking the bread
- Parchment paper to line the pan
- Kitchen scale – Ideally, you will have a kitchen scale to measure this recipe in grams. If you don’t, US-size cup measurements are provided, too, but note that these are inaccurate. These are often over-packed, adding too much flour to the bread and making the dough dry. For best results, use a scale.
Method
- Combine the warm water, milk, sugar, and yeast in a large bowl. If using active dry yeast, let this sit for around 5-10 minutes until it becomes foamy; if using instant yeast, this step can be skipped.

- Add the flour, starter, and salt, and use a fork or a wooden spoon to combine it into a shaggy dough.
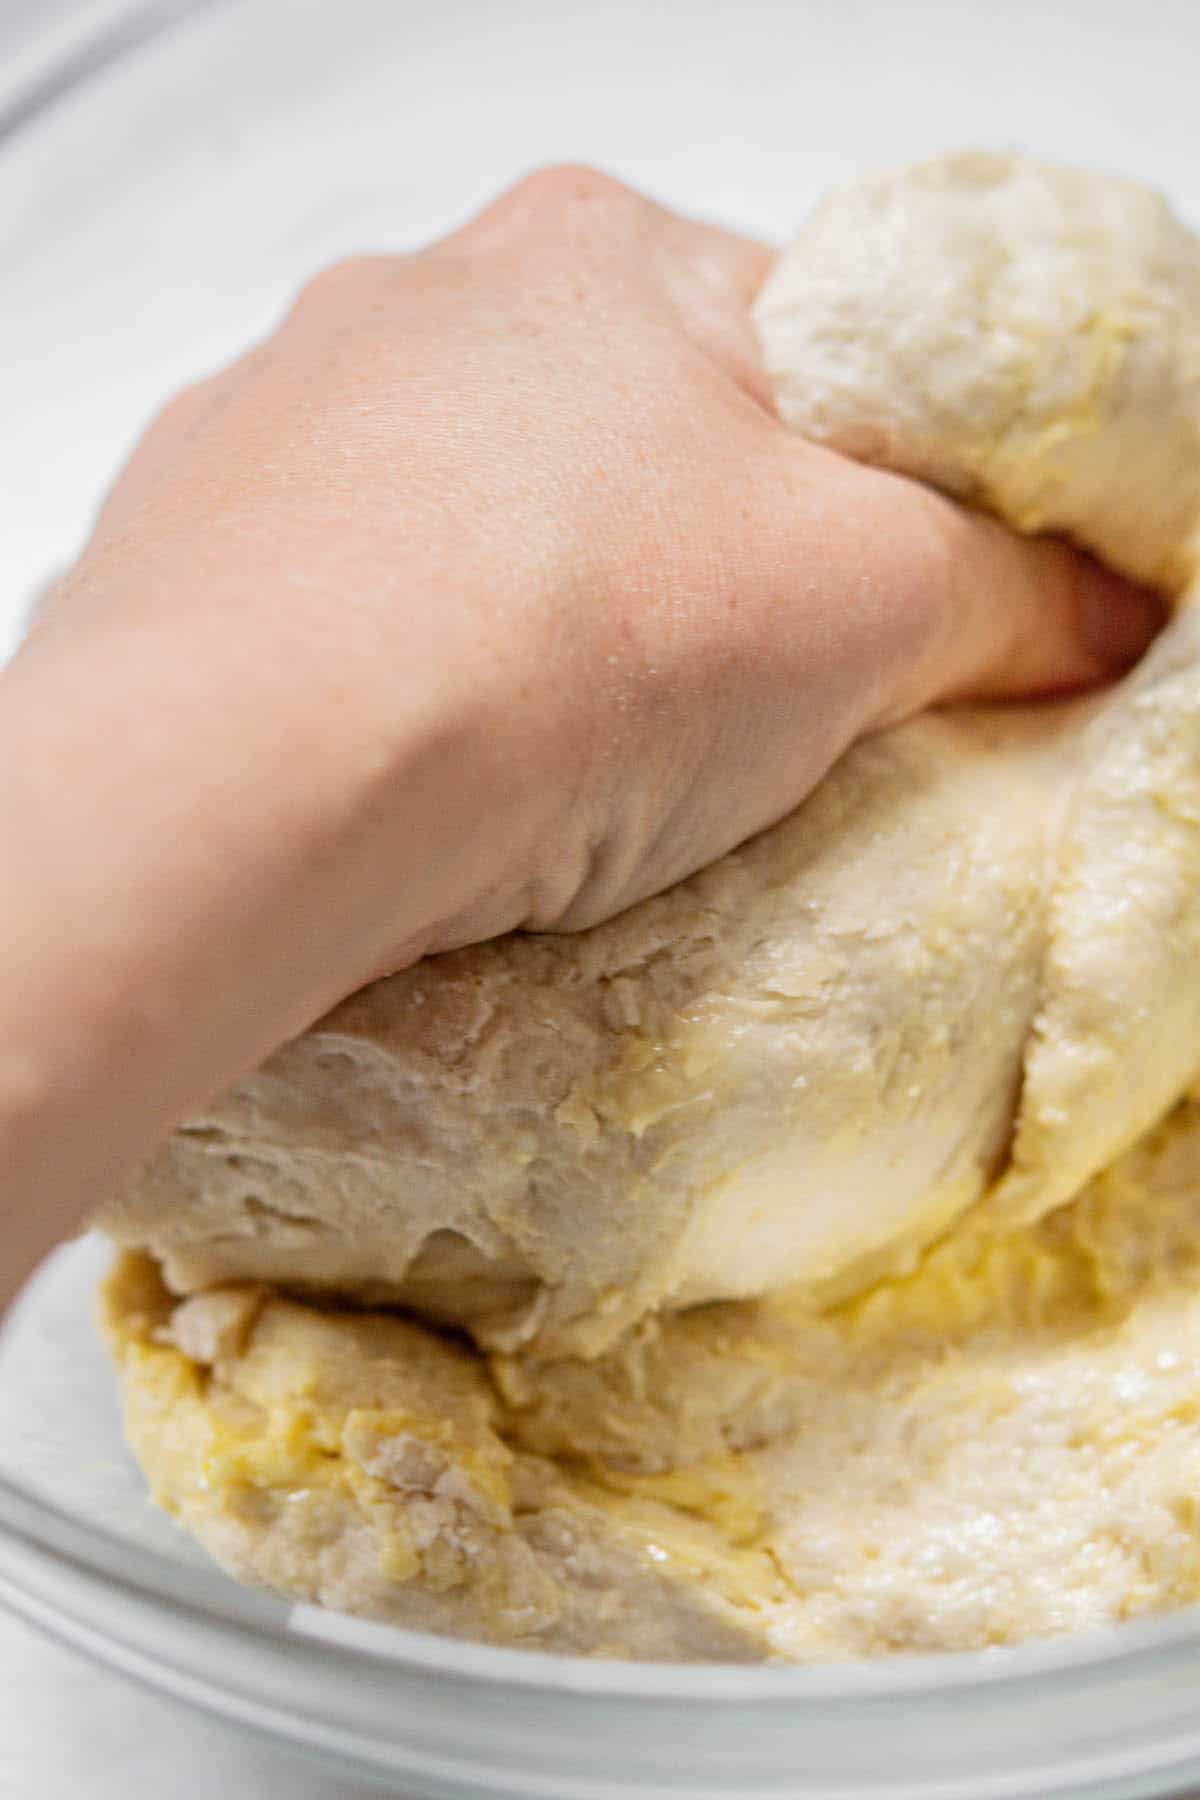
- Add the softened butter and work it by hand into the dough, squishing it until combined.
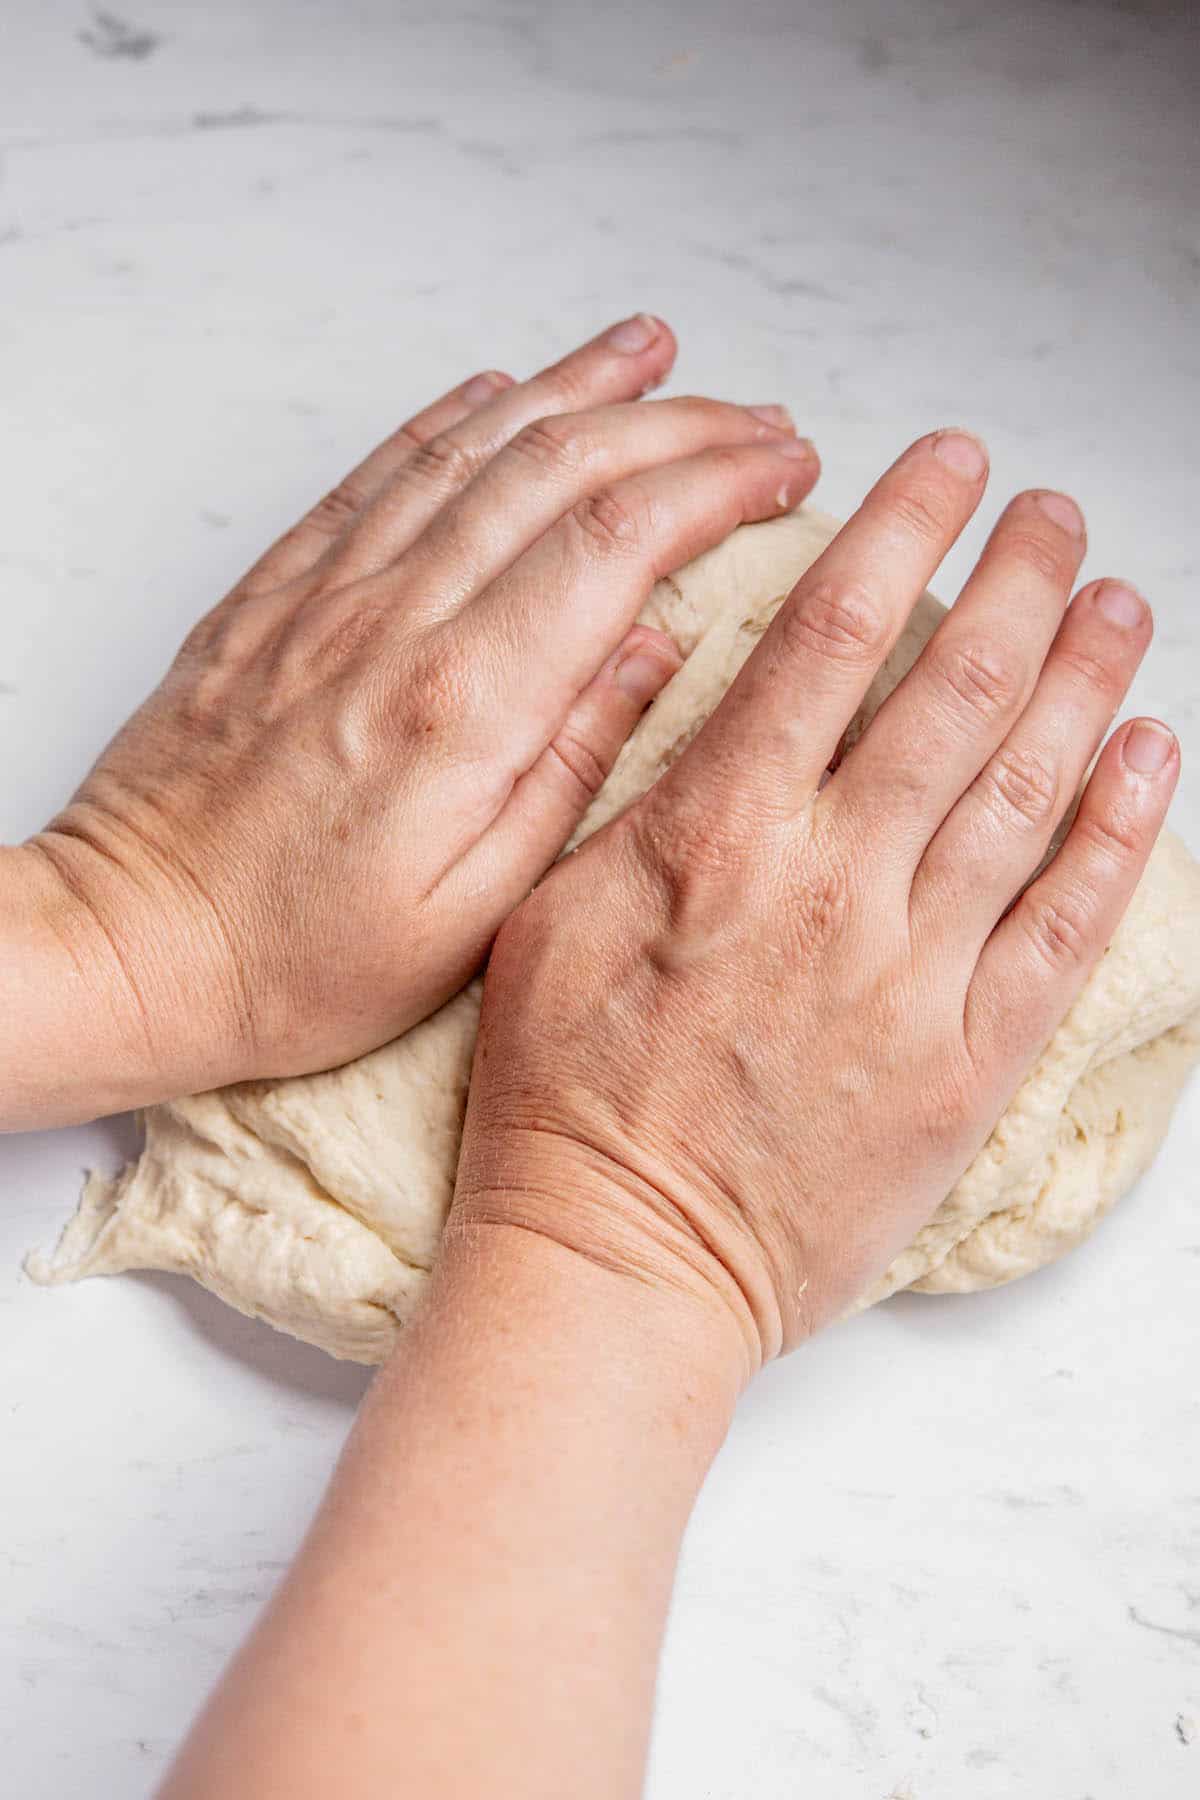
- Bring the bread dough onto a lightly floured work surface and knead it by hand for around 8-10 minutes until it’s soft, smooth, and elastic.

This can also be done in a bowl of a stand mixer fitted with a dough hook attachment.
- Once the dough has been kneaded, place it into a ball in a lightly greased bowl. Cover the bowl with a damp towel and let the dough rise in a warm place until doubled in size, approximately 1 to 1 1/2 hours. The rising time will depend on the room temperature.
- You can also do this first rise overnight in the refrigerator to give the dough a cold proof.
Shaping
- Line a 9×5-inch bread pan with parchment paper.

- Deflate the dough and pull it from the bowl onto a lightly floured surface.
- Flatten the dough with your hands into a rectangle, with the width being just under the length of your loaf pan.

- Fold the top third of the dough halfway back towards the center. Use your fingers or heel of your hand to press along the fold to seal it.
- Fold the top (now folded) portion of the dough back over itself again, bringing it back towards the center. Press along this fold to secure the seal.
- Finally, fold the dough again, bringing the top edge to meet the bottom edge and sealing it.

- Place the dough seam side down in the lined pan.

- Loosely cover the dough with a clean kitchen towel or plastic wrap and let the bread rise again until just doubled in size and about 1 inch / 2.5 cm above the rim of the pan.
How fast this happens will again depend on room temperature, but the second rise usually takes less time than the first. Take care not to overproof it, especially if your environment is warm.
Baking
- While the dough is rising, preheat the oven to 350°F/180°C.
- Bake the risen sourdough loaf for about 35 minutes until deep golden brown. If the top is browning too fast before the bread is ready, loosely cover it with aluminum foil after around 20 minutes of baking.

- When done baking, the bread should sound hollow when tapped. The internal temperature of the loaf should be around 200°F/94°C.
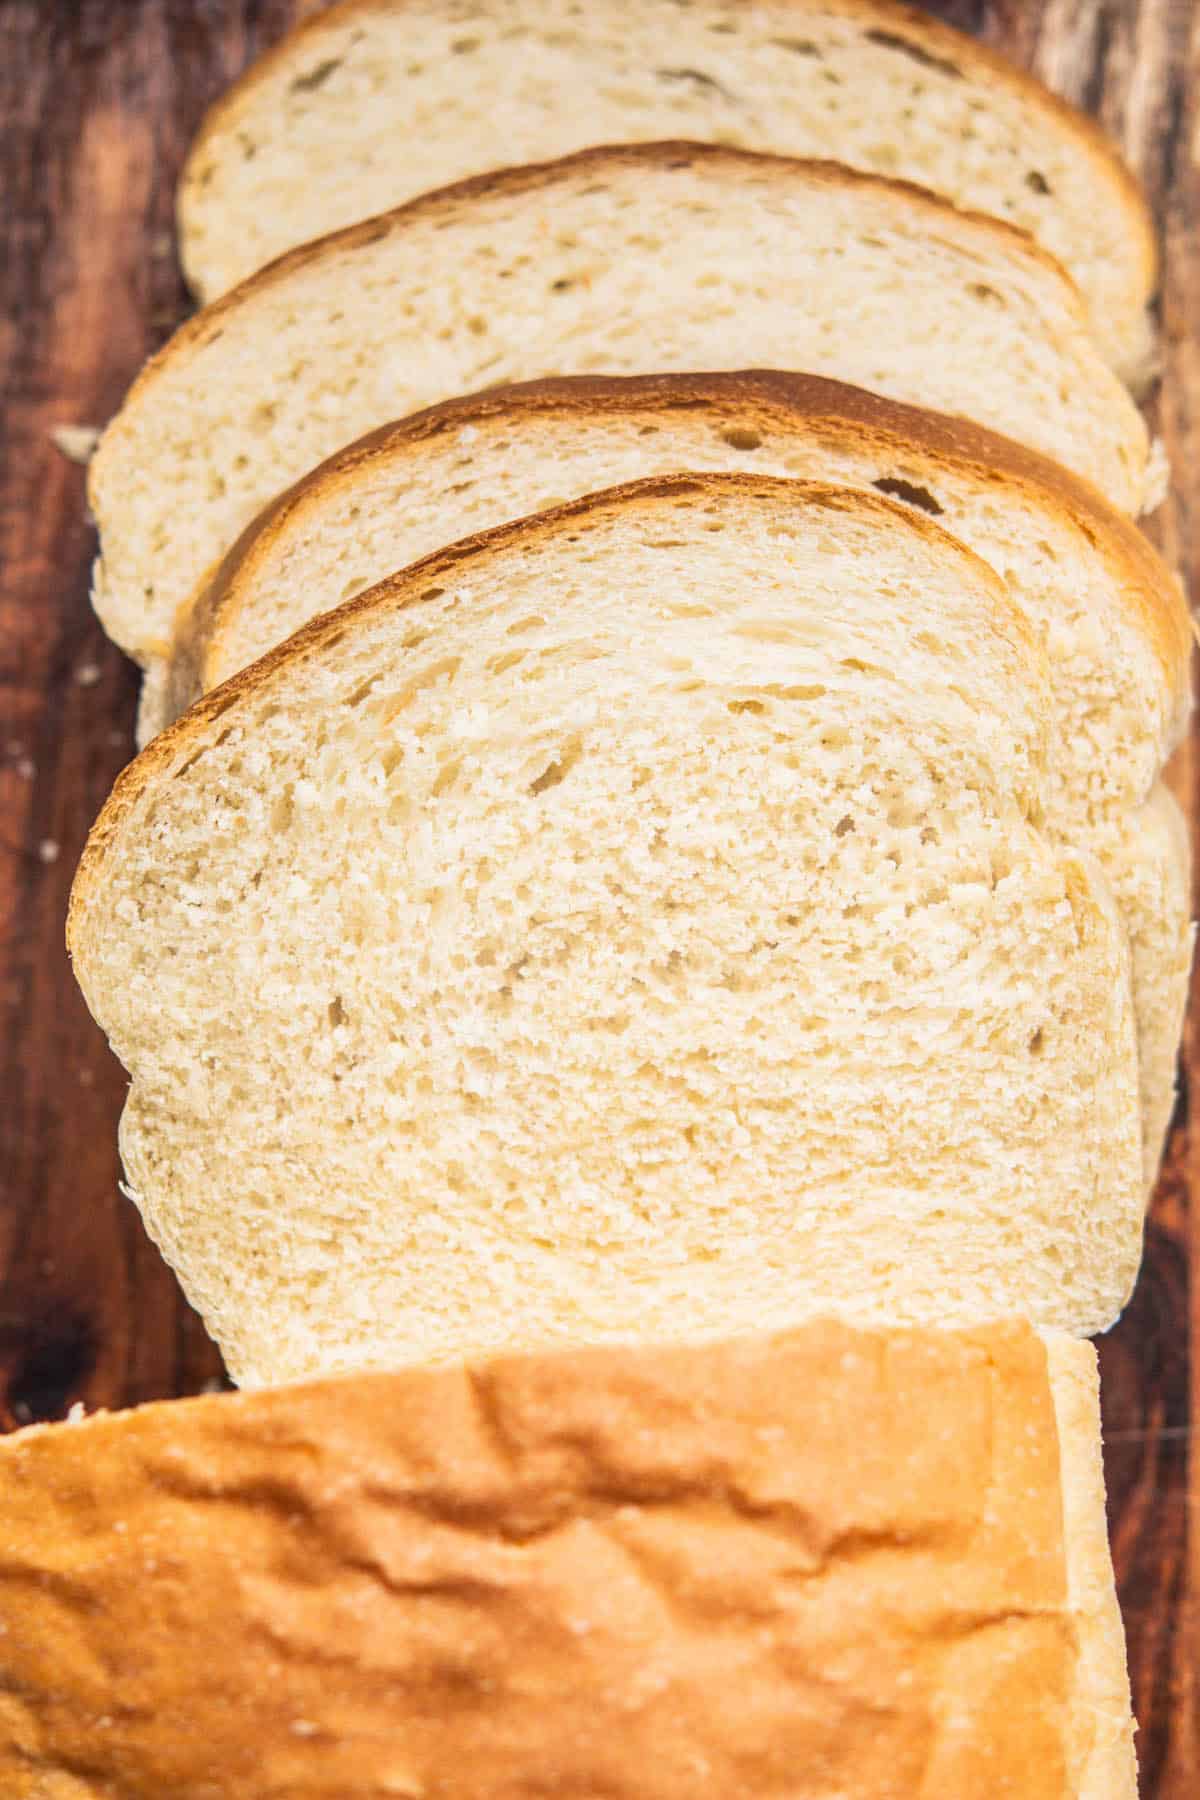
- Let the bread cool to room temperature before slicing.
Storing
The bread can be stored at room temperature and covered tightly for 4-5 days. Alternatively, it can be frozen for up to 3 months.
Happy baking!

FAQS
Yup you can use sourdough discard straight from the fridge.
Sure! You can add in seeds like flaxseeds, pumpkin or sunflower seeds. Or flavorful cumin or caraway seeds!
Possible reasons include old or inactive yeast, incorrect water temperature (too hot or cold), insufficient kneading, or a too-cool environment for rising.
Whole wheat flour absorbs more water and can make the dough denser. You may need to adjust the added water. Mixing a little bit of whole wheat and all-purpose or bread flour is a better idea.
Overproofing – If your bread rose too much and collapsed, it can make the bread dense. Underproofing – If the bread didn’t rise enough it will also be dense.
The dough should be smooth, elastic. It should pass the “windowpane test.” Let the dough relax for 5 minutes, then take a small piece stretched between your fingers to become thin enough to be translucent without tearing.
More sourdough recipes
- Sourdough Monkey Bread
- Chocolate Sourdough Bread
- Soft Sourdough English Muffins
- Double chocolate sourdough muffins
- Naturally Leavened Sourdough Doughnuts
Sourdough Discard Sandwich Bread Recipe
This easy sourdough discard sandwich bread recipe uses leftover starter and commercial yeast to create a soft, tender bread loaf.
Ingredients
- 120g (1/2 cup) lukewarm water
- 120g (1/2 cup) lukewarm milk
- 7g (2 1/2 teaspoons) instant yeast
- 25g (2 tablespoons) granulated white sugar
- 406g (3 1/4 cups*) bread flour or strong all-purpose flour
- 100g (approx 1/2 cup) discard sourdough starter
- 8g (1 1/2 teaspoon) salt
- 45g (3 tablespoons) room-temperature butter
Instructions
- Combine the warm water, milk, sugar, and yeast in a large bowl. If using active dry yeast, let this sit for around 5-10 minutes until it becomes foamy; if using instant yeast, this step can be skipped.
- Add the flour, starter, and salt, and use a fork or a wooden spoon to combine it into a shaggy dough. Add the softened butter and work it by hand into the dough, squishing it until combined.
- Bring the bread dough onto a lightly floured work surface and knead it by hand for around 8-10 minutes until it's soft, smooth, and elastic. This can also be done in a bowl of a stand mixer fitted with a dough hook attachment.
- Once the dough has been kneaded, place it into a ball in a lightly greased bowl. Cover the bowl with a damp towel and let the dough rise in a warm place until doubled in size, approximately 1 to 1 1/2 hours. The rising time will depend on the room temperature.
- You can also do this first rise overnight in the refrigerator to give the dough a cold-proof.
Shaping
- Punch down the dough and pull it from the bowl onto a lightly floured surface. Line a 9x5-inch bread pan with parchment paper.
- Flatten the dough with your hands into a rectangle, with the width just slightly shorter than the length of your loaf pan.
- Orient it so that the longer sides are to your left and right, and the shorter sides are closest and farthest from you.
- Take the top third of the dough (the edge farthest from you) and fold it halfway back towards the center of the dough. Use your fingers or heel of your hand to press along the fold to seal it.
- Fold the top (now folded) portion of the dough back over itself again, bringing it back towards the center. Press along this fold to secure the seal.
- Finally, fold the dough again, bringing the top edge to meet the bottom edge and sealing it.
- Place the dough seam side down in the lined pan.
- Loosely cover the dough with a clean kitchen towel or plastic wrap and let the bread rise again until just doubled in size and about 1 inch / 2.5 cm above the rim of the pan. How fast this happens will again depend on room temperature, but the second rise usually takes less time than the first. Take care not to overproof it, especially if your environment is warm.
Baking
- While the dough is rising, preheat the oven to 350°F/180°C.
- Bake the risen sourdough loaf for about 35 minutes until deep golden brown. If the top is browning too fast before the bread is ready, loosely cover it with aluminum foil after around 20 minutes of baking.
- After baking, the bread should sound hollow when tapped. The internal temperature of the loaf should be around 200°F/94°C.
- Let the bread cool to room temperature before slicing.
Storing
- The bread can be stored at room temperature and covered tightly for 4-5 days. Alternatively, it can be frozen for up to 3 months.
Notes
*Ideally, you will have a kitchen scale to measure this recipe in grams. If you don't, US-size cup measurements are provided, too, but note that these are inaccurate. They are smaller than metric-sized cups.
Cups are often over-packed, adding too much flour to the bread and drying the dough. For best results, use a scale.
Nutrition Information:
Yield: 8 Serving Size: 1 sliceAmount Per Serving: Calories: 197Total Fat: 6gSaturated Fat: 3gTrans Fat: 0gUnsaturated Fat: 3gCholesterol: 13mgSodium: 688mgCarbohydrates: 29gFiber: 2gSugar: 7gProtein: 6g
This is an informational estimate only. I am not a certified Dietitian or Nutritionist


This sandwich bread is super soft and delicious. I mix some Rye flour with bread flour. Easy to make it with my breadmaker. Thank you.
Turned out great!!👍🏻
Could this be mixed, kneaded, and thru first rise in a breadmachine??
Hey yes it can be:)
This was delicious and super easy! Could you use active starter and skip the yeast? If yes, how much active?
Yup! I use a very similar recipe for my sourdough dinner rolls – around 100g active starter 🙂
Could this same recipe be used to make sandwich buns? I have one I currently use, but always looking to try new ones.
yup it could! 🙂
My baking bread journey started about 4 months ago and I have tried many different sandwiches bread recipes. This recipe is hands down the best I’ve have made yet!
It is easy, the crumb is fluffy and delicious and it is fail proof! I have made it several times already and it always turns out great even when I think I’ve messed it up! Thanks so much for the wonderful recipe! My search for a great sandwich loaf recipe has ended here!!
Did you have any variations on measurements of grams and cups. My 120g of water & milk and the 1/2 cup were differnt.
Heya, cups are never going to be accurate because it depends on what cup you are using, they vary all over the world. Grams is what I use and predominantly test in, so that’s what I recommend using 🙂