Flaky Sourdough Croissants – With Step by Step Instructions
These sourdough croissants are buttery and flaky, and leavened entirely with your sourdough starter, no commercial yeast. The process is spread over two days, but it isn’t actually difficult, and this step-by-step guide walks you through every stage!
I haven’t updated this post for a long time, but I took new photos recently so thought it was finally time! The recipe itself is the same one you know and love, I have just done a rewrite to make it much clearer and so you can see exactly what the dough and butter should look like as you go.

About these sourdough croissants
These croissants are made entirely with sourdough starter, with no commercial yeast. The slower fermentation is what gives them their flavour, with just a gentle tang. The outside bakes up crisp and shattery and the inside is soft and layered.
It does take a bit of time, but the steps themselves are simple and once you get the rhythm it doesn’t feel like a big deal. You mix the dough on day one and chill it overnight, then on day two you laminate it with butter using three folds, with a rest in the fridge between each one, before shaping, proofing, and baking. None of the individual steps are hard, there are just a lot of them spread across two days.
The one thing that makes or breaks croissants is keeping the butter cool. The flaky layers come from thin sheets of solid butter trapped between layers of dough, and if that butter warms up and melts into the dough, those layers disappear and you get a bready texture instead. This is why croissants are easiest to make in a cool kitchen. If your room is above 25°C / 77°F, you’ll struggle to keep the butter firm enough as you work, so aim for a cooler day or a cooler spot in the house.
The starter
These croissants rely only on your sourdough starter, so it needs to be active, bubbly, and low in acid. A weak or sleepy starter will give you slow, flat croissants that don’t rise properly, and an over-acidic starter will affect both the flavour and the dough strength.
You’ll need around 140g of fed, active starter at 100% hydration (equal weights of flour and water when feeding). A few tips for getting it right:
- When you feed it depends on which schedule you’re following. For Schedule 1 I feed it in the morning of day 1 and let it peak before mixing.
- For Schedule 2 I feed it the night before so it’s peaked and ready first thing, since day 1 is busier. More on this in the schedule below.
- Refresh your starter regularly using a small amount of seed starter each time. This slows the acid build-up and keeps the flavour mild.
- Use the starter before it passes its peak and starts to collapse. If used after this point, it will be too exhausted and acidic to give good results.
At a room temperature of 21 to 23°C, a starter fed at a 1:2:2 ratio will double or even triple within around 6 hours. Good lamination starts with strong dough, and a well-fed, active starter builds the strength that lets the dough hold all those butter layers. You can read more about acid content in starters if you want to go deeper.

Baker’s schedule
Sourdough croissants are a two-day bake, and there are two ways to split the work. The difference is when you feed the starter, when you laminate, and which dough rests overnight. Both give great results, so pick whichever suits your day.
Schedule 1: laminate on day 2. Feed the starter in the morning of day 1 and let it peak over around 6 hours. Mix and ferment the dough, then chill it overnight. The next day, make the butter packet and laminate with three folds (30 minute chills between each), chill for 2 hours, then shape, proof, and bake. Good if you’d rather spread it out, though day 2 runs long.
Schedule 2: laminate on day 1 (my preferred way). Feed the starter the night before so it’s peaked and ready first thing, since day 1 is the busier day. Mix and ferment the dough, chill it for 2 to 3 hours, then laminate with all three folds the same afternoon and rest the laminated dough overnight. Day 2 is then just shape, proof, and bake, so you get fresh croissants by lunchtime. The overnight rest also relaxes the gluten and makes day 2 rolling much easier.
Watch the dough, not the clock because these timings are a guide and you can shift them to suit your kitchen.
Method
The dough
- Feed your starter so it’s bubbly and active.
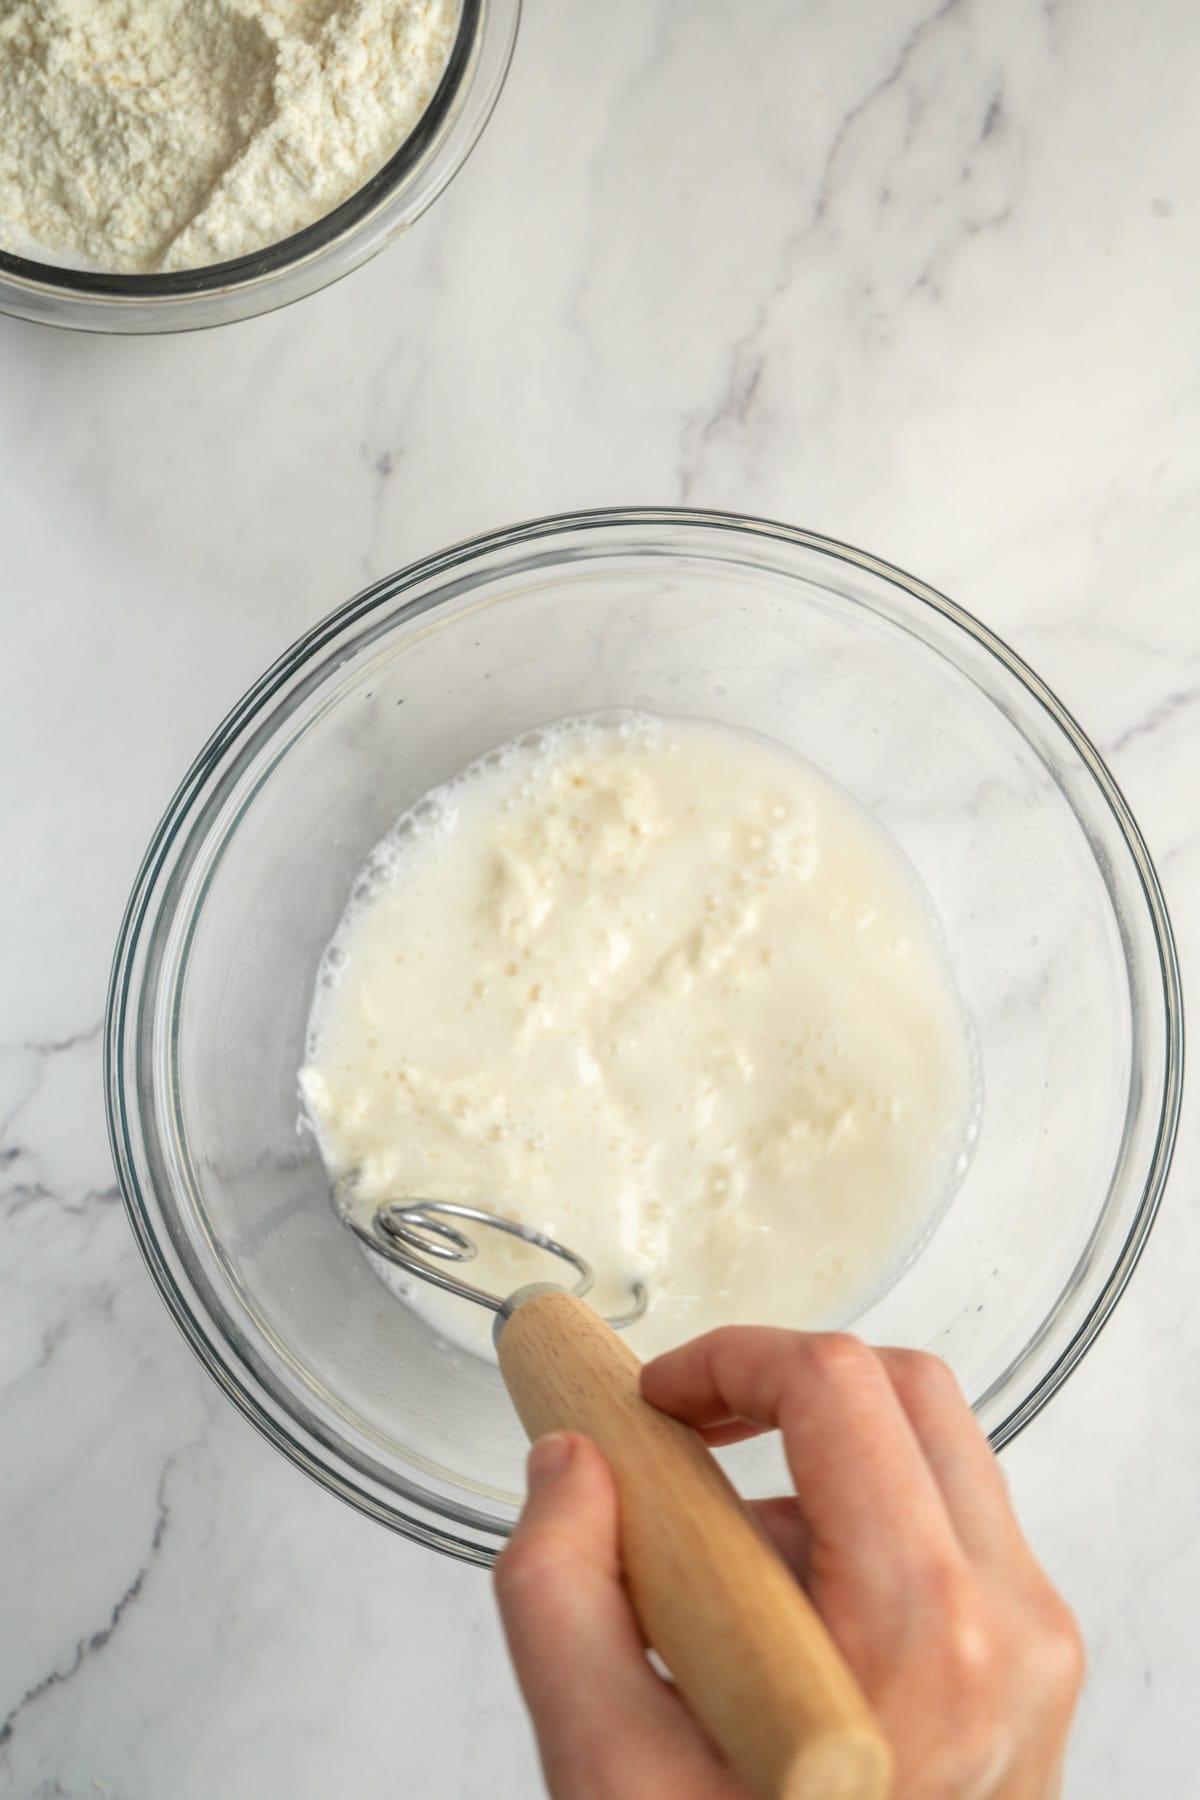
- Whisk water and sourdough starter.
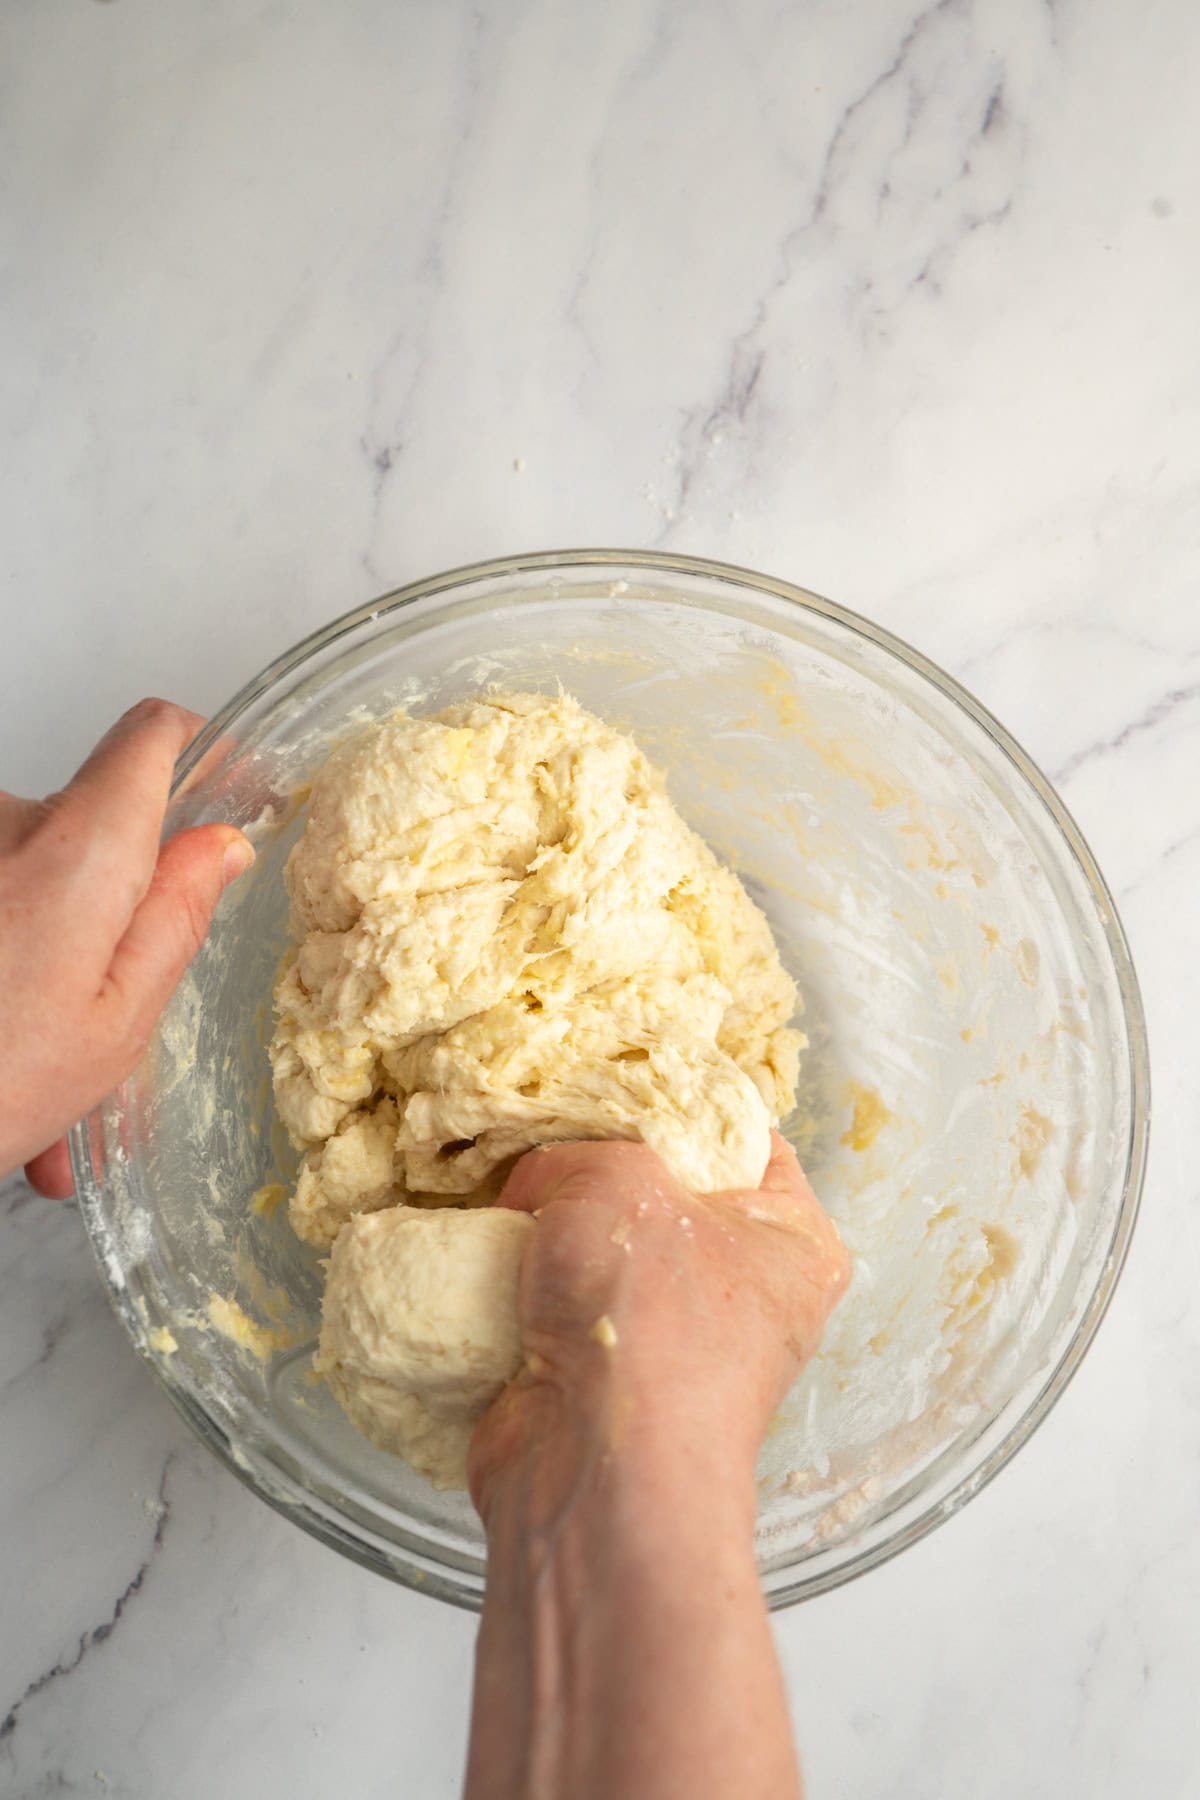
- Add the flour, sugar, salt, sourdough starter, and butter to the bowl. Mix by hand into a sticky ball of dough, then work it further on the bench until smooth.
- Place the dough in a greased bowl, cover, and leave to ferment for 3 hours at 23 to 25°C / 74 to 77°F. If your room is cooler, leave it for 4 hours. The dough should be slightly puffier after fermenting.
- Shape the dough into a flat rectangle, then wrap it tightly or place it in an airtight container and chill in the fridge overnight. Shaping it into a rectangle now means less rolling tomorrow, which keeps the dough cold and relaxed for lamination.
The butter packet
The butter packet is the thin slab of butter you fold into the dough. There are two ways to make it, and which you choose comes down to your kitchen and your butter.
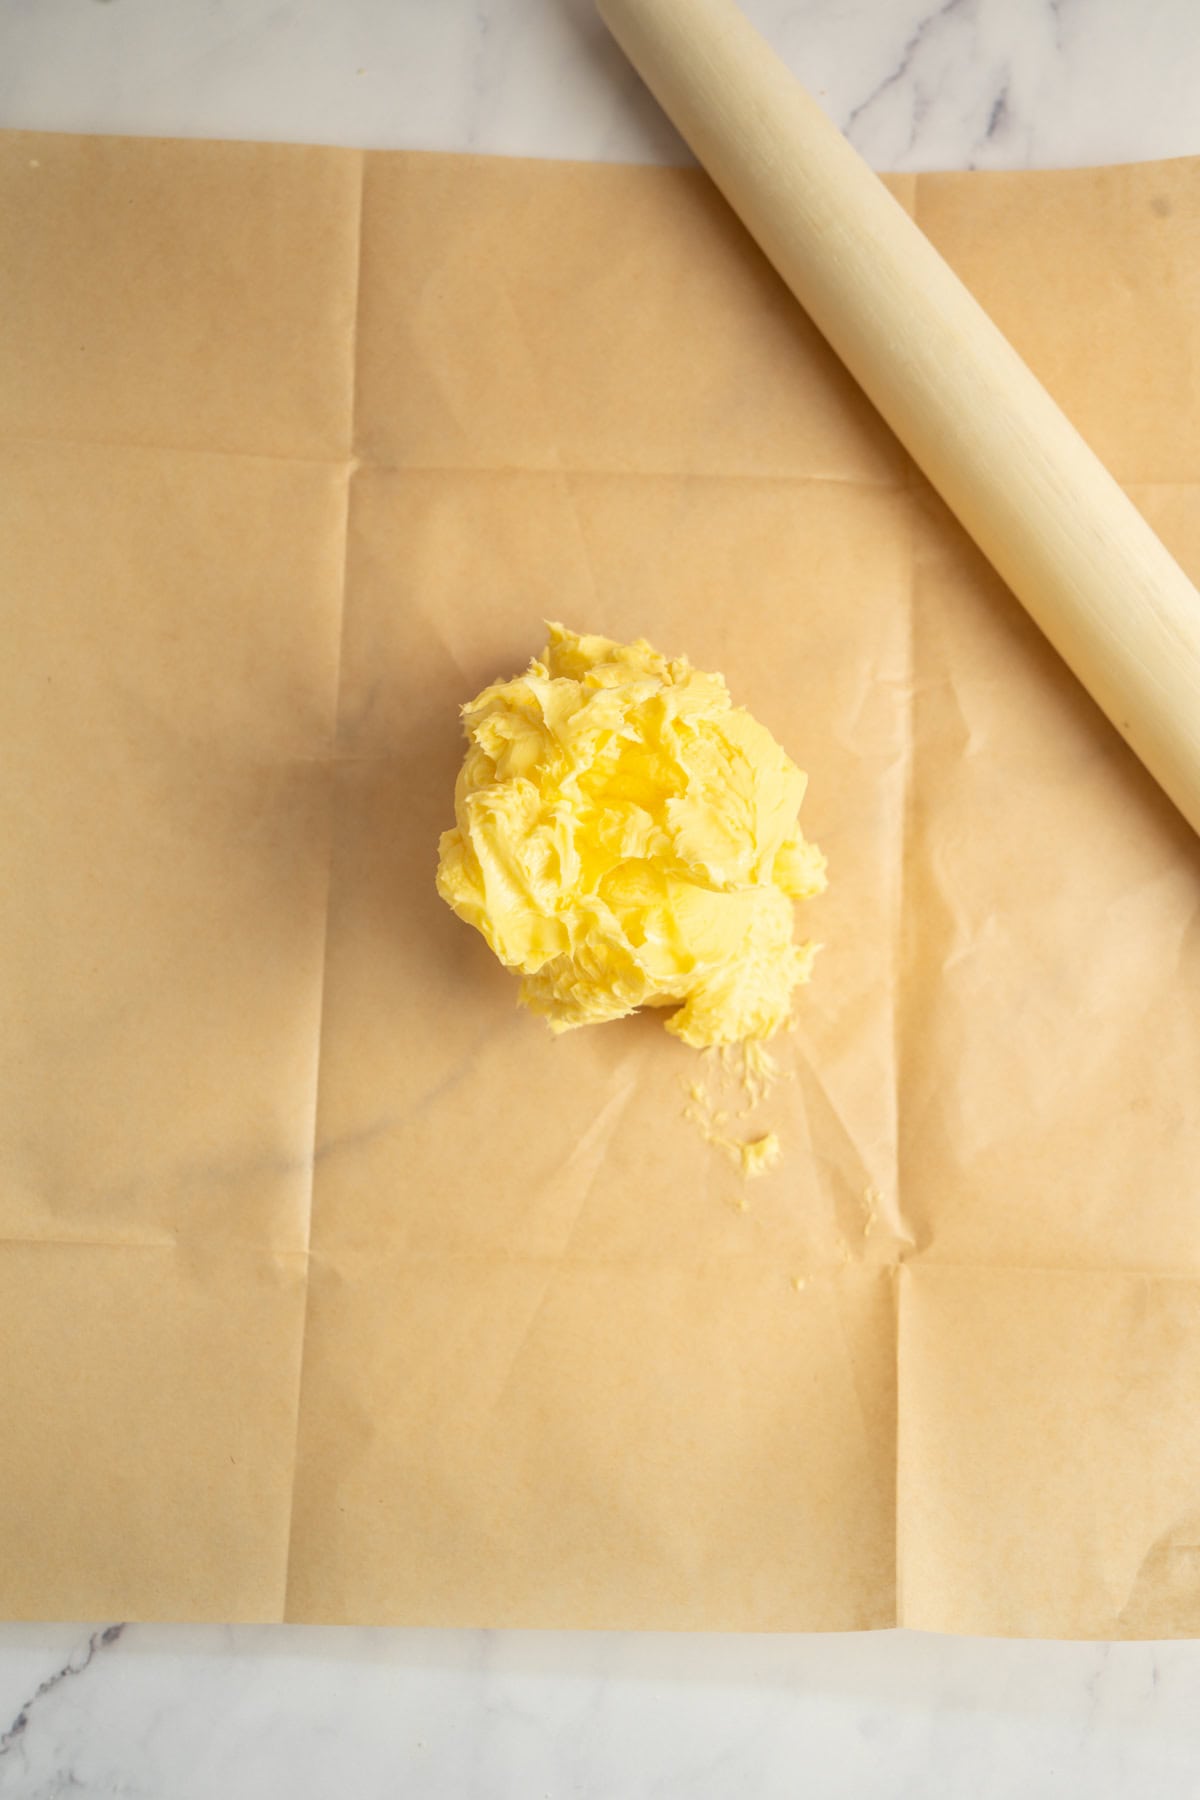
The flour method: Mix room-temperature butter with a little flour (around 1½ tablespoons for 250g butter) until smooth, then roll it between two sheets of baking paper into a rectangle of about 15 x 20cm (6 x 8 inch), then chill it. The flour stabilises the butter so it’s less likely to crack when cold. Good if your butter tends to be brittle or your kitchen is cool.
The just-butter (bashing) method: Slice cold butter and lay the pieces side by side on a sheet of baking paper. Fold the paper into a rectangle to give you clean edges and a size guide, cover with the top sheet, and pound with a rolling pin to soften, then press it out to fill the rectangle evenly. No flour. This gives cleaner layers and a better flaky texture, so it’s my preferred method when I can keep things cool.

Whichever method you use, you then chill the packet until firm. Just before laminating, you bash it with the rolling pin, which breaks up and rearranges the firm fat crystals that set in the fridge and works them into a smooth, pliable mass without warming the butter. This is what gets the butter to that cold but bendy state, about the same firmness as the chilled dough. Matching those two consistencies is the single most important thing in lamination. Too cold and stiff, and the butter shatters inside the dough; too warm, and it smears in and you lose the layers. Gauging this gets better with practice.
Tip: The two methods want different starting butter. For bashing, keep the butter cold from the fridge. For the flour method, soften it to room temperature first so the flour mixes through easily, then chill it afterwards until firm.
Laminating
Encasing the butter
- Take the butter packet from the fridge and give it a few bashes with the rolling pin to bring it back to a workable, bendy state. You’re aiming for the dough and butter to be a similar consistency, with the dough being cold and firm and the butter cold but bendy.
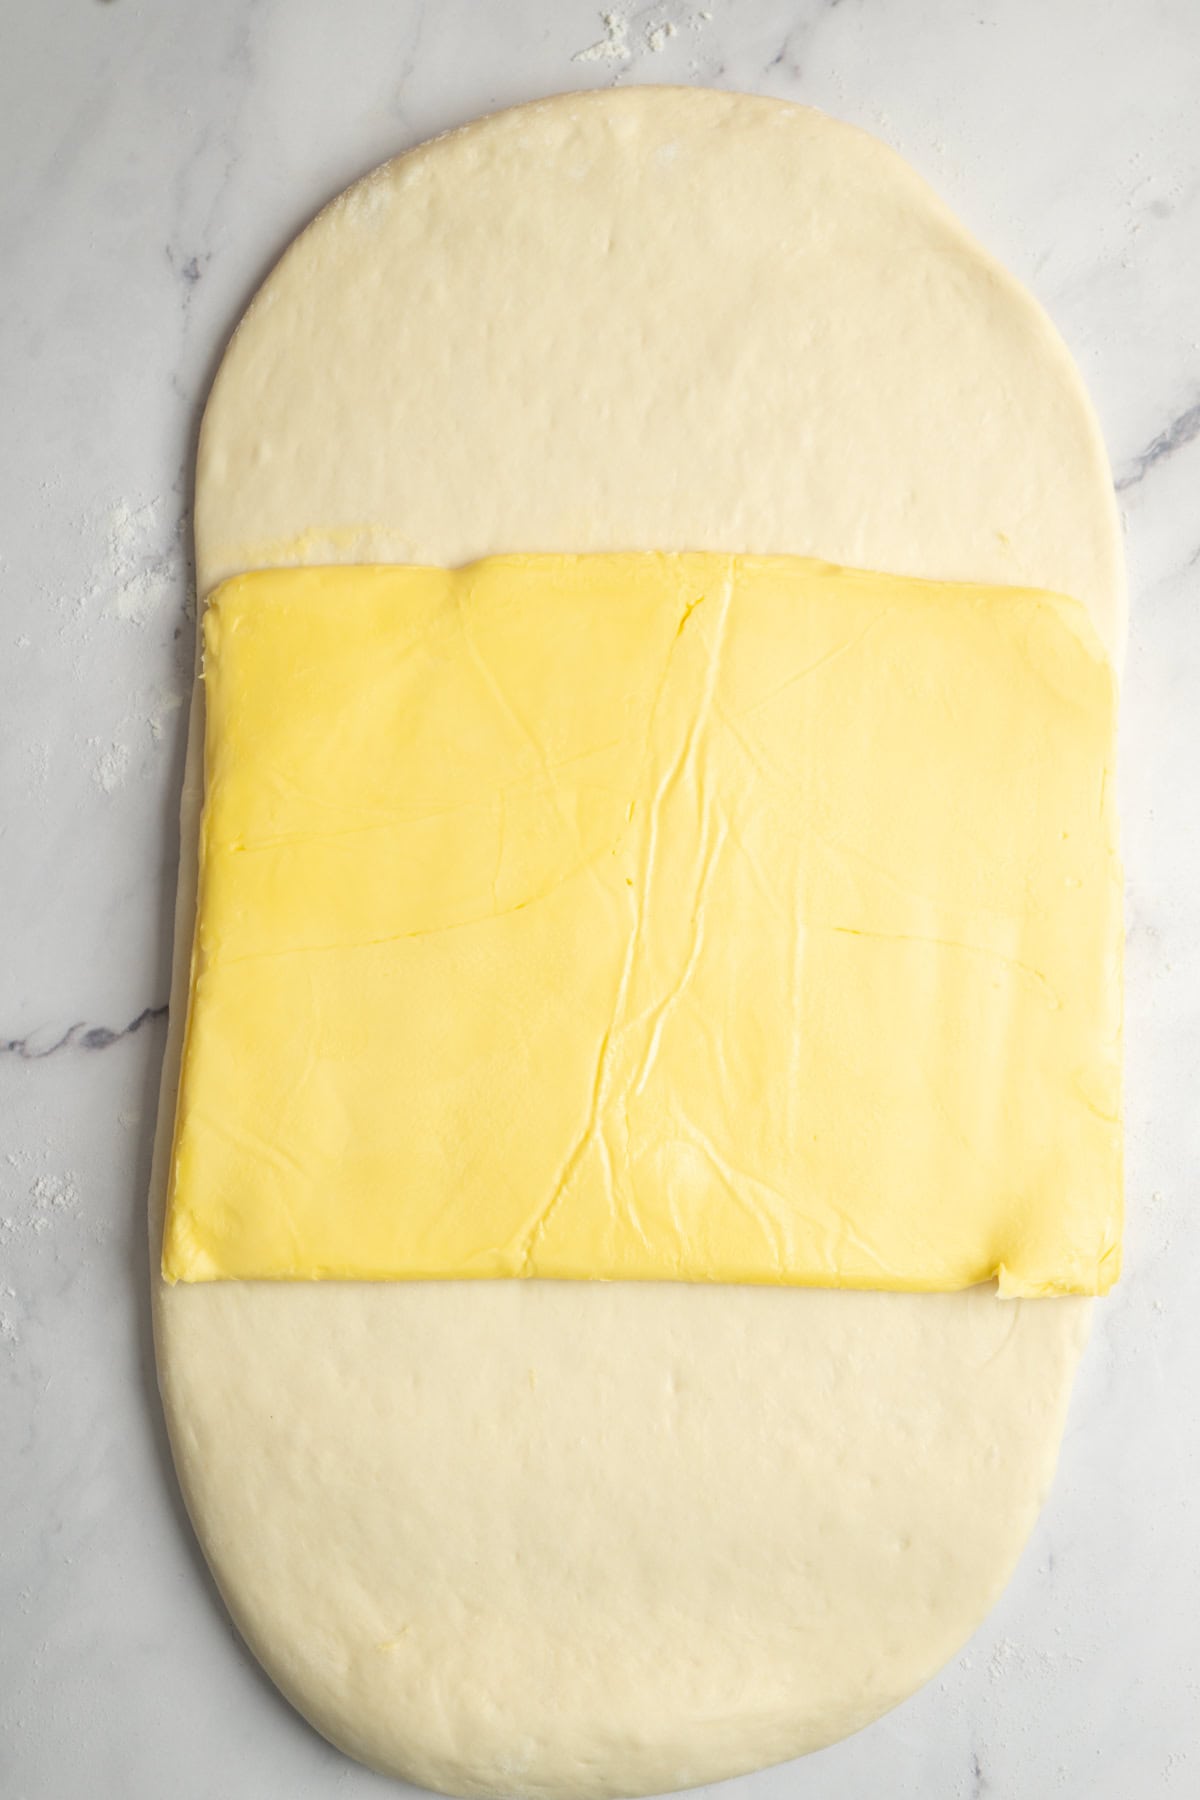
- On a floured bench, roll the chilled dough into a 20 x 40cm (8 x 16 inch) rectangle. Place the cool butter packet in the middle of the dough.

- Bring the top of the dough down and the bottom up to meet in the middle, tucking the butter inside. Use a sharp knife to make a shallow slit along the long edges of the dough, to prevent excessive tension in the dough. Turn the dough a quarter turn.
Fold 1
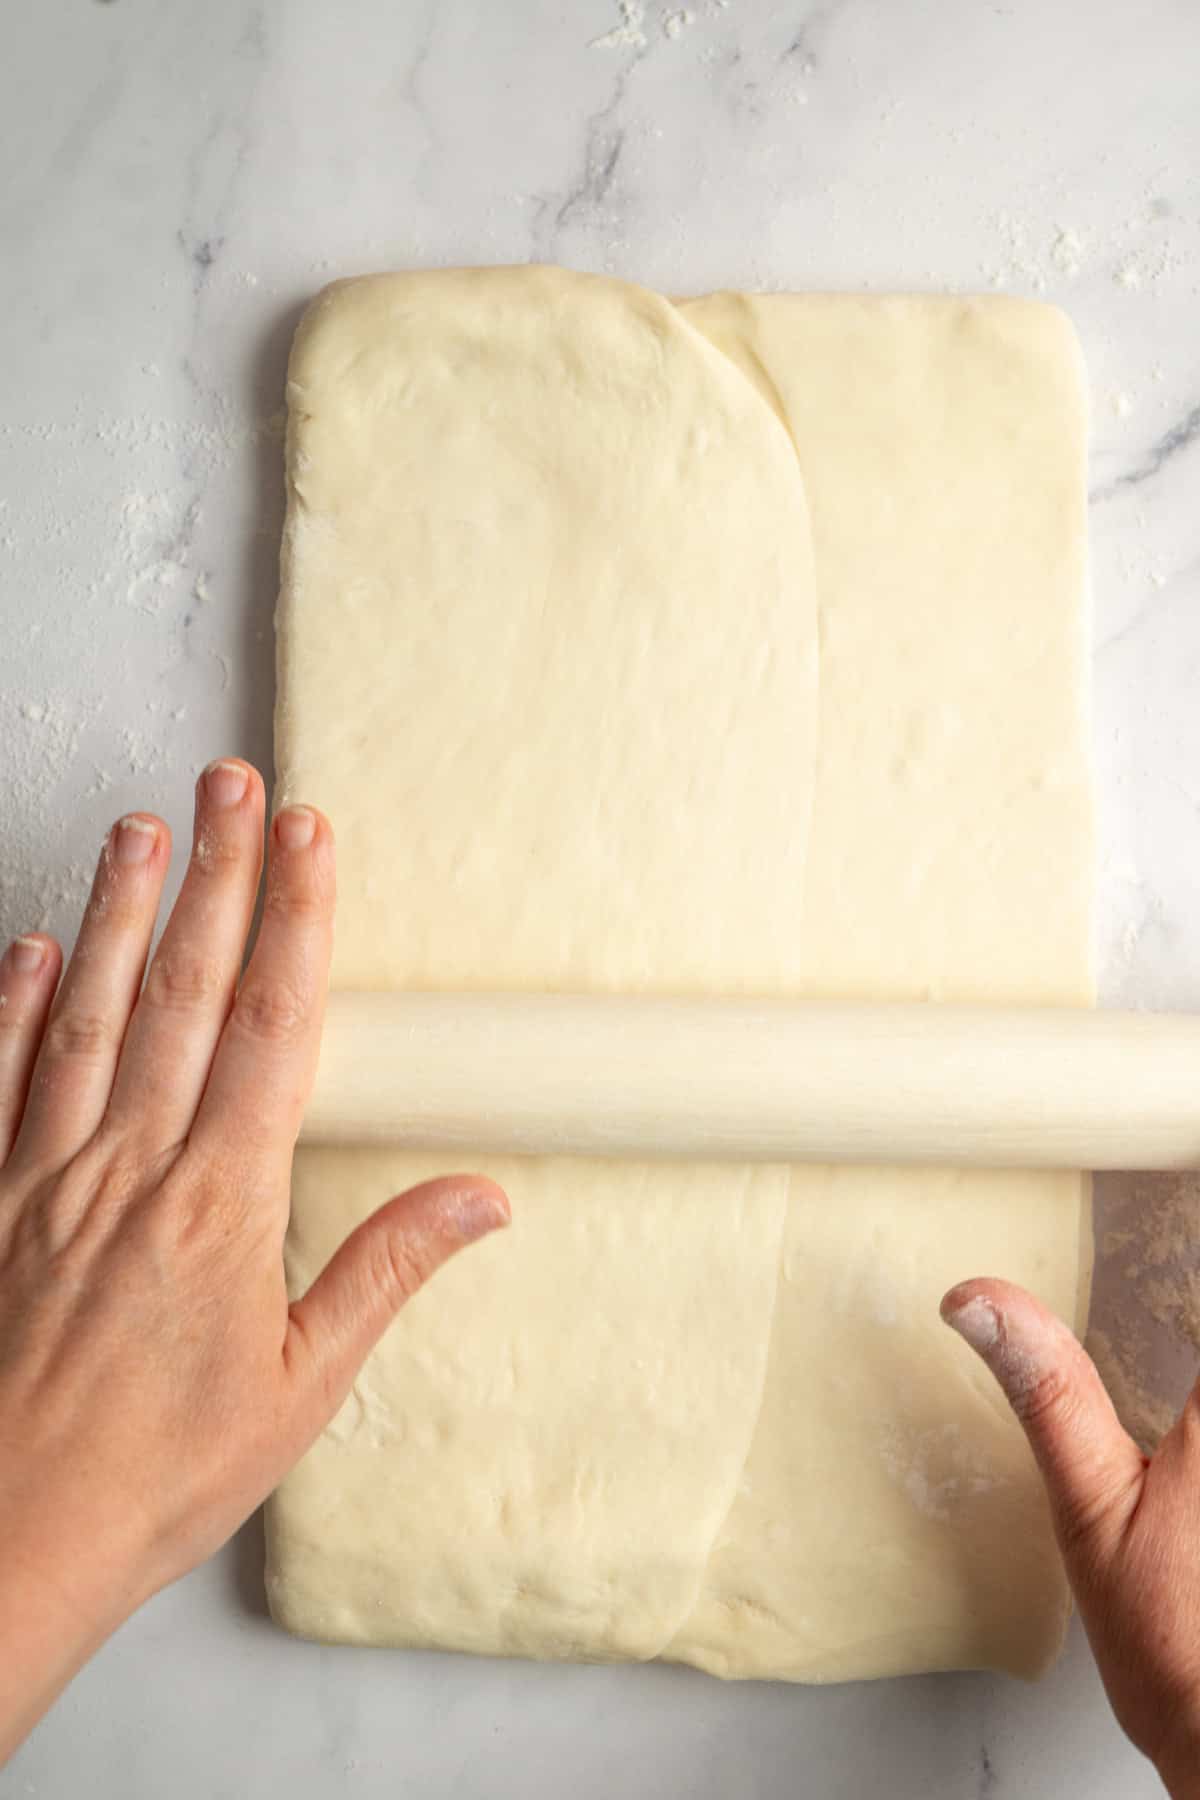
- Use the rolling pin to gently press along the length first to start dispersing the butter, then roll out into rectangle, around 8mm thick, focusing on lengthening rather than widening. Always roll in one direction, away from you, lifting the pin and starting again rather than rolling back and forth, which drags the layers against each other and smears the butter. Dust with flour if it sticks.

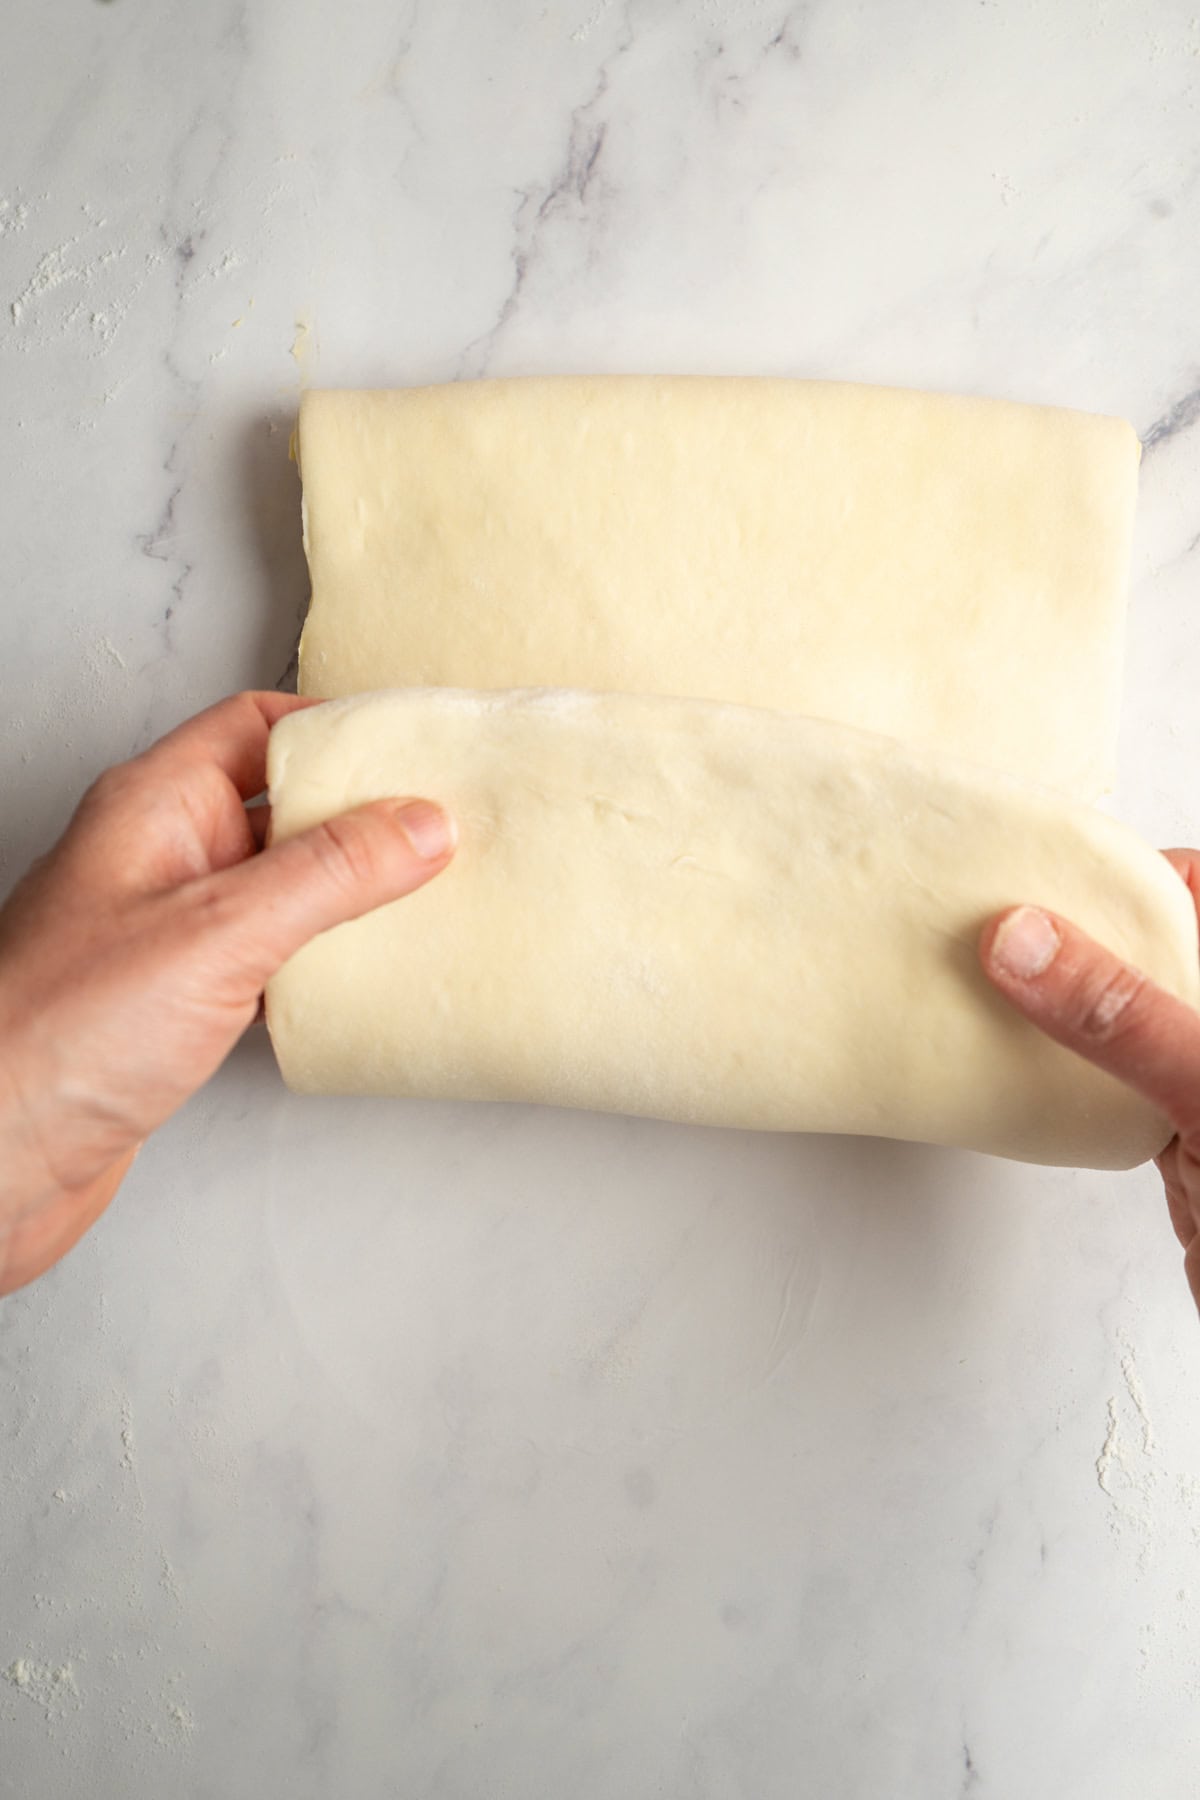
- Fold the dough like a pamphlet, bringing the top third down to the middle and the bottom third up over the top. Wrap tightly or place in an airtight container and rest in the fridge for 30 minutes.
Fold 2 & 3
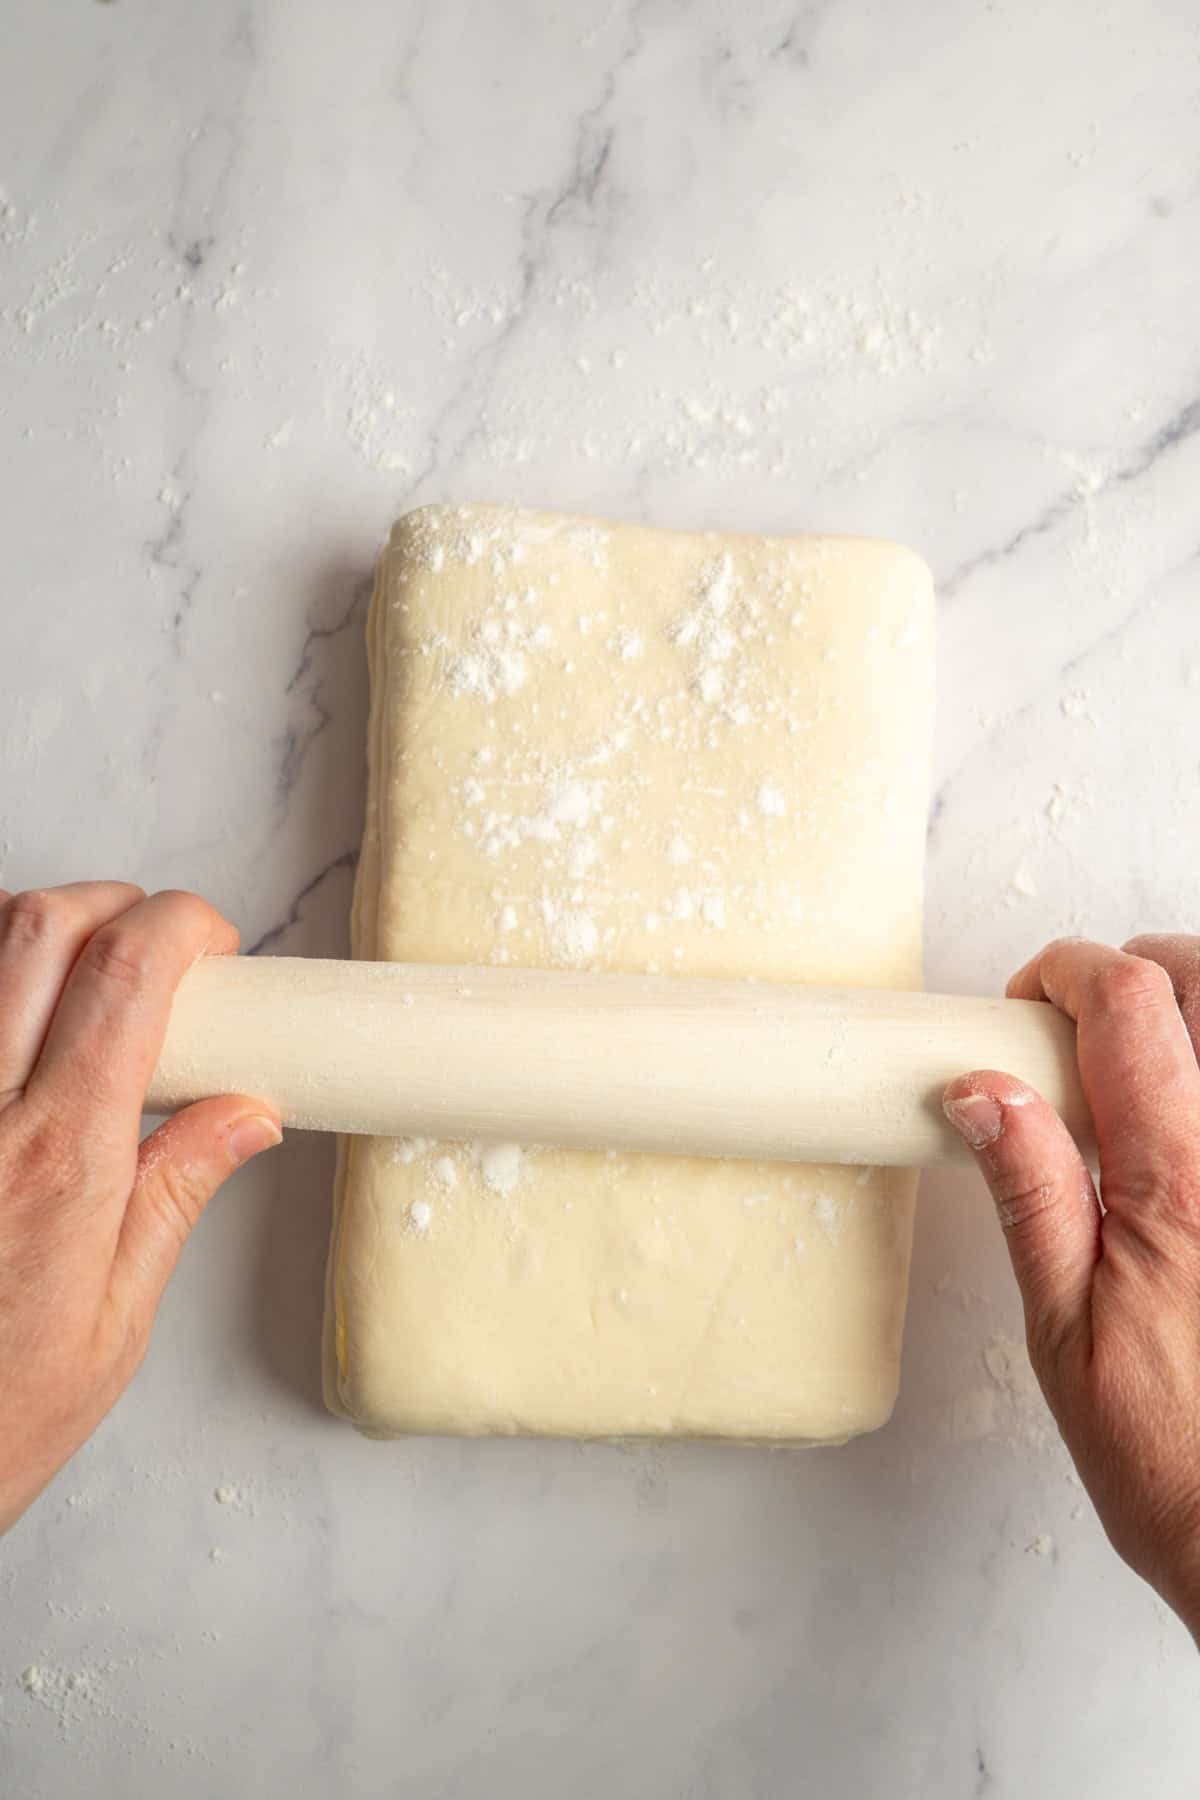
- Turn the chilled dough 90 degrees and roll it out into another rectangle, around 8mm thick. Trim off any scraggly edges to help give you more even layers later. Repeat the pamphlet fold and chill for 20 to 30 minutes.
- Repeat the rolling and folding once more. After this third fold, chill the dough for at least 2 hours, tightly covered.
Cutting and shaping
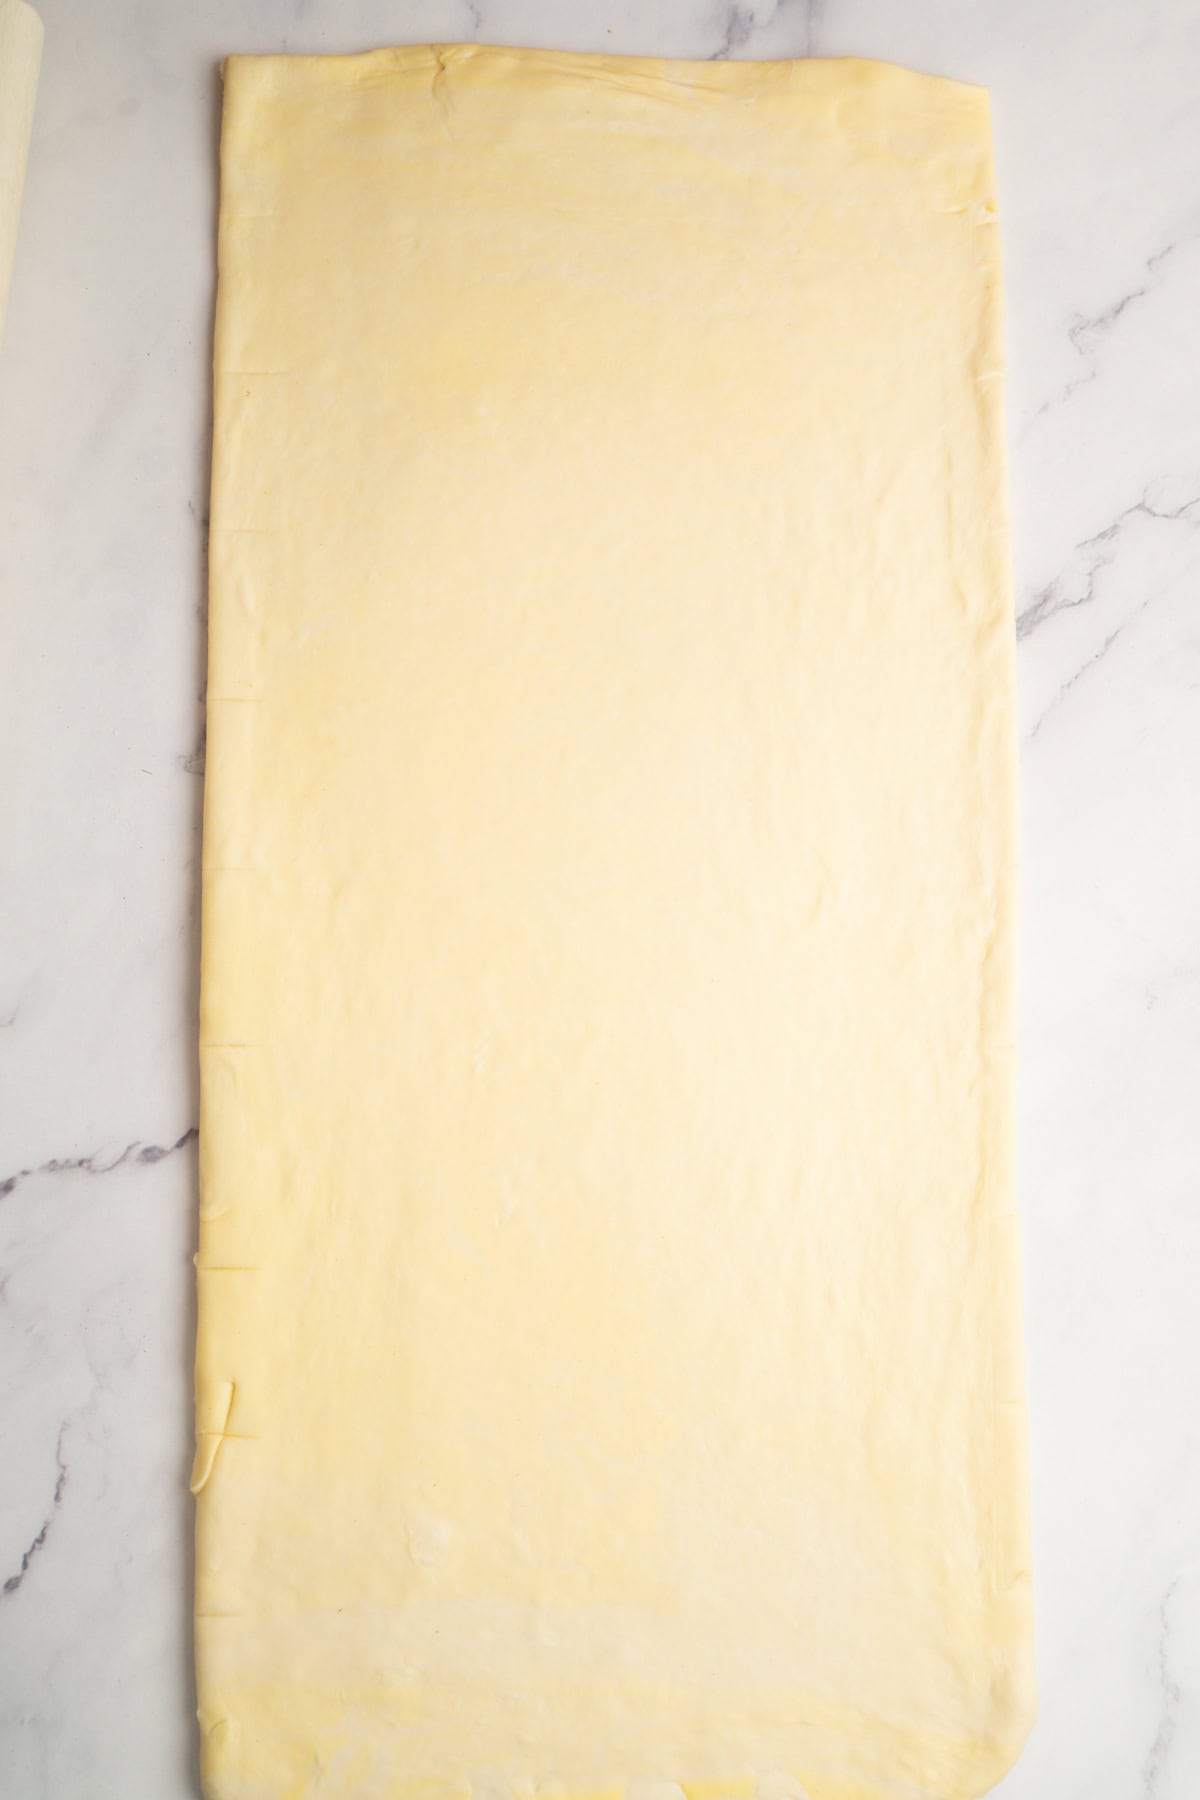
- Roll the chilled dough into a 28 x 60cm (11 x 24 inch) rectangle, around 4mm thick.
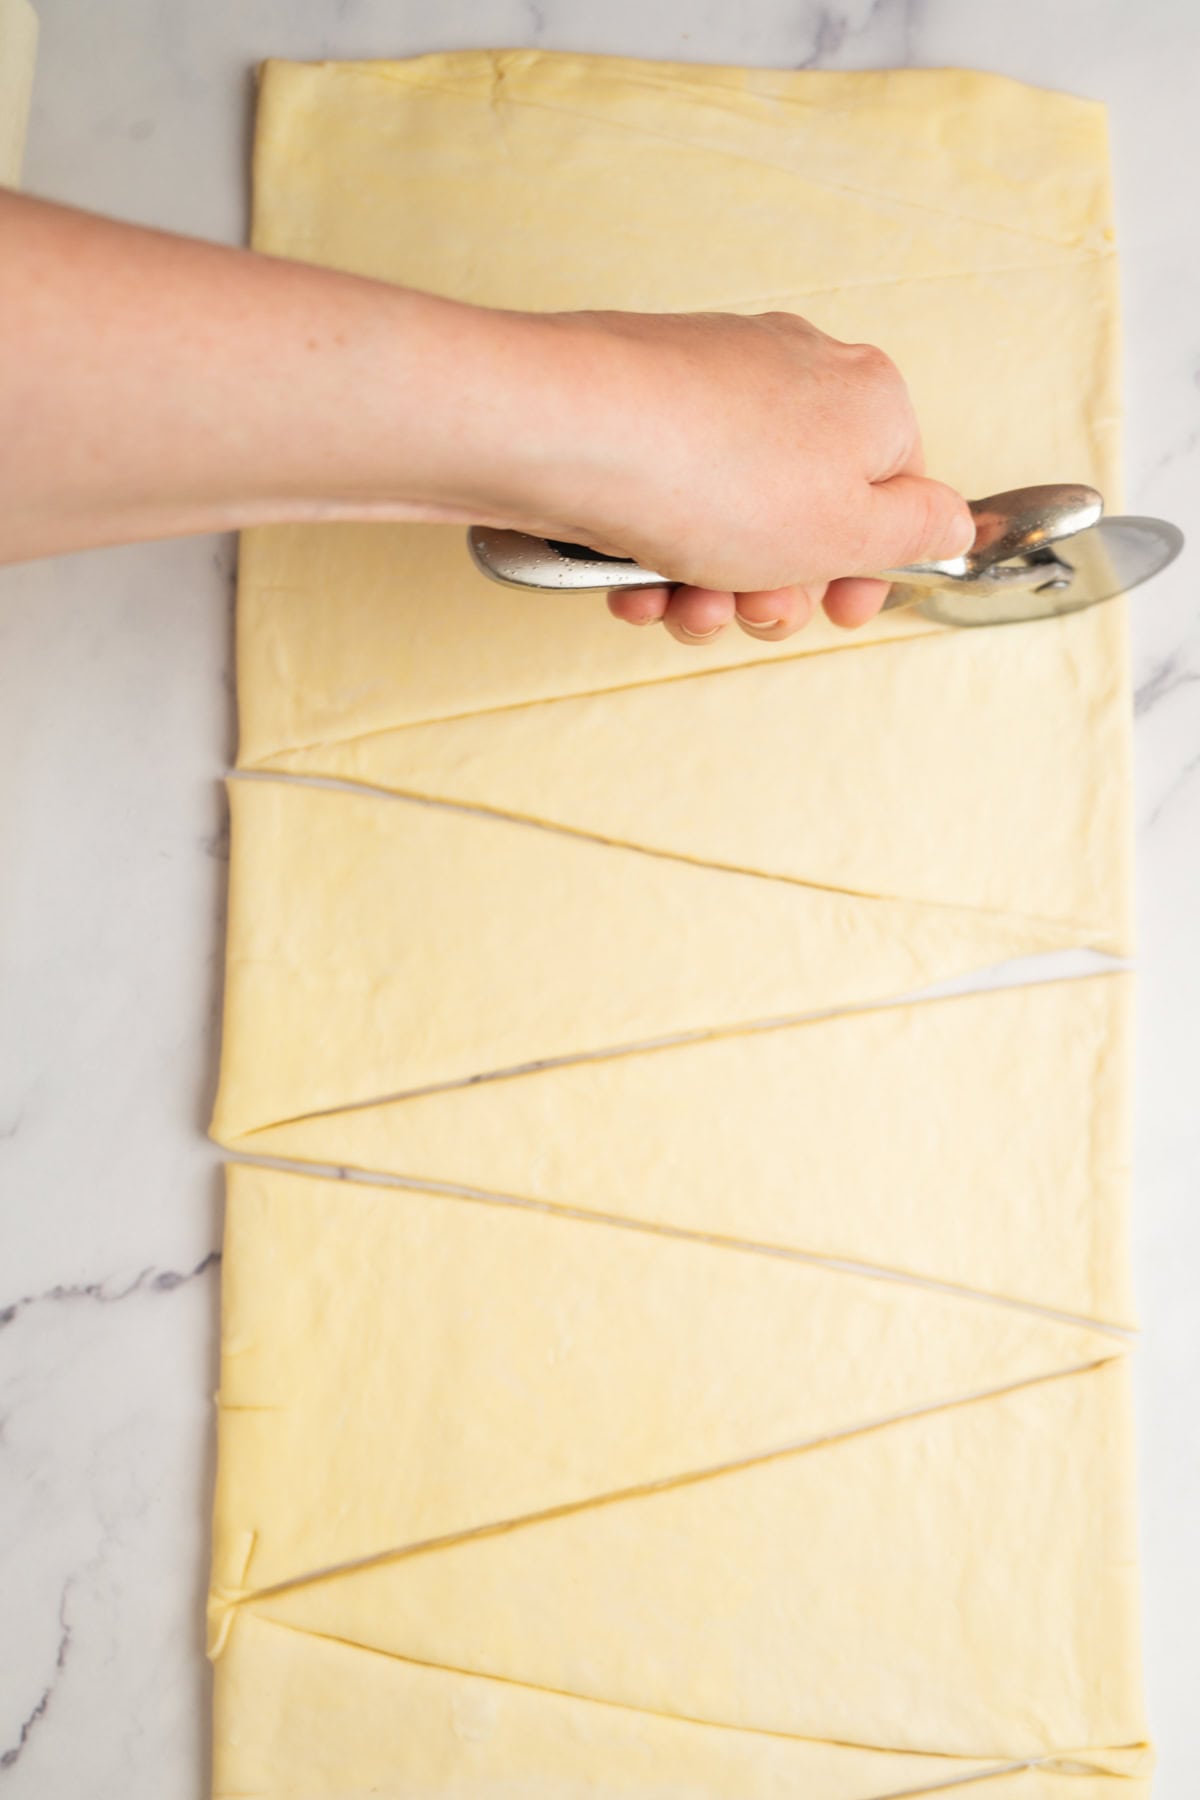
- Mark 5cm (2 inch) intervals along both long edges of the rectangle. Using a pizza cutter or large knife, cut triangles connecting the marks from top to bottom.
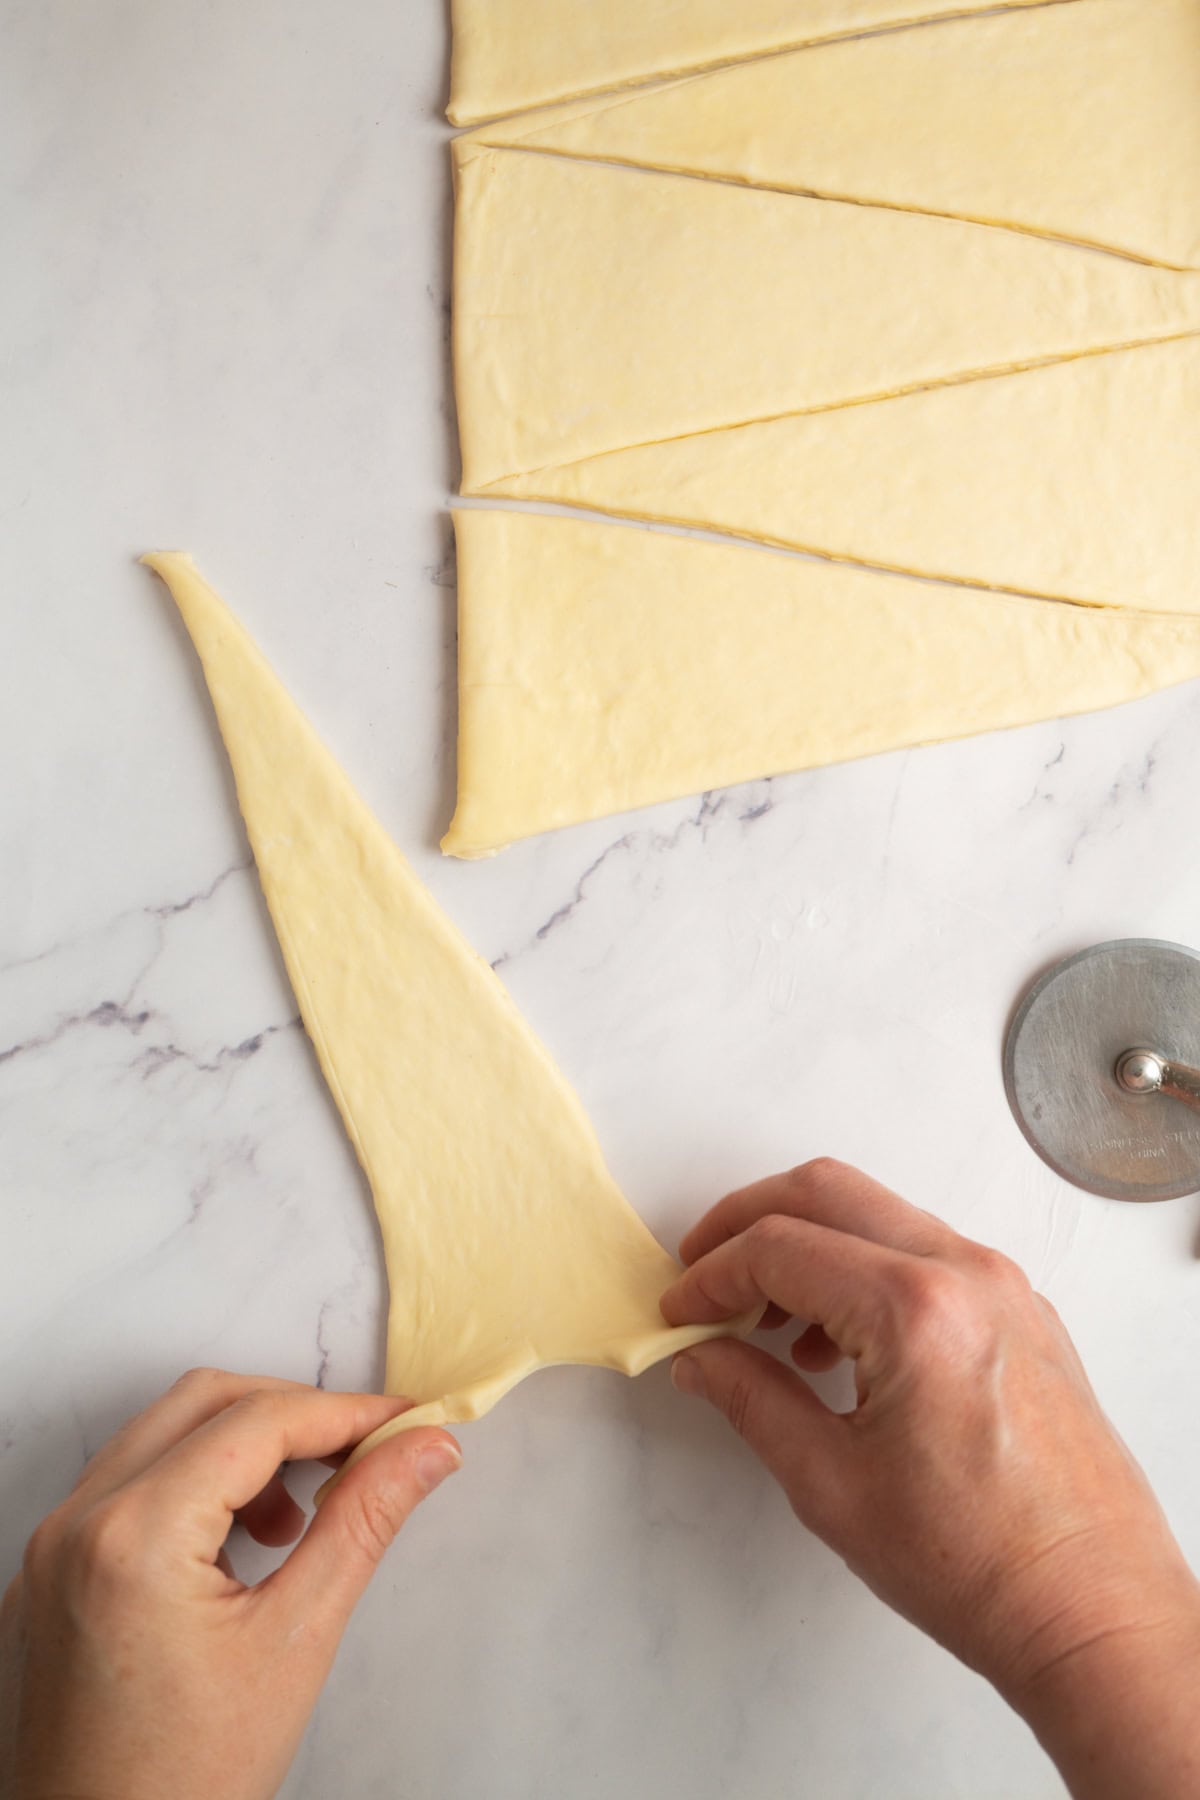
- Stretch the cut at the base of each triangle out a little.
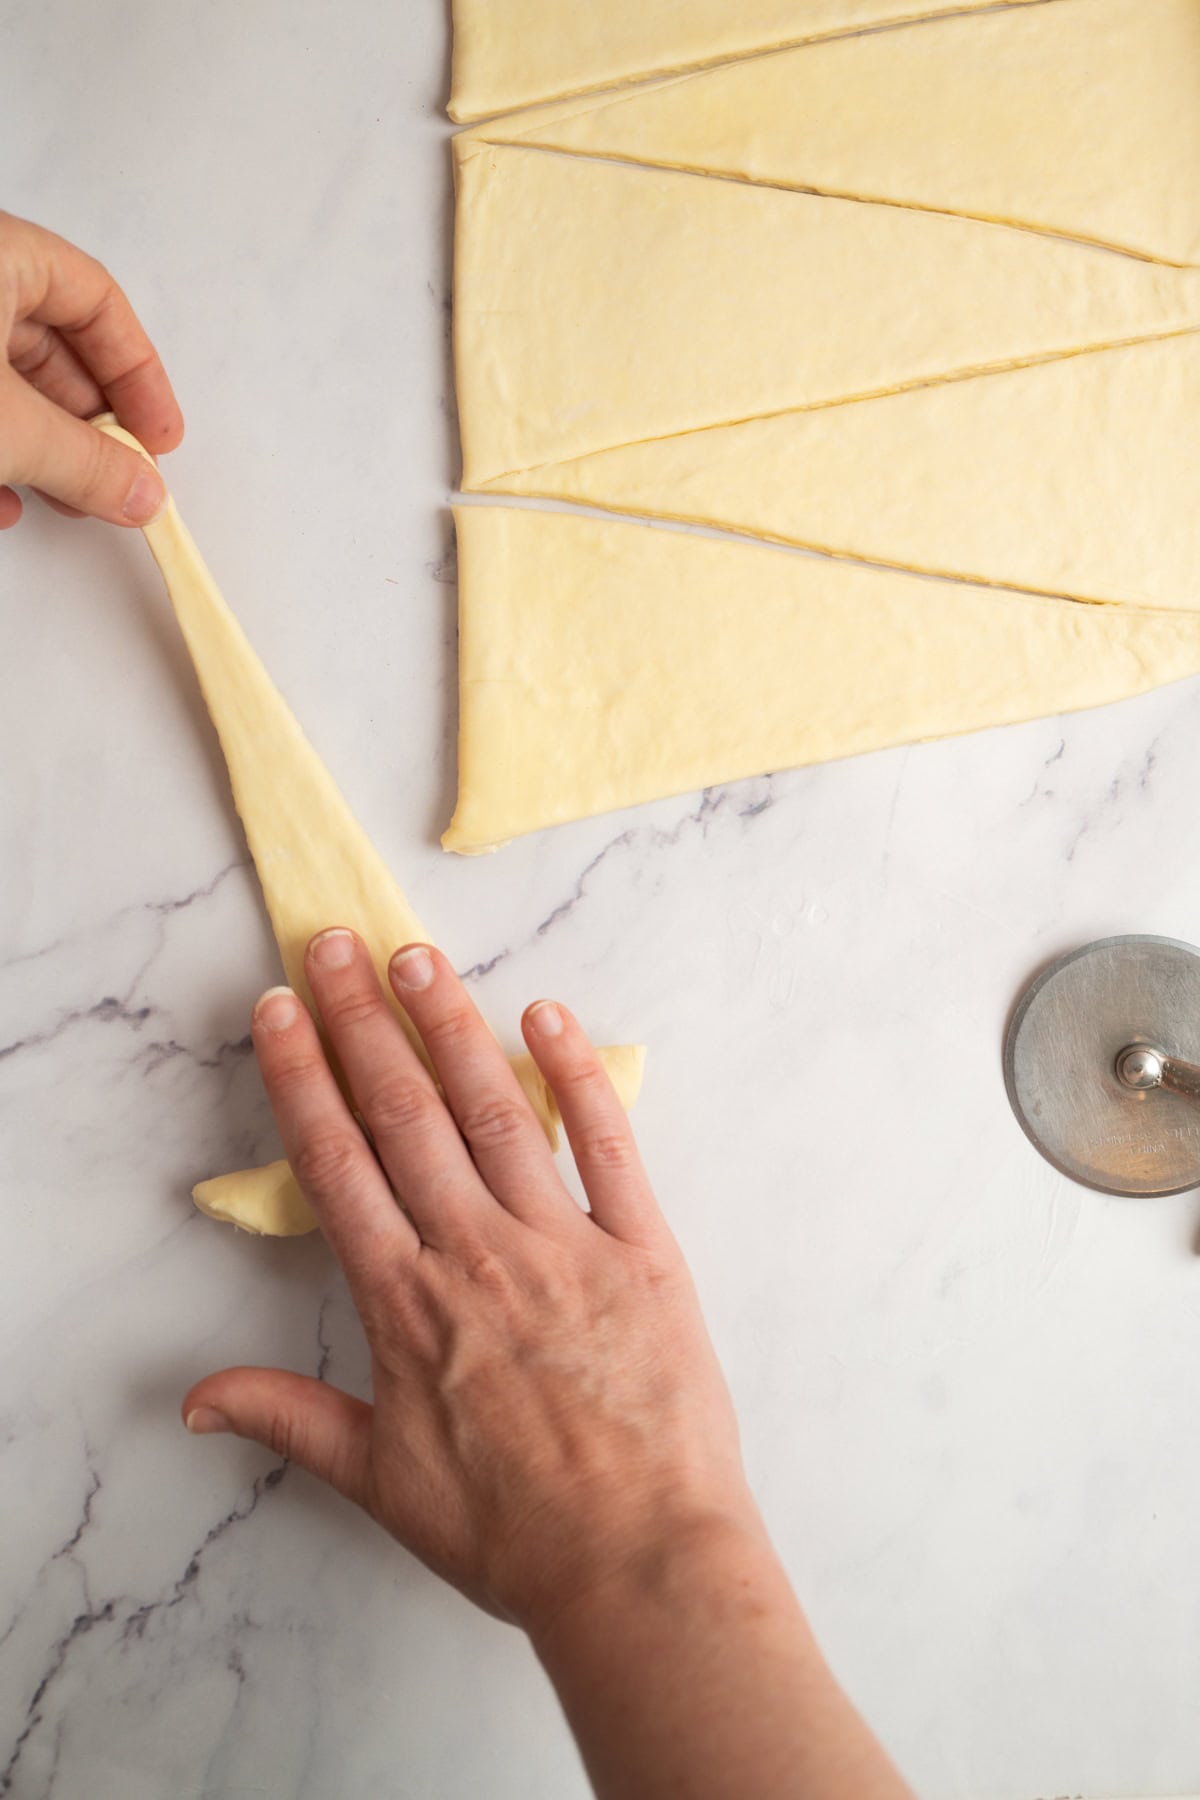
- Roll the triangle up tightly from the base to the tip.
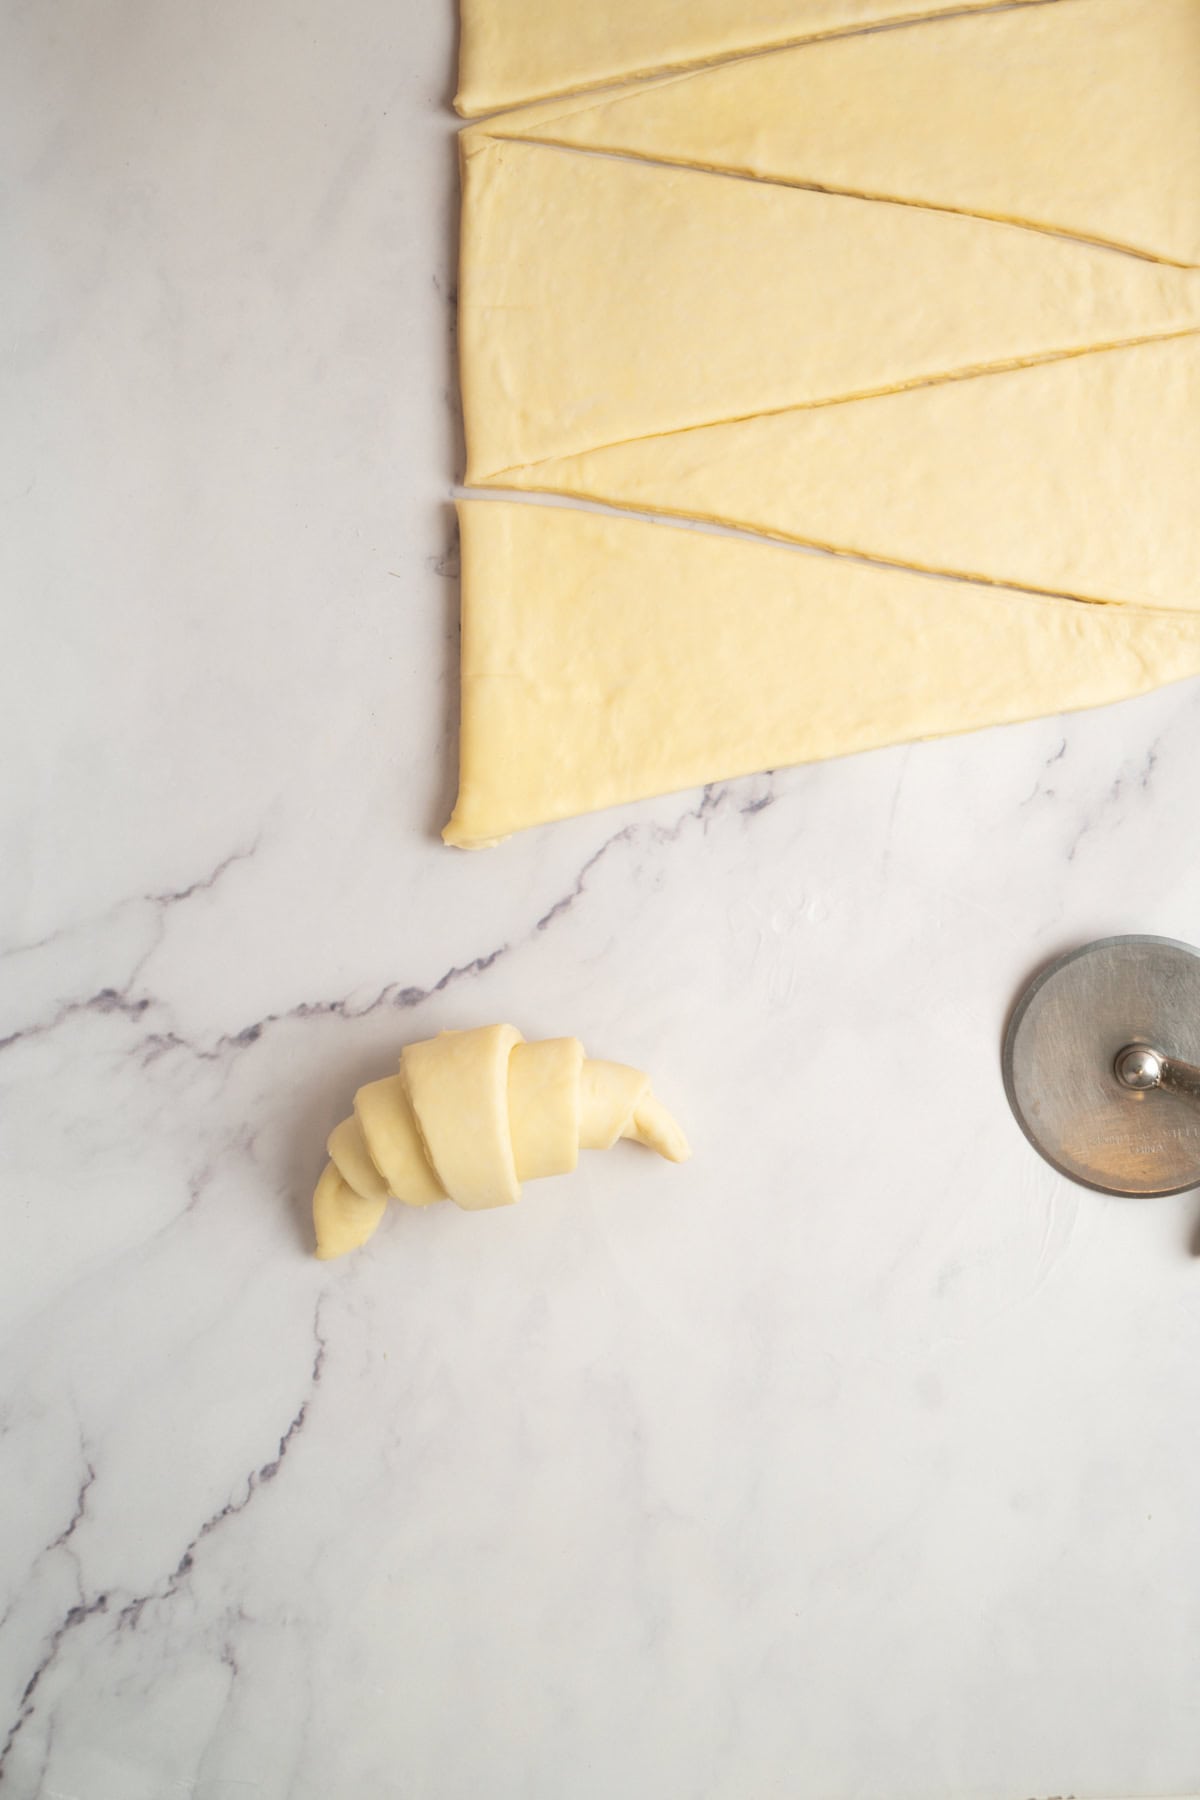
- Bend the ends in slightly to make a crescent, or leave them straight.
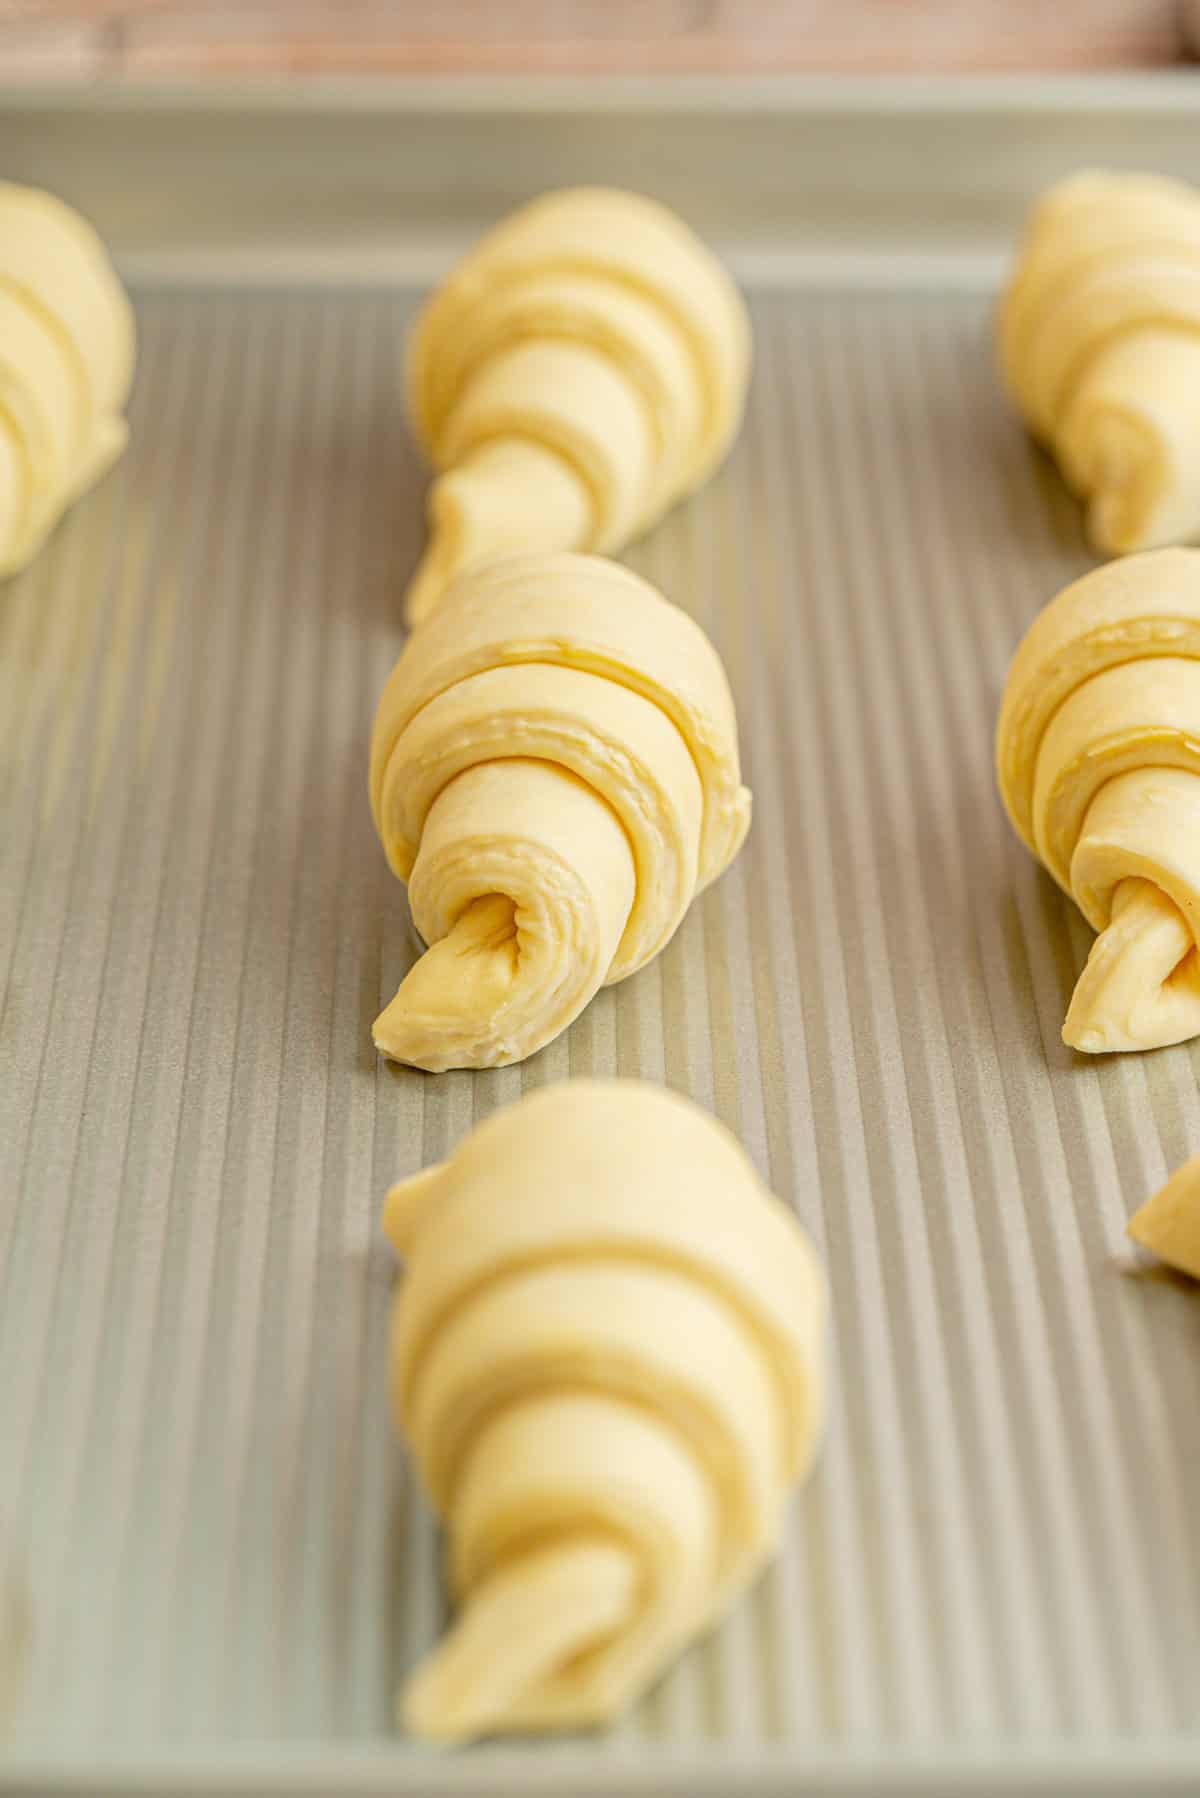
- Place the shaped croissants on parchment-lined trays and proof in a warm but not hot spot until they are puffy, lighter, and jiggle when the tray is gently shaken.
Proofing: The layers in the proofed croissants should be visible. This can take anywhere from 4 to 7 hours depending on your room temperature, so go by the look and feel of them rather than the clock. To stop them drying out, spritz them gently with water, or create a warm, humid spot by placing them in a cold, turned-off oven next to (not above) a cup of hot water. Just make sure the spot doesn’t get too hot, or the butter will melt and ruin your layers.

- Brush the proofed croissants with egg wash.

- Bake at 205°C / 400°F for around 20 minutes, until deeply browned. If they are browning too quickly, turn the oven down a little.
Tips for success

Other ways to use this dough
This same laminated dough is endlessly useful. You can turn it into:
- Sourdough pain au chocolat, with batons of dark chocolate rolled inside
- Sourdough cruffins, twisted into a muffin tin and rolled in sugar
- Sourdough Danish pastries, shaped and filled with custard, fruit, or jam
- Sourdough kouign-amann, caramelised in muffin tins with sugar
Storage and freezing
Croissants are best served fresh on the day they’re baked, and the layers will be most prominent once the croissant has cooled to room temperature before slicing.
Leftover croissants can be stored in an airtight container at room temperature for up to 4 days, or frozen for up to 3 months.
Freezing croissant dough: Freeze the croissants after shaping but before proofing. Place the shaped croissants on a tray without them touching and freeze until solid, then store in an airtight container or bag for up to 2 months. To bake later, place the frozen croissants on a lined tray and let them thaw and proof at room temperature until very puffy, light, and jiggly. This can take 4 to 7 hours depending on your room temperature. Once fully proofed, bake as normal.
FAQs about sourdough croissants

Related recipes
Try these other sourdough recipes:
- Easy sourdough focaccia
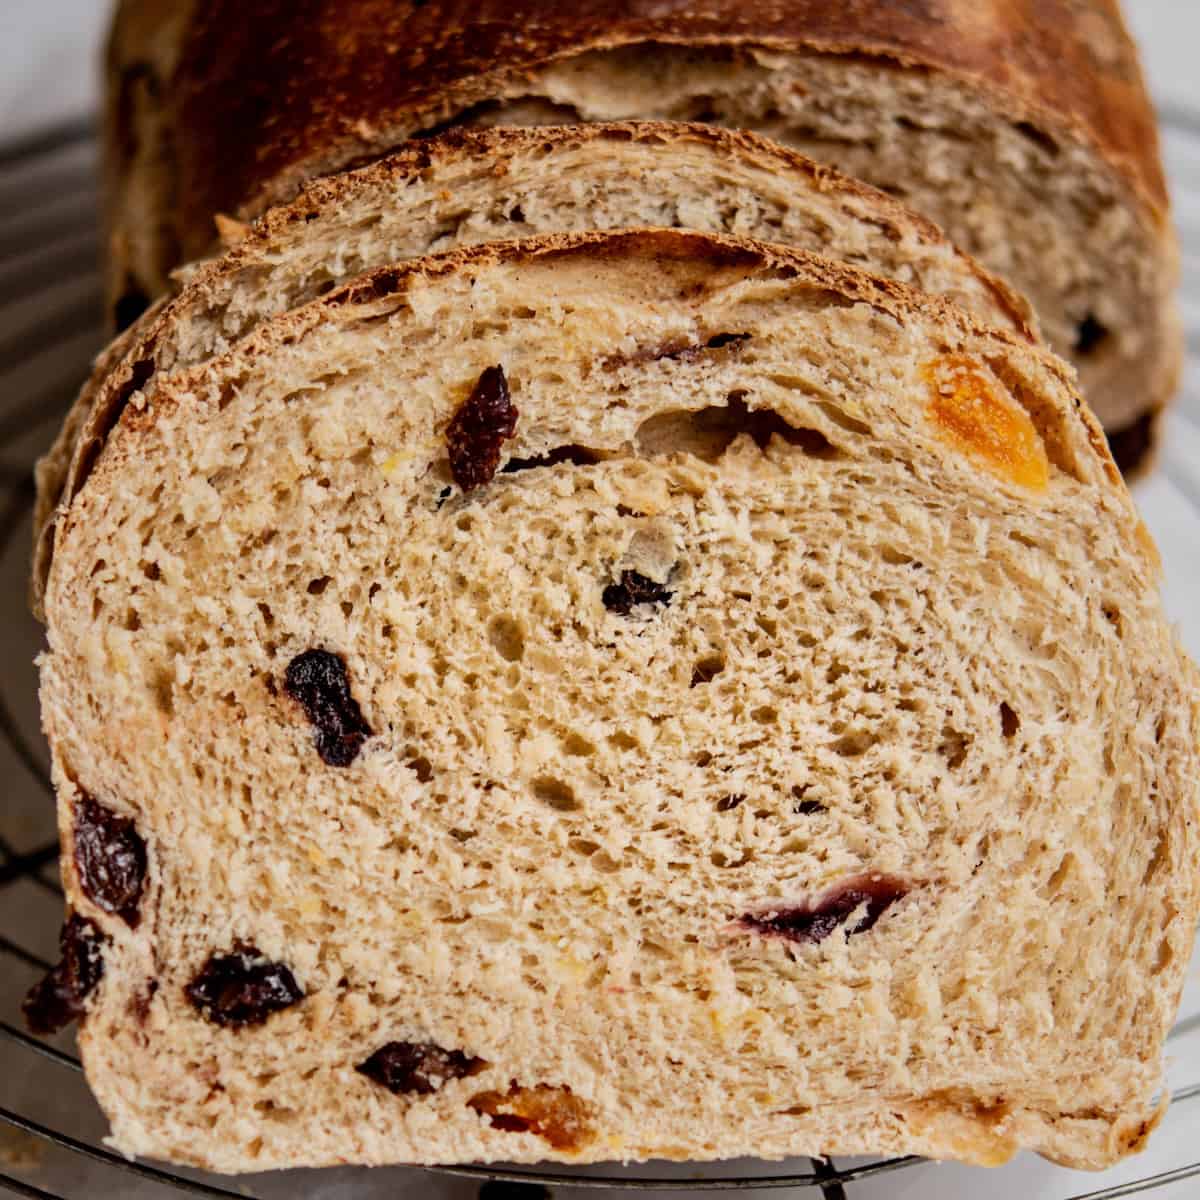
- Chocolate sourdough bread
- Sourdough garlic knots
- Sourdough cruffins
- Sourdough fougasse
Love lamination? Try this inverse puff pastry, or if you’re short on time, here’s a rough puff pastry.

Step by Step Sourdough Croissants
Ingredients
Starter
- 30 g starter
- 60 g all-purpose flour
- 60 g water
Dough Ingredients:
- 450 g all-purpose flour
- 8 g salt
- 40 g sugar
- 230 g water
- All the active sourdough starter around 140g
- 50 g unsalted butter room temperature
Butter packet:
- 250 g unsalted butter room temperature or cold depending on method used, see notes
- 1 1/2 Tablespoons all-purpose flour (only for the flour method, see notes)
Egg Wash
- 1 egg + 1 tbsp water
Instructions
Starter
- In the morning, feed your starter by combining the starter, flour, and water in a bowl and mixing until well combined. Tip it into a clean jar and leave until doubled or tripled and at peak.
The dough
- Mix all the dough ingredients together by hand to form a sticky dough ball. Knead on the bench for 5 to 8 minutes until smooth. It will still be a bit sticky, which is fine.
- Place the dough in a greased bowl and cover. Ferment for 3 hours at 23 to 25°C / 74 to 77°F (4 hours if your room is cooler), until puffed by around 30 to 40%.
- Shape the dough into a flat rectangle, wrap tightly or place in an airtight container, and chill in the fridge overnight. Shaping it into a rectangle now means less rolling tomorrow, which keeps the dough cold and relaxed for lamination.
The butter packet
- Make the butter packet using either the bashing method or the flour method (see notes). Roll it into a rectangle of about 15 x 20cm (6 x 8 inch) between two sheets of baking paper, then chill it in the fridge.
Encasing the butter
- Take the butter packet from the fridge and bash it firmly all over with the rolling pin, then give it a roll to bring it into a workable, bendy state. Bashing the cold butter with the rolling pin works the fat into a smooth, pliable state without warming it, so it bends like cold clay instead of cracking.
- On a floured bench, roll the chilled dough into a 20 x 40cm (8 x 16 inch) rectangle. Place the butter packet in the middle. Bring the top of the dough down and the bottom up to meet in the middle over the butter, then pinch the seam where they meet to seal.
- Make a shallow slit along each of the folded long edges (the closed sides where the butter is sealed in, not the open ends), to relieve the tension. Then turn the dough a quarter turn.
Fold 1
- Gently press along the length of the dough with the rolling pin to start dispersing the butter, then roll out to around 8mm thick, focusing on lengthening rather than widening. Always roll in one direction, away from you, lifting the pin and starting again rather than rolling back and forth, which smears the butter. Dust with flour if it sticks.
- Brush off any excess flour, then fold the dough like a pamphlet, bringing the top third down to the middle and the bottom third up over the top. Wrap tightly and chill for 30 minutes.
Fold 2 and 3
- Turn the chilled dough 90 degrees and roll out again to around 8mm thick. Trim off any scraggly edges for more even layers. Brush off excess flour, repeat the pamphlet fold, and chill for 20 to 30 minutes.
- Repeat the rolling and folding once more. After this third fold, chill the dough, tightly covered, for at least 2 hours.
Cutting and shaping
- Roll the chilled dough into a 28 x 60cm (11 x 24 inch) rectangle, around 4mm thick.
- Mark 5cm (2 inch) intervals along both long edges. Using a pizza cutter or large knife, cut triangles connecting the marks from top to bottom. A ruler helps keep your lines straight.
- Stretch the base of each triangle out a little, then roll up tightly from the base to the tip. Bend the ends in slightly to make a crescent, or leave them straight.
- Place the shaped croissants on parchment-lined trays and proof in a warm but not hot spot until puffy, lighter, and jiggly when the tray is gently shaken, with visible layers. This can take 4 to 7 hours depending on your room temperature, so go by the look and feel rather than the clock.
- To stop them drying out, spritz them gently with water or create a warm, humid spot by placing them in a cold, turned-off oven next to a cup of hot water. Don't put the cup directly under the croissant tray, and don't let the spot get too hot, or the butter will melt and ruin the layers.
Baking
- Brush the proofed croissants with egg wash.
- Bake at 205°C / 400°F for around 20 minutes, until deeply browned. If they brown too quickly, turn the oven down a little.
- Let them cool to room temperature before slicing, so the layers stay nice and distinct.
Notes
Baker’s schedule ( 2 ways)
Schedule 1 (laminate day 2): Feed the starter in the morning of day 1 and let it peak (around 6 hours). Mix and ferment the dough, then chill it overnight. Day 2, make the butter packet, laminate with three folds (30-minute chills between), chill 2 hours, then shape, proof, and bake. Schedule 2 (laminate day 1, my preferred): Feed the starter the night before so it’s peaked by morning. Mix and ferment the dough, chill 2 to 3 hours, then laminate with all three folds the same afternoon and rest the laminated dough overnight. Day 2 is just shape, proof, and bake, so you get fresh croissants by lunchtime.The butter packet, two methods:
For the bashing method (my preference), slice cold butter, lay it on baking paper, fold the paper into a 15 x 20cm frame, and bash and roll with a rolling pin to fill it evenly. This gives cleaner, more defined layers. Place it in the fridge to firm back up. For the flour method, mix 250g room temperature butter with 1½ tablespoons flour until smooth, then roll into the same size rectangle. Place it in the fridge to firm back up.Tips
-
- Keep everything cold. Cold butter is what gives croissants their flaky layers. When you bash the butter packet to make it bendy, you’re working it into a pliable state, not warming it. It should stay cold the whole time, just bendy enough to roll out with the dough. If the butter or dough ever feels soft, greasy, or sticky during lamination, chill it for 20 to 30 minutes before continuing. If butter melts into the dough at any stage, from lamination through to proofing, you’ll get a bread-like texture with no layers.
- Roll in one direction. Always roll away from you and lift the pin to start again. Rolling back and forth smears the butter rather than keeping it in clean sheets.
- Underproofed croissants leak a lot of butter in the oven and can be gummy and look undercooked inside. Make sure they are genuinely puffy and jiggly before baking.
- Freezing: Freeze the croissants after shaping but before proofing. Place them on a tray without touching and freeze until solid, then store in a bag for up to 2 months. To bake, place from frozen on a lined tray and let thaw and proof at room temperature until very puffy and jiggly (4 to 7 hours), then egg wash and bake as normal.
- Storage: Best on the day they’re baked. Store leftovers in an airtight container at room temperature for up to 4 days, or freeze baked croissants for up to 3 months.


My dough is not coming together into a ball after 8 minutes in the mixer. It is still VERY sticky and wet. Am I safe to add more flour bit by bit? Thank you in advance!!
hey! yup go ahead and a tablespoon at a time if needed 🙂
Hi Eileen,
Can I suggest as an old video producer that your videos would really benefit from better audio. This would mean a lavalier or neck mic for yourself which is plugged into your camera. There are lots of options out there – but it would make a huge difference to the overall presentation. Using only a camera mic means your audio is very echoey and difficult to understand.
Thanks
I have tried other sourdough croissant recipes with little success, the timing on everything with this recipe was perfect, I got the most airy crisp flaky croissants ever!
Love croissants. Love using my sourdough starter for homemade things.
Can this recipe be doubled?
Yes it can
How do you refrigerate these? Do they need to be covered? Or will they dry out?
Hey yes I cover with a damp, light kitchen towel, or I put them in a large container with a lid
This recipe is incredible. I’ve made it twice in the past few days, and it came out perfectly both times. I had always heard that 100% sourdough croissants didn’t rise well and thus needed a small amount of yeast. But these rose equally as high as any yeast croissant I’ve ever made: airy, perfectly flaky with a shatteringly crisp exterior…plus a depth of flavor that is a perfect backdrop to their butteriness. Elien, thank you so much for developing this recipe and sharing it!
Thank you so much for this wonderful feedback!! It’s so lovely to read! ☺️
How do you bake them from frozen?
If they were proofed before freezing, you can simply bake them from frozen and add on a couple of extra minutes bake time if needed 🙂
I have been on a quest to make a perfect croissants for years! With this recipe I finally did it! Best croissants I’ve ever made or had!!
It’s a pity I can’t post a picture of my pretty little rolls – putting them in the oven now – hold thumbs