Easy Sourdough Fougasse Recipe
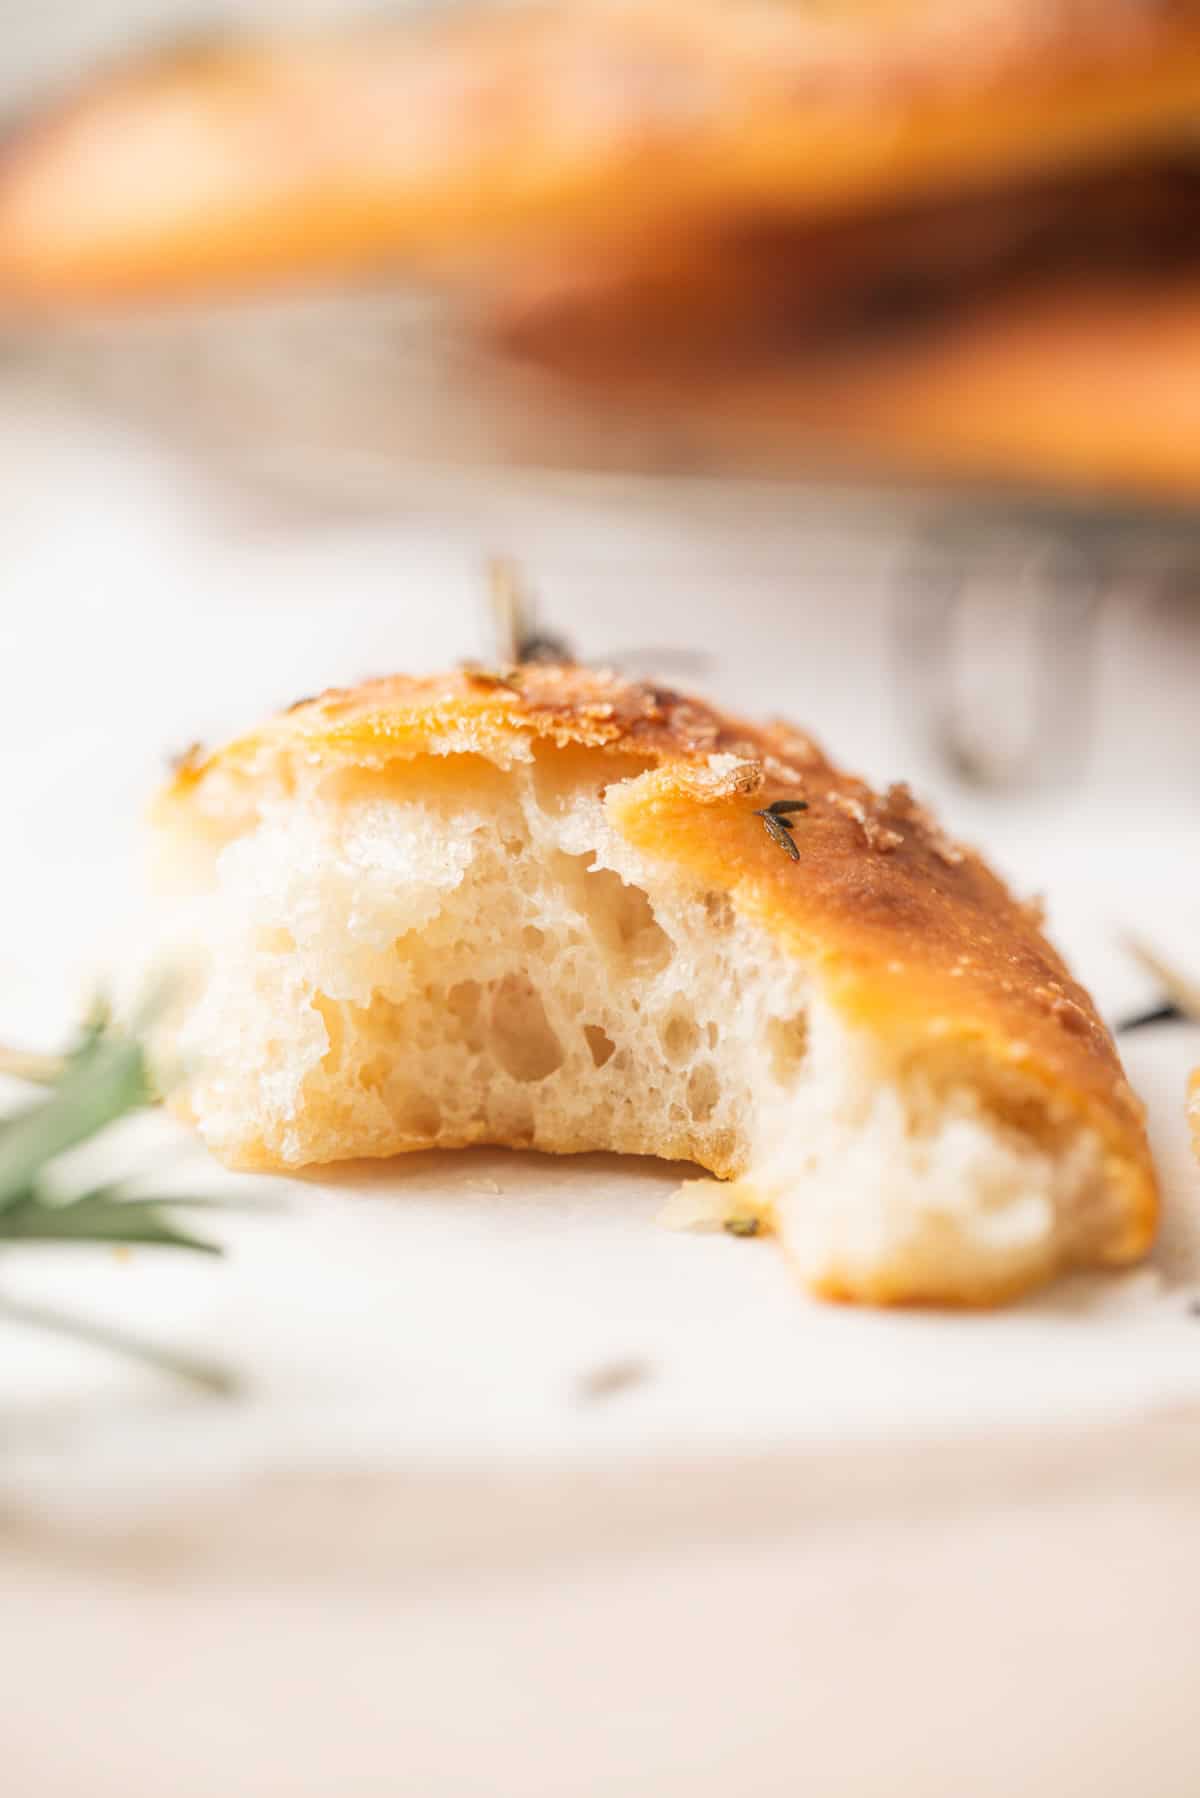
This easy sourdough fougasse recipe is baked until it’s deep golden and crispy on the outside with a chewy open crumb on the inside. It’s topped with fresh herbs, salt and a generous helping of olive oil. This recipe makes two fougasse.

About this recipe
This is a naturally leavened fougsse that’s made with sourdough starter and no commercial yeast. It’s made up of a lean bread dough that’s around 74% hydration. It’s not too wet to work with but it has enough water to make a nice open crumb. It’s similar in taste to focaccia, but with a lower hydration so that the dough can be cut and baked free-form on a tray and not in a pan. The dough is cut right through the middle a few times which means that when it bakes, you get more crispy edge pieces that fry in the oven in olive oil. I have increased the dough amount in this recipe and divide it into two breads and bake one per tray. I bake them one at a time so that each bread gets the full heat of the oven to crisp up properly.
Baker’s schedule
Here is a baker’s schedule with two options to outline the process involved. The exact timings can be tweaked to suit your own schedule.
Same day sourdough fougasse will have a more subtle sourdough tang. The flavour profile of the fougasse is increased with an overnight ferment.
Option 1: Same day
- The night before: feed your sourdough starter
- 8:30am: mix flour and water, autolyse 30 minutes
- 9:00am: add starter, salt and oil. Knead until smooth
- 9:30am and 10:00am: one set of stretch and folds each
- 10:00am to 1:00pm: bulk ferment until risen by 40 to 50%
- 1:00pm: divide in two and pre-shape into rounds, rest 30 minutes
- 1:30pm: shape both fougasse, then final proof 1-2 hours until puffy
- 3:00pm: top with herbs, oil and salt. Bake one at a time
Option 2: Overnight cold ferment
- 10:00am: feed your sourdough starter
- 3:30pm: mix flour and water, autolyse 30 minutes
- 4:00pm: add starter, salt and oil. Knead until smooth
- 4:30pm and 5:00pm: one set of stretch and folds each
- 5:00pm to 8:00pm: bulk ferment until risen by around 40%
- 8:00pm: cover and refrigerate overnight
- 9:00am next day: divide and pre-shape the cold dough, rest 30 minutes
- 9:30am: shape both, then final proof 2 to 3 hours until puffy
- 12:30pm: top and bake one at a time
Method
- Mix together your sourdough starter so it’s ready when you need it.
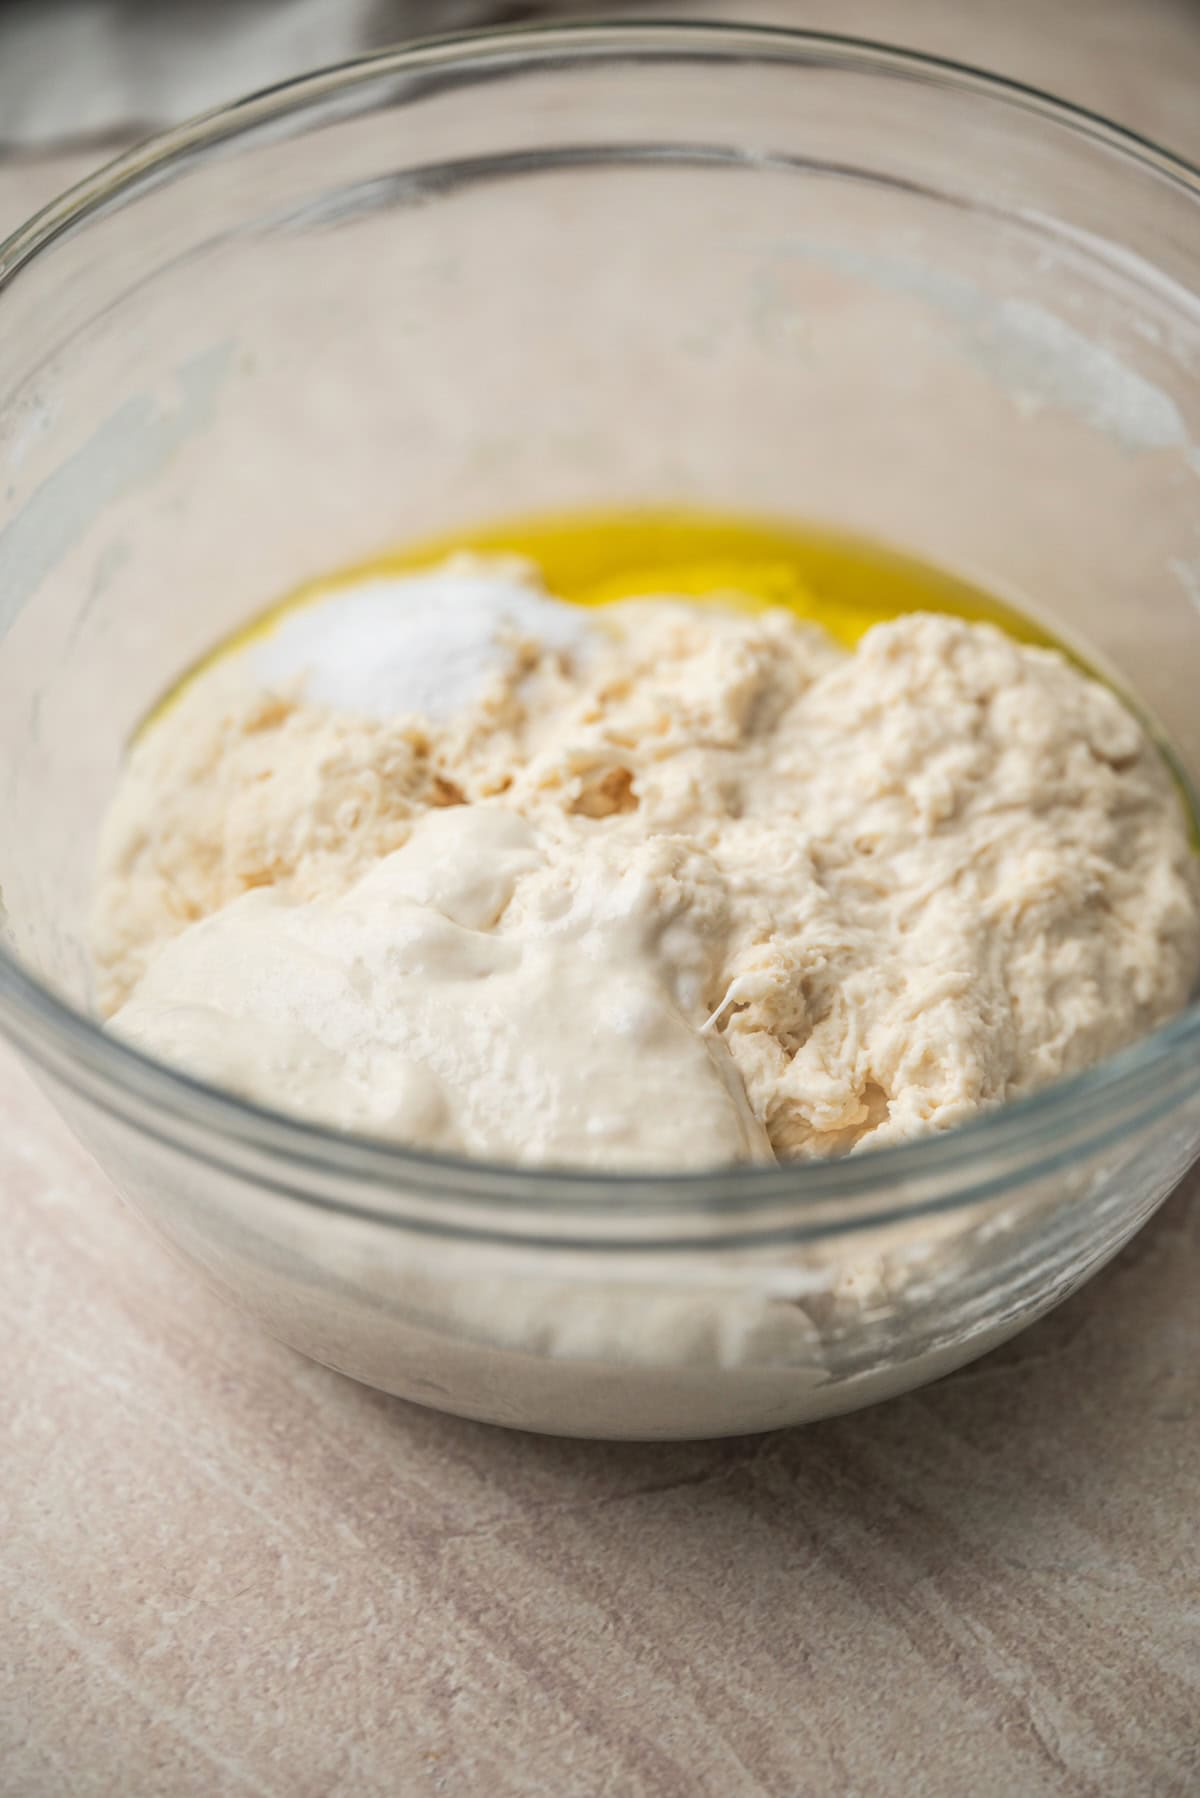
- Add the ripe starter, salt and olive oil. Use wet hands or a fork to squeeze and fold everything together until it’s a cohesive, sticky dough. Mix it in the bowl for 5 minutes to start forming the gluten, then let it rest.
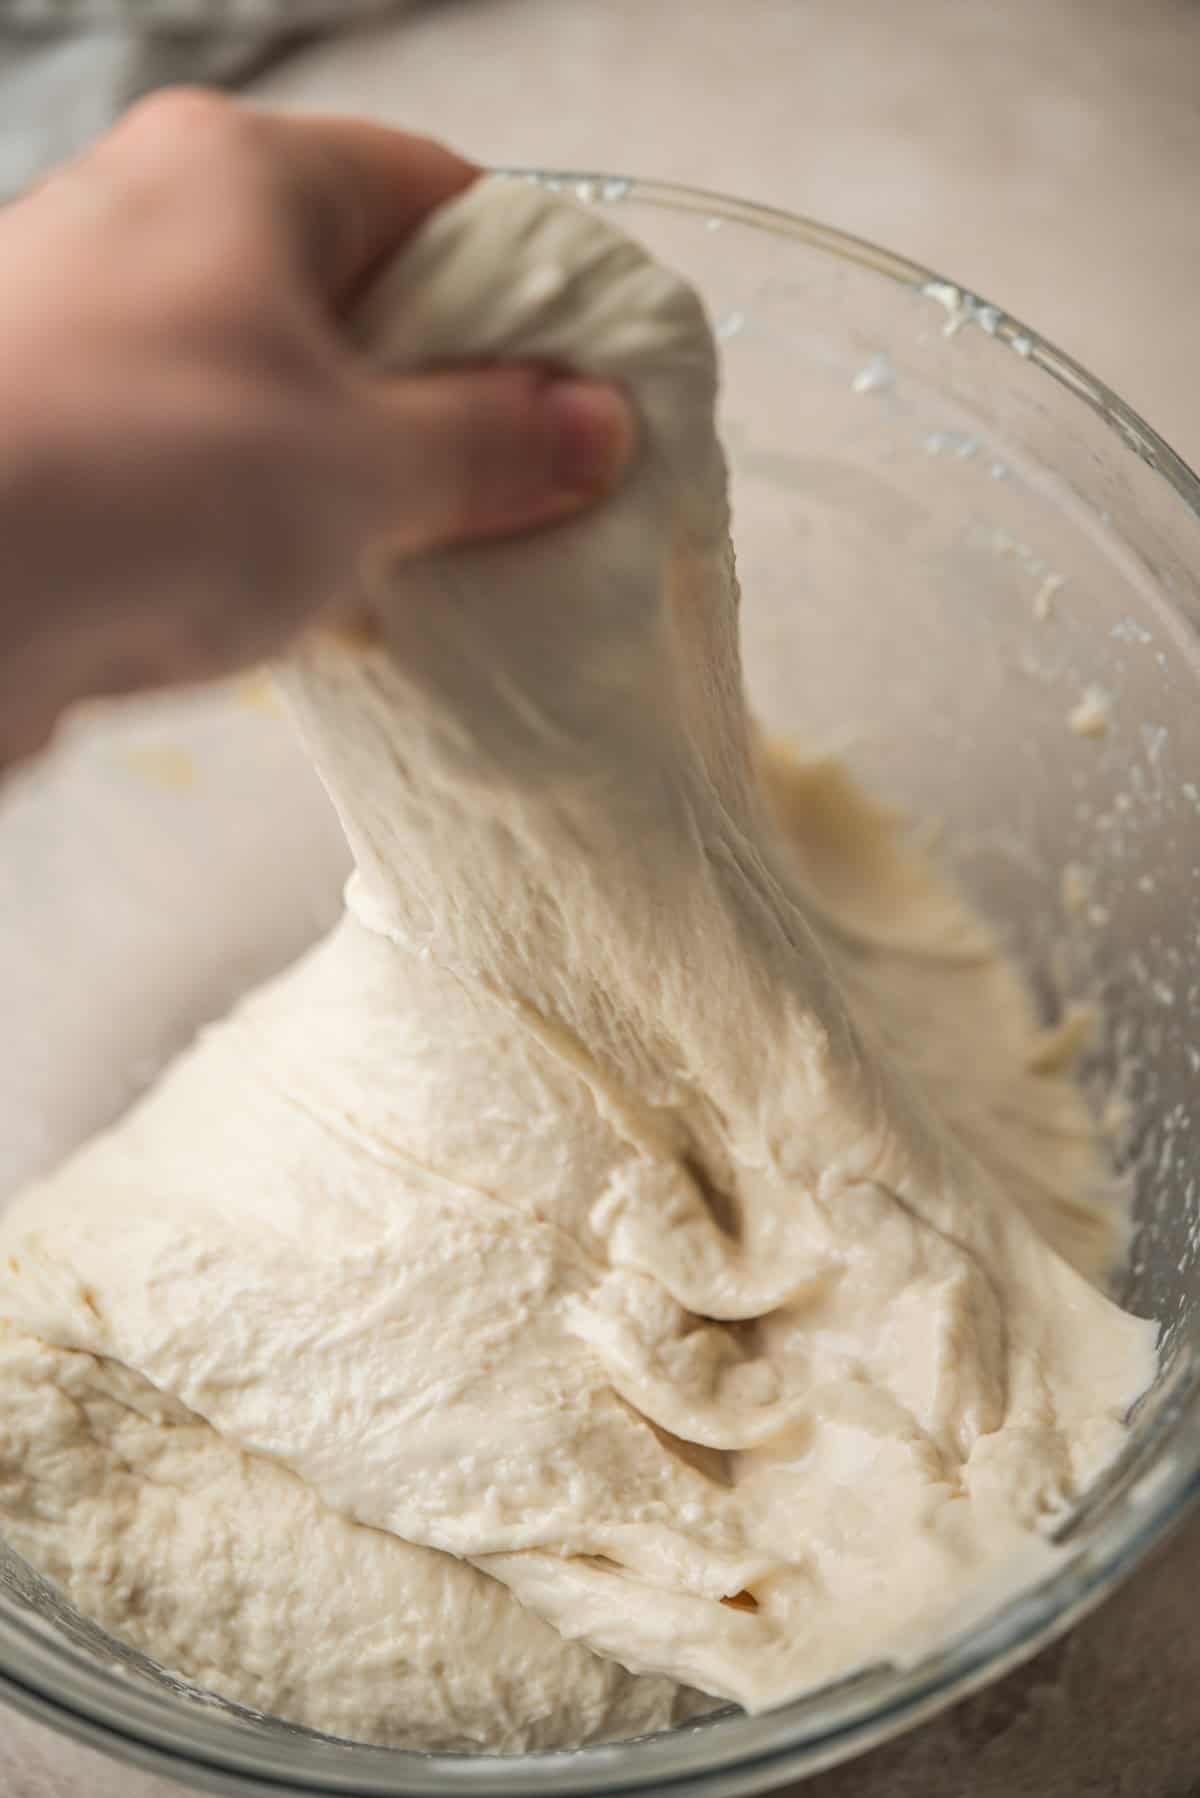
- Over the next hour, do 2 sets of stretch and folds every 30 minutes. Wet your hand, grab an edge of the dough, stretch it up and fold it over the centre, then rotate the bowl and repeat three or four times.
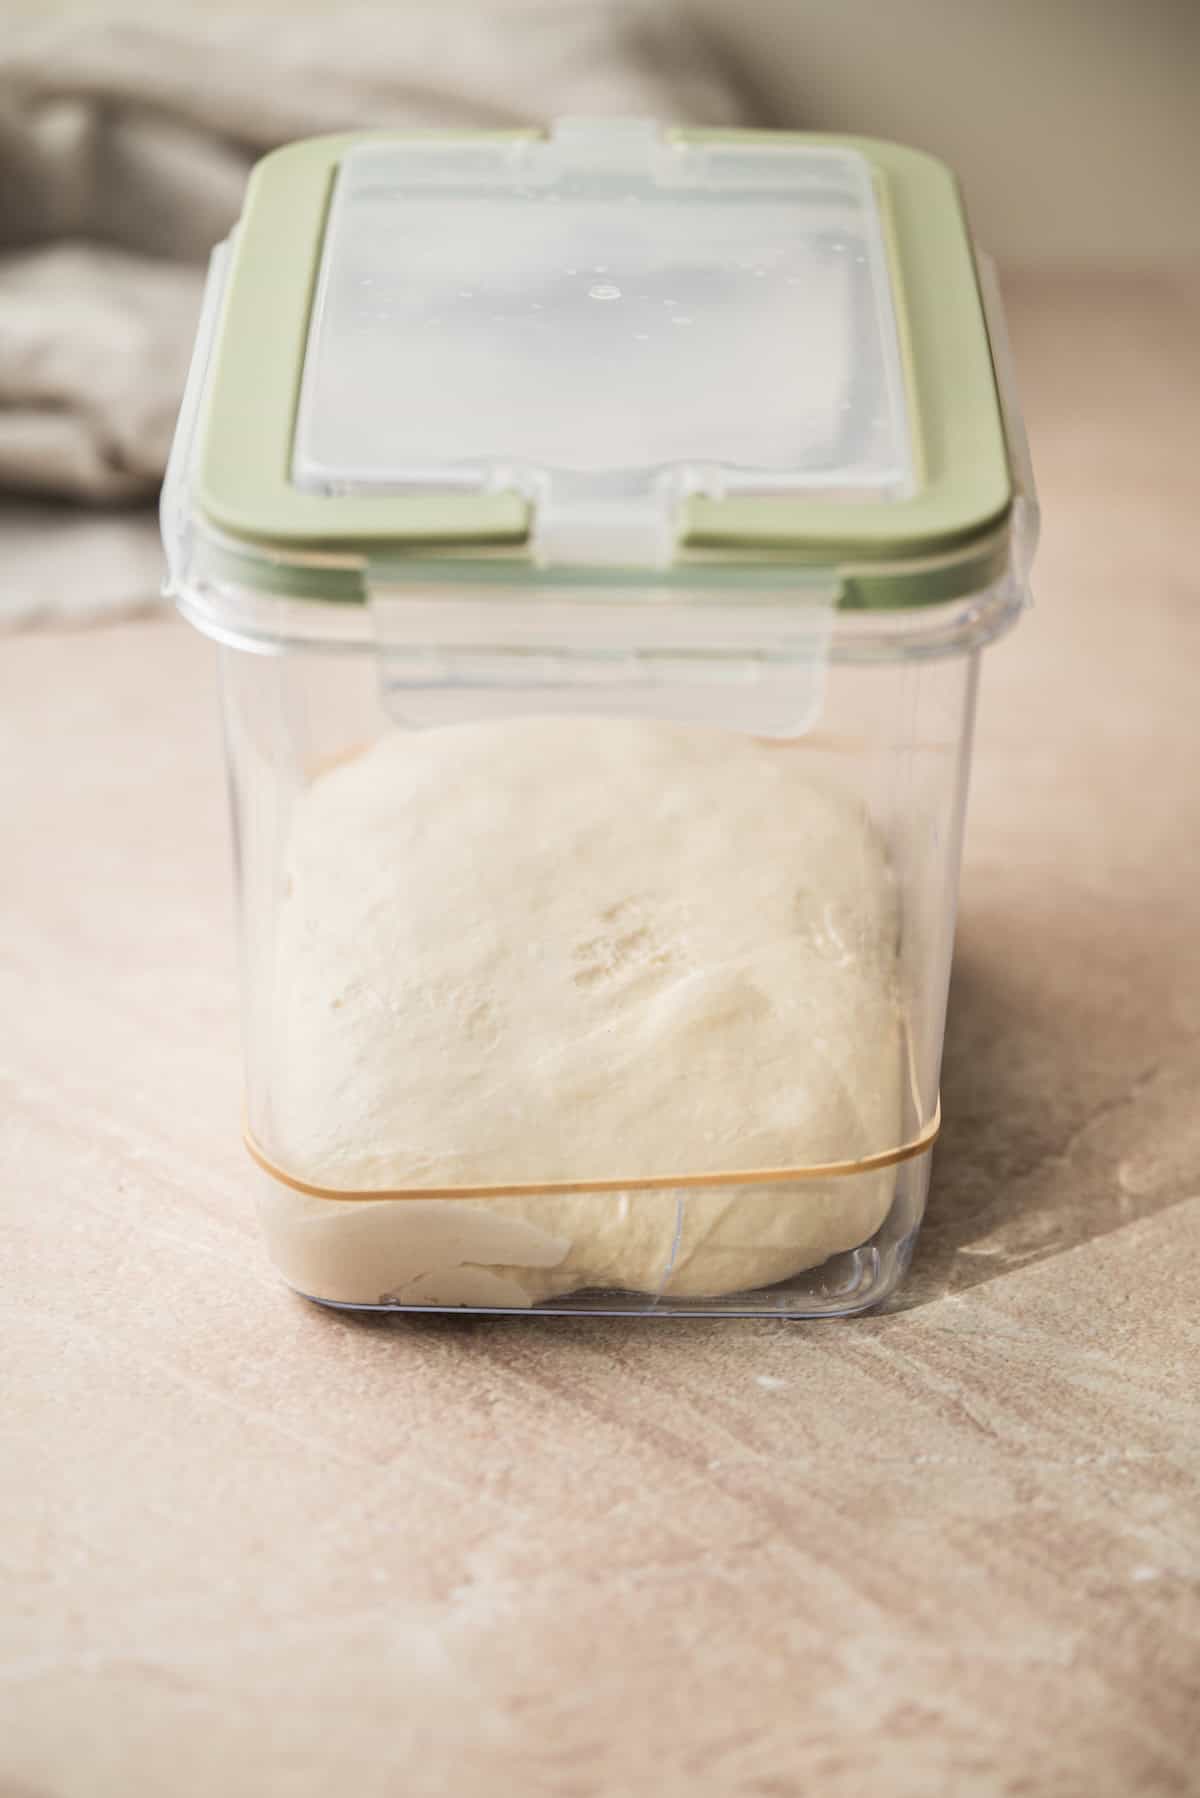
- Place the dough in a covered container and it bulk ferment in a warm spot for 2-3 hours until risen by 30 to 40%.
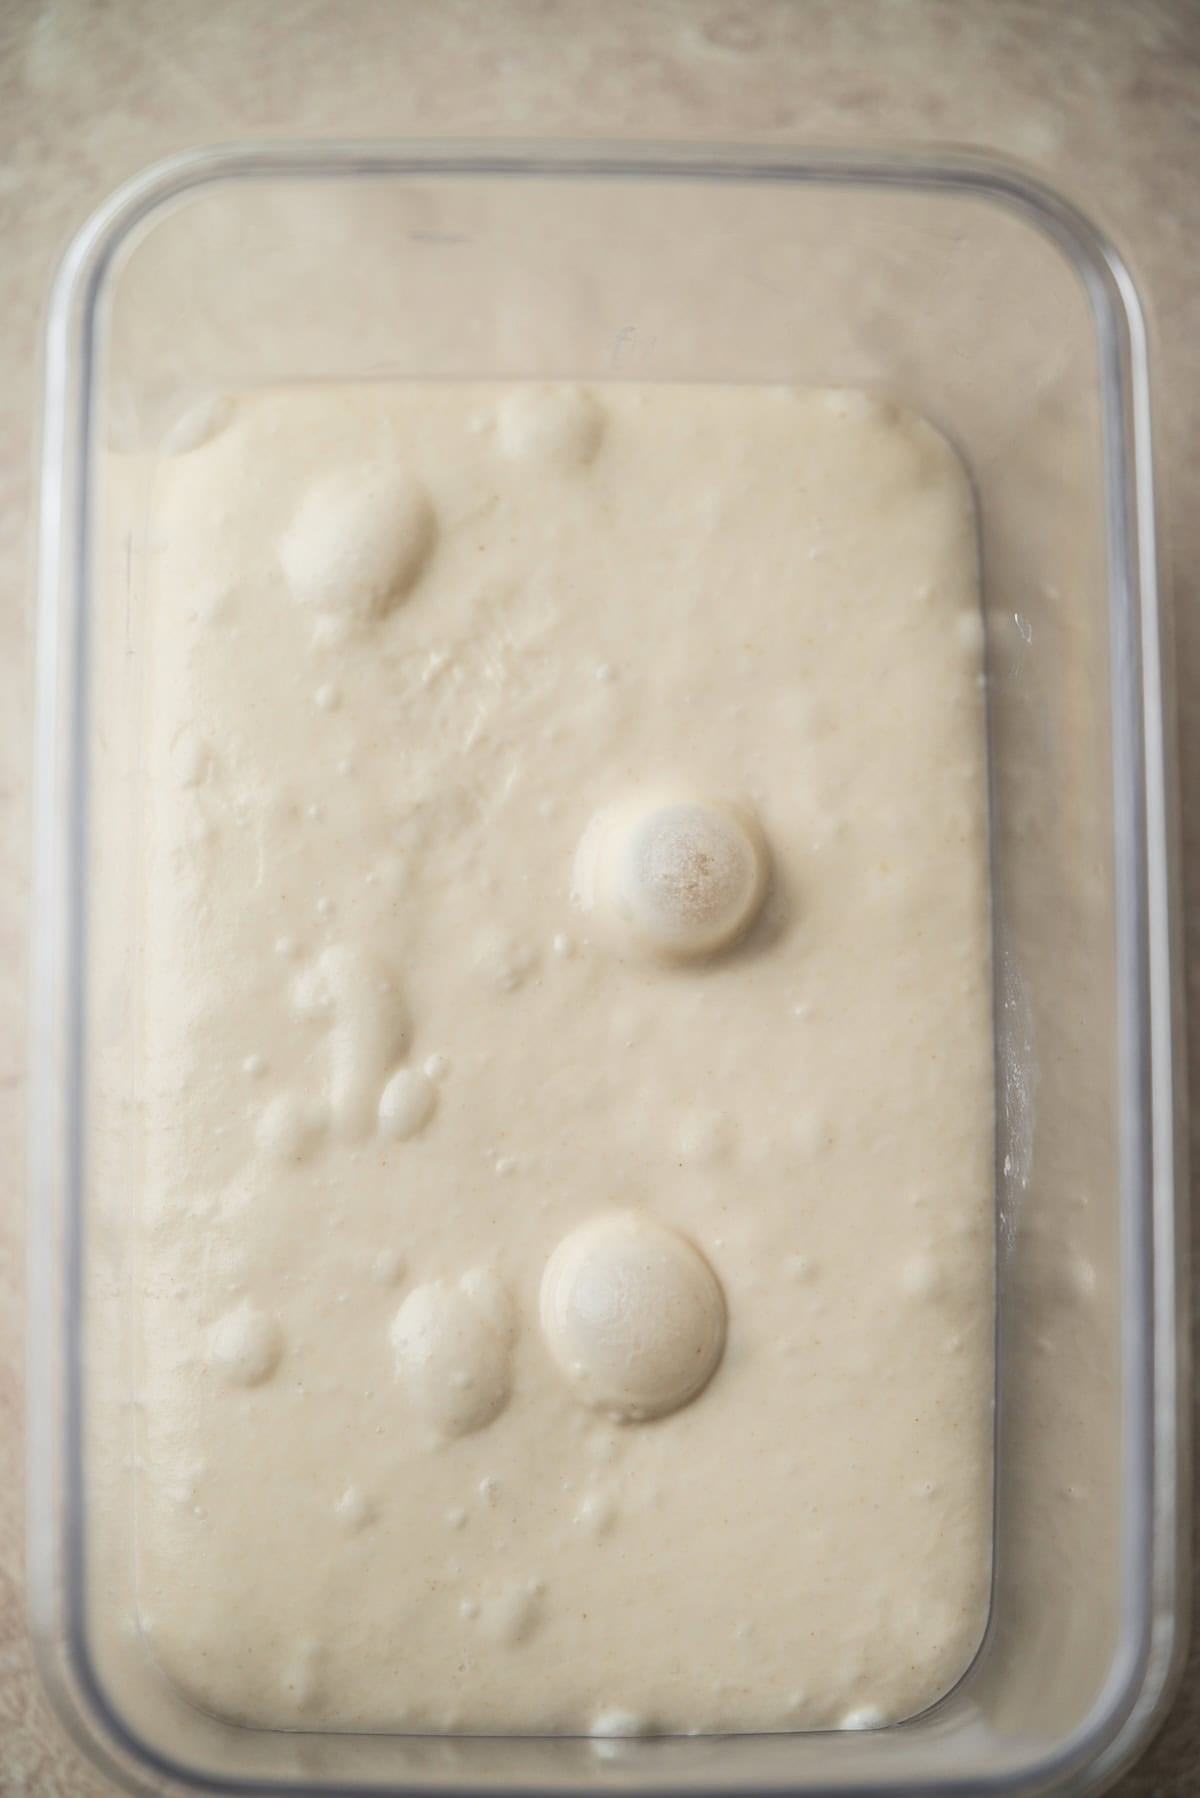
- The dough should show bubbles and signs of activity. Cover it tightly and place in the fridge overnight.
Divide and pre-shape
Tip the dough onto a lightly floured bench and divide it in half with a bench scraper. Fold the edges of each piece into the centre, flip them over, then use your hands or the scraper to drag each one towards you a few times into a loose round. Rest them, uncovered, for 30 minutes to relax the gluten a bit.
Shape the fougasse
Brush two sheets of baking paper generously with olive oil. Use a bench scraper to lift a round of dough onto each one.
Dust the top with flour, then use your fingertips to press and stretch each piece into a rough rectangle or oval, around 25cm long. Don’t roll it, you want to keep the gas in there.
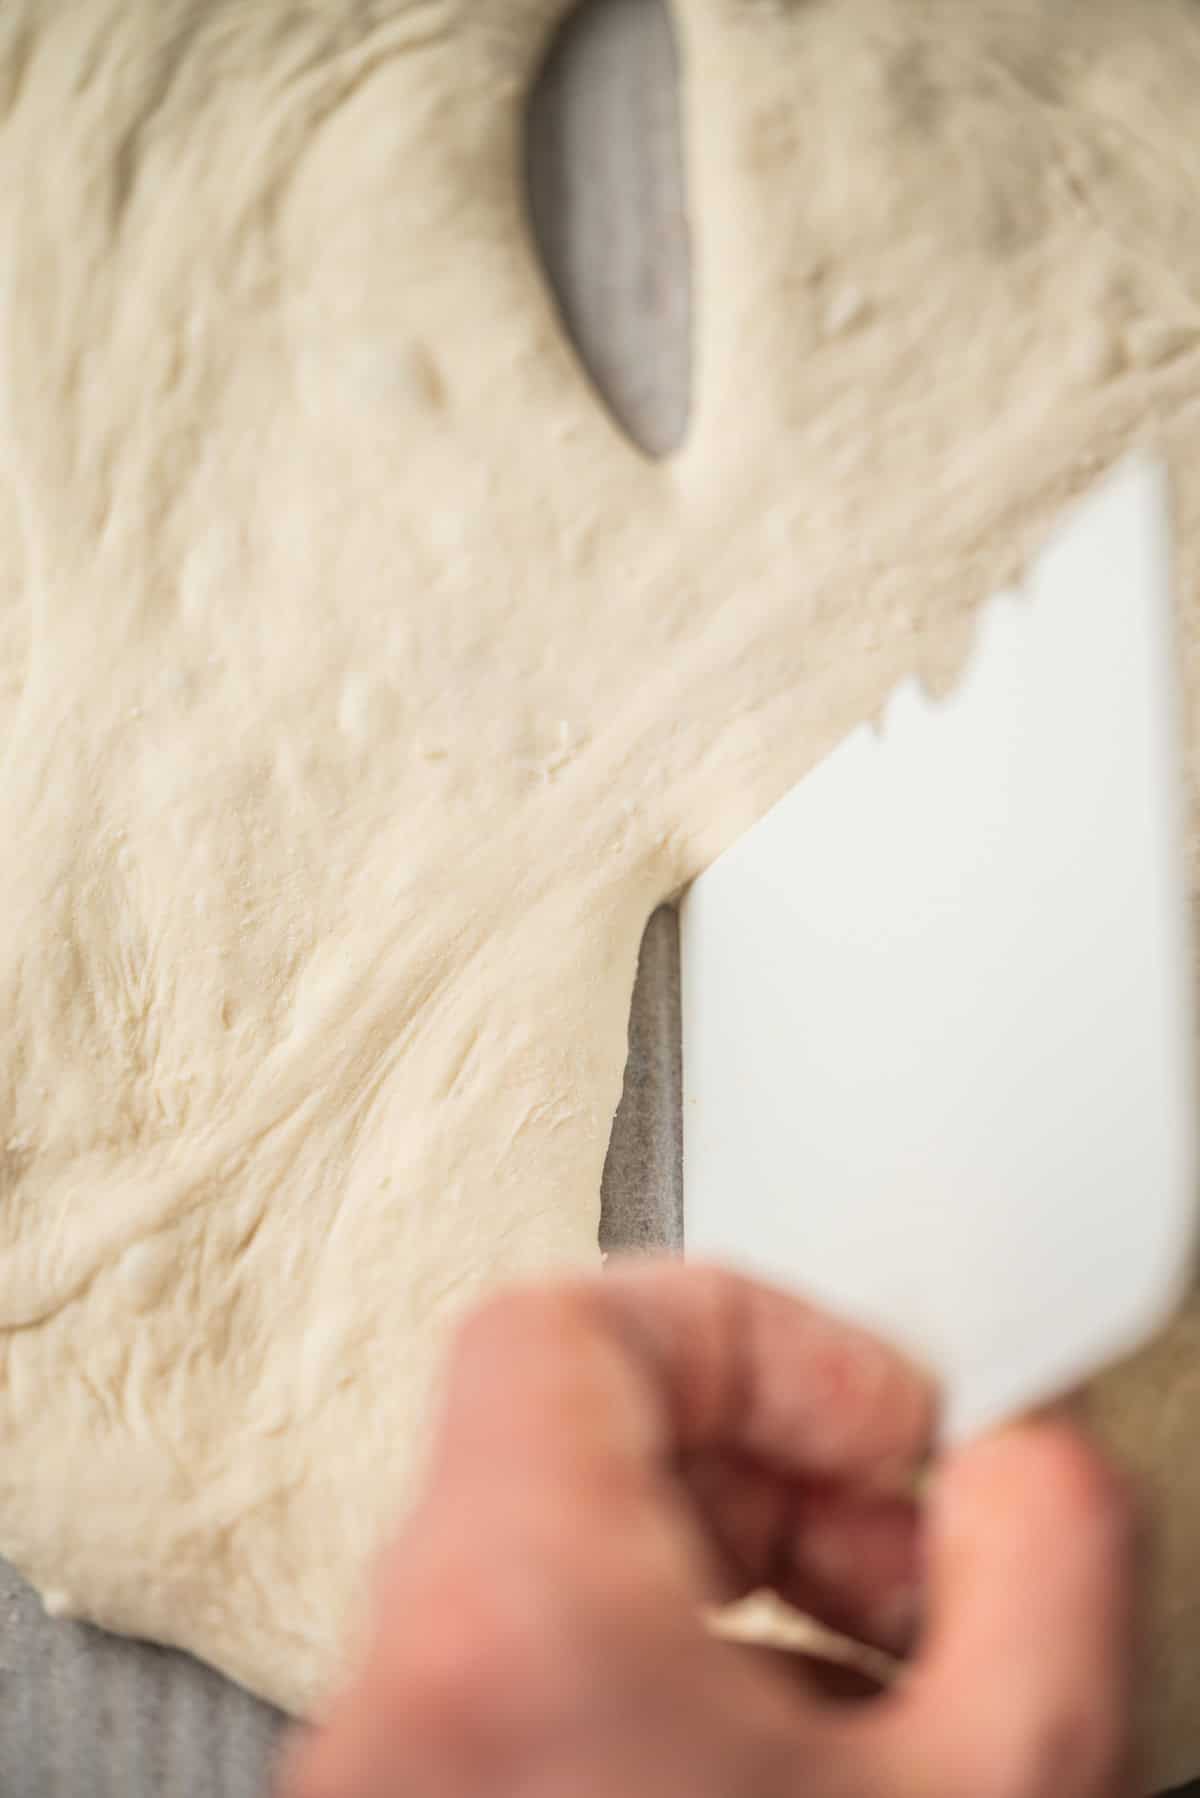
- With a bench scraper make two cuts in a line down the centre, one in the upper half and one in the lower half. Then make 3 shorter diagonal cuts on each side of that centre line, again stopping before you reach the edge. Every cut needs to go all the way through the dough to the paper.
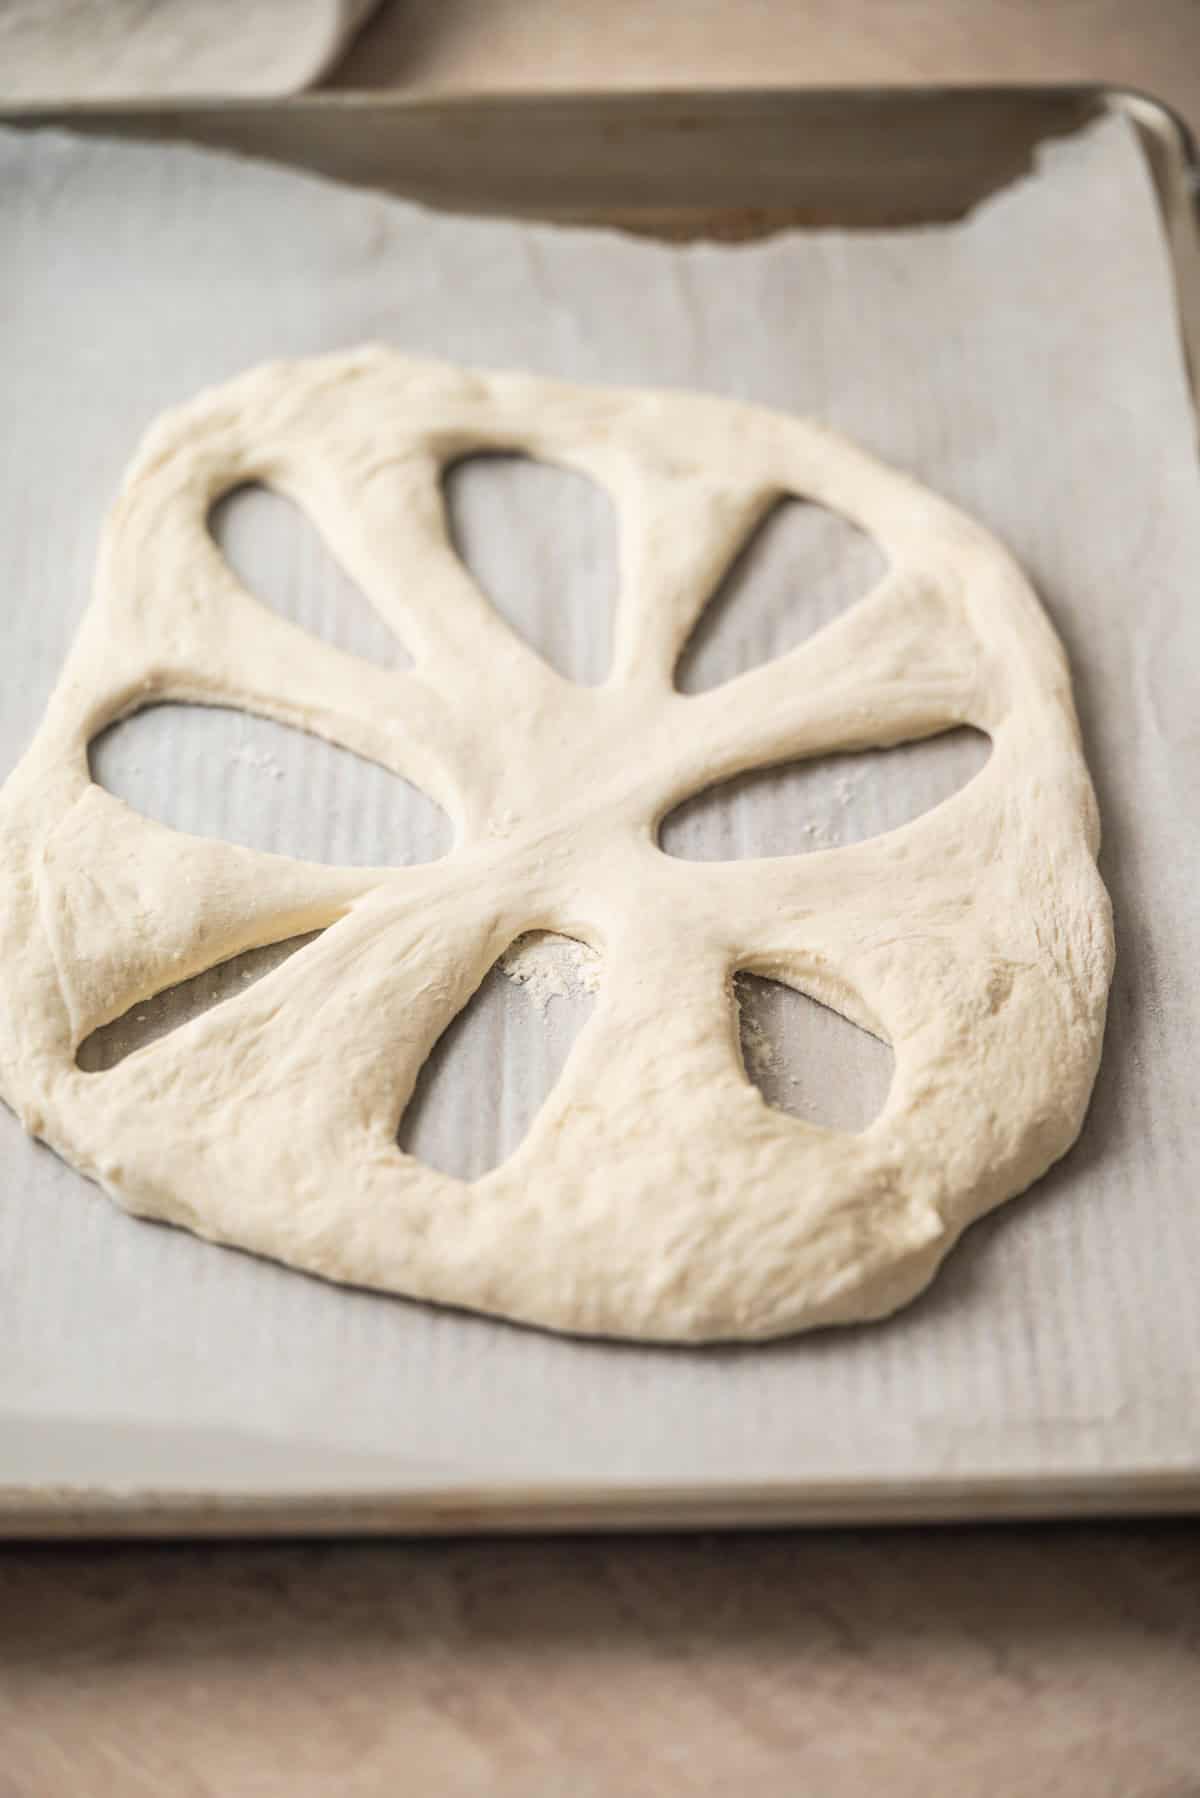
- With oiled hands, gently pull the cuts apart, widening each one until you have a leaf shape with clear open gaps. Open them wider than you think you need to, because they’ll close in as the dough proofs and again in the oven.
Final proof and topping
Leave them until noticeably puffy and soft on the surface.
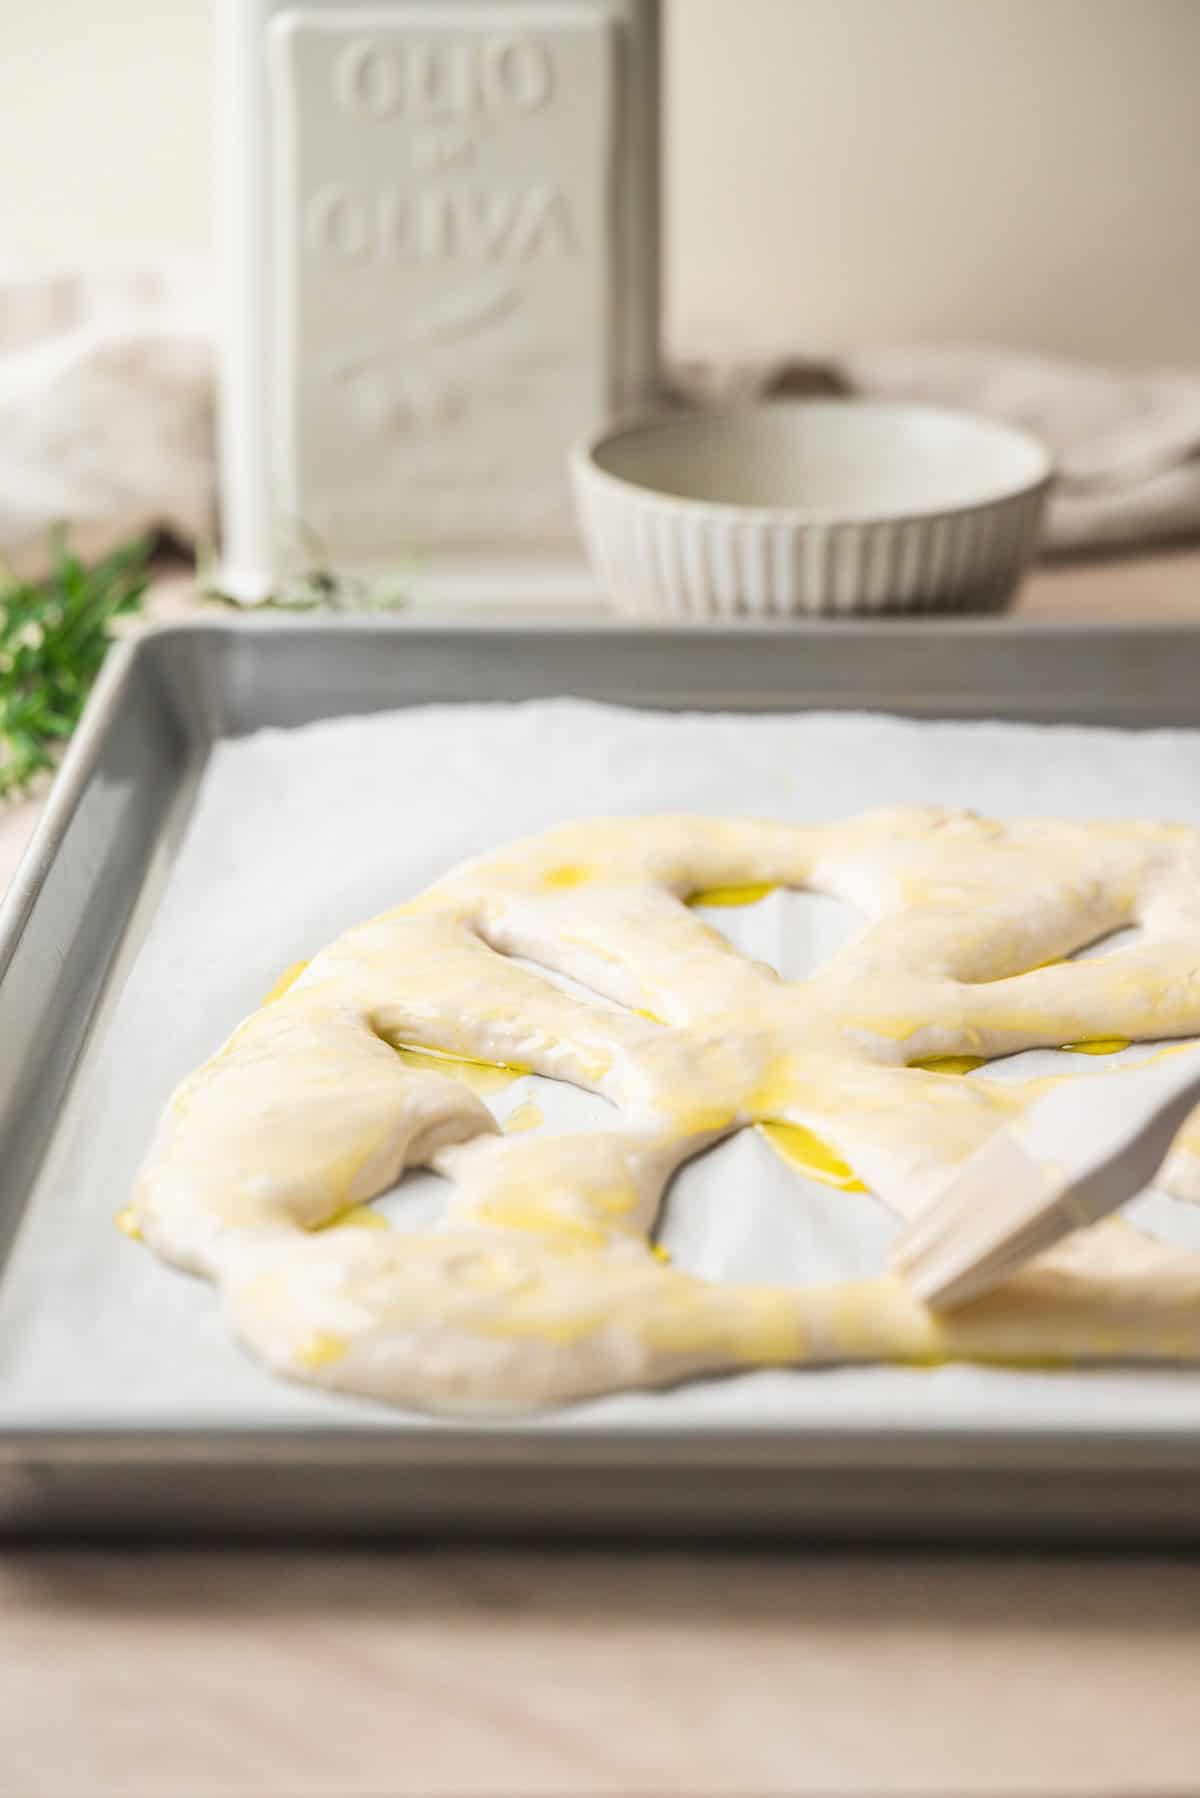
- Brush the top of the proofed dough with olive oil.
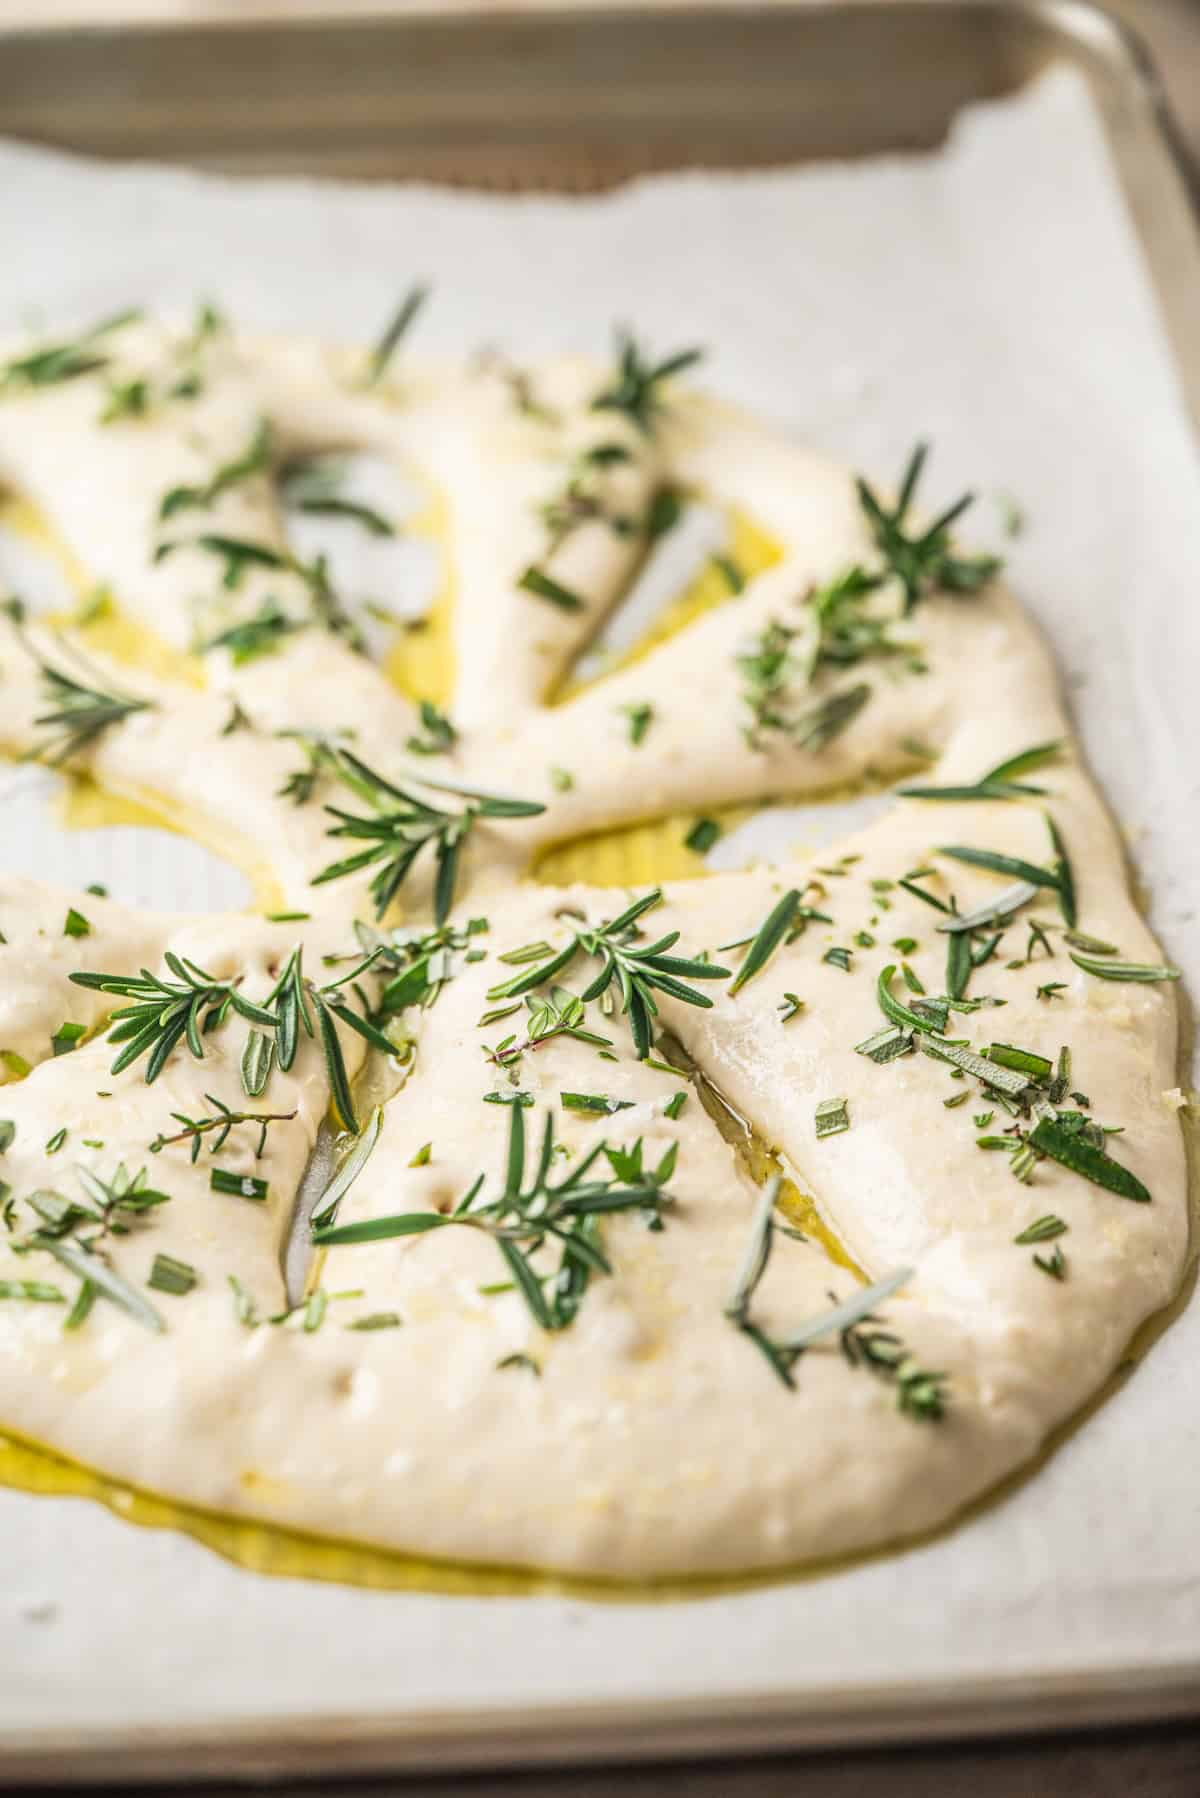
- Scatter the thyme leaves over the dough first then lay the rosemary over the top, pressing the larger sprigs and pieces down into the dough. Drizzle a bit more olive oil over the rosemary then finish with coarse salt.
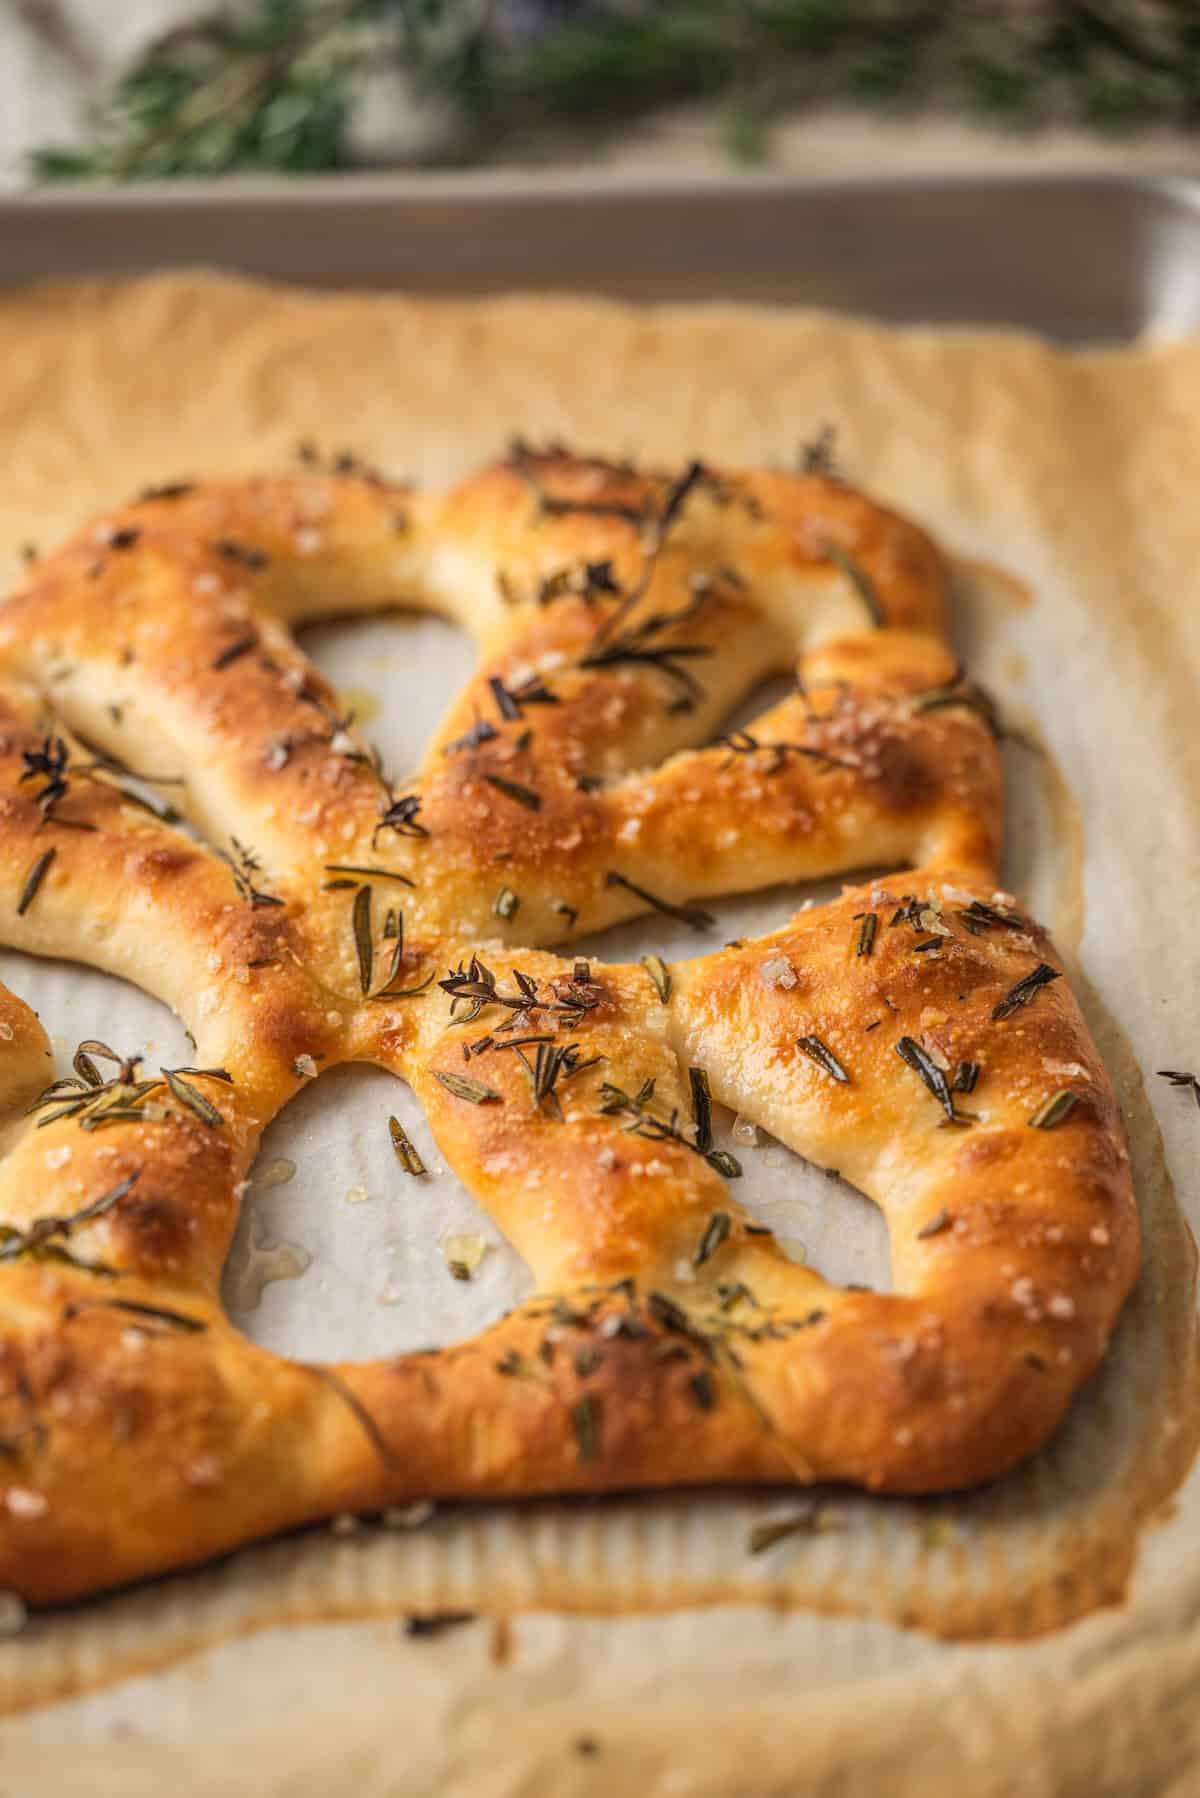
- Bake until deep golden brown.
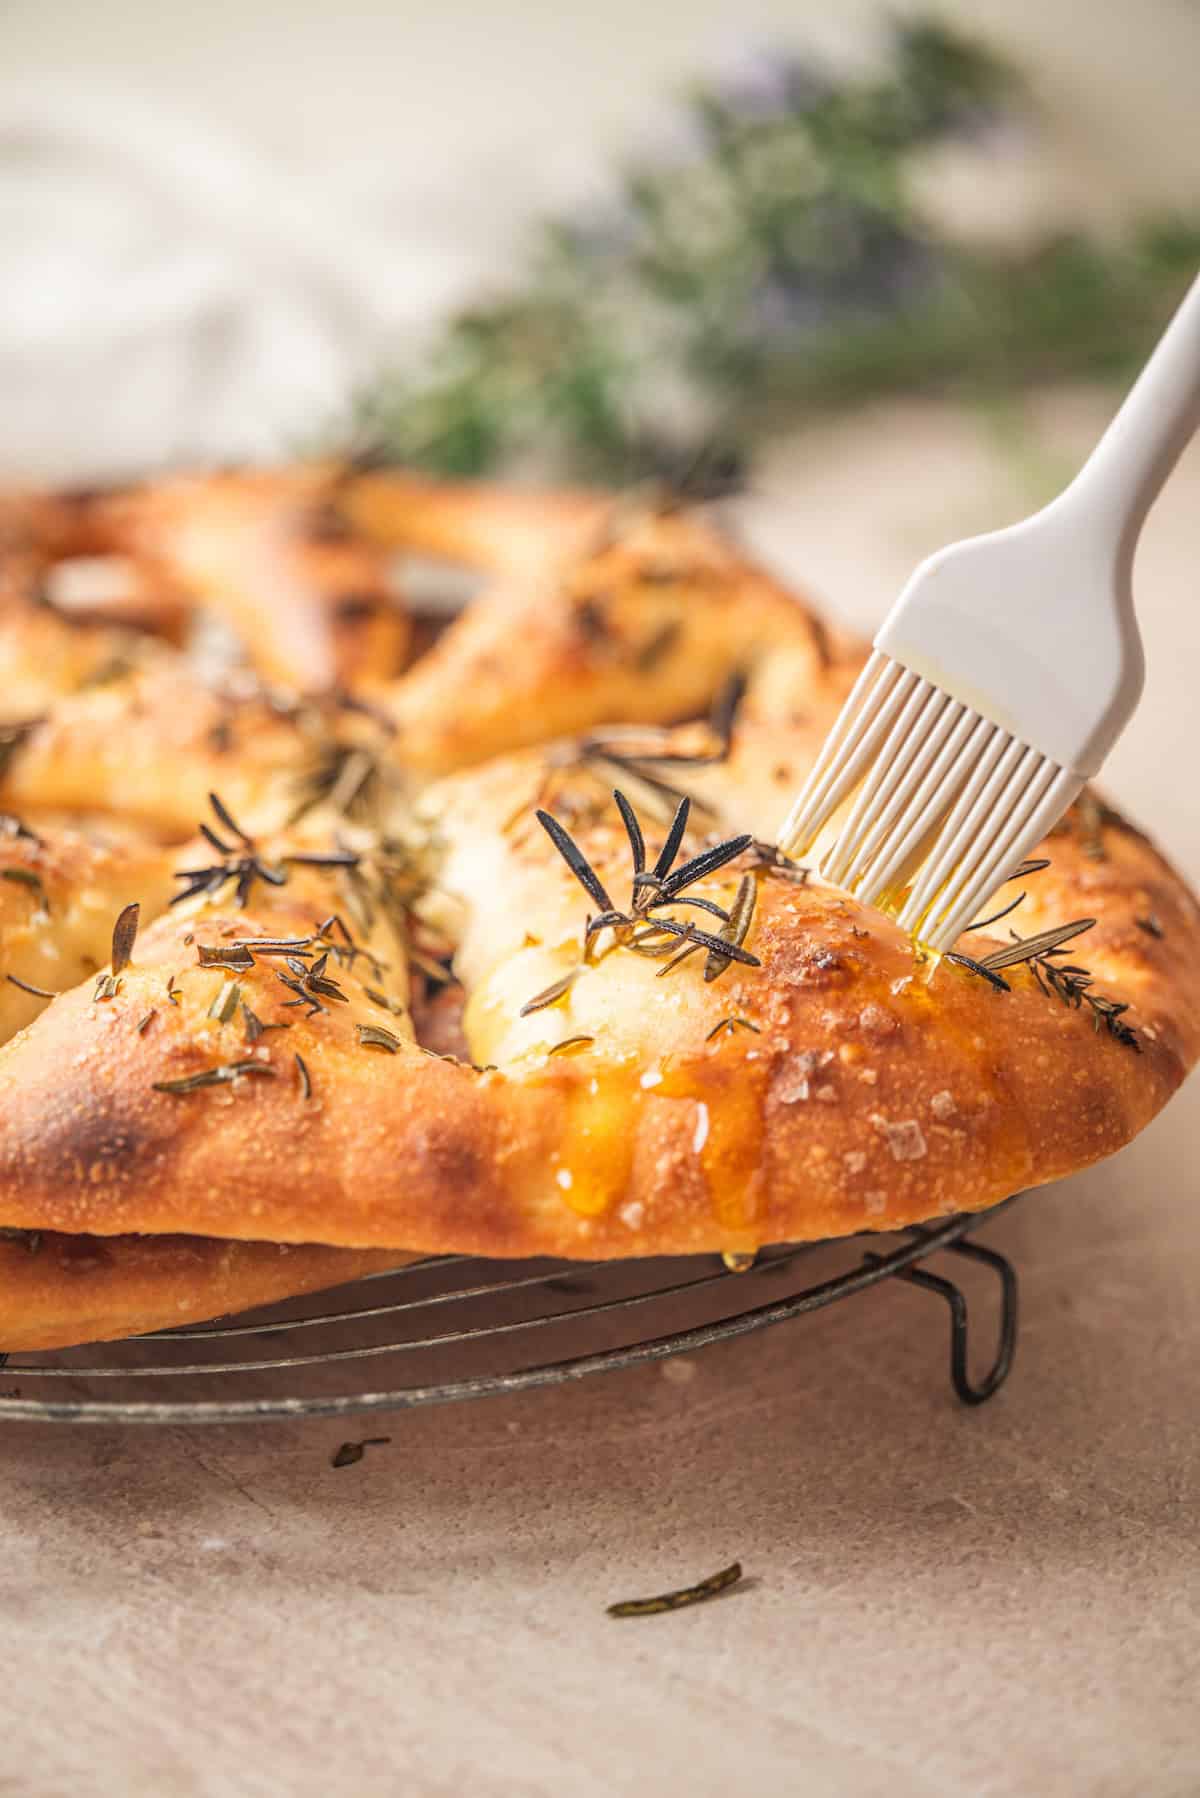
- While it’s still hot, brush it with more olive oil and scatter over more finely chopped fresh rosemary.
Storing and freezing
Fougasse is at its best on the day it’s baked. Store leftovers in a paper bag or loosely wrapped in a tea towel at room temperature for up to 2 days.
To bring it back, warm it in a 180°C (350°F) oven for 5 minutes.
It also freezes well. Wrap the cooled bread tightly and freeze for up to 3 months. Reheat from frozen at 180°C (350°F) for 10 to 12 minutes.

FAQs about sourdough fougasse
Related recipes
If you like this, try my sourdough focaccia or this rosemary sourdough bread if you want the same herby flavour in a loaf. For another sharing bread, there’s sourdough pull apart bread, and my sourdough pizza bases use a similar lean dough.
New to sourdough bread? Start with my guide to making sourdough step by step.

Easy Sourdough Fougasse Recipe
Ingredients
Sourdough starter
- 20 g starter
- 40 g flour
- 40 g water
Fougasse
- 420 g all-purpose flour or bread flour with a protein level of at least 11%
- 300 g water
- all the sourdough starter around 100g
- 20 g olive oil
- 8 g salt
Toppings
- 3 Tbsp Olive oil plus extra for brushing after baking
- Coarse salt
- Fresh rosemary and/or thyme
Instructions
Starter
- Mix the starter, flour and water together in a bowl until well combined. Transfer to a clean jar and mark the level with a rubber band or marker so you can see the rise.
- Leave at room temperature until it has at least doubled and is domed and bubbly. Use it before it peaks and collapses.
Dough
- In a large bowl, mix the flour and water together with a fork or your hands until no dry flour remains. It will be shaggy. Cover and autolyse for 30 minutes.
- Add the ripe starter, salt and olive oil. Squeeze everything together with wet hands until it forms a sticky dough.
- Knead the dough for 5 to 8 minutes, either against the side of the bowl with a wet hand, or by slapping and folding it on an unfloured bench. Do not add extra flour. It is ready when it is noticeably smoother and elastic, and springs back when pressed. Return it to a clean bowl.
- Over the next hour, perform 2 sets of stretch and folds, spaced about 30 minutes apart. With wet hands, stretch a portion of dough up and fold it over the centre, rotating the bowl and repeating 3 to 4 times per set.
- Cover the bowl and bulk ferment at warm room temperature until the dough has risen by 30-40% and is showing some bubbles or signs of activity on top. These times assume a dough temperature of around 25°C, which takes roughly 2 to 3 hours. I use a dough proofing box, but a warm spot works too, such as the oven with just the light on or the top of the fridge. A cooler kitchen will take longer, so go by how the dough looks rather than the clock.
- For same day baking, continue to the pre-shape. For an overnight ferment, cover the bowl tightly and refrigerate for 8-12 hours, then continue the next day with the cold dough.
Divide and pre-shape
- Tip the dough onto a lightly floured surface and divide it in half. Each piece will be around 420g. Fold the edges of each piece into the centre, flip over, and shape into a loose round. Rest for 30 minutes, or closer to an hour if the dough has come from the fridge.
Shape
- If you have a stone or steel, shape each fougasse on parchment paper set on a board, pizza peel or upside-down baking tray, so you can slide it directly onto the hot stone or steel at baking time. If you don't have one, you can bake the fougasse on a regular baking tray. For a slightly crisper base, you can optionally preheat the tray and shape the fougasse on parchment set on a board, then slide it onto the hot tray when it's time to bake. Either way, shape the dough on parchment paper.
- Brush the parchment generously with olive oil. Transfer a round of dough onto each with a bench scraper.
- Dust the tops with flour and use your fingertips to press each piece into a rectangle or oval around 25cm (10 inches) long.
- Make two cuts in a line down the centre of each piece, one in the upper half and one in the lower, leaving 3 to 4cm of uncut dough between them and stopping around 3cm short of the top and bottom edges. This bridge of dough in the middle holds the fougasse together, so don’t join the two cuts up.
- Make 2 to 3 shorter cuts on each side, angled outwards from the centre like the veins of a leaf, stopping about 3cm before the outer edge. Every cut must go all the way through the dough to the paper.
- With oiled hands, gently pull the cuts open, working from the centre outwards and pulling sideways. Open them wider than you think you need to.
- Cover the trays loosely and leave to rise until noticeably puffy. Same day dough will take 1 to 2 hours, dough from the fridge will take longer. Once the fougasse is starting to look visibly puffy, preheat the oven to 220°C (430°F). If you’re using a stone, steel, or a tray you’re preheating, put it in at the same time, since a stone or steel needs a good hour to come properly up to temperature.
Top and bake
- Before topping, run a finger back through any cuts that have closed up during the rise, opening them out again.
- Brush the first fougasse with olive oil and scatter the herb leaves over. Lay the rosemary on top of the thyme if using both, pressing the larger pieces down into the dough.
- Drizzle a little more olive oil over the herbs then sprinkle with coarse salt.
- Bake the first tray for 18 to 22 minutes, until deeply golden.
- Straight out of the oven, brush the surface with a little more olive oil and scatter over more chopped fresh herbs. It will be very crisp from the oven and will soften a little as it cools.
- Top and bake the second tray the same way. If your kitchen is warm, keep the second tray in the fridge while the first bakes and bring it out just before topping.
- Serve warm or at room temperature, torn into pieces.

I can’t wait to try this!
This looks so good. Homemade bread recipes always make me feel overwhelmed, but this looks so achievable with the step by step photos and timelines 💜 It’s also the closest I’ll get to Provence for a while!
Thank you!