A Beginner’s Sourdough Bread Recipe
This is a beginner’s sourdough bread recipe, perfect for starting your sourdough journey. In this post, I will show you how to make this simple sourdough bread step-by-step. The process is spread out over two days.
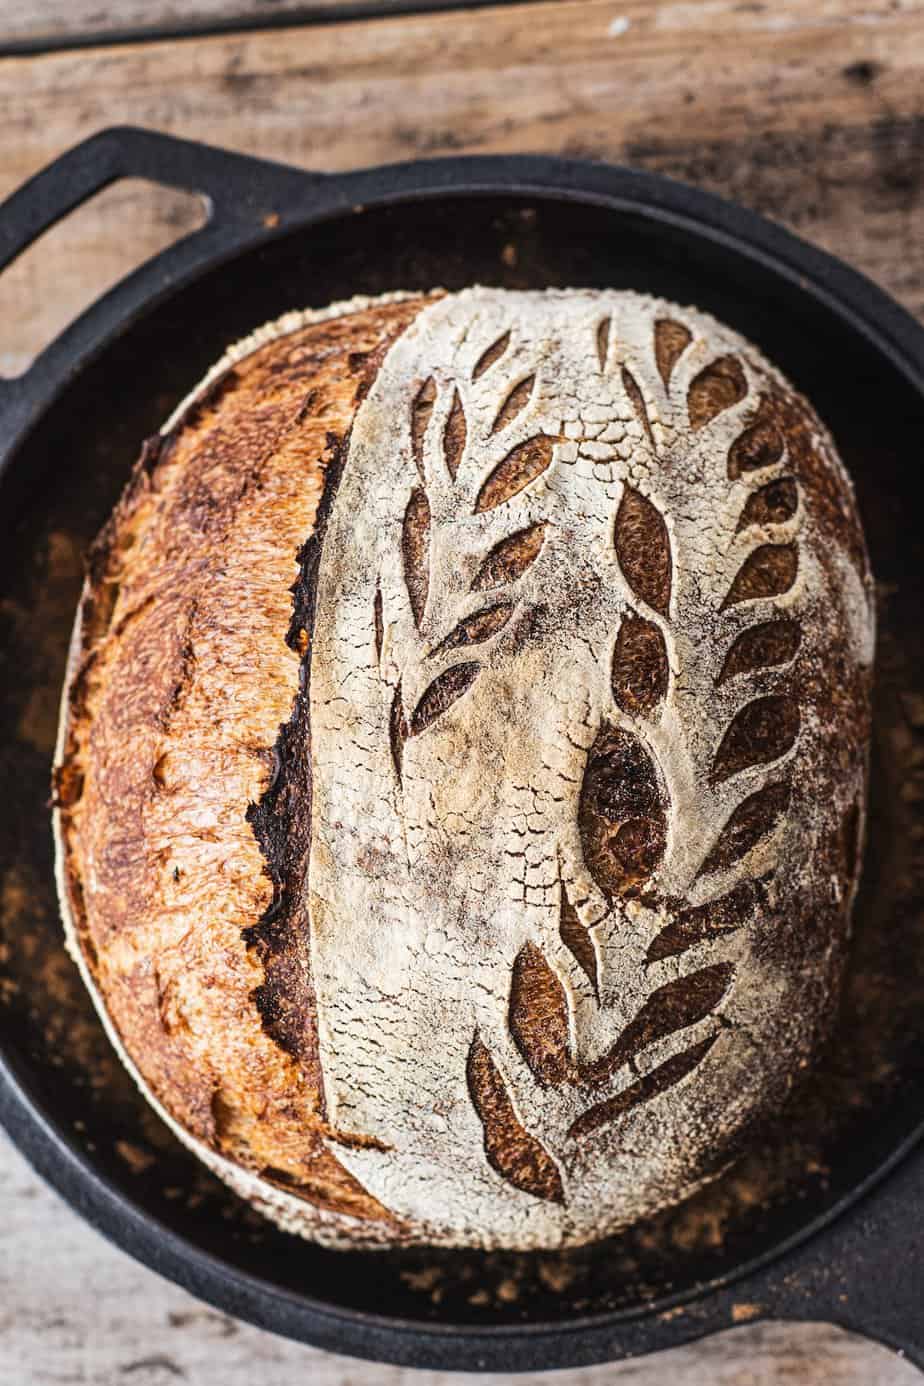
There’s a bit of understanding about sourdough bread. This is a beginner’s sourdough bread recipe, but the fundamentals should still be read through. Once you’ve done that, you’ll understand how to make sourdough bread and create the perfect loaf every time.
If you have issues with your bread, check out my Sourdough Bread Troubleshooting Guide.
See my whole Sourdough Bread Process on Youtube
What is sourdough bread?
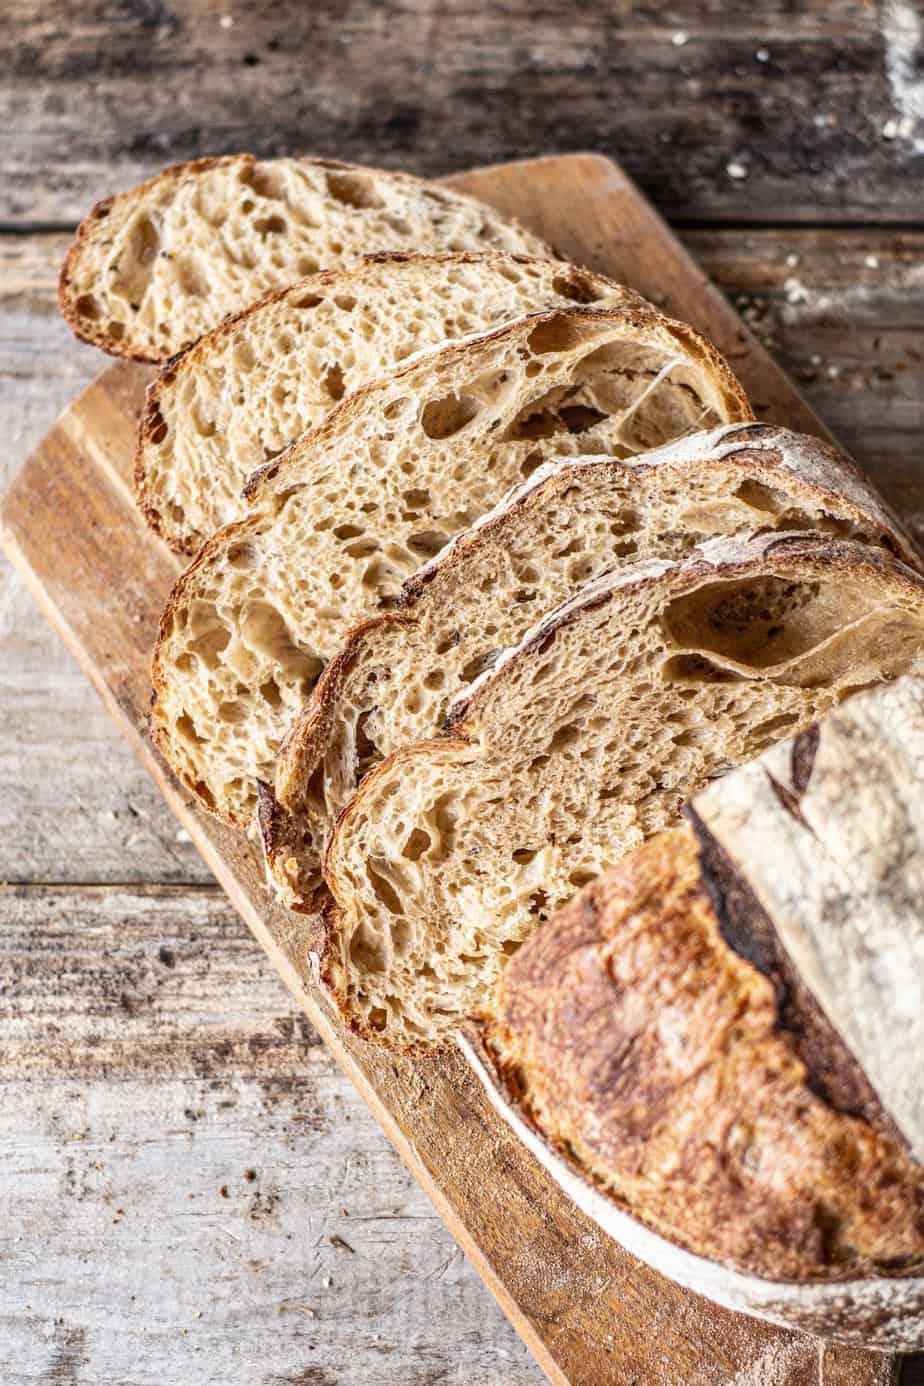
Sourdough bread rises without the need for commercial yeast. Instead, it uses a collection of wild yeasts. When the bread is baked, the yeast will be responsible for the rise of the bread as it releases carbon dioxide. Alongside the wild yeast, bacteria are also at work. Sourdough bread is often easier to digest than other bread types because it undergoes a fermentation period.
The bacteria, which is the lactobacillus strain, is also responsible for the sour tang in sourdough bread. This is due to the lactic acid and acetic acid they produce.
The starter and levain
See how to make a sourdough starter here.
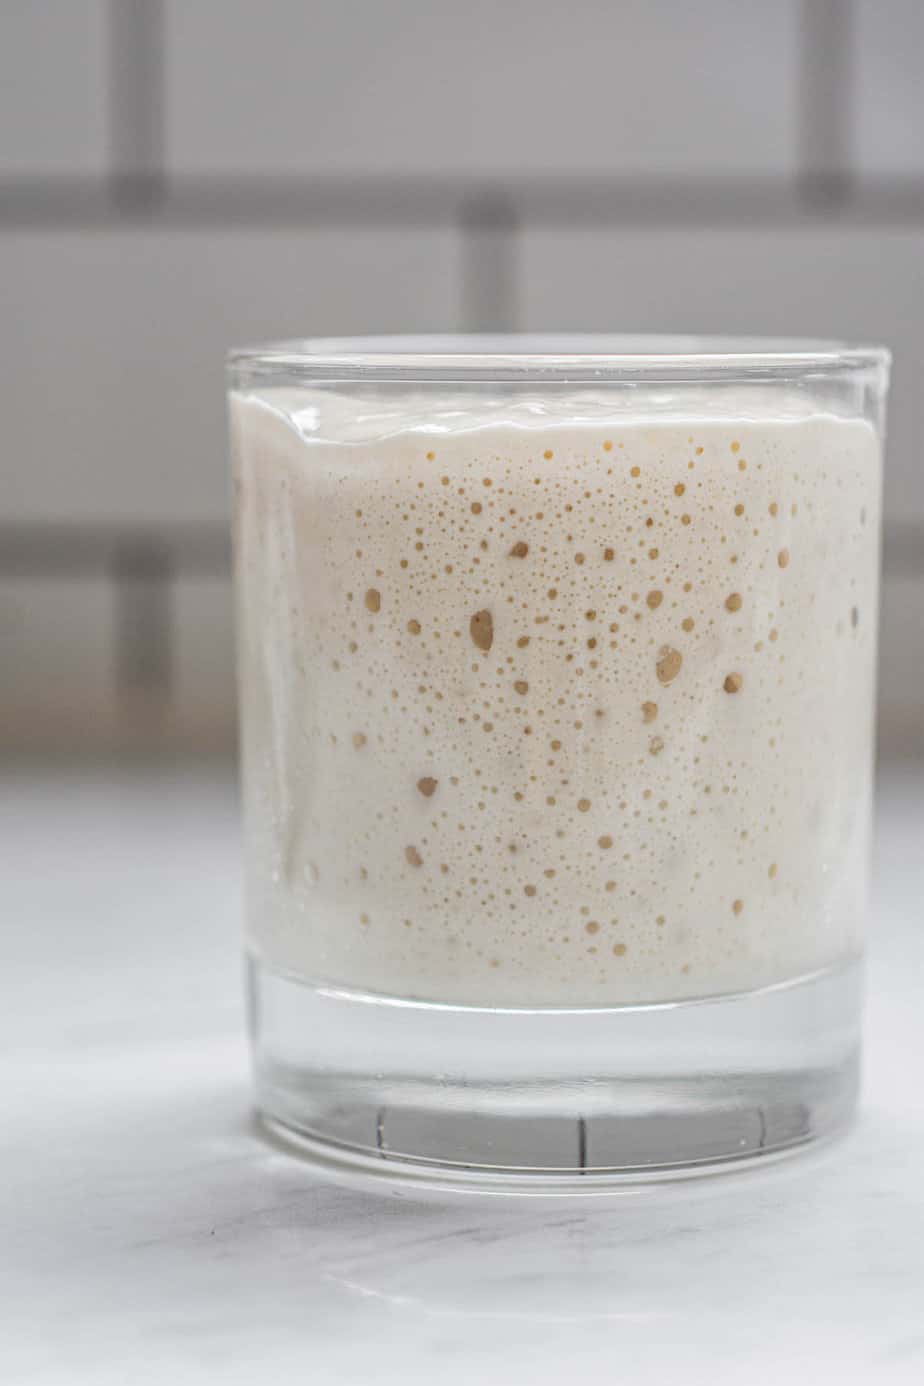
Before you learn how to make sourdough bread with a starter, you’ll need an active sourdough starter. I keep mine at 100% hydration. This means equal weights of water and flour are fed. I ensure it has a low acid content and is used before it collapses. Too much acid can make the dough hard to work with. Keeping your starter refreshed regularly and using a small amount of seed starter each time can keep the acid load low.
When feeding the sourdough starter, I use a ratio of 1:2:2 (1 part starter, 2 parts flour, and 2 parts water) or 1:3:3 depending on when I want to use it. That’s all measured in weight.
- A starter fed at 1:2:2 should double or triple within 6 hours when kept at a room temperature between 21-26 °C (or 69-78°F).
- A starter fed at 1:3:3 will take longer, and this is usually what I feed my starter if I want it to rise overnight. This slows down the rise
A levain
I create a levain for many of my recipes.
A levain is an offshoot of your main starter, created specifically for the bread dough you’re preparing. It is a mixture of flour, water, and a small portion of an active sourdough starter. The whole thing will be used in the recipe.
The amount of sourdough starter to keep after making bread varies based on your method and desired starter quantity. Here’s one approach to managing your starter and creating a levain:
- From your jar of established starter, measure out two amounts. One is for your bread dough (a levain), and the second amount will be used to create a fresh jar of starter for future use.
- For the levain, measure the amount needed for your bread recipe in a small bowl. Feed it and transfer this mixture to a clean jar. Set this aside for bread-making.
- With the remaining starter in the original jar, measure approximately 30g-50g (or less if all that remains) and feed this. Place this mixture into a clean jar and store it in the refrigerator.
Don’t worry if you have a small remaining starter; even the tiniest bit can be built into a larger one. Discard any leftover starter from the old jar (or save it up to use in discard recipes.)
Ingredients
Here is a rundown of the basic ingredients for this simple sourdough recipe. See the printable recipe card at the bottom of this post for the amounts.
- Bread flour or all-purpose flour (with a high protein content of at least 11%.)
- Active sourdough starter – Mix the starter with flour and water to create a levain. This is the name for the separate mixture of sourdough starter, where the entire thing will be used in the dough. Don’t have a sourdough starter yet? Learn to make a sourdough starter.
- Water
- Salt – Flavor enhancer and helps with dough structure.
Baking equipment
I use a cast-iron combo cooker which is fantastic. It works as a Dutch oven, trapping steam. Mine is from Lodge Cast Iron though other brands make similar cookers.
Baking sourdough in a Dutch oven is an important piece of equipment as the steam it traps during the baking stage allows it to rise to its full potential before the crust forms.
Alternatively, a large pot with a lid can be used, but it won’t give the same results as cast iron which holds the heat well.
Other equipment I use –
- A kitchen scale – This is helpful to get consistent results in baking.
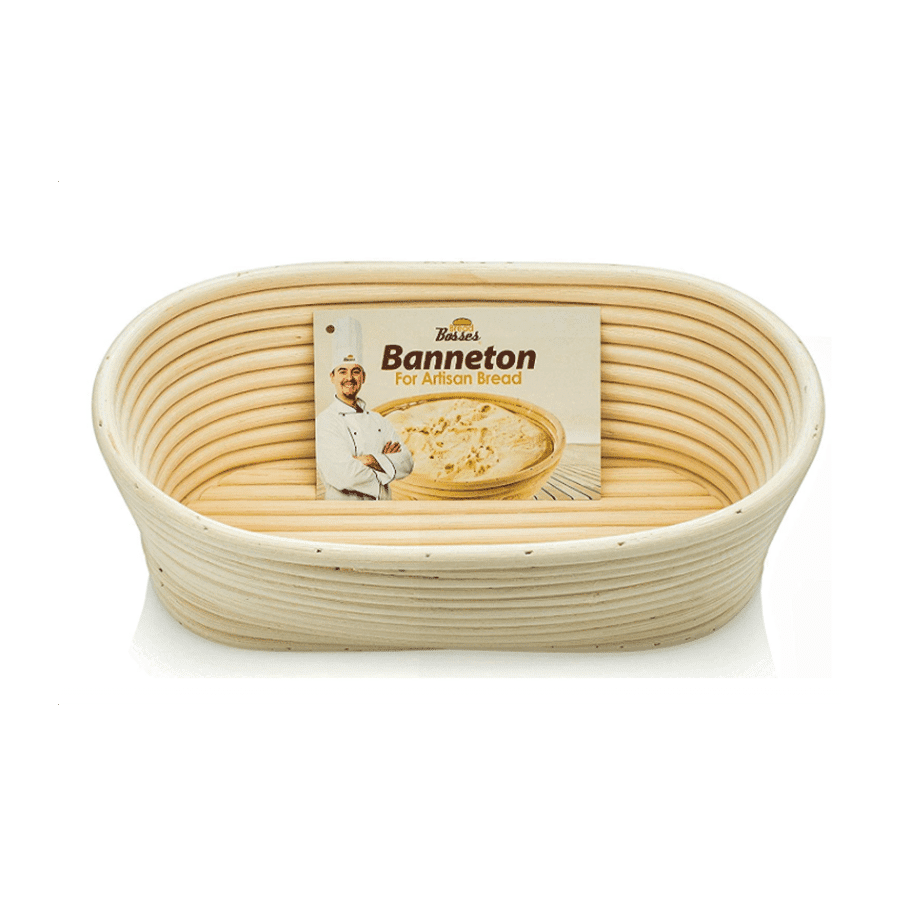
- Proofing basket – You’ll need a bowl for the dough to hold its shape while it proofs. I use a traditional banneton basket lined with a floured towel.
- Bench scraper – Very helpful when moving the dough around on a work surface.
Baker’s schedule (overview)
This is a high-level overview and example of the timing of what goes into the process of the Sourdough bread Schedule. These exact times of day can be adjusted to suit your schedule.
Further down are more detailed instructions.
- 8 am – Feed your starter and create a levain.
- 12 pm – Autolyse
- 1 pm– Add in starter
- 1.30- 4:30 pm – Perform 6 sets of stretch and folds, one every 30mins.
- 4:30- Bulk Ferment
- 8 pm – Shaping. Put in the fridge overnight
- The next day – Baking
Step-by-step instructions
Levain
Mix together the levain ingredients in a bowl and stir well until thoroughly mixed. Add it to a clean jar or glass and cover it with a loosely balanced lid or damp towel.
Leave it to sit until it has at least doubled.
Autolyse
An autolyse is when flour and water are mixed together, and the flour is left for a period of time to hydrate. An autolyze hydrates the gluten and helps to create an elastic dough. Start this at least 30 minutes before your starter is ready to use, but up to a few hours in advance. It doesn’t need to be done, but it does make a difference.
Combine the water and flour in a large bowl to start the autolyse. Use wet hands to mix it into a rough dough. No kneading is required, but ensure all the dough is wet.
Cover the bowl with a plate or damp kitchen towel to prevent drying.
If you’re wanting to add any seeds, they can be added at this point too. I like adding ground turmeric, pumpkin seeds, linseeds, or poppy seeds to my bread for some variation.
Add levain and Salt
Now it’s time to add in the salt and the doubled levain. Use wet hands to mix this well and form a sticky mound of dough.
Tip the dough into a flat glass or ceramic tray and let it rest for 30 minutes before moving on to the next step. It will flatten out a bit.
Coil Folds
I use a coil-fold method to work my dough. You’ll need to fold your dough every 30 minutes for three hours to develop the gluten in the dough.
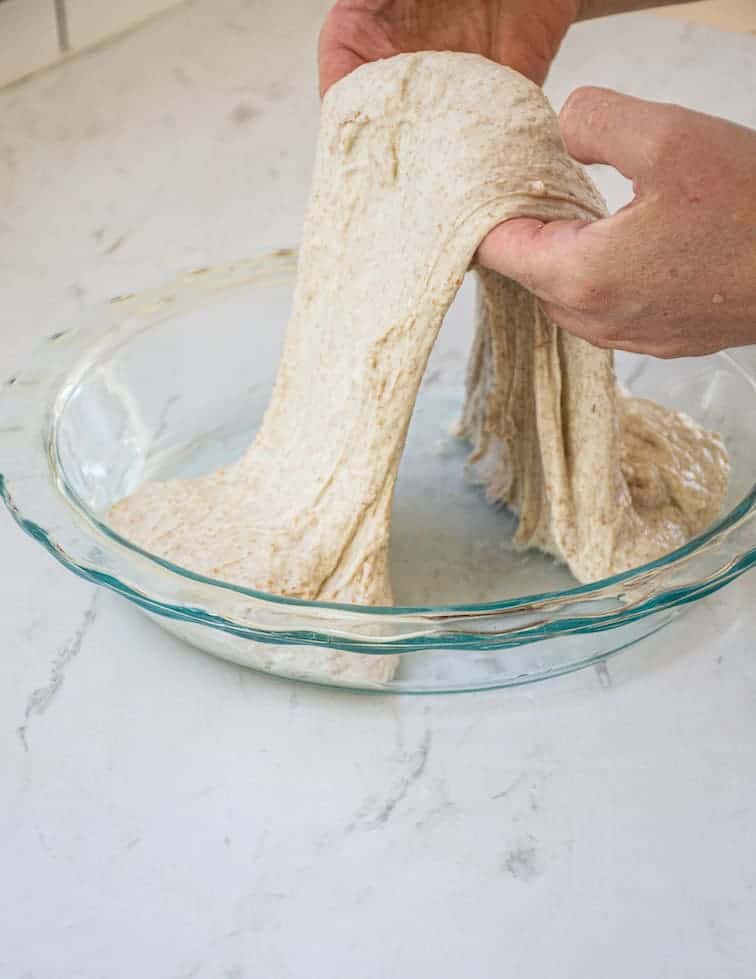
Using wet hands, gently coax the sides with your fingers and lift it from the middle and back onto itself.
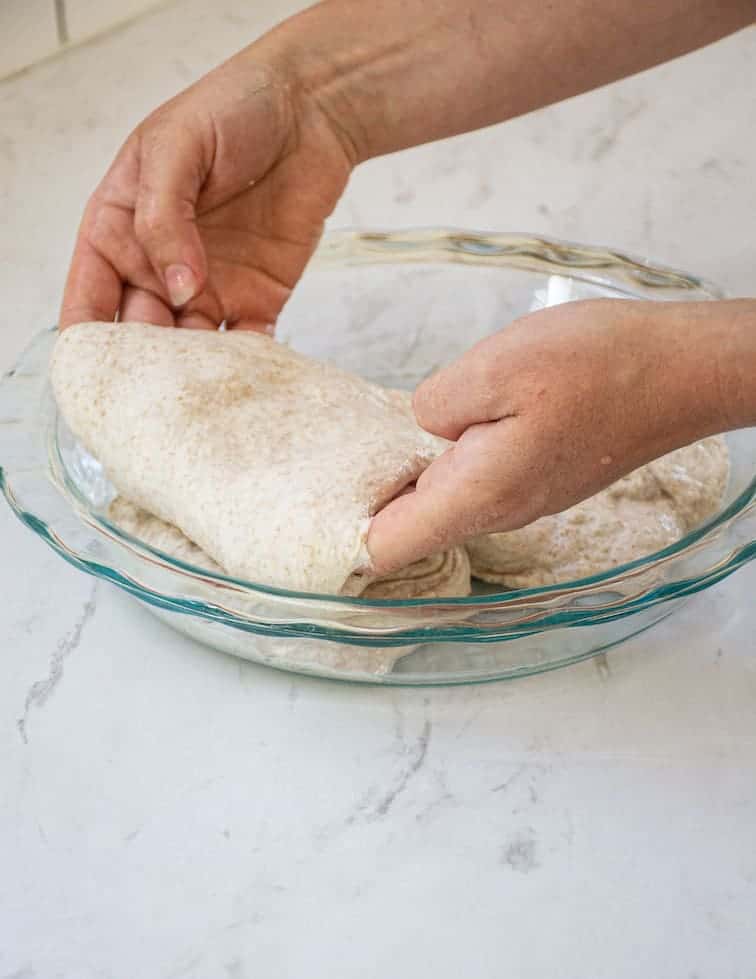
Turn your tray and repeat on all sides until it forms a ball. If the dough sticks too much to your hands, wet them again
The pictures above are of folds in the second round of coil folds, where the dough is already quite elastic. Repeat this every 30 minutes for three hours. Initially, the dough will be very sticky and wet, but after a few folds, it will hold together more and become elastic.
If your starter was in optimum condition, you should easily feel the improvement in elasticity as your folds go on.
You can also use a regular stretch and fold method. This is where you take one side of the sourdough dough and, stretch it up, then pull it over itself. Repeat on all sides of the dough.
Bulk Fermentation
After all your folds, let the dough ferment and rise. How long this takes depends on the warmth of your room. If my kitchen is too cold, I place my bread in the oven that is off with a dish of boiled water. This creates a humid proofing spot.
Your dough should bulk out by around 50%. That does not mean it doubles, but it has to bulk out by around half the amount. Don’t rush this dough rise step. It very much depend on the temperature of your kitchen.
Under-fermented and over-fermented dough
Bulk fermenting here is super important! An under-fermented bread will be dense, may seem undercooked, or have a very thick and chewy crust. A lack of bulk fermentation can cause an under-fermented dough.
On the opposite end, if your dough starts rising too much, you risk over-proofing, and it will weaken the gluten structure you’ve built up. This will result in a collapsed dough that’s very hard to shape and bakes flat.
Bulk ferment timing can vary depending on the warmth of your room. An average bulk ferment for me (after the folding of the dough) is at least 3-4 hours. In the depths of winter, it can be 6-7 hours long, and in the height of summer, only 2 hours. Watch the dough and not the clock.
It is normal for your dough to stretch back out and fill the dish again, but it should feel bouncier and fuller.
Shaping And Cold-Proofing
Now it’s time for the shaping of the dough and the slow, cool ferment, which is when your dough will proof in the refrigerator for anywhere between 8-20 hours.
Line a banneton basket or bowl with a clean kitchen towel and flour it well.
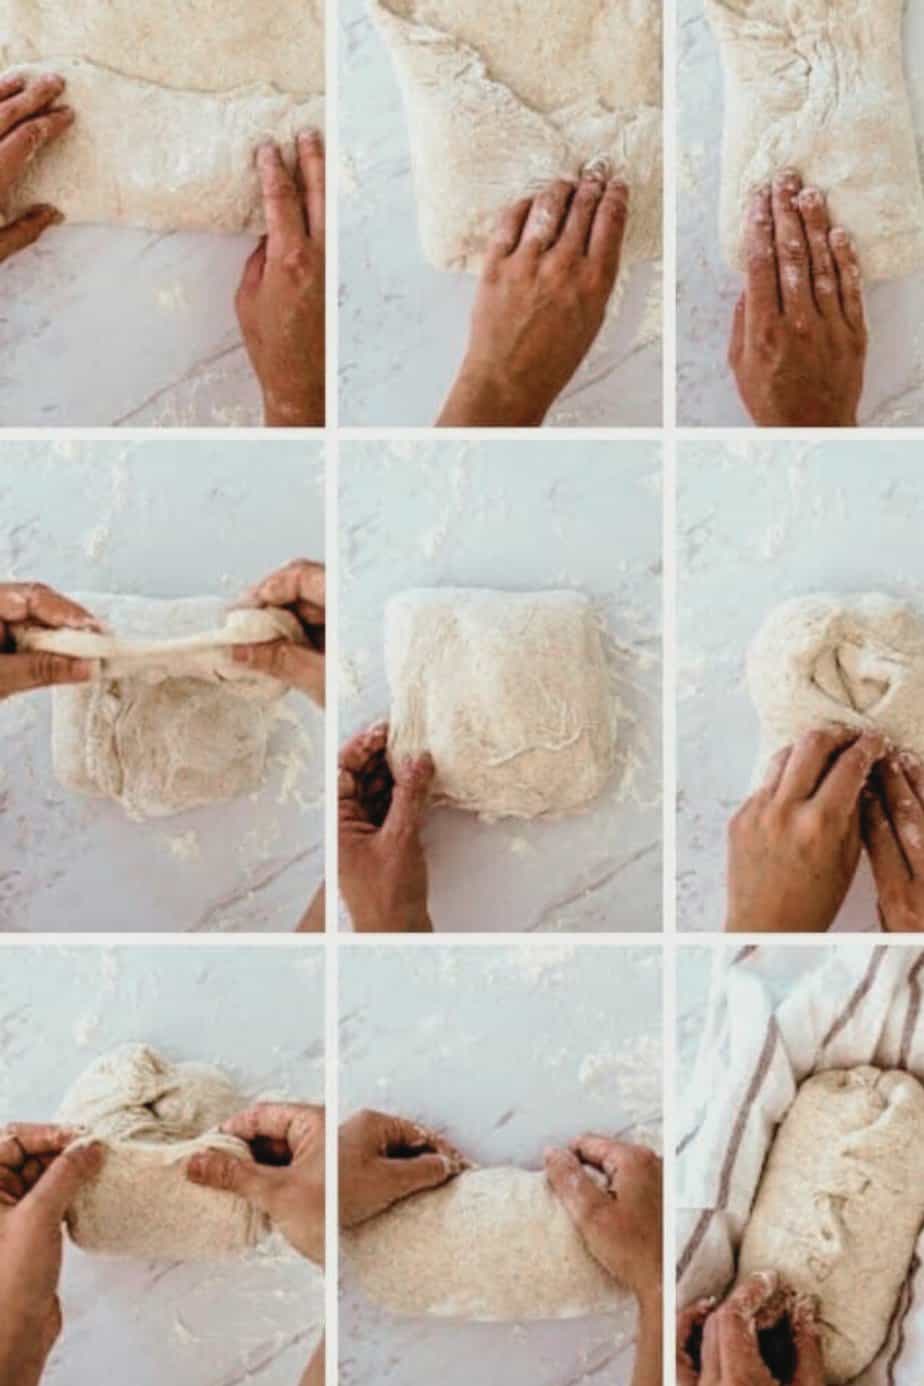
- Tip your dough carefully on a lightly floured work surface and gently form it into a rectangle. Take care at this shaping stage not to squash the dough too much.
- Take the bottom third of the dough and fold it up so it meets the middle.
- Take the right side of the dough and fold it to meet the middle, then take the left side of the dough and fold it to meet the middle.
- Take the top third of the dough and bring it down to meet the bottom. This makes a sort of ball shape.
- Stitch this ball together by grabbing some dough from the top left and a little from the top right and bringing them together to meet in the middle. Carry on doing this down the length of the dough. When you reach the bottom, grab a flap of dough and carry it over the stitched dough to meet at the top.
- Now gently grab this ball and gently roll it towards you on the bench. This will create some surface tension. All the while, take care not to de-gas your dough too much.
Add the shaped dough into the floured basket with the seam-side facing up. If the dough spreads out in the basket, you can stitch it together by grabbing a little bit from the top left and a little from the top right and bringing them together to meet in the middle. Repeat all down the length of the dough.
Place it in the refrigerator, and cover the top of the dough with a tea towel.
Baking Day
Preheat the oven and Dutch oven to 450°F/230°C for at least 30 minutes until well-heated.
Remove the hot Dutch oven and flour the bottom well. Take the dough from the fridge and carefully flip it out of the basket into the Dutch oven.
If baking this in a large pot, it’s best to tip your dough onto a piece of parchment paper. This way, you can lower it into the pot. Brush it with a little flour (this flour is optional).
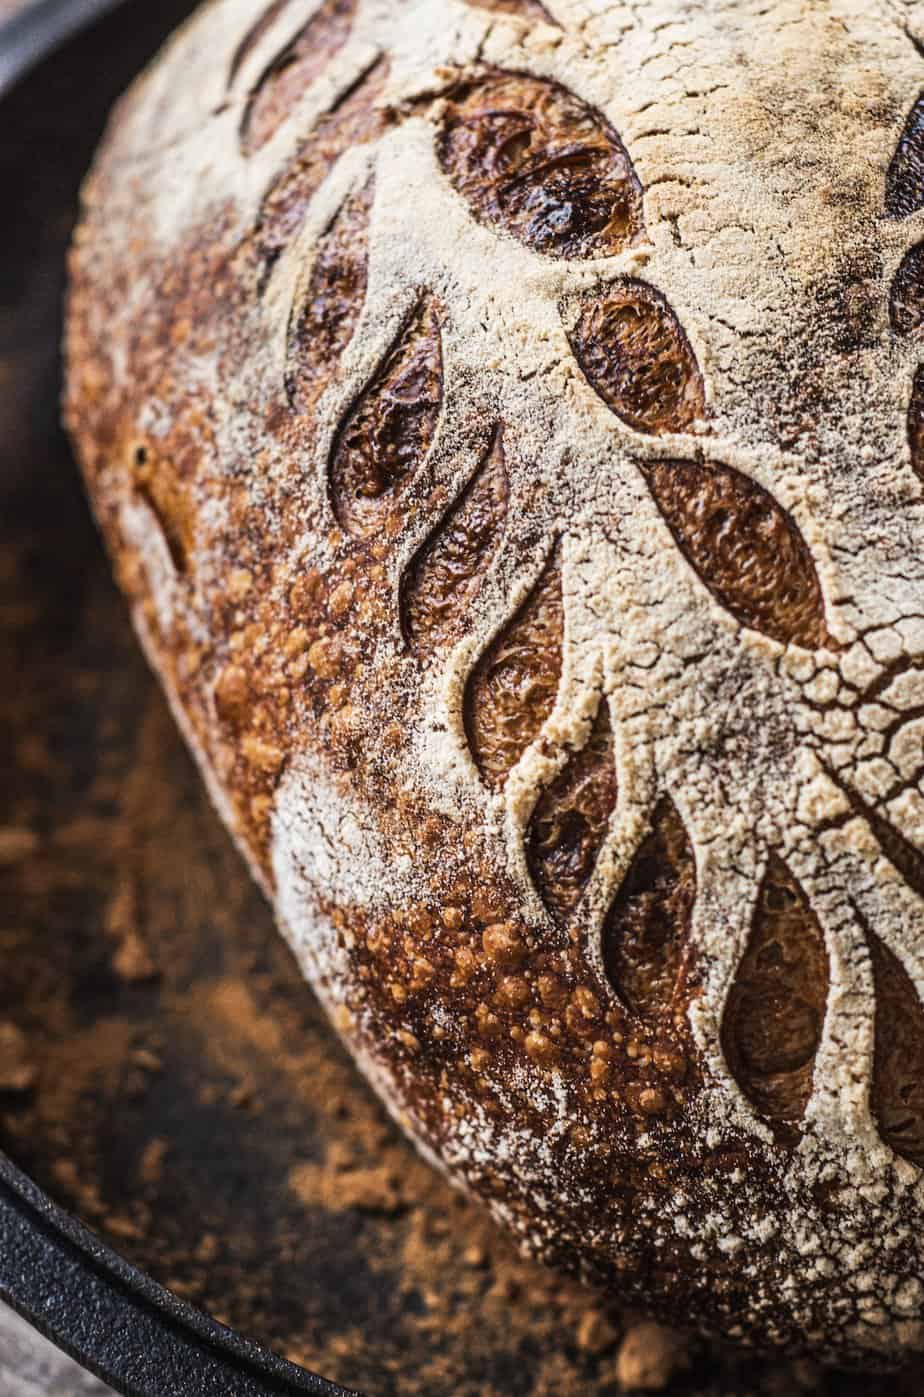
Score the dough using a razor blade or a very sharp knife.
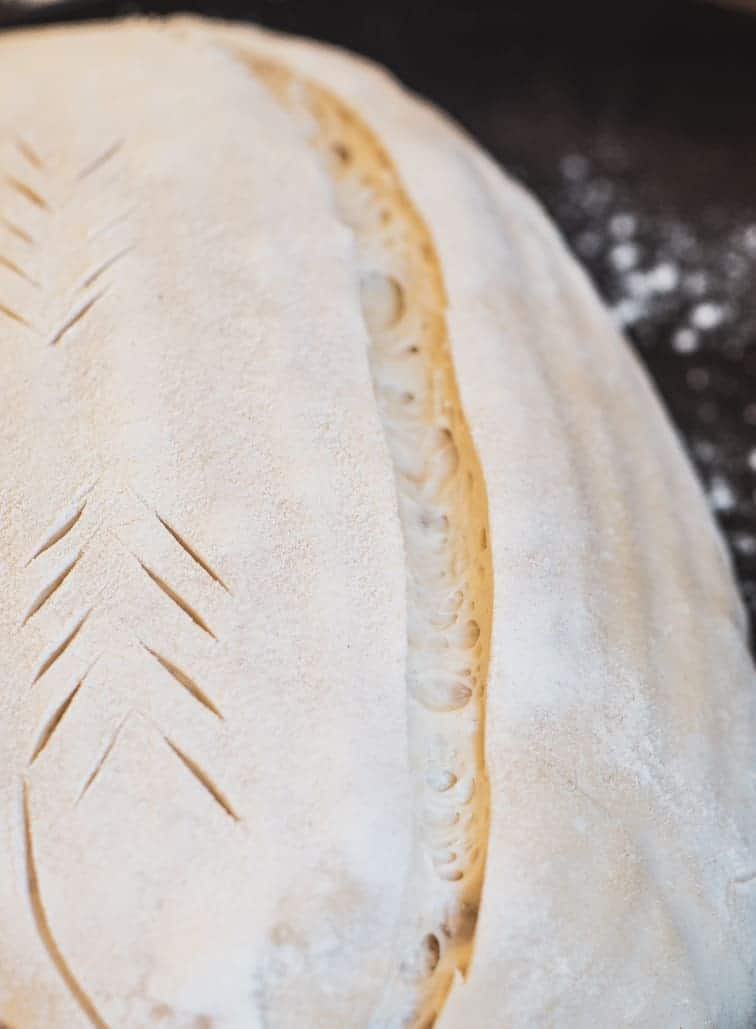
Bake covered in the hot oven for 20 minutes. Capturing the steam inside the pot helps the bread rise to its full potential before the crust sets.
Remove the lid and bake uncovered for 15-25 minutes, depending on your preference.
Here’s the hardest part: let the sourdough cool before cutting it. This is because if you cut a sourdough too early, it tends to be a little ‘gluey’ in texture. The steam needs time to escape the bread first. It will make it a lot easier to cut too.
Related posts
Want more Sourdough bread recipes? Try my Chocolate Sourdough Bread, sourdough baguette recipe, dinner rolls, or sourdough bagels!
Want sourdough recipes that are not bread? Try my sourdough bao buns or sourdough chocolate cake.
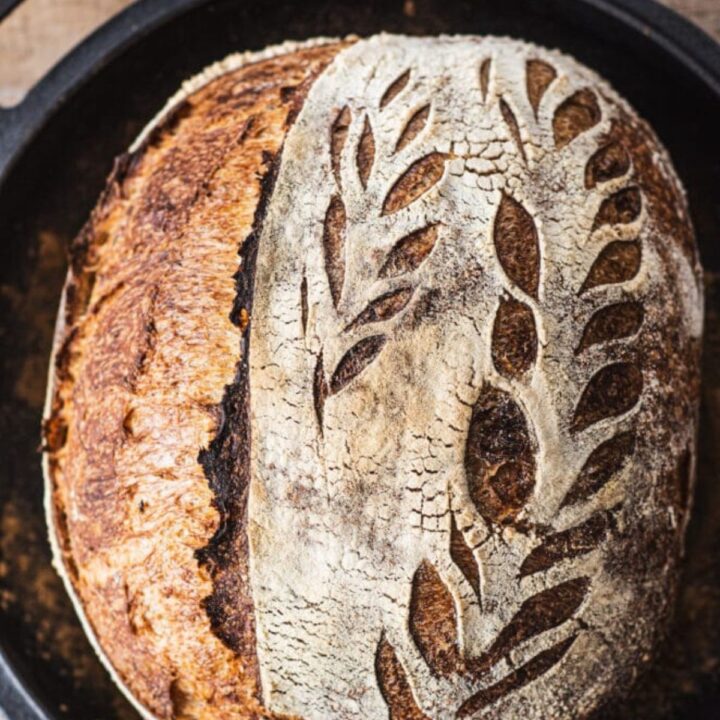
A Beginner's Sourdough Recipe
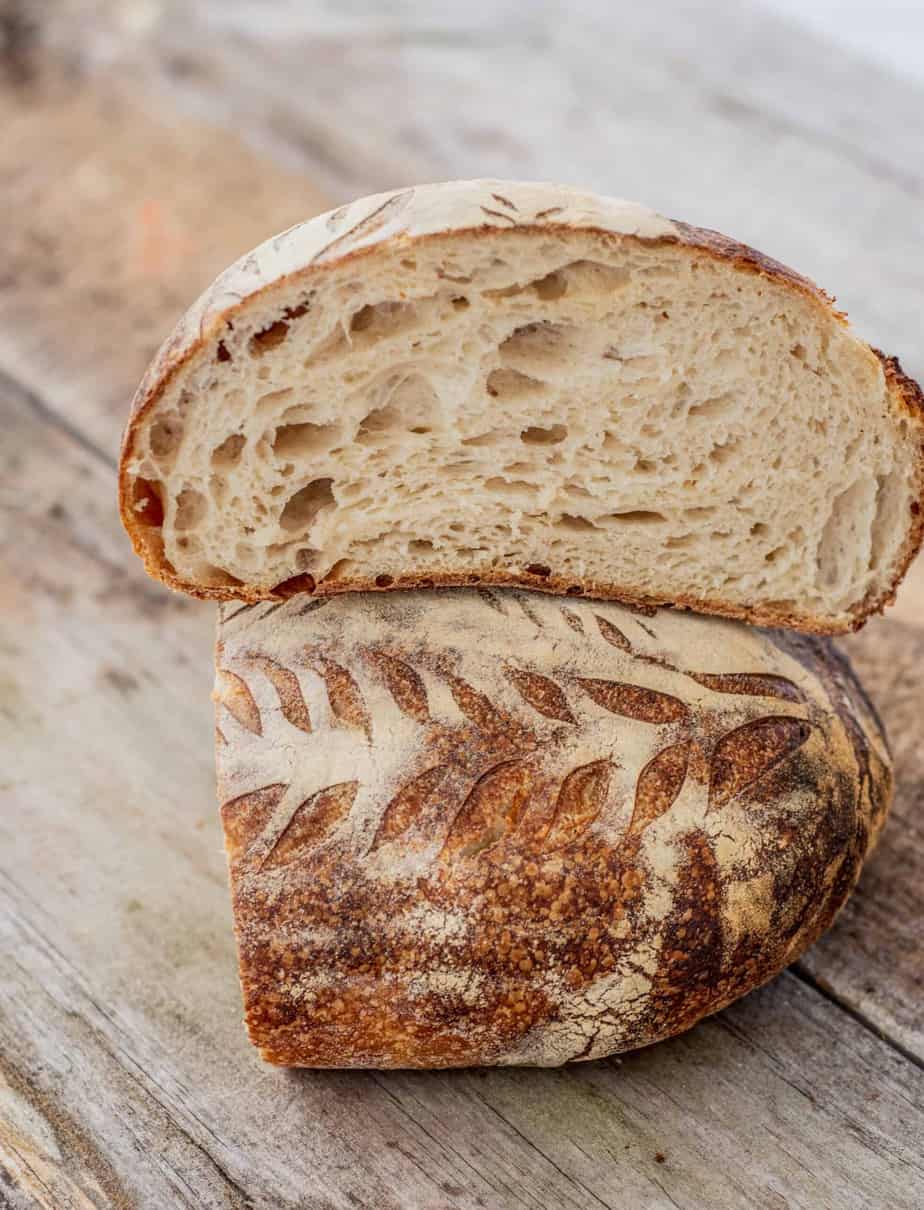
This easy sourdough bread recipe is so straight forward. All you need is a little patience and time. It uses a coil fold to create its structure.
Ingredients
Levain (this will all be used in the dough.)*
- 30g sourdough starter
- 60g all-purpose flour
- 60g water
Dough
- 460g bread flour or all-purpose flour (with a protein level of at least 11%)
- 330g water
- All the levain
- 8-10g salt
Instructions
Levain
- Mix together the levain ingredients in a bowl and stir well until thoroughly mixed. Add it to a clean jar or glass and cover it with a loosely balanced lid or damp towel.
- Leave it to sit until it has at least doubled.
Dough
- Around an hour before the starter has finished rising, combine 460g flour and 330g water in a large bowl. Use wet hands to mix it into a shaggy dough ball, then cover the bowl with a plate or damp kitchen towel. Leave it to sit on the bench.
- Add the doubled levain and the salt to the dough and combine them together using wet hands. It will form a sticky dough. Place it in a flatter dish.
- Over the next three hours, stretch and fold this dough every 30 minutes using a coil fold (see the video in the post above.) Always use wet hands. It is normal for your dough to stretch back out after each fold.
- Cover the dough and let it rise in a warm spot, ideally around 77°F/25°C, until bulked out by around 50%. You can create a warm proofing spot by placing the bread dough in a turned-off oven and adding a dish of boiled water at the bottom. Replace the water as it cools down.
- This step is very important; you must watch your dough, not the clock, to ensure it has bulked enough.
Shaping
- Line a banneton basket with a towel and flour it well.
- Tip your dough carefully on a lightly floured work surface and gently form it into a rectangle. Take care at this shaping stage not to squash the dough too much.
- Watch the short video in the post above on shaping to see how to shape, as written instructions are very hard to decipher. I have tried to explain them.
- Take the bottom third of the dough and fold it up so it meets the middle. Take the right side of the dough and fold it to meet the middle.
- Then, take the left side of the dough and fold it to meet the middle. Take the top third of the dough and bring it down to meet the bottom. Now you have a sort of ball shape.
- Stitch this ball together by grabbing some dough from the top left and a little from the top right and bringing them together to meet in the middle.
- Carry on doing this down the length of the dough. When you reach the bottom, grab a flap of dough and carry it over the stitched dough to meet at the top. This will again create a sort of ball.
- Now gently grab this ball and roll it gently towards you on the bench. This will create some surface tension. All the while, take care not to de-gas your dough too much.
- Place in the floured bowl or basket, seam-side up.
Cold Proof
- Cover with a floured tea towel and place in the refrigerator for 8-24 hours.
Baking
- Preheat the oven and Dutch oven to 450°F/230°C for at least 30 minutes until well-heated.
- Remove the hot Dutch oven and flour the bottom well. Take the dough from the fridge and carefully flip it out of the basket into the Dutch oven.
- If baking this in a large pot, it's best to tip your dough onto parchment paper. This way, you can lower it into the pot. Brush it with a little flour.
- Score the dough using a razor blade or sharp knife.
- Bake in the pot covered with the lid for around 20-25 minutes. Cast iron pots hold the heat really well and don't need quite as long as other Dutch ovens.
- Remove the lid and bake uncovered for 15-25 minutes more, depending on your preference.
- Let the sourdough cool for at least two hours before slicing.
Notes
*A levain is an offshoot of your main starter, created specifically for the bread dough you're preparing. It is a mixture of flour, water, and a small portion of an active sourdough starter. The whole thing will be used in the recipe.
The amount of sourdough starter to keep after making bread varies based on your method and desired starter quantity. Here's one approach to managing your starter and creating a levain:
- From your jar of established starter, measure out two amounts. One is for your bread dough (a levain), and the second amount will be used to create a fresh jar of starter for future use.
- For the levain, measure the amount needed for your bread recipe in a small bowl. Feed it and transfer this mixture to a clean jar. Set this aside for bread-making.
- With the remaining starter in the original jar, measure approximately 30g-50g (or less if all that remains) and feed this. Place this mixture into a clean jar and store it in the refrigerator.
Don't worry if you have a small remaining starter; even the tiniest bit can be built into a larger one.
If you want to start your starter the evening before so you can start folding earlier the next day, feed your starter at 1:3:3 or 1:4:4 before you go to bed. Cover the jar with a tea towel and keep it in a warm place overnight.
For example, 30g seed starter, 90 g flour, and 90g water, or 20g seed starter, 80g flour, and 80g water. The more flour is fed, the longer the rise will take.
Are you having issues with your sourdough bread? Check out my Sourdough Bread Troubleshooting Guide.
Recommended Products
As an Amazon Associate, a Mighty Ape affiliate and member of other affiliate programs, I earn from qualifying purchases.
Nutrition Information:
Yield: 8 Serving Size: 1 gramsAmount Per Serving: Calories: 223Total Fat: 1gSaturated Fat: 0gTrans Fat: 0gUnsaturated Fat: 0gCholesterol: 1mgSodium: 3885mgCarbohydrates: 44gFiber: 2gSugar: 0gProtein: 9g




Awesome work on the sourdough
Thank you! 😁
Made this recipe recently and loved the results. Texture was greater. However, the bread seemed very under seasoned. Is it ok to add more salt? Will that effect the texture/structure of the bread at all?
You can absolutely add more salt if you like 😊 My recipe does use quite a small amount, which is just my personal preference.
Although we are holidaying in a ‘bread paradise’, we truly miss your yummy breads 💕
The written steps don’t seem to match the instructions at the bottom? Do I add the sourdough starter at the beginning or wait and hour for the gluten to develop in the flour and water mixture, then add the starter? 🙂 🙂
Oh sorry! That’s cause I do both! I’ve changed the instructions so it’s consistent but I’ve added it both before and after and have seen no notible difference so you add it at either stage. 😊
Thanks for picking that up!
Thanks! Sorry, I’m not a very successful bakery so trying to follow the recipe to a T 🙂
Great recipe. The first time I followed your video was the first time my soughdough bread turned out edible so thanks for making it simple and easy to follow. Can I half everything in the recipe and make a loaf half the size? We dont quite finish the loaf
Thank you Mary! Yup you can just halve the ingredients!
Yum. Just watched the video. Am on Day 5 of my starter, can’t wait till it’s ready 😂
Hi! I was just wondering if you have a recipe for wholemeal sourdough? Or would it be easy enough to use the same weight measurement but with half white and half wholemeal flour? Thanks!
Hey you can totally do that, maybe with a little more water but for me the most important bit is the kind of wholemeal you use. Are you in NZ? If so, the supermarket wholemeal here is essentially white flour with large bits of bran mixed in and I hate using it in my bread. I really like using organic wholemeal because it’s finely ground and I find it easy enough to incorporate it into my dough. This recipe here has a fairly low hydration though so you probably will need to add a little more water. 😊
Hello! This is the clearest description of the sourdough bread making process I’ve been able to find and I am going to give it a go tomorrow at 7am. : ) But could you please tell me if that particular approach to the kneading is essential? I don’t know if I have the patience! I am hoping a regular knead or something not at such close intervals will work?
Thank you so much!
Hey it makes a difference to the structure of the dough, you definitely need to work the gluten. However you can knead the dough one or twice instead of my method, though it would be a good 15-20 minutes of kneading to get it developed enough. Ideally the dough would be able to stretch out super thin so it’s almost see through without ripping (the window pane effect.)
So from the step where the salt and starter is mixed with the flour and water you could then knead it in a mixer or by hand until you see it come together. The should easily pull away from the sides of the bowl and not leave any dough behind. Really give it the time it needs. Don’t rush it.
If you’re hand mixing, have a look on YouTube for the ‘slap and fold method’ which is the easiest way to knead a wet dough.
Whatever you do, don’t cut down the actual timings of the proofing. As in, even if you knead once, it still needs that 3 hours + the 1-4 hours afterwards to bulk out. So like between 4-7 hours total depending on the temperature of your house.
Hope that makes sense, good luck!
Yes! It makes sense. : ) I’ve begun the steps and am so looking forward to my first sourdough adventure. Thank you again for the lovely help.
Very helpful information. I’ve been making sourdough bread since 4 months and you’re tip about long autolyse and coil folding has given very good results. Thanks!
That’s great Lyne! I’m happy you find it helpful 😄
Made this recipe today and was thrilled with the results. Thank you for sharing your process. Really love your sourdough posts.
Thank you so much for this comment! I’m so happy you loved it 😄
Hi. Using your recipe I am nearly finished coiling/ stretch & folding but dough has become quite wet in that it doesn’t form any resemblance of a ball. It just spreads out & fills the dish again?? Thanks for any advice you can give me.
Hey,
It’s hard to know what the exact issue is but I always find it helpful to go back to the basics when troubleshooting sourdough;
– Ensure your starter was ready and rising easily.
– Endure the acid content in it is low enough – you can read more about this in my sourdough starter guide, posted below.
– Check you’re using your starter before it has peaked otherwise the starter is more likely to be exhausted.
Most importantly – sourdough is a journey, read about it as much as you can because the more you understand about it the easier it will be to figure out what’s going on.
https://homegrownhappiness.com/starting-and-maintaining-a-sourdough-starter/
Made this recipe recently and was really happy with the texture of the bread, but it tasted very under-seasoned to me. Anyone else think it needed more salt? If I add more salt next time, will that impact the texture at all?
Hey, you can definitely add more salt if you like. It won’t affect the texture 🙂
thank you for the awesome recipe, now I can bake myself some sourdough bread at home. 🙂
Hi, just wondering when we take the dough out of the fridge to bake the next day do we need to wait for the dough to come back to room temperature or can we bake it from cold straight out of the fridge? I’m a newbie to sourdough and giving it a go through the lockdown here in NZ. You site and instructions are brilliant by the way! 🙂
Hey thank you! I bake the dough straight from the fridge 😄
This recipe is great! I’ve made it four times since lockdown started – first time working with a sourdough starter ever so I’m really pleased that it all worked out. The videos on the folding and knitting were especially helpful 🙂
That’s so cool to hear Katie! I’m so pleased you like it! 😄
Thank you so much! My first successful loaf after many disappointments! You are a genius!
So glad to hear you liked the recipe 😁😁
Hey I made this recipe worked out well thank you so much! I just have one query my bread doesn’t really have a strong sourdough flavour though it definitely smells like sourdough. Is this to do with my starter? Also when my starter doubled in size it then started to reduce again is this normal?
Hey Julia, if you’d like a stronger ‘sour’ taste, you can extend that cold fridge proof for the full 20 hours 🙂
My 7th and 8th loaves came out of the oven this morning (after your Sourdough Hot Cross Buns). Being a novice and having never baked bread before, I am thrilled that so far each one has been successful even when experimenting with flour combinations. Thank you for sharing your recipes and knowledge it is appreciated.
I’m so glad I found your website. We made our first loaf today from this recipe and had great success! Just wished we had baked 2 loaves so that there was some left for toast. Your video and instructions are so clear and easy to follow – very reassuring for a novice sourdough baker. Many thanks!
So glad you liked the recipe and videos! 😀
Hi, I followed your recipe to make my own starter (the scientist in me loved the process so much!) and from there to make my very first loaf of sourdough. My family loved it, so thank you for creating something that was accurate and so easy to follow! I’ve never come across the second (cold) proof in baking breads before, and was wondering what the function is please? Thank you again!! And trying your pizza bases today 😀
Hey! So glad you liked the recipes 🙂 The cold ferment is to slow down the rise of the yeast and let the bacteria do their magic; fermenting the flour, making it easier to digest and it helps develop the taste. The longer the cold ferment, the more sour the bread can taste.
After the bulk ferment, my dough is still so sticky and runny I can hardly shape it.
Hey, head to my starter page and make sure your starter is healthy and ready to make bread, and that it’s being used at the correct time. A starter past its peak can make dough difficult to work with, because there can be too much acid in it – make sure you’re using it at peak or before – this can take some time of watching your starter each day to see where the peak is and how long it takes to get here. 🙂
What if you are having this problem (dough is way too wet, windowpane isn’t really happening, and shaking is impossible) and you know your starter was perfect when added in?
If you’re sure your starter wasn’t too acidic, then I’d perhaps change flours
Thank you for your incredible detail, Elien. Can you tell me what size basket you use for this loaf? I’m thinking ahead to Mother’s Day and am going to request a couple of baskets so if you have advice on a couple of basic sizes and/or anything I should look for, it would be very much appreciated. I’m currently using a cake tin. Thanks again.
Heya, I use a 25cm/10inch rectangle banneton basket 🙂
HI Eileen,
I found your starter recipe on Pinterest and followed it to make my very first sour dough starter. I made your easy sour dough loaf. I was concerned at the end because my stitching wasn’t going well as I felt my dough way very sticky on the bottom. I made it work and baked it yesterday morning and it’s some of the best sour dough I’ve ever eaten. Thank you for sharing this and the detailed you tube video!!! My son loves pancakes so we are going to try those in the morning and then I’ll try croissants and pizza dough! Thank you again. Love from California.
Oh that’s great to hear! I’m so happy you liked it 😁
Thanks for your amazing instructions in all things sourdough. My starter is really active – maybe less than 5hrs to double with a 1:2:2 feed. We have already had the delicious pancakes with the discard along the way – perfect recipe.
I was wondering if you have experimented with mixing in other flours with your standard sourdough recipe. I have some spelt flour and believe it has different properties to strong white flour. I was thinking that I might try a 25% substitution to start and see how it goes. Curious if you had tried it?
Thanks again for creating such great content – also working up the courage to turn a section of our front lawn into a no-dig patch… but one thing at a time!
Hey subbing in 25% spelt is a great idea, that’s about the amount that I use too when I use spelt ☺️
Hi Elien,
Thanks so so much for sharing your recipe! One of the easiest to follow that I’ve found! I’ve made two loaves now and keep having the same problem. The dough seems similar to yours in the coil and foil part – looks great, but after the bulk ferment it feels very fragile and wobbly, and seems to spread out very easily – it definitely doesn’t hold together in the shaping part like yours does….do you have any tips? My starter seems very active -doubling in just 5 hours. Is there another way to test if it’s not ready? I’ve heard of the float test but haven’t tried that yet? Or am I over or under fermenting the dough? I’ve also just been using strong white bread flour as unfortunately it’s all I can find during lockdown. Perhaps this is the problem? I’m determined to get this right!! haha
Hey it actually does sound like it could be over fermented. An over fermented dough is definitely more fragile and can spread as the gluten structure has weakened.
I would try it again and watch it during the bulk ferment. It shouldn’t double or anything, just bulk out a bit. And when prodded with a wet finger it should make an indent that slowly fills back about half way. Over proofed dough will leave the dent without filling back out. 😊
Hello Elien – I’m on my 2nd loaf of your Easiest No Knead Sourdough load, but have ended up with 2 starters in the fridge now. I’m thinking one of them could be discard – instead of which I’m breeding monster starters! From my seed starter which had been in the fridge I took 65g, added 130g flour and 130g water for my loaf. I then fed the remainder of the seed starter 1:2:2 and replaced it in the fridge for a future bake. Made my autolyse, and put the new starter aside to rise. I then used 150g of that to add to my autolyse for my loaf which left me with 150g of the new starter. Which I then fed 1:2:2 and put that in the fridge – giving me 2 starters in the fridge for a future bake. Should I not have fed one of these, but used it as discard, and if so, which one? Is there a time frame I should use the discard in? – I have been making chocolate chip cookies and pancakes. Thanks in advance.
Hey,
I take the starter from the fridge and feed it, for example the 65 g with 130g flour and 130g water, and discard whatever is left. You fed this discard, and that’s where I do it differently.
Then after I take 150g for my bread, I’ll feed the remainder and place that back in the fridge in a clean jar, or feed and keep it out for the next bread. That way I always have just one jar of starter on the go at a time. The 65/130/130 amounts are really just examples too as they make quite of starter. Feel free to lessen this so it works for you 🙂
There isn’t really a time frame in which to use the discard, it’ll accumulate more acid as it matures but that’s not a bad thing in discard recipes.
That makes sense thanks Elien. What decides whether you feed the remainder and place it back in the fridge, rather than feed it and keep it out for the next bread. Is that dependent on when you are making your next loaf? If you feed it and keep it out, do you need to then continue to feed it twice a day so it has enough food to keep it going? – as I understand your instructions, it goes in the fridge to slow the action down. I’m finding the whole process fascinating and am looking forward to my next loaf!
Yeah it depends on when I next bake. One example is if I feed it in the morning 1:2:2 and bake in the afternoon, I may feed it 1:3:3 or even 1:4:4 after that and leave it to rise all night, so I can use it earlier the next morning. The fridge slows it down, but so do large feedings 🙂
I just made this sourdough, and it was the first time I had real success! The dough is definitely underseasoned, it needs at least 2tsp of salt. But apart from that, perfect recipe and explanation!
Glad you enjoyed the recipe! 😄
I’ve tried this twice already and the dough is always extremely wet and slack when it comes to shaping. I almost have to pour it into the banneton and hope for the best. My starter is very active and has made bread successfully before so that’s not it.
That sounds like your starter has too much acid, which can really make the dough so hard to work with, it turns it quite sloppy and liquid. I avoid this by regularly refreshing my starter, and keeping the seed starter amount really small, and making sure to use it before it peaks
Interesting I’ll try to make it less acidic and see
After 3 failed attempts (hockey pucks) I found your recipe and your instructional video. All I have to say is thank you thank you thank you. It came out perfect this is my go to recipe from now on.
That’s awesome Bea, I’m so glad you loved the recipe! 😀
I’ve had some good success with your excellent recipe thanks. But I’m having trouble with the autolyse staying too wet and will not form a ball towards the end of the coil process. I’ve read above comments and think it’s a issue with too much acid, and I’ve read your references to this in the sourdough starter link. I’ve tried using the starter to make a fresh batch but I seem to get the timing wrong ~ takes too long to double during the day and peaks overnight so is past it’s best in the morning.
Any suggestions?
Many thanks for your excellent website and videos.
Hey :), it can take some time to get to know your starter well and find when it hits the peak, and sometimes it takes a little trial and error. It also depends on the warmth of your room and maturity of your starter. In general, if my starter is in a room between 21-23°C and I feed it at 1:1:1 I would expect it to double and use it between 3-4 hours, 1:2:2 between 4-6 hours and 1:3:3 between 6-8 hours. So that being said, you could feed your starter 1:1:1 if the 1:2:2 ratio is taking too long in the day for you. Just ensure to use it before it peaks. Or, on the other hand feed it 1:3:3 overnight, to stop it peaking too fast (when the temperature drops, 1:3:3 can take between 8-10 hours.)
Hello! Could this recipe be doubled to make two loaves? Want to make one for my mom and one for me 🙂 Or do you suggest mixing two separate doughs?
Heya you can just double it and split it apart at the loaf shaping stage 🙂
Thanks to your excellent recipes and videos I’m now baking a pretty good sourdough bread. Was wondering if you have a sourdough Focaccia recipe planned?
I do have one planned! 🙂
Gr8 Lk4ward 2 it!
I am enjoying the process. My starter appears to be quite active. I am feeding 50 gm daily at 1:1:1 once in the morning and once at night. It is doubling in rocky 6 hours and by the time I feed again it is collapsed. What should I do? I am considering moving it to the refrigerator to slow it down. Thank you so much. I made my first loaf this weekend. I thought I had failed due to how wet the dough was but it worked! I’ll keep trying.
Heya, that is great it is so active! try feed it now at 1:2:2, (1 part starter, 2 parts flour and 2 parts water). The extra flour and water to seed starter will slow it down.
Hi, I like how much detail you provide but there is one bit of information I can’t seem to find. How many times you fold the dough each time you coil?
Hey a minimum of 4 usually, though sometimes I add a couple more if I’m working with wetter dough ☺️
Thank you. That’s helpful. My dough was quite wet which had me worried but both loaves I’ve made have been superb! I’m looking forward to your focaccia recipe now.
Hello, 14 days after I commenced my starter it was ready and I am pleased to say I pulled off a beautiful first loaf, thankyou so much. I must admit I found it a slow process when you think you start the day before and only have bread the next day. Guess I need to learn to slow down. I proofed overnight and baked for lunch the next day but wondering if I want to swap around times to have bread ready at dinner how would I work the times ? hope that is not a stupid question…. thankyou for sharing this information.
Hey you can always extend the fridge time and bake it in the evening instead of before lunchtime 😊
Thankyou
Hello, just found your recipe and I am new to sourdough …so really just experimenting .
I have got my seed starter sitting in my fridge at the moment. So to prepare the starter for the recipe, do I take the seed starter out of fridge to bring it to room temperature first ? Or do I just prepare the starter for the recipe from the seed starter straight from the fridge ? Thanks…
I used this recipe for my first homemade sourdough loaf and it turned out GREAT! Very easy instructions to follow.
I’m just embarking on my first sourdough attempt (wish me luck!) and wondering what your thoughts are on the ‘float test’? I made the leaven starter for my bread this morning and it’s more than doubled already (4 1/2 hours) but I just tried dropping a tiny bit in a glass of water and it sank straight to the bottom! I’ve read that if it does that, your bread won’t turn out well? I’ve already done my autolyse so I’ll carry on regardless, but interested to know whether you think this is a reliable test or not… Thanks! 🙂
Heya I do find the float test pretty good, the fact that it didn’t float means it probably wasn’t quite ready yet and could have risen a little more 😊
Hi I’ve made your method s few times now and just couple of queries how much water at the autolyse stage in ingredients it’s written as gm while in recipe it’s ml , I’m using a Rye starter could this be changing my dough , my dough is to wet and not coming together at the coiling stage. Thank you in advance . Cheers Lindy
Heya, 1 gram water is equivalent to 1 ml water :). It could be your rye starter that’s making a difference to the dough though. Here is my troubleshooting guide which has information on starters and how it could be affecting the dough.
Great step-by-step recipe! My sourdough turned out so great! Thanks 🙂
Just made your bread follow the directions did a little bit different on the lift and fold but it turned out awesome. Like the feel of the dough! Wanted to post a picture but don’t see how! Planning on trying to make the croissants next!
Awesome. So glad you liked it! 😄
My 3rd ever sourdough bake was done using your recipe, instructions and video guidance. It was a raging success. Thank you so much! Just wondering what the amount of starter, flour and water could be used for a slightly larger loaf. I used what you had in your recipe: 150 g / 460 g / 330 ml
Hey so glad you had good results! It’s easy to make a recipe larger by adding the % increase to all the ingredients. Eg, a 10% bigger loaf will be 165g starter, 506g flour and 363ml water 🙂
On my second attempt I had success and I am so excited about it! I just have a question about using and storing the starter. In the directions above you say to take the remaining 50g of starter (not added to the autolyse) and feed it 1:2:2 and put it in the fridge, but then on the page about “starting and maintaining a starter” you said to feed leftover 1:1:1 before putting in fridge. I am just confused only because I took out my recently used and fed “1:2:2” starter out of fridge to feed to bake with (2 days after putting in there) and just wanted to make sure it would be good to use. Sorry if this is confusing! Thank you!
Hey it can be either or, though with a younger starter 1:1:1 may be best when it’s stored in the fridge. However in well established starter, or with a starter that will be in the fridge for a wee while, I prefer 1:2:2 😊
Thank you for teaching me how to make bread Elien! I just took my very first (and near perfect) sourdough loaf out of the oven this morning. After trying to follow other online sourdough recipes I found your directions to be the clearest and most helpful. I’m so pleased to have this new skill!
That’s so awesome to hear Susan! 😁
I searched all over the internet for a sourdough bread recipe that was easy to follow and then I found this one. It did not disappoint. Great instructions and the video was a massive help. I have made multiple loaves and they have all turned out amazing. Thanks so much 🙂
Thank you for the lovely feedback!😁
Im making bread on sourdough since 2 yeras and wasnt so good, i new i do something wrong and then i find your recepie. Yesterday i try exactly with your methods and bread is amazing. My problem was with starter and now i know how important is to prepare correct starter. We cant cheat math and physics.
before baking you say to cold proof when it is time to bake does it go straight from fridge to oven or room temperature first then oven
It is baked from cold 😊
I used your recipe 3 times now and each time it turned out better than the previous. My question is should the dough be that sticky and soft when shaping? It’s difficult doing the envelope folds and stitching because there doesn’t seem to be any firm structure. . And later when I’m ready to bake it, when I turn the banneton with dough over on to some parchment, it kind of spreads out again. It’s not a tight ball like in your video. Is that because I didn’t shape the dough well?
Hey Frank,
If your bread is losing structure it could be to do with your starter. You might find my guide here helpful: https://homegrownhappiness.com/sourdough-bread-trouble-shooting-guide/ 😊
Hi Elien! I love this recipe – it works so well! Just wondering whether you’ve used this recipe with add-ins (cheese / herbs / dried fruit etc), and what sorts of adjustments you’d recommend making when doing so?
That’s great to hear! I have experimented with adding dried herbs, fruit and nuts, and I add them at the autolyse stage. ☺️ Haven’t tried cheese though!
Thank you for this recipe! It’s my favourite one beCause it never fails me!
I love it!
Yay that’s so cool to hear! 😄 you’re so welcome!
Your recipe is literally the best I’ve tried! I am getting wonderful open crumb, thin crust and very consistent results! One question I have is when I leave the Boyle overnight in the fridge, I feel like it’s getting stuck to the banneton and I put a lot of flour to prevent it. But then the flour stays as a thick unattractive layer on top. Do you use rice flour for that? Or is my dough not strong enough and that’s why it sticks? Thank you for your recipe!
I would definitely give rice flour a go! Your bread sounds like it’s working very well, so your dough shouldn’t be the problem. I have to use a heap of regular flour too to stop the sticking, but need much less with rice flour. Thanks for your lovely feedback!
Bread turned out awesome! Your recipes are fabulous! The bread turns out quite a bit darker than I’d like. Should I bake it at a lower temperature, and/or for less time?
Hey! Thank you! You can turn down the temperature for the uncovered bake ☺️
Hi there
I’m wondering what size Banneton you use for the basic recipe
Heya I use a 750g banneton 😊
Love the recipe and how you explain it in detail. The bread looks amazing!
You mentioned fan bake and convection oven times and temperatures, but what about a very regular oven without a fan or convection settings, what temp and time would you recommend?
Thanks from Canada!
Hey thanks for pointing that out, I have updated it 🙂
HI – great video. Where di you get your cast iron dutch oven as love to get one the same with a handle.
Thanks
Hey! I got it from https://lodgecastiron.co.nz/ 🙂 it’s the combo cooker
Do you mean 330 ml of water or 330 gr of water?
Grams and ml work out the same 🙂
Best recipe I have tried. Lovely!!
Thank you so much!
Eilen, love the simple instructions and practicality.
Can you advise if you let the loaves come to room temperature or bake them straight from the fridge after cold proofing?
PS: Easter Buns are on the cards!
Hey Richard, thanks so much! I bake the loaves straight from the fridge 🙂
Loved your recipe. I’ve been making sourdough since last July and this bread was terrific. I used bread flour and modified it a bit and added some whole wheat and rye flour for extra flavor. Thanks for making my day a little better. Picture @nachampion on Instagram
Thank you so much! A whole wheat and rye addition sounds brilliant! Your bread looks awesome 🙂
Hi Elien
I’ve been making your bread for a while now but recently I’ve found that it hasn’t been rising overnight like it use to and I can’t figure out why so any suggestions?
Hey Jo, I would look at the starter. Perhaps the change in season and temp has made things a little slower. Is the starter taking longer to rise then before?
I have tried a few recipes and this one works every time, even when I sub in a percentage of rye flour, it just works! Thanks so much for developing this recipe. This is exactly the taste i remember of bread growing up.
Thank you Julia, I’m so pleased you like the recipe!
Hi, thank you very much for this perfect recipe, I have been successful for 3 times now !
I have one question, on the instructions you recommend to wait two hours at least before slicing, but then it gets too cold and we want to it it warm 🙂 Shall I re-heat?
Thanks !
Yup reheat it afterwards. You can always slice it warm if you want to, but you might just notice the texture isn’t as good. I prefer to slice it cold and toast the slices after if I want them warm 🙂
Hello Ellen,
Thank you for your careful and detailed recipe. I have made this a few time. The final results have been satisfactory, but I don’t think I have achieved the desired dough consistency. I have follwed the quantities exactly, but I think my dough is too wet. It fails to come together the way yours appears to, especially by the last fold (and before) when it appears to be in a tight loaf shape. My most recent attempt I used a bannetton for the first time. When I finally laid the dough in the cast iron pan it did not hold its shape. After 30 min covered bake, the bread has settled into a boule shape. It looks great, nonetheless. I in the midst of top brown. I am anxious to see the result as I don’t think the covered bake was long enough and the interior was a bit chewy (but still good to eat). Any advice on getting a dryer dough? On my own I would try a bit less water. Thanks, Jim
Hey Jim, I would first take a look at your starter and check that’s at optimal condition . You can reduce the water in the dough but that isn’t the reason for the lack of elasticity. The chewy bread sounds under proofed which again can be related to the starter. Here’s a bit more information.
Jim,
I have followed Elien’s method (not recipe) twice now with fantastic results! My loaves are huge. I use a strong bread flour with approx. 13% protein content. I use 500g of flour with 320g of water. A much lower flour to water ratio than Eilen’s. I have figured out that the flour I use absorbs a lot of water so I started using less water. I also use 150g of starter and 10 g of salt as recommended by Eileen. I use a Rye/Spelt starter. Even though I use less water, I get a huge oven spring and blistering by on my loaves by following Elien’s method including her method for shaping a batard. My loaves stay moist for a few days too.
Hey Jim, that’s meant to be a link to my sourdough trouble shooting guide. You can find it if you search ‘Sourdough Guide’ on my blog. Unfortunately I can’t view those pictures
Hi Ellen,
Thanks for this recipe! I have just started my sourdough journey and love coming across different techniques, such as your coil fold! I was on a mission to get more holes, as previous loaves have been more dense. Your folding with wet hands, creates lovely bubbles. Finally, I love that in the morning, there is no faff, just straight into the oven! Other recipes you have to shape, leave on the counter etc. I’ve made a few of your Plain white loaves, my first was the best so far. I reduced the water so only used 303g (my flour has a lower protein value). It took longer to prove, I had to pop it on my boiler which worked a treat (I’m in the UK).
My question to you is this: you say ‘now you can add seeds’ but you don’t say a quanity or method. Other recipes I’ve used for seeded sourdough have a quantity of seed and water ratio (they say to soak first). I added 100g of seed but I didn’t soak first. The dough was definitely less elasticated, I think the seeds affected the water content?! (I used Linseed & poppyseeds).
Any thoughts and advise on this would be appreciated!
Hey Vicki, I’m glad you’ve had success with this recipe! For the seeds, I can add 2-3 tbsp worth without it affecting the dough structure, but that’s only 20-30g. 100g would affect it. I suggest starting with a lower amount of seeds and seeing how the dough feels, and gradually increasing the seeds and water if needed in future loaves. 🙂
Eline,
Just to let you know, I made the loaf today and rather than preheating the cooking vessel I put the floured and slashed loaf into a baking cloche and put it into a cold oven. Then turn the heat on to 425 degrees F, and the timer to 30 minutes. At thirty minutes remove the cover and baked it for another 25 min. to an internal temperature of 205 degrees F. It came out great. Eliminating dealing with the super hot baking vessel makes it a lot more attractive especially to the novice baker.
Gene, thanks for sharing! Great to know it works well without a preheated pot too 🙂
Hi,
Love your recipes!
What would you recommend for gluten free version?
Thanks 😊
Ran
Hi,
Great recipe, we have being making two loaves a week now for over a year, love it. The only question we had was after baking and leaving for at least two hours plus, today five hours, looks perfect when cut however it is always quite sticky, is there a fix for this.
Thanks 😋
William
Hey William, a sticky loaf sounds like it could be a bit under proofed. You could extend the bulk ferment a bit before shaping or pop it in a warmer spot 🙂
Hello! I made this recipe, and it was a good loaf! I have a question: whenever I bake a sourdough bread in a Dutch oven, despite putting a baking sheet or a baking steel on the shelf below it, the bottom crust is too hard to cut through without difficulty, and you can’t chew it. Is there a solution to this, or should I just not bake it in a Dutch oven? I even slightly underbaked this one this morning- still tough and chewy on the bottom. Is there an alternate way to bake to avoid this? Thank you! Love your site!
Hi carol my friend gave me a tip with the bottom being hard. Put a good layer of coarse salt on the bottom of the dutch oven and then put your sourdough with the parchment paper on it. It creates a tiny space so the bottom doesnt get over baked. Hope that helps.
Love your site and recipes. Got confused with recipe for beginners sourdough. Ingredients say 330ml water, instructions say 330gr water. I stuck with the grams as I’ve never made sourdough using mls.
Maybe a typo?
Hey! Grams and ml are the same when it comes to water 🙂 1gram water = 1ml water too, but I will update it to avoid confusion
Hi
Just reading your nutrition information and it has the serving size as 1 Gram. As I’m type 1 diabetic I need to know the carbs in food.
I am very interested in your starter and sourdough recipe. Sounds and looks delicious.
Thank you
Cheers Sue
Hey Sue, the serving size is meant to be 1 serving, not one gram but unfortunately, the nutritional calculator that comes with the recipe card isn’t very consistent or accurate! I suggest finding one online that’s a bit better and entering your own numbers.
Hi Elien,
Just baked my first sourdough loaf this morning. It turned out to be perfect! The crust was so nice and chewy, the inside was moist and the right texture, and the shape was just like your pictures. I was surprised because when I scored the dough, it did not hold its shape – I used a razor blade but it was difficult to cut, not like your video. Thanks so much for the great instructions. I have learnt so much. I have my starter in the refrigerator – ready for #2!
Yay so happy to read about your successful first bake! Bring on round 2 😀
Hello,
The first time I made it bread turn out perfectly!
However, second and third and the end of bulk proofing, it was all sticky and I had to chuck it! I’m tried to steal cold proof with the third one but it just stuck on to the tea towel after.
Is this over proofing or how do I troubleshoot this please?
Thank you!
Heya, I would have a look first at your starter. Is it refreshed often and not too acidic? Too much acid can ruin the dough structure and make it very sticky.
Otherwise, if your starter isn’t the issue then it might be over proofing yes. You could play around with reducing the amount of starter in the dough if your environment is quite warm.
I have tried, and failed so many times I’ve lost count, to bake a satisfying sourdough loaf that looks even remotely like the picture. It usually resembles a small windowless building. But today, I’m ridiculously excited by my loaf. Tall. Round. Crunchy crust. and WOW! even ears!! I am beyond grateful to my work colleague who recommended your site. And thrilled by your easy to follow recipe. Life long fan.
That’s awesome Sarah!! So stoked to read this 😀
Hi,
For 3 1/2 years I’ve been following your recipe and enjoying the result. Thank you so much! But I have a conspicuous problem, I think. After the first proof for bulking out the stretched and folded dough, I turn it out. It’s a mass of dough strings! Lots of air between the strings. It’s also sticky and difficult to fold and “stitch” before it goes into the cool proofing basket. The finished bread looks and tastes fine, but what’s causing the strings? I’m guessing this isn’t an unknown issue.
Hey Linda, if it’s so sticky and difficult to shape, I would wonder if it’s perhaps over-proofed! Then the dough will lose its structure and become very weak
This is a fantastic recipe and came out perfectly. I’ve been making Sourdough for a couple of years but have had difficulty with the inside being a little gummy. Decided to try this recipe and then work from there. Will try some wholemeal into it now.
Thanks for all your great recipes, we love them and they are super reliable.
So happy you’re enjoying the recipes Ruth, thank you! 😀
Made the most perfect loaf of bread thanks to your clear instructions. One question: if I feed my starter at 1:3:3 ranger than 1:2:2 will I still use a total of 150 grams for my bread?
Oh thats great to hear!! And yup you still want to keep the total amount the same 🙂
You are so generous with your time! Thank you. I will be making your bread to share with family and friends for Xmas. May you have a wonderful Xmas.