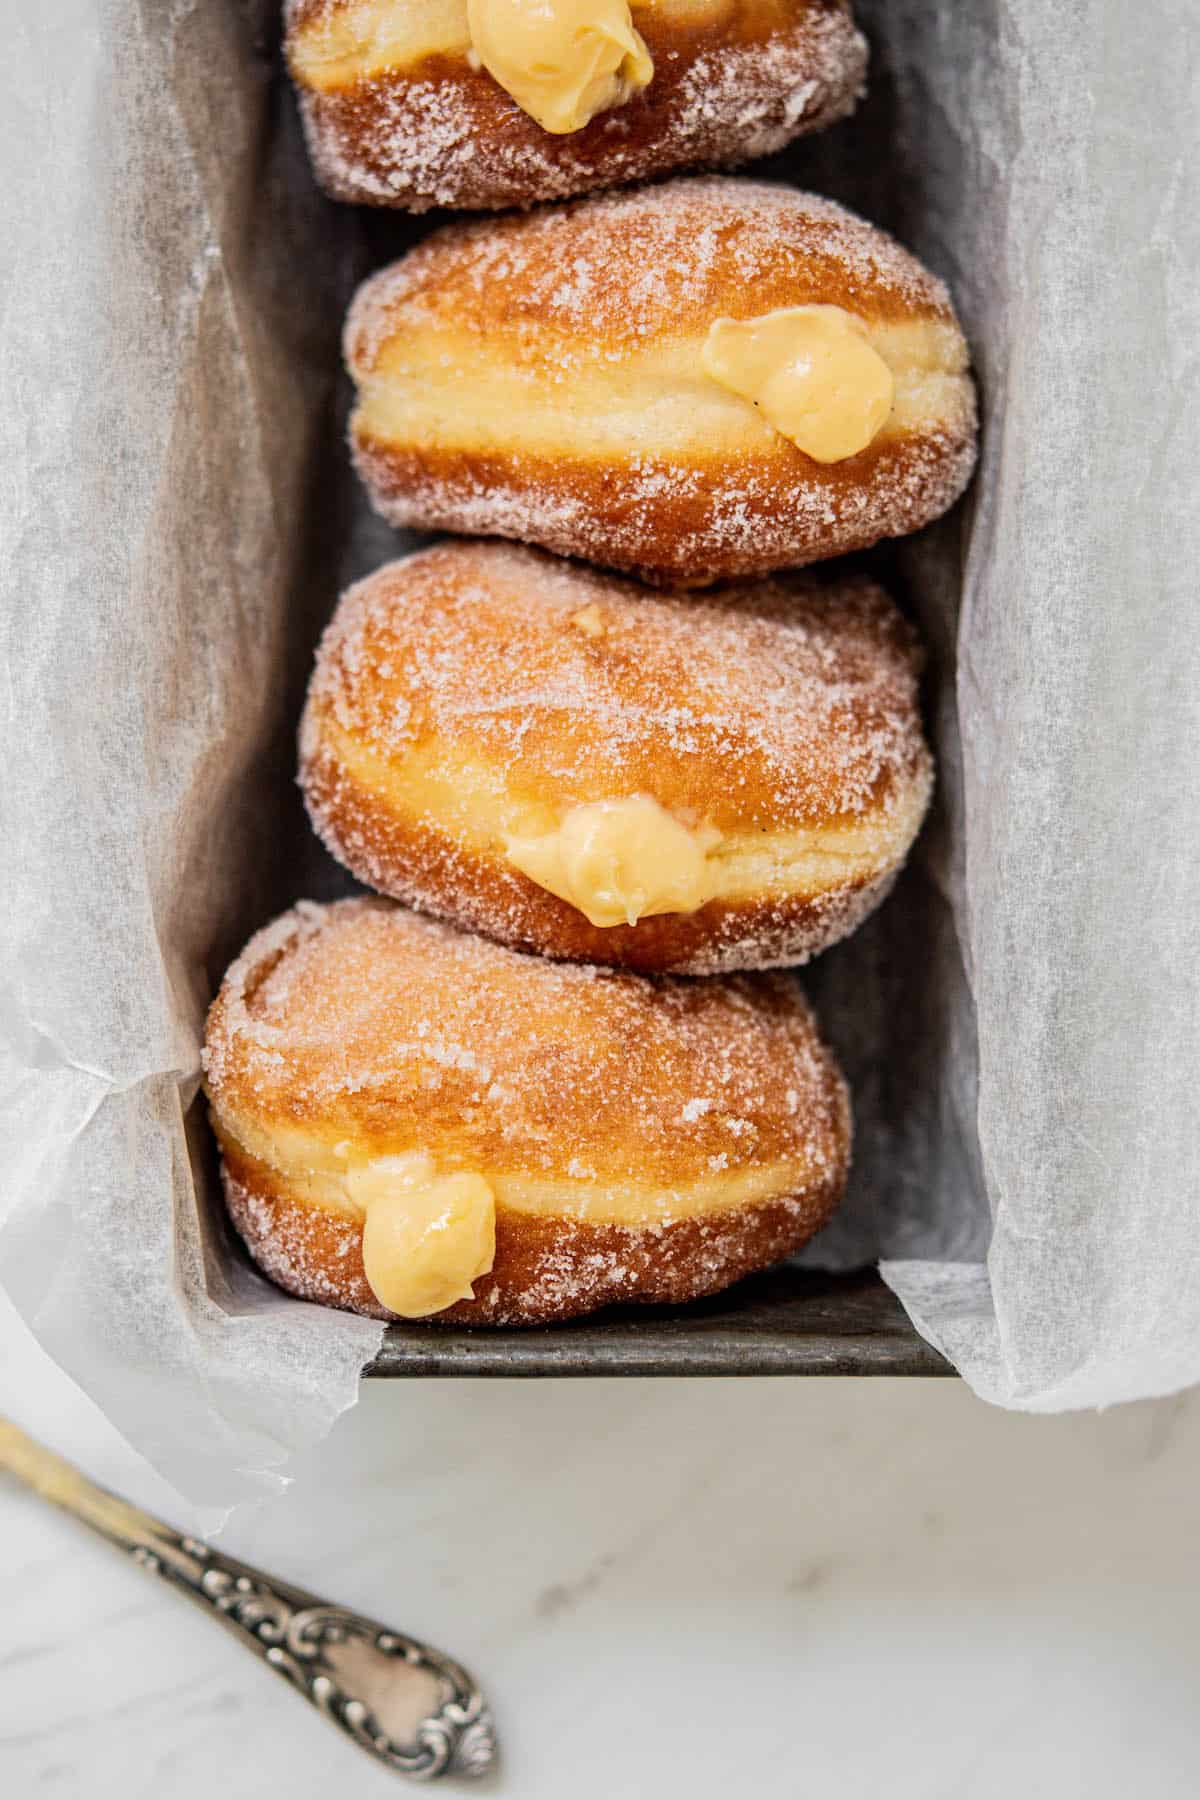
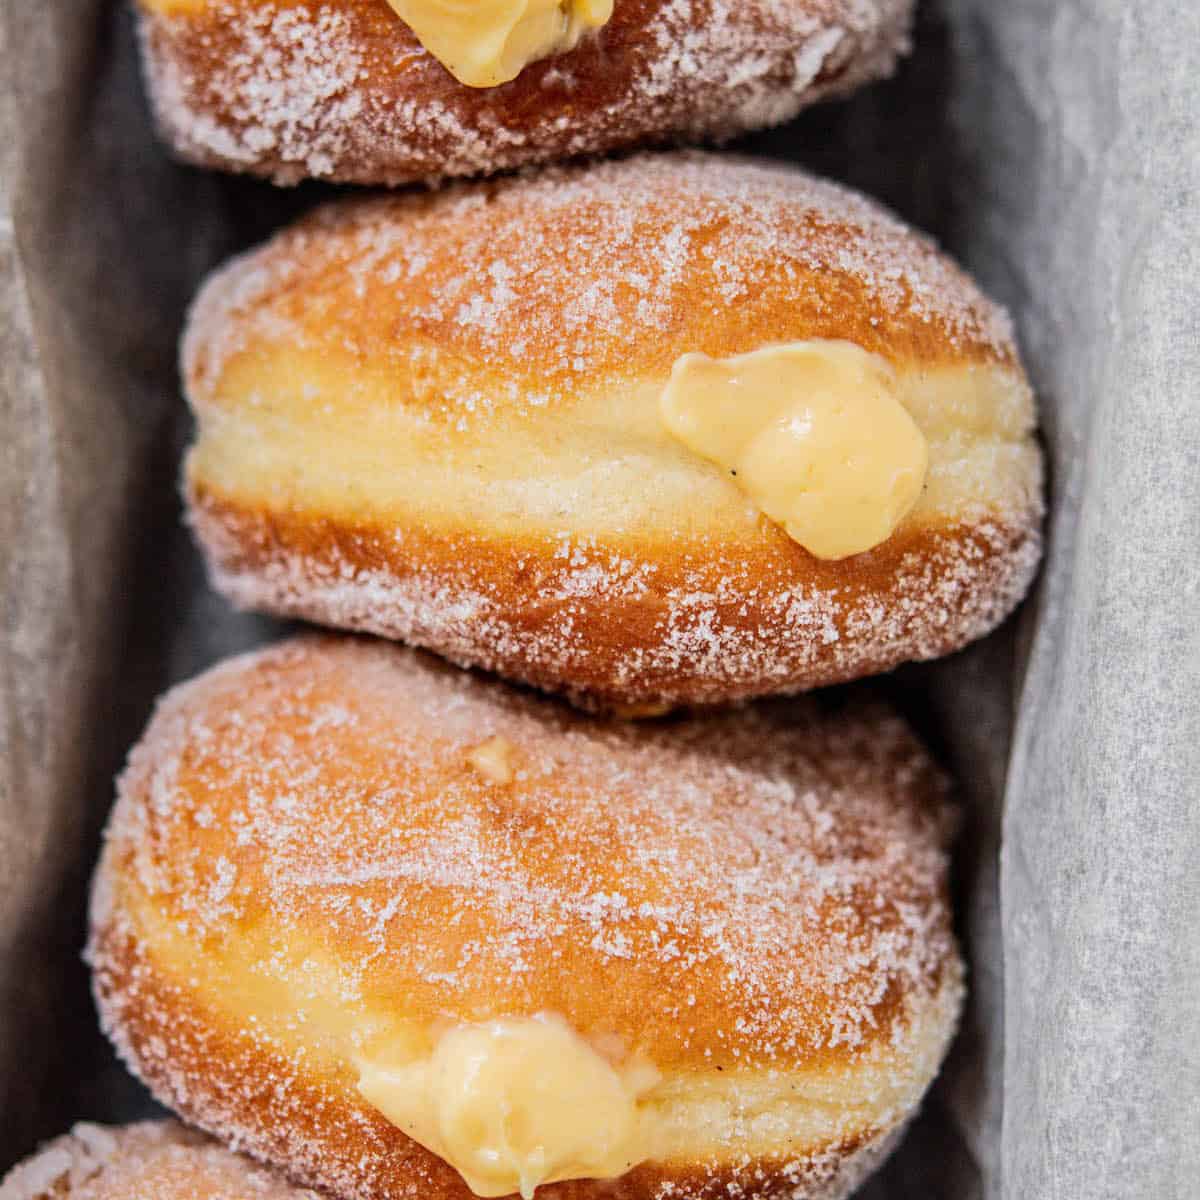
Vanilla Custard Doughnuts
These custard doughnuts are pillowy soft and filled with creamy vanilla custard. Homemade doughnuts take a little time to prepare, but it’s worth it!
I love using a yeasted dough when making doughnuts. There’s something about the flavour of a risen dough that’s much more complex and delicious than other raising agents. The doughnut dough is a simple enriched dough. If you’d prefer a sourdough version, I’ve got a sourdough doughnut recipe too.
It’s easiest to make in a stand mixer, but you can make it by hand too. The filling is a homemade custard that comes out a gorgeous yellow, rich, and creamy.

Custard and dough ingredients
Here’s what you need for the custard doughnuts. The ingredient quantities are written in the printable recipe card at the bottom of this post.
- High-grade flour or all-purpose flour: One with a protein level of around 11%, which is enough for building dough structure.
- Instant yeast or active dried yeast.
- Granulated white sugar: Adds a little sweetness to the dough.
- Whole milk: For the creamy custard and the doughnut dough.
- Egg yolks and large whole eggs: Structure and texture in the dough, and the base of the custard.
- Butter: Adds flavour, a tender crumb to the doughnuts, and extra richness to the pastry cream.
- Vanilla pod, extract, or paste: Use whatever you have.
- Salt.
- Cornstarch: To thicken the custard filling.
- Neutral oil: Use something with a high smoke point and a neutral flavour, like rice bran, canola, or sunflower oil, for frying.
Method
Dough
- Add the warm milk to the bowl of a stand mixer fitted with a dough hook, then stir in the yeast and sugar. If using active dried yeast, let this sit for 5 to 10 minutes until foamy.

- Add the eggs, flour, vanilla, and salt to the yeast mixture. Turn the mixer on low speed, or use your hands, to combine into a sticky, thick dough.

- Mix this dough for around 2 minutes to start developing the gluten.

- Next, add the room-temperature butter, a bit at a time. Turn the mixer on medium speed until the sticky dough strengthens and comes together.

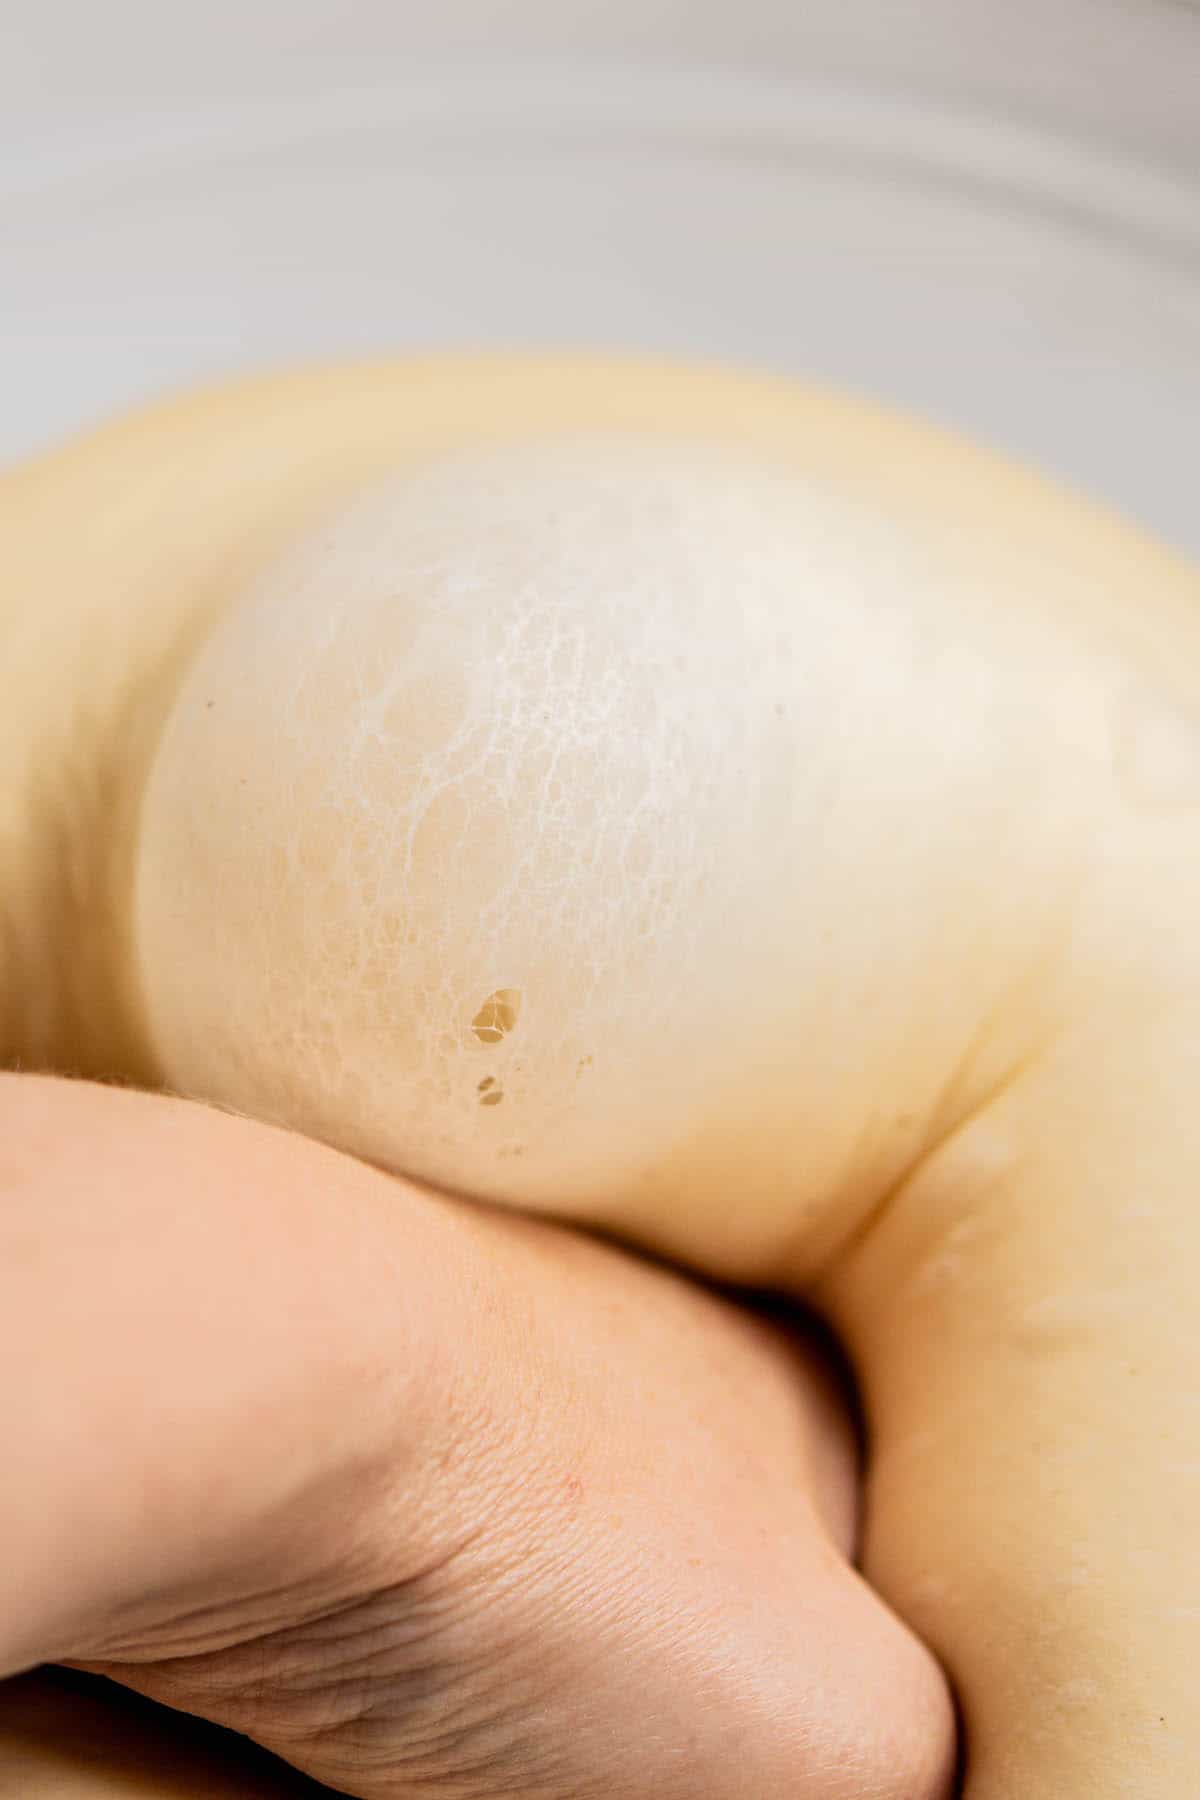
- Mix the dough for at least 10 minutes for the best gluten development. It should pull away cleanly from the sides of the bowl and feel smooth, soft, and strong.
- Shape the dough into a ball and place it into a lightly greased bowl. Cover the bowl with plastic wrap and let it proof in a warm spot until doubled in size. You can also proof the dough in the refrigerator overnight for extra flavour. Overnight Option: Let the dough chill overnight in the refrigerator for deeper flavour.
Custard
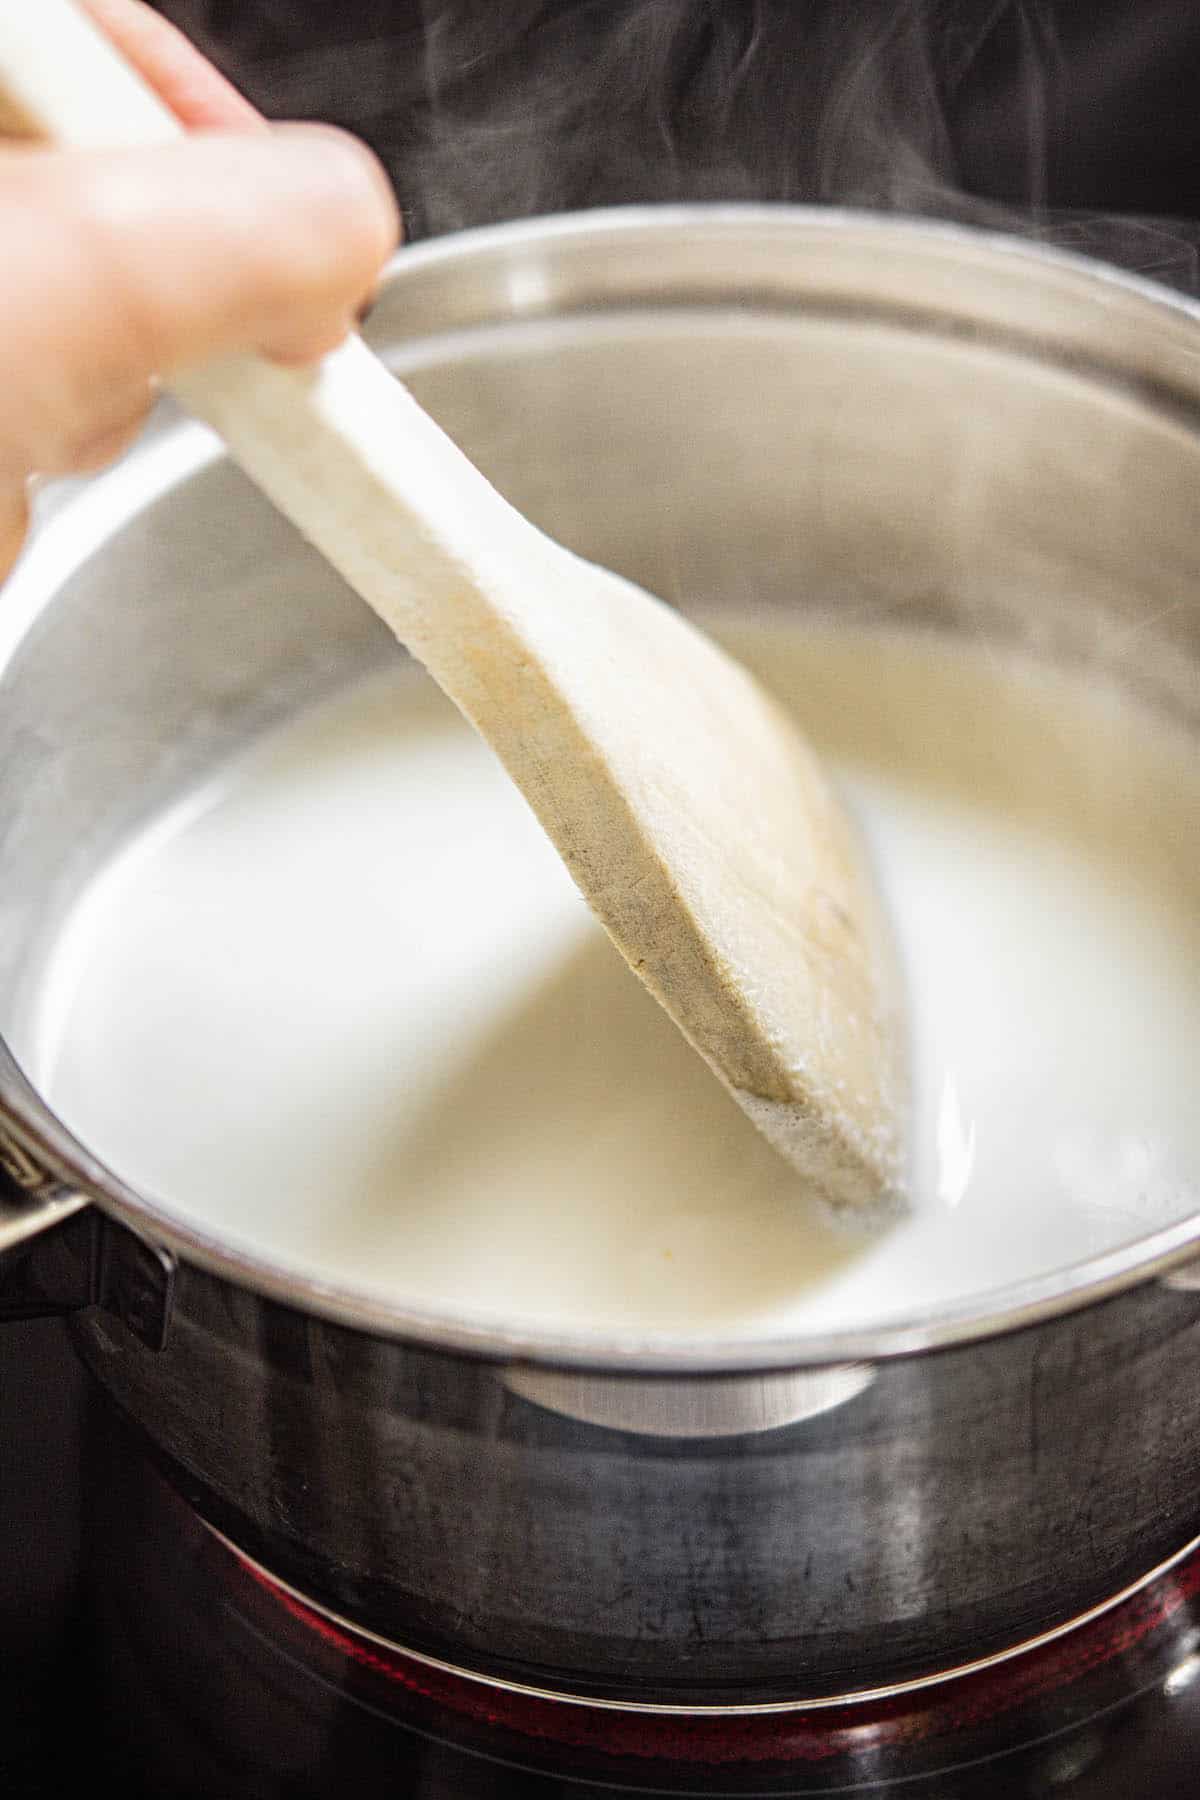
- In a medium saucepan, heat the milk until it’s just at a simmer, but don’t let it boil.
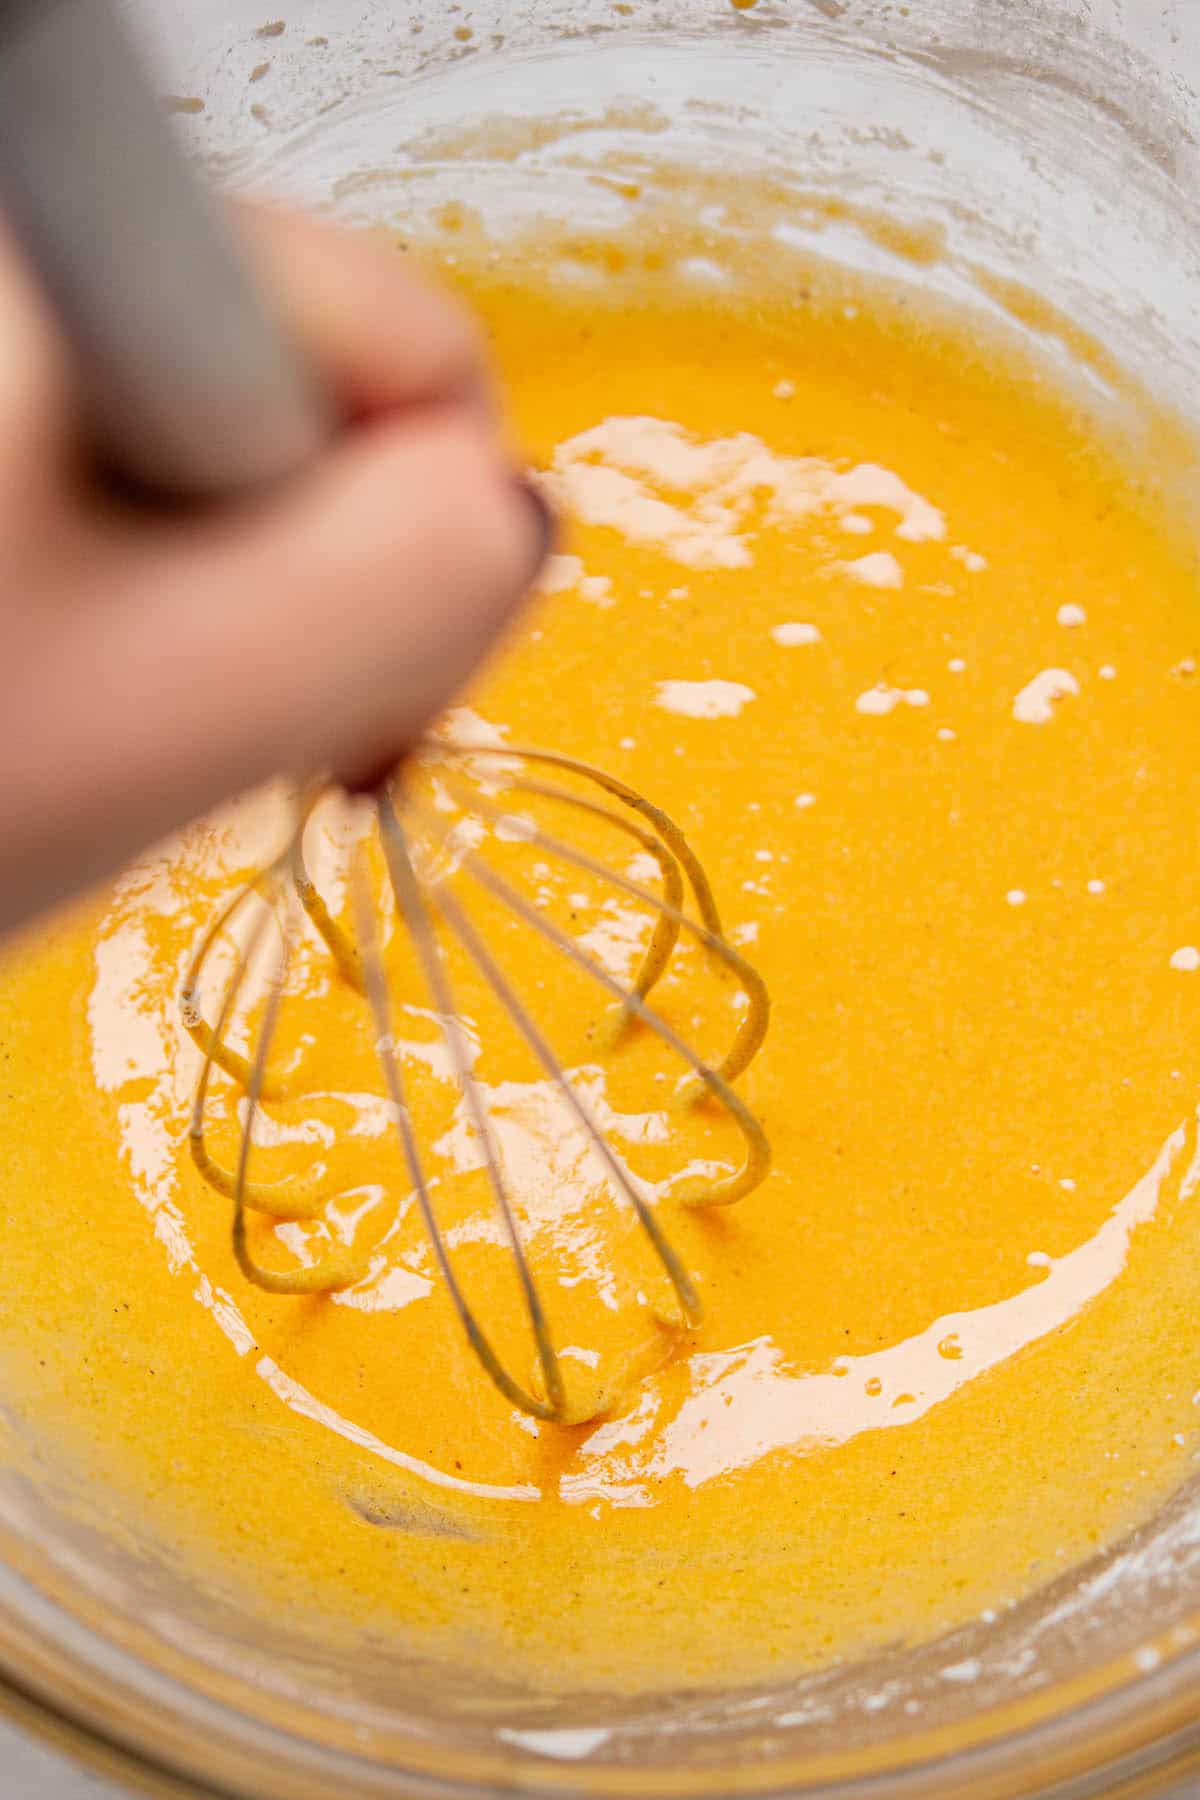
- While the milk is warming, whisk the egg yolks, sugar, salt, vanilla, and cornflour together in a heatproof bowl until smooth.
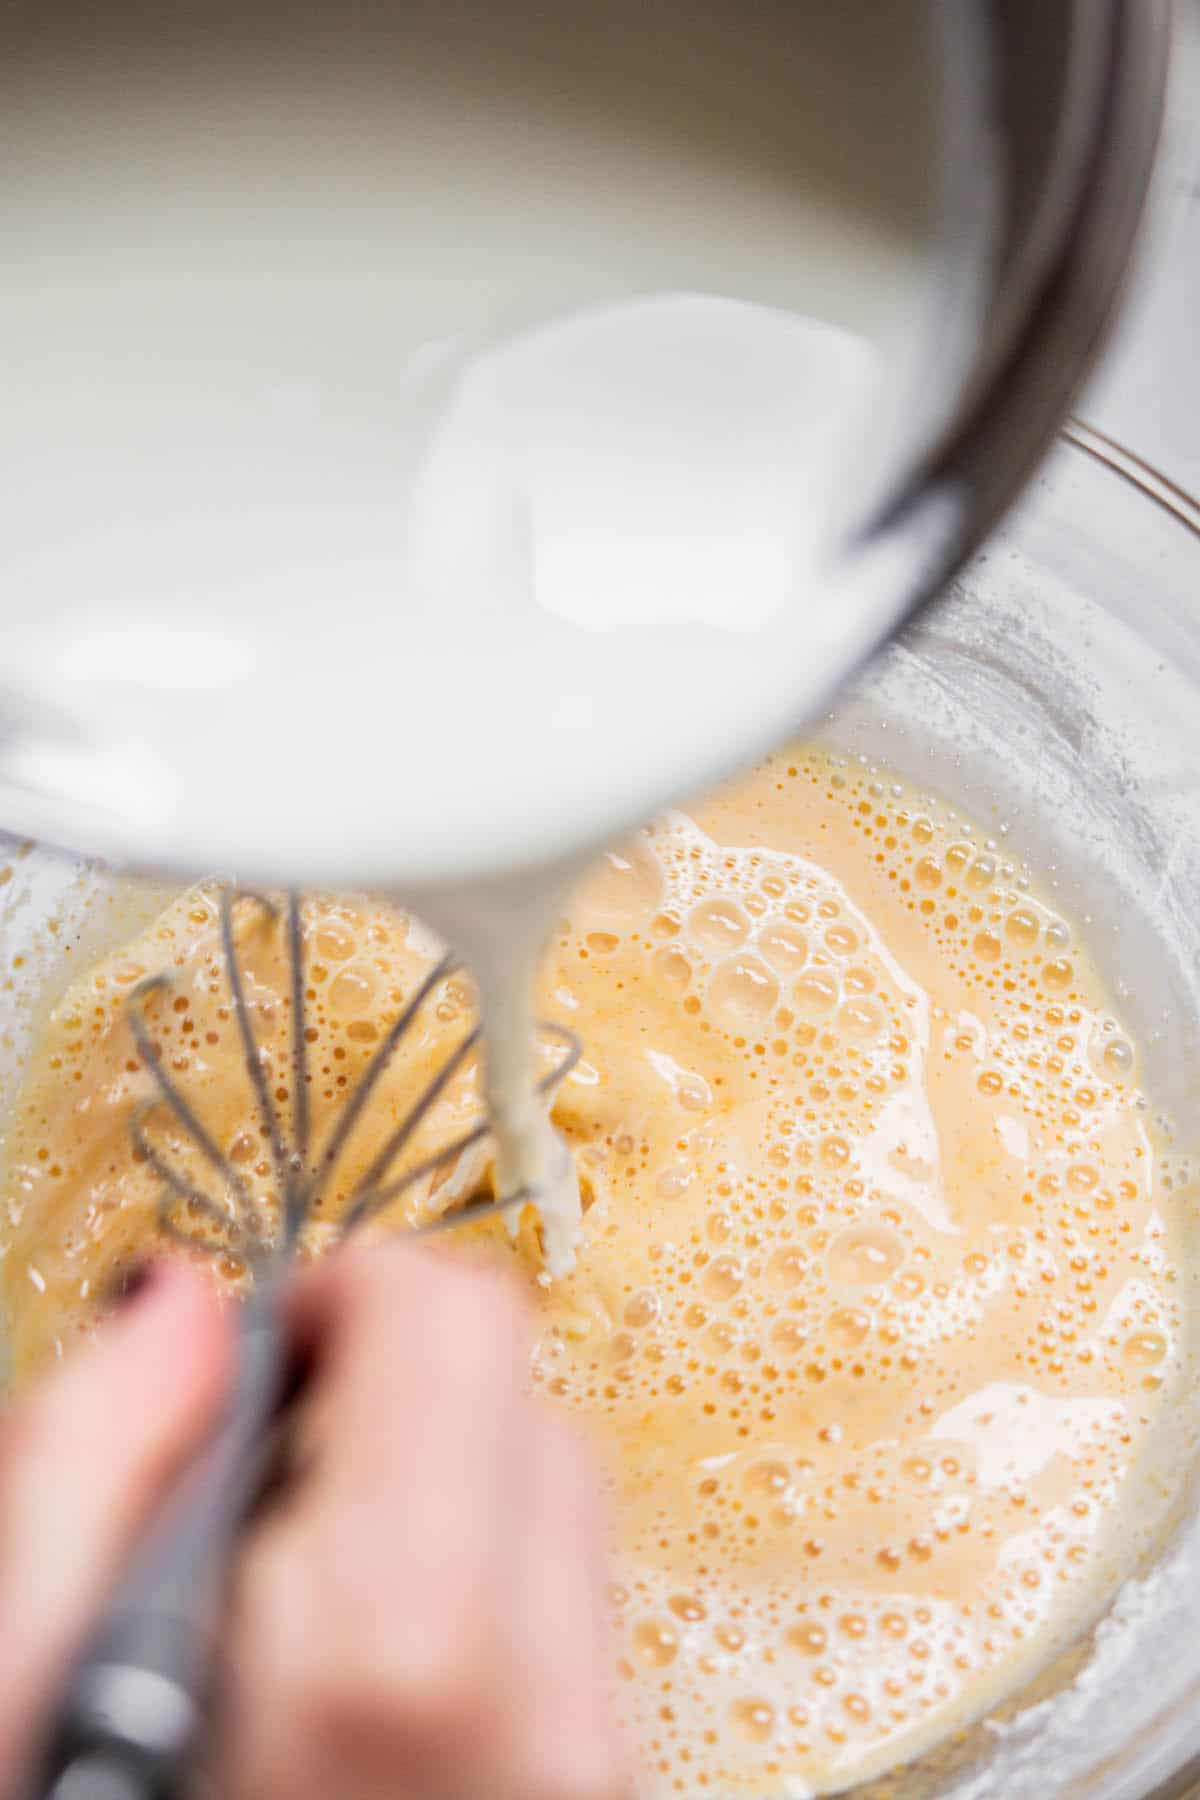
- Gradually pour the hot milk into the egg mixture, whisking constantly. Return the combined mixture to the saucepan.

- Place over medium heat, whisking constantly until it bubbles. Once it starts bubbling, it will begin to thicken. Keep it at a bubble, and don’t stop whisking, for 1 minute.

- Take it off the heat and whisk through the butter until combined.
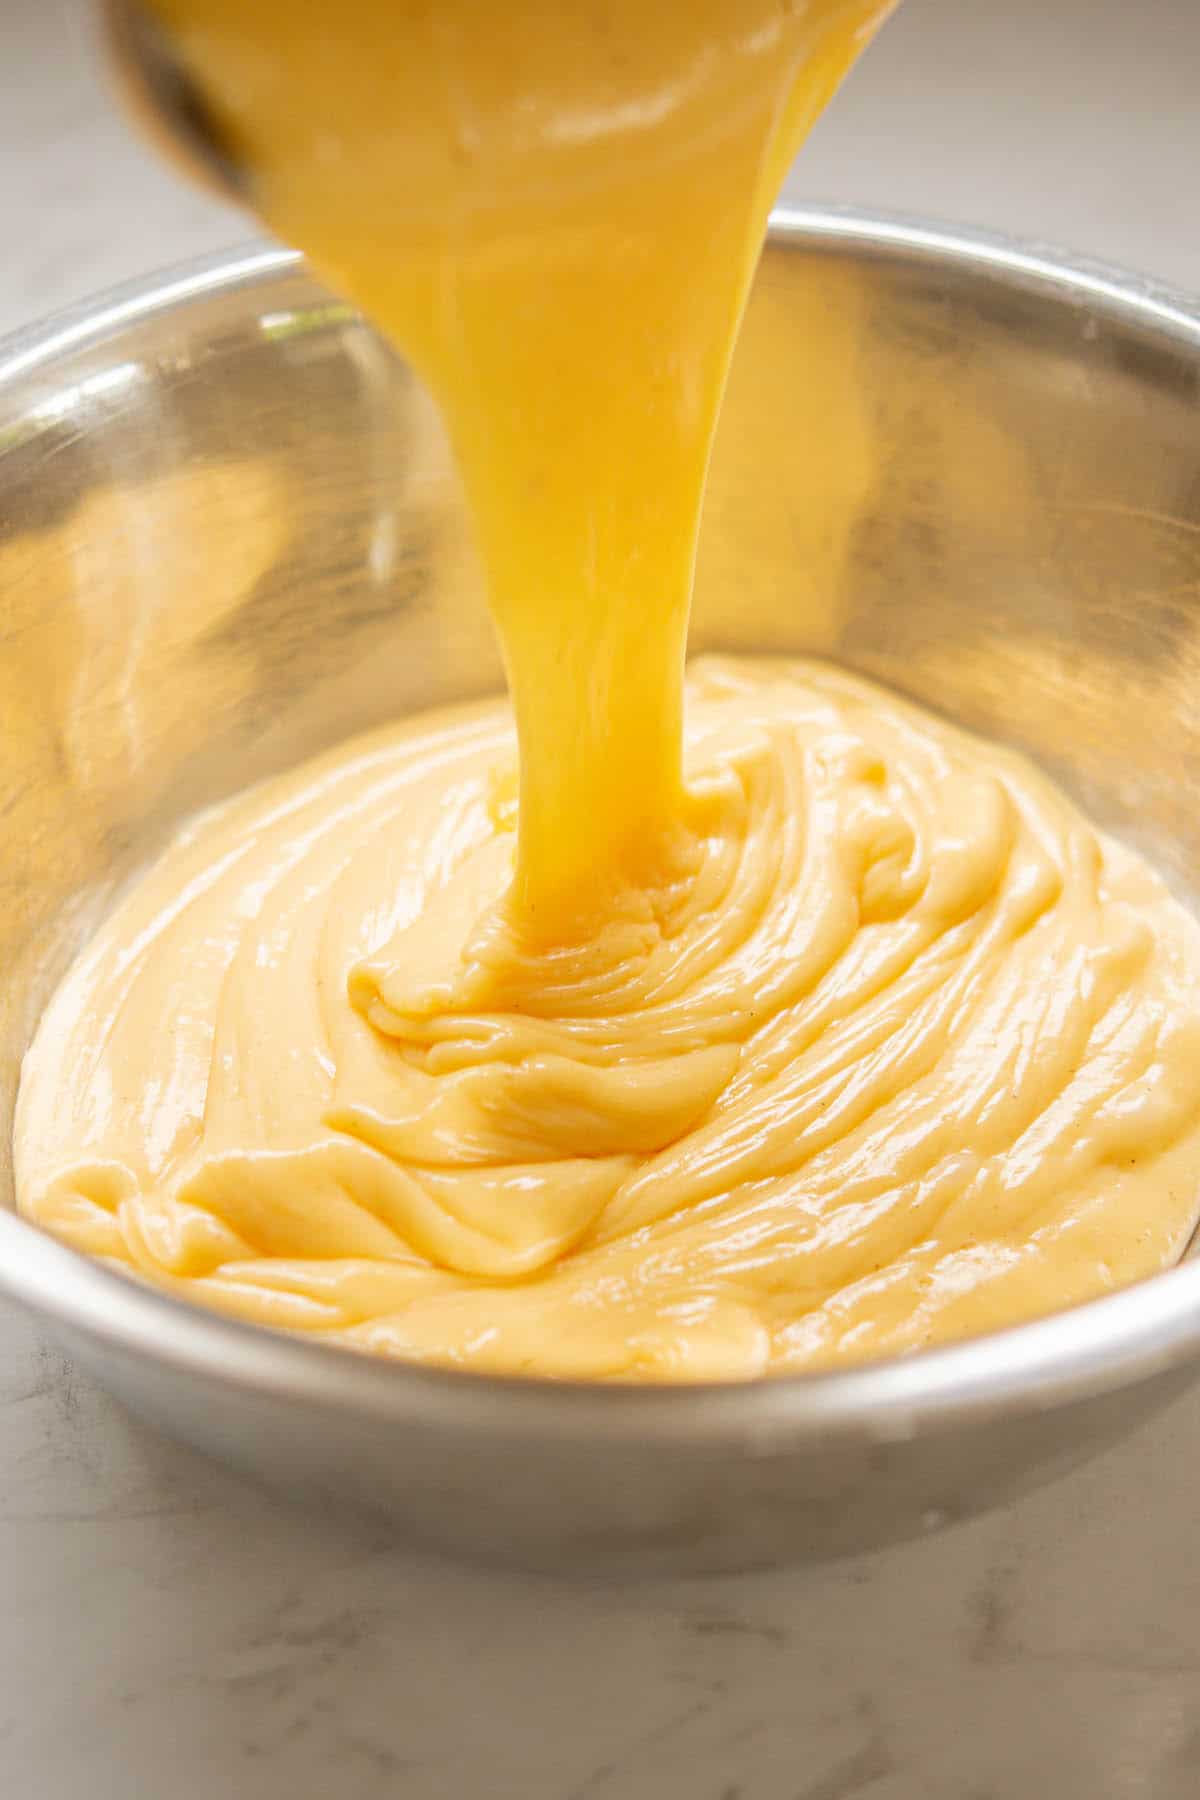
- Pour the hot pastry cream into a clean bowl. If you’d like an extra silky smooth texture, you can push it through a fine mesh sieve first.
- Lay a piece of plastic wrap directly onto the surface of the custard to stop a skin forming. Let it come to room temperature, then chill it in the fridge until completely cold. The pastry cream can be made up to 2 days in advance.
Shaping
- Punch down the dough and pull it onto a lightly floured surface.
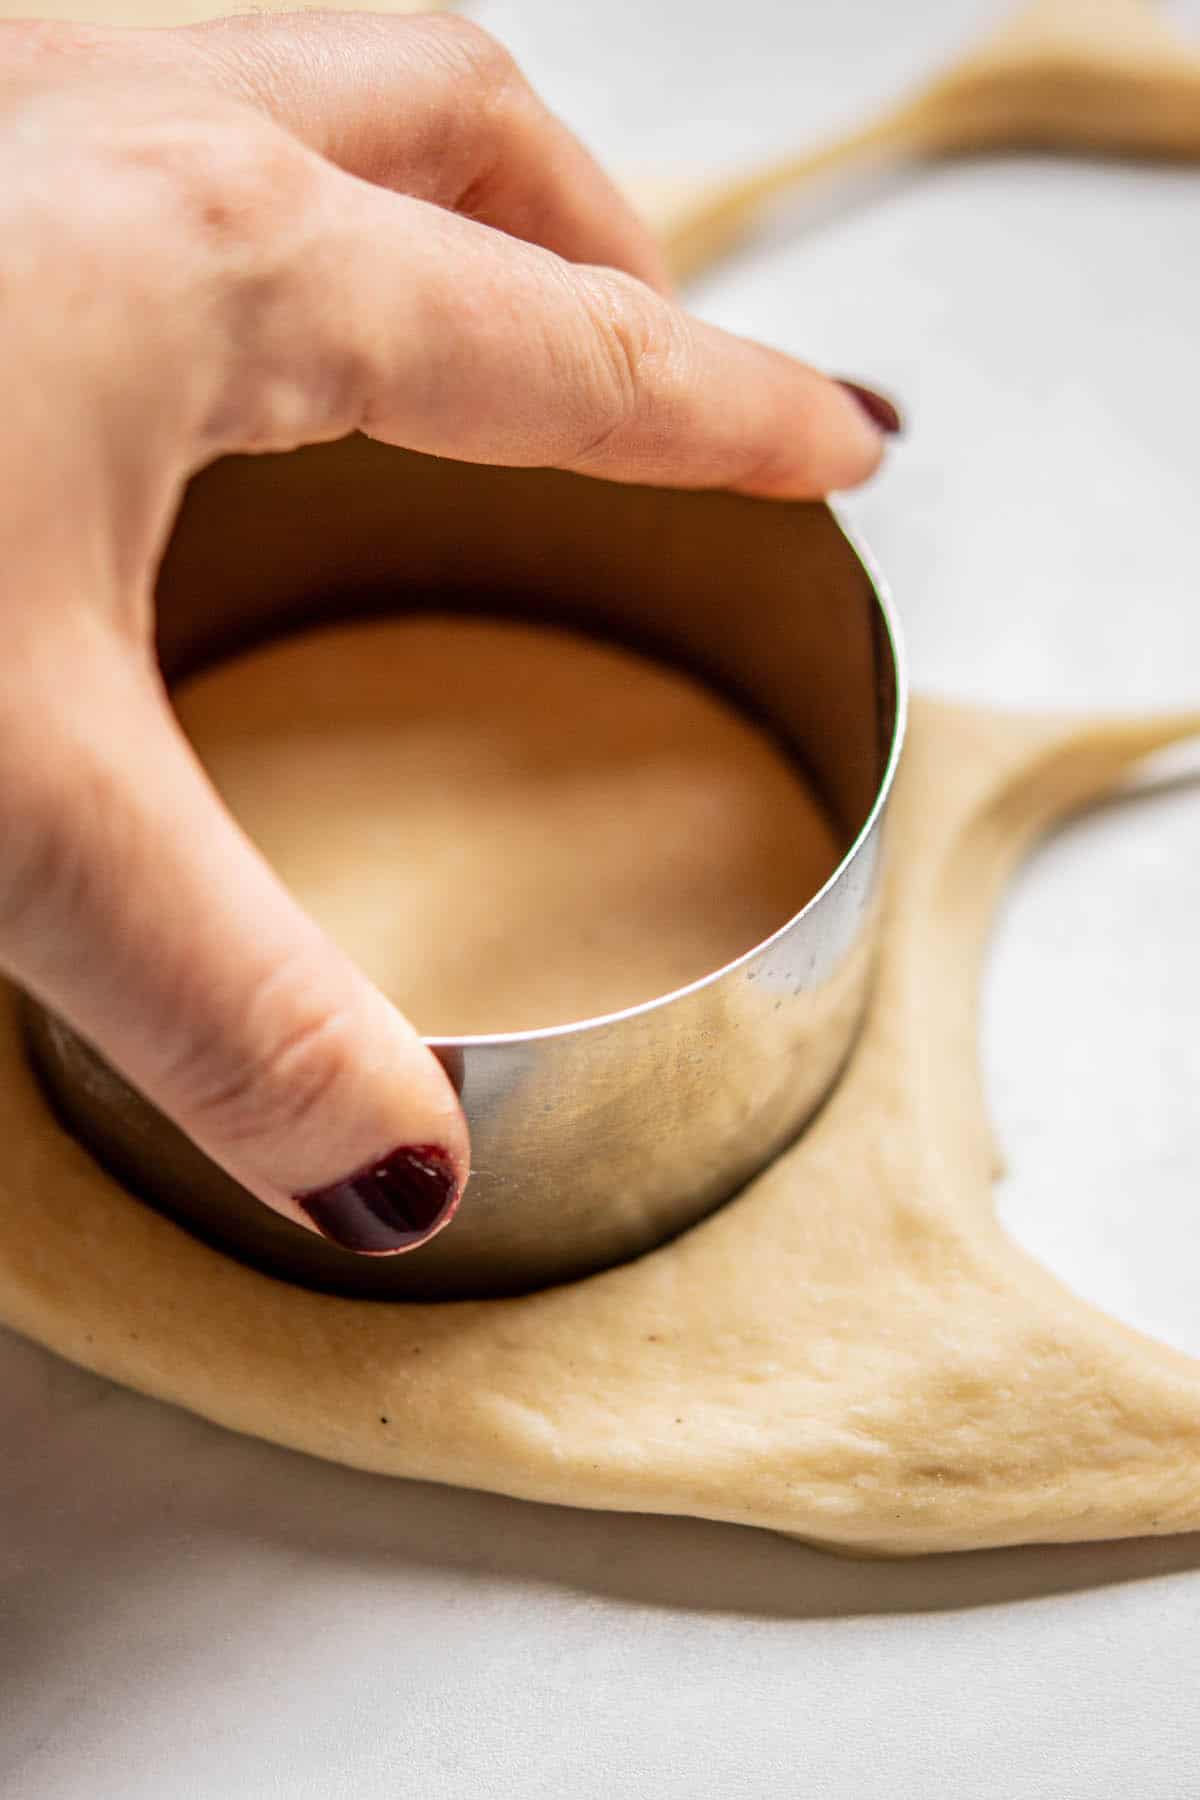
- Roll it into a 1.3cm (½ inch) thick rectangle. Use a cookie cutter or jar lid to cut out 9cm (3½ inch) rounds, placing each on baking paper. Knead any scraps back into a ball, let them rest, then roll out again.
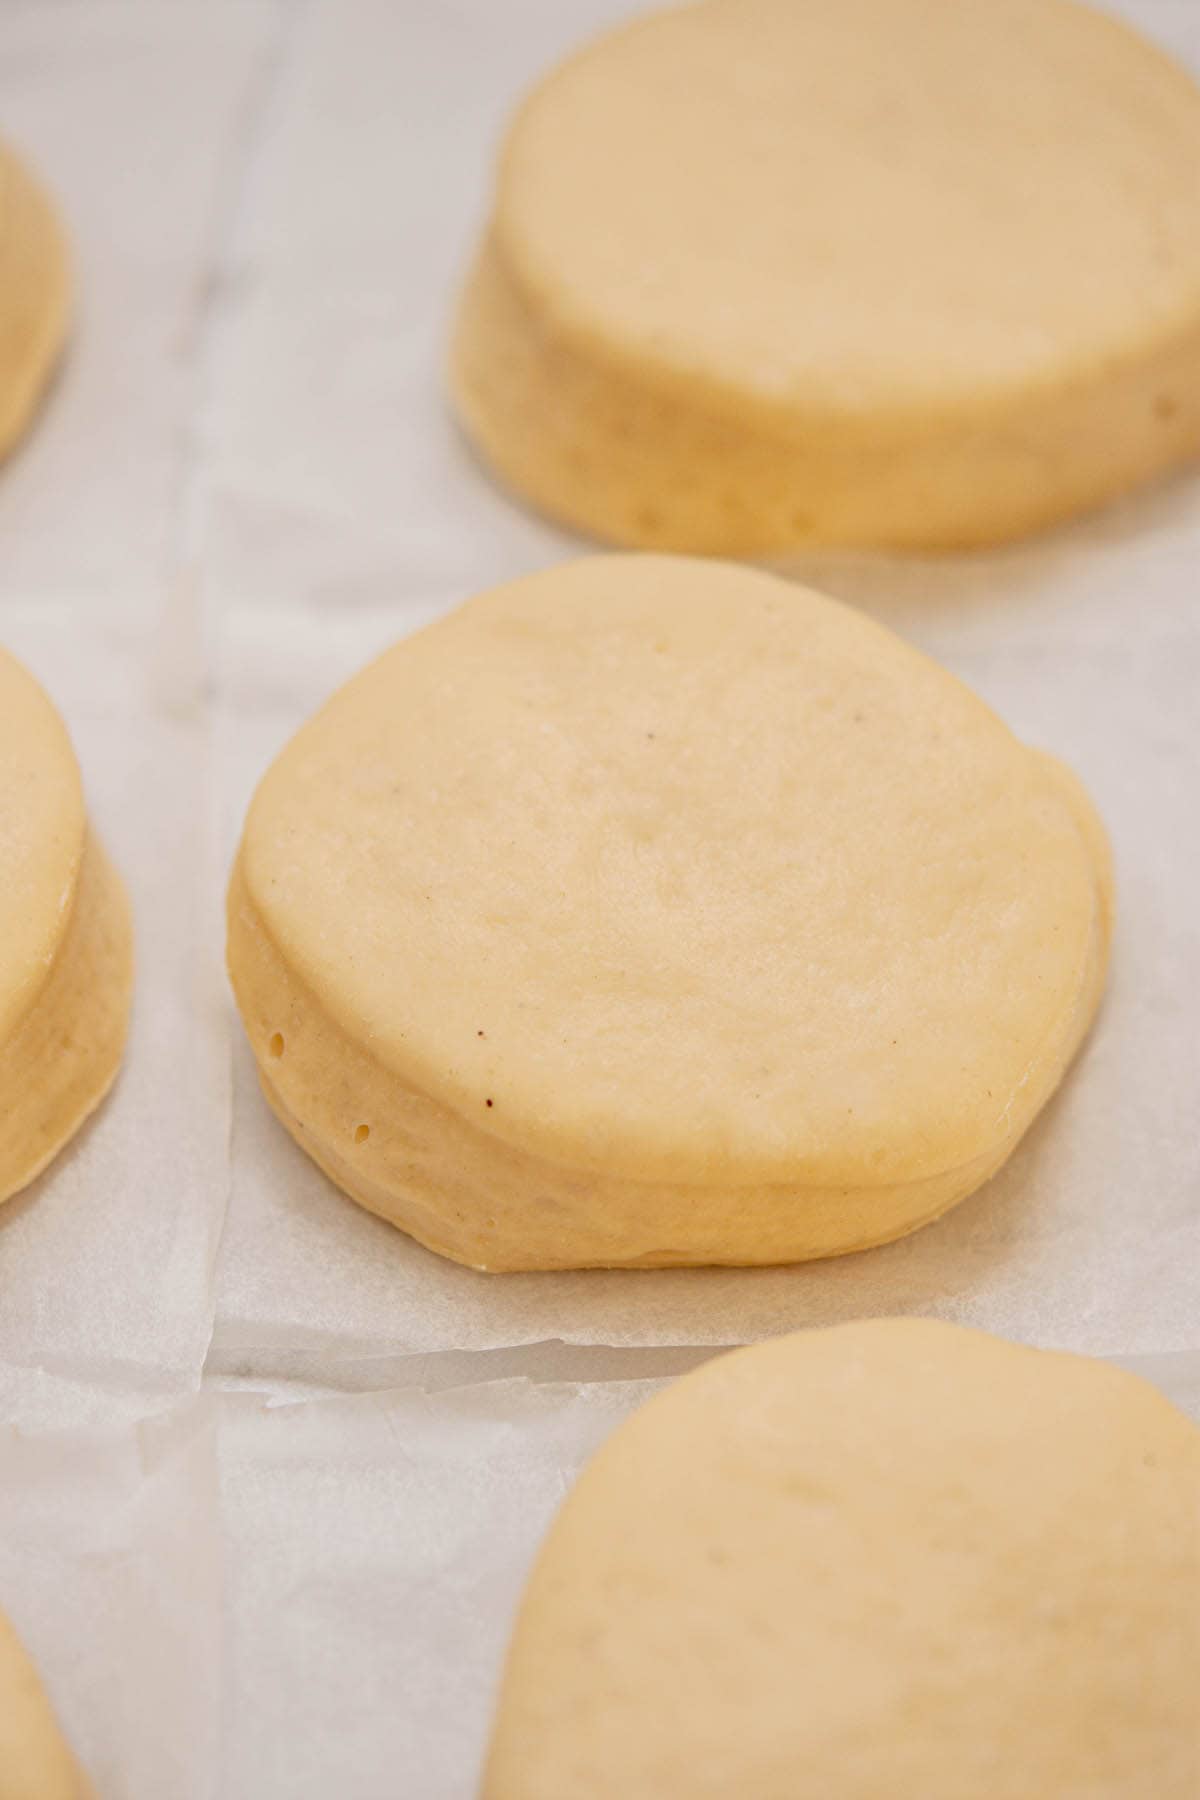
- Let the cut doughnuts rest for 30 to 60 minutes until puffy, then cut around the paper with kitchen scissors so each doughnut is on its own piece.
Deep Frying
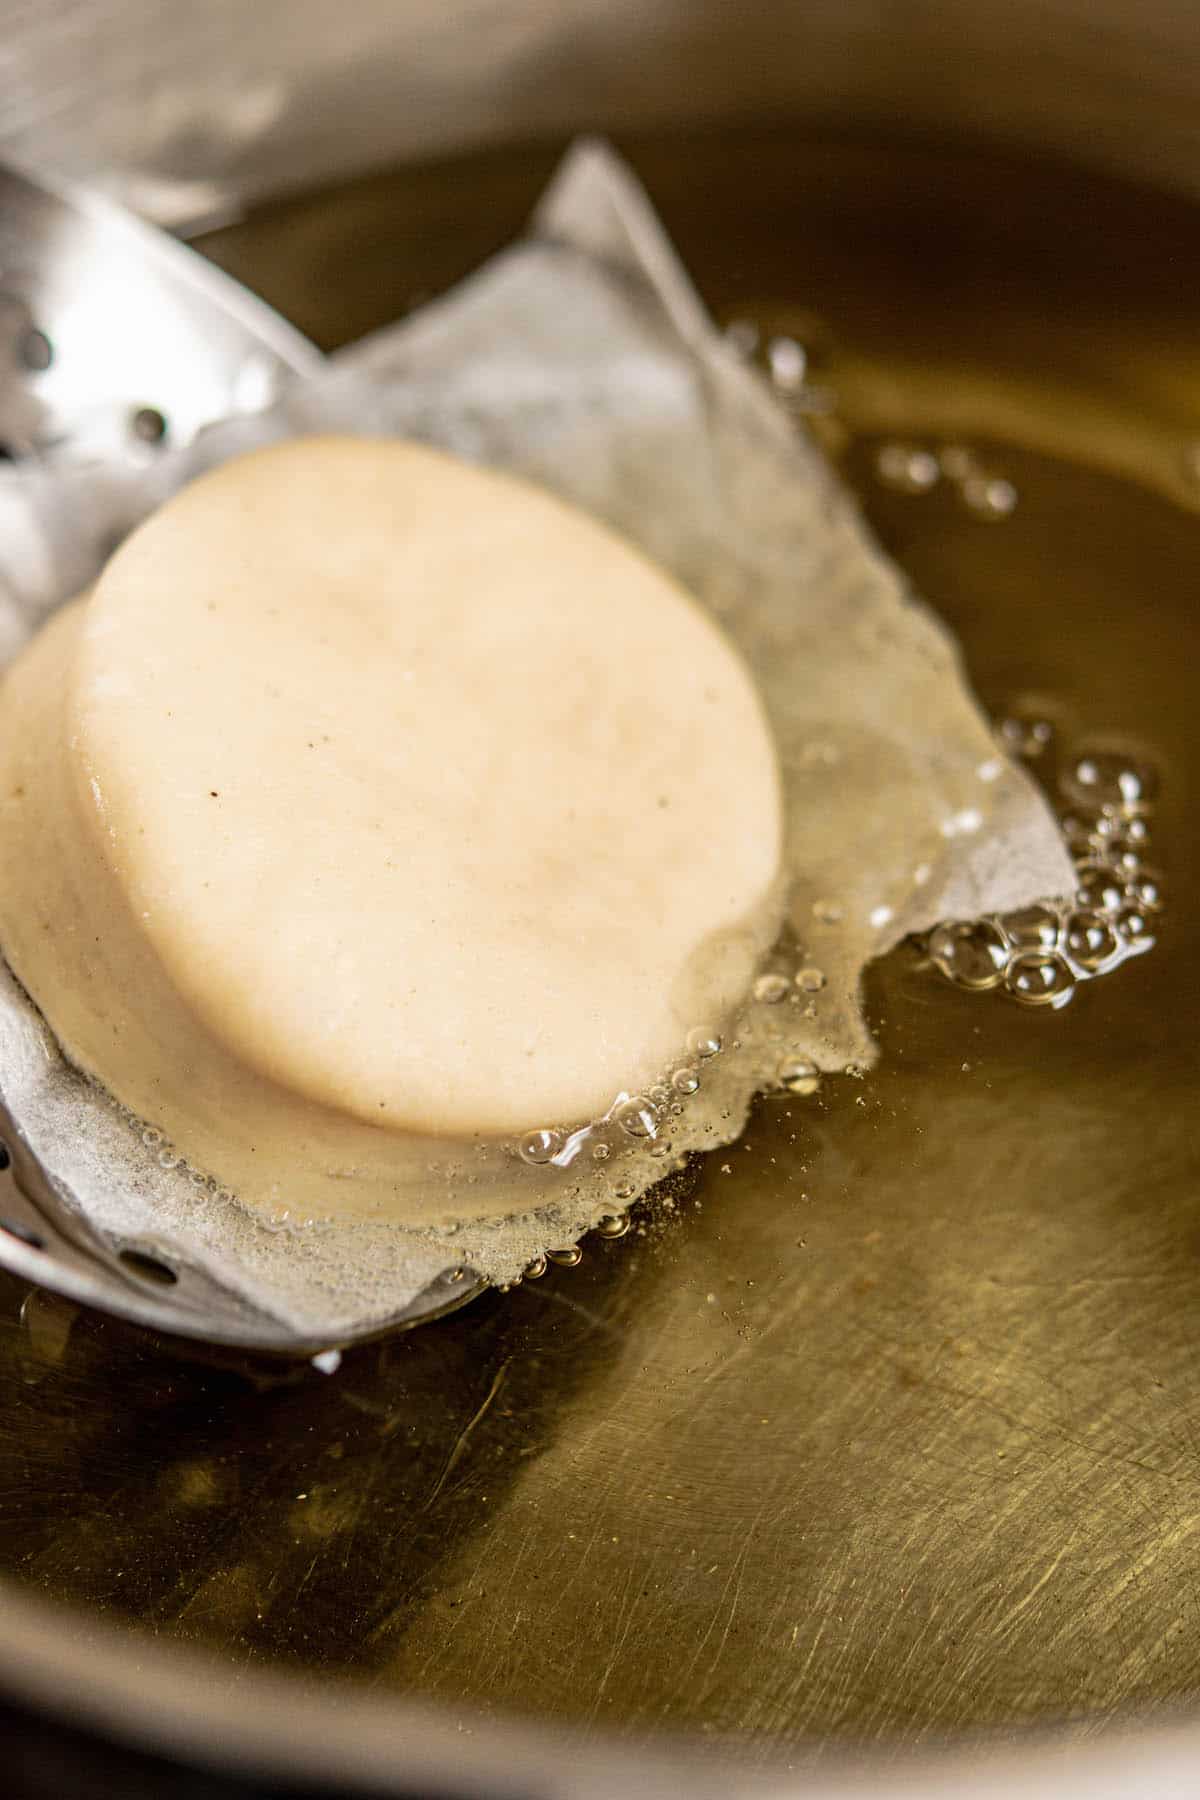
- Heat around 7.5cm (3 inches) of oil in a deep fryer or deep saucepan to 170°C / 340°F. Carefully drop 2 to 3 doughnuts into the hot oil, removing the paper with tongs.
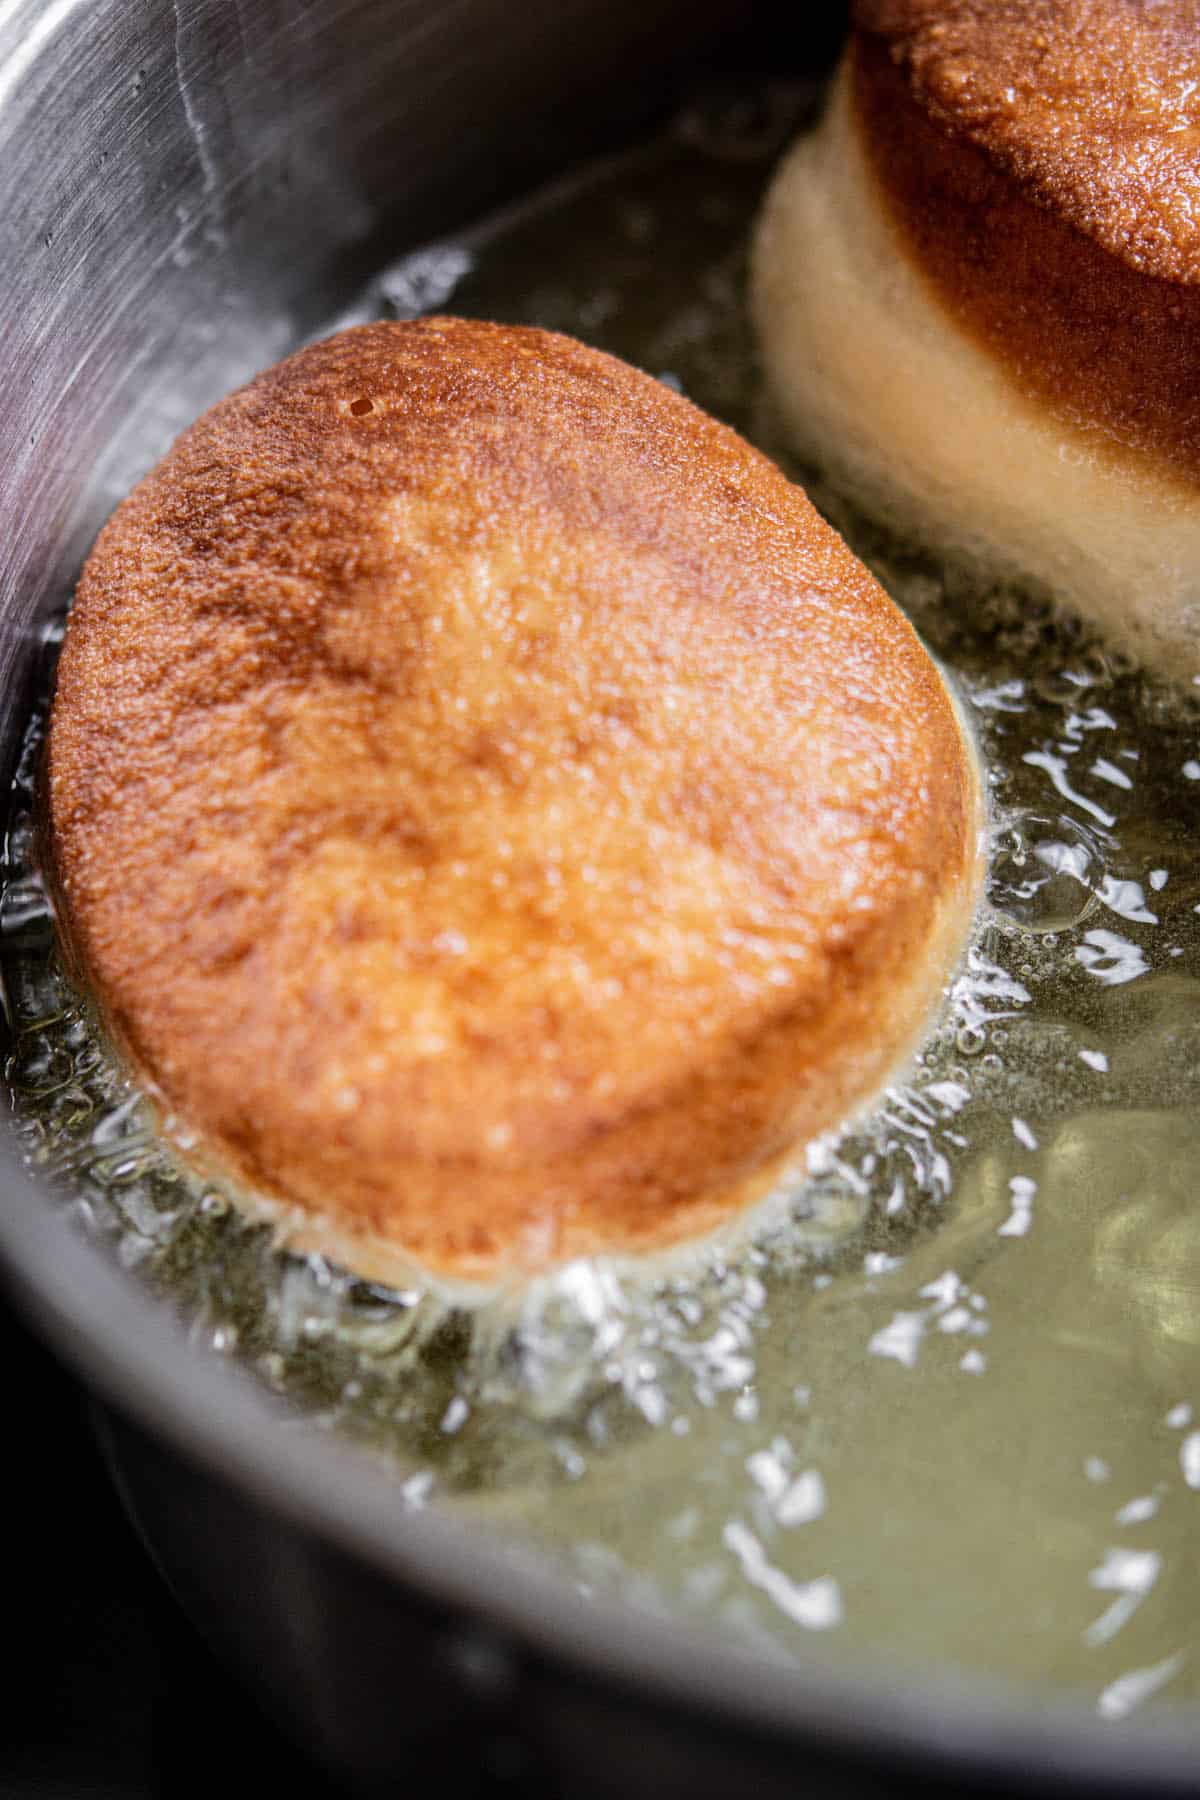
- Fry for 2 minutes until deep golden brown, flip, and fry for another 2 minutes. Keep the oil hot but under 175°C / 350°F so the doughnuts don’t brown before the middle cooks through.

- Remove the fried doughnuts with a slotted spoon and place them on a wire rack to cool, while you continue frying the rest.

- Toss the still hot doughnuts in a separate bowl of granulated or caster sugar to coat.
Filling
- Give the cold custard a whisk to loosen it up, then spoon it into a piping bag with a round tip. Insert the tip of a small knife into the side of each cooled doughnut to make a hole for the filling. Pipe the custard through the hole into each doughnut.

Storing
Once filled, custard doughnuts are best served on the day they’re made. Store any leftovers in an airtight container in the fridge.
FAQs about doughnuts

Vanilla Custard Doughnuts
Ingredients
Doughnut dough
- 7 g instant yeast or active dried yeast
- 30 g granulated sugar
- 180 g whole milk lukewarm
- 405 g high-grade flour or all-purpose flour
- 2 large eggs
- 1 tsp vanilla bean paste or extract
- ¾ tsp salt
- 42 g butter salted or unsalted, softened
Custard
- 480 g whole milk
- 1 vanilla bean or 2 tsp vanilla paste or extract
- 65 g granulated sugar
- 30 g cornstarch
- 4 large egg yolks
- ¼ tsp salt
- 45 g butter salted or unsalted
For frying and coating
- 1 to 2 litres neutral oil such as rice bran, canola, or sunflower, enough to fill the pot around 7.5cm (3 inches) deep
- 100 g caster or granulated sugar for coating
Instructions
The Dough
- Add the warm milk to the bowl of a stand mixer fitted with a dough hook, then stir in the yeast and sugar. If using active dried yeast, let it sit for 5 to 10 minutes until foamy.
- Add the eggs, flour, vanilla, and salt to the milk mixture. Turn the mixer on low speed, or use your hands, to combine into a thick dough. The dough will feel quite thick and stiff at this stage, that's normal, it'll loosen as you add the butter. Mix for around 2 minutes to start developing the gluten.
- Add the room-temperature butter. Turn the mixer to medium speed until the dough strengthens and comes together. It should pull away cleanly from the sides of the bowl. Mix for at least 10 minutes for the best gluten development. The dough should feel smooth, soft, and strong.
- Shape the dough into a ball and place in a lightly greased large bowl. Cover and proof in a warm spot until doubled in size. You can also proof the dough in the fridge overnight for a deeper flavour.
The custard
- In a medium saucepan, heat the milk until it’s just at a simmer, but don’t let it boil.
- While the milk is warming, whisk together the egg yolks, sugar, salt, vanilla, and cornstarch in a separate heatproof bowl until smooth.
- Place the bowl on a dampened tea towel to stop it slipping. Pour the hot milk into the egg mixture in a steady stream, whisking constantly.
- Return the combined mixture to the saucepan over medium heat, whisking constantly until it bubbles. Once it starts bubbling, it will begin to thicken. Keep it at a bubble, and don’t stop whisking, for 1 minute.
- Take it off the heat and whisk through the butter until combined. Pour the hot pastry cream into a clean bowl. If you’d like an extra silky smooth texture, push it through a fine mesh sieve first.
- Lay a piece of plastic wrap directly onto the surface of the custard to stop a skin forming. Let it come to room temperature, then chill in the fridge until completely cold. The pastry cream can be made up to 2 days in advance.
Shaping and frying
- Gently deflate the dough and turn it out onto a lightly floured surface. If it’s been refrigerated it will be stiff. Form it into a mound, lightly flour the top, then roll into a 1.3cm (½ inch) thick rectangle.
- Use a cookie cutter or jar lid to cut out 9cm (3½ inch) rounds. Place each doughnut on baking paper. Knead any scraps back into a ball, rest for a few minutes (so the gluten relaxes and the dough doesn’t spring back), then roll out and cut again.
- Let the doughnuts rest for 30 to 60 minutes, until they’re puffy. If they look like they’re drying out, lightly brush the tops with water. Use kitchen scissors to cut around each doughnut on the baking paper so each one sits on its own piece.
- When nearly ready to fry, pour the oil into a deep fryer or deep pot and heat to 170°C / 340°F. Fill a shallow bowl with the coating sugar.
- Carefully drop 2 to 3 doughnuts into the oil and remove the baking paper with tongs. Fry for 2 minutes until deep golden brown, flip, and fry for another 2 minutes.
- Keep the oil hot but don’t let it go above 175°C / 350°F, or the doughnuts will brown before the middles cook through.
- Remove the fried doughnuts with a slotted spoon and place them briefly on a wire rack. While they're still hot, toss them in a separate bowl of granulated or caster sugar to coat, then return them to the rack and continue frying the rest.
Filling
- Give the cold custard a whisk to loosen it up, then spoon it into a piping bag with a round tip. Insert the tip of a small knife into the side of each cooled doughnut to make a hole for the filling. Pipe the custard through the hole into each doughnut.

How long will the vanilla custard last in the fridge if i want to make extra for next time?
Hey, it can be made up to 3 days in advance 🙂
I ended up leaving the vanilla out of the dough because the actual instructions never say when to.. and needed a lot more milk for the right consistency maybe that’s why? Other than that turned out great!
Hey, the dough is thick before the butter is added, but once the butter goes in it becomes soft and easy to work with, so you shouldn’t need extra milk unless a bit too much flour was added or your flour absorbs more liquid than mine. Did you measure by grams or cups? And the vanilla goes in with the milk and eggs 🙂 thanks!