No More Dense Sourdough – A Sourdough Guide
If your sourdough bread is dense, gummy, flat, or not rising the way it should, you are in the right place. This guide explains exactly why sourdough fails and how to fix the most common problems at home.
It’s hard to write an exact recipe with timings and temperatures as every environment is so different and there are so many variables. I think it’s best to understand what is actually happening while the sourdough is being made, and what is happening in your sourdough starter. Once you understand that you can tailor things to suit your individual spaces and loaves.
Why sourdough becomes dense or flat
Dense sourdough usually comes from one of these causes:
- A weak or acidic starter
- Under fermentation during bulk proof
- Over fermentation that collapses the dough
- Poor gluten development
- Dough that is too cold or too warm
- Incorrect hydration
- Shaping without enough tension
- Lack of steam in the oven
Don’t worry though, we are going to go through all of these with clear things to look for and easys fixes!
If you are just getting started with sourdough, my main Sourdough Hub is a great place to begin. It has all my starter guides, bread tutorials, and techniques in one spot.
What causes dense sourdough bread
Dense sourdough almost always points to under fermentation or starter issues. When the yeast cannot produce enough gas, or the gluten network is not strong enough to hold that gas, the loaf bakes tight and heavy.
Signs of dense or under fermented sourdough:
- Tight crumb with gumminess
- Thick, chewy crust
- A few random large holes surrounded by dense areas
- Dough that felt stiff or slow during folding
If you see this, you are usually dealing with a starter that needs strengthening or a bulk ferment that did not go long enough.
Why your sourdough starter affects rise and texture
A healthy sourdough starter is the foundation of every good loaf. It contains wild yeast and lactic acid bacteria that ferment the dough. The yeast is responsible for rise, while the bacteria develop flavour.
A bubbly starter is not always a strong starter. Both yeast and bacteria create bubbles, but yeast is slower to grow. You need enough yeast activity to raise the dough.
If you want to dive deeper into starter care, feeding routines, or how to build strength over time, you can browse my Sourdough Starter Guides for step by step help.
How to know if your starter is strong enough
Your starter should be showing consistent, predictable growth. How fast it rises depends on the feeding ratio, but at a typical 1:2:2 feed, a healthy starter will:
- Double or triple in 4 to 6 hours at about 21°C / 70°F
- Smell fresh, slightly fruity or yoghurty
- Look airy and sponge like when you scoop into it
If it does not double at a 1:2:2 feed within 6 hours, the yeast colony is not strong enough yet.
Stiff starter vs liquid starter: which is better
Most people have a 100% hydration starter which means the starter is fed with the same amount (in weight) of flour and water and this is what I use in my NZ kitchen. However, this does not suit every environment. In really warm or humid rooms make liquid starters become acidic faster. When bacteria outrun the yeast, the starter collapses early and it will struggle to raise dough. In this case a stiff starter (about 50 to 65 % hydration) can be a good option, it will be more stable.
Benefits of a stiff starter
- Slower acid build up
- More predictable rise
- Stronger gluten structure
- Better performance in hot climates
- Milder flavour in the final bread
How to convert your starter to a stiff one
Feed it 1 part starter, 2 parts flour, and 1 part water. It should form a soft dough ball and rise slowly but steadily.
You can use a stiff starter directly or convert a small amount into a stiff levain.
Why sourdough starters become weak or acidic
A starter can become unbalanced for a few reasons:
- Too much seed starter in each feed (like 1:1:1 every time)
- Long gaps between feedings
- Warm rooms that speed up fermentation
- Chlorinated water
- Flour with low nutrient content
Note: The portion of starter you carry into a new feed is called the seed starter. If you always feed 1:1:1, that means you are keeping a large amount of old starter and giving it only a small amount of new food. The mixture becomes acidic faster, because the bacteria have already produced acid in the older starter. Smaller seed amounts, like 1:2:2 or 1:3:3, give the yeast more fresh flour to work through and help keep the acidity balanced.
See my guide on sourdough starter maintenance for more information.
Signs of an acidic starter:
- Strong, sharp smell
- Surface that sinks or wrinkles
- Thin or stringy texture
- Dough made with it becomes sticky and slack
Acidic starters like this are great in discard recipes such as pancakes. That’s because these recipes rely on the acid the bacteria produces. It reacts with baking soda to give the rise.
How to fix an unbalanced starter
Refresh it at a higher ratio
Feed it 1:3:3 for a few goes. This reduces the acidic part and gives yeast more fresh food.
Check your water
Some tap water contains enough chlorine to weaken yeast growth. Chlorine affects yeast more than bacteria, so the starter may become acidic and sluggish even if you feed it well. If chlorine might be the issue, switch to:
- filtered water
- boiled and cooled water
- water that has sat uncovered for a few hours
This gives yeast a better chance to grow.
Adjust for room temperature
In warm rooms, use higher feed ratios like 1:3:3 or 1:4:4, or switch to a stiff starter, which slows acid build up.
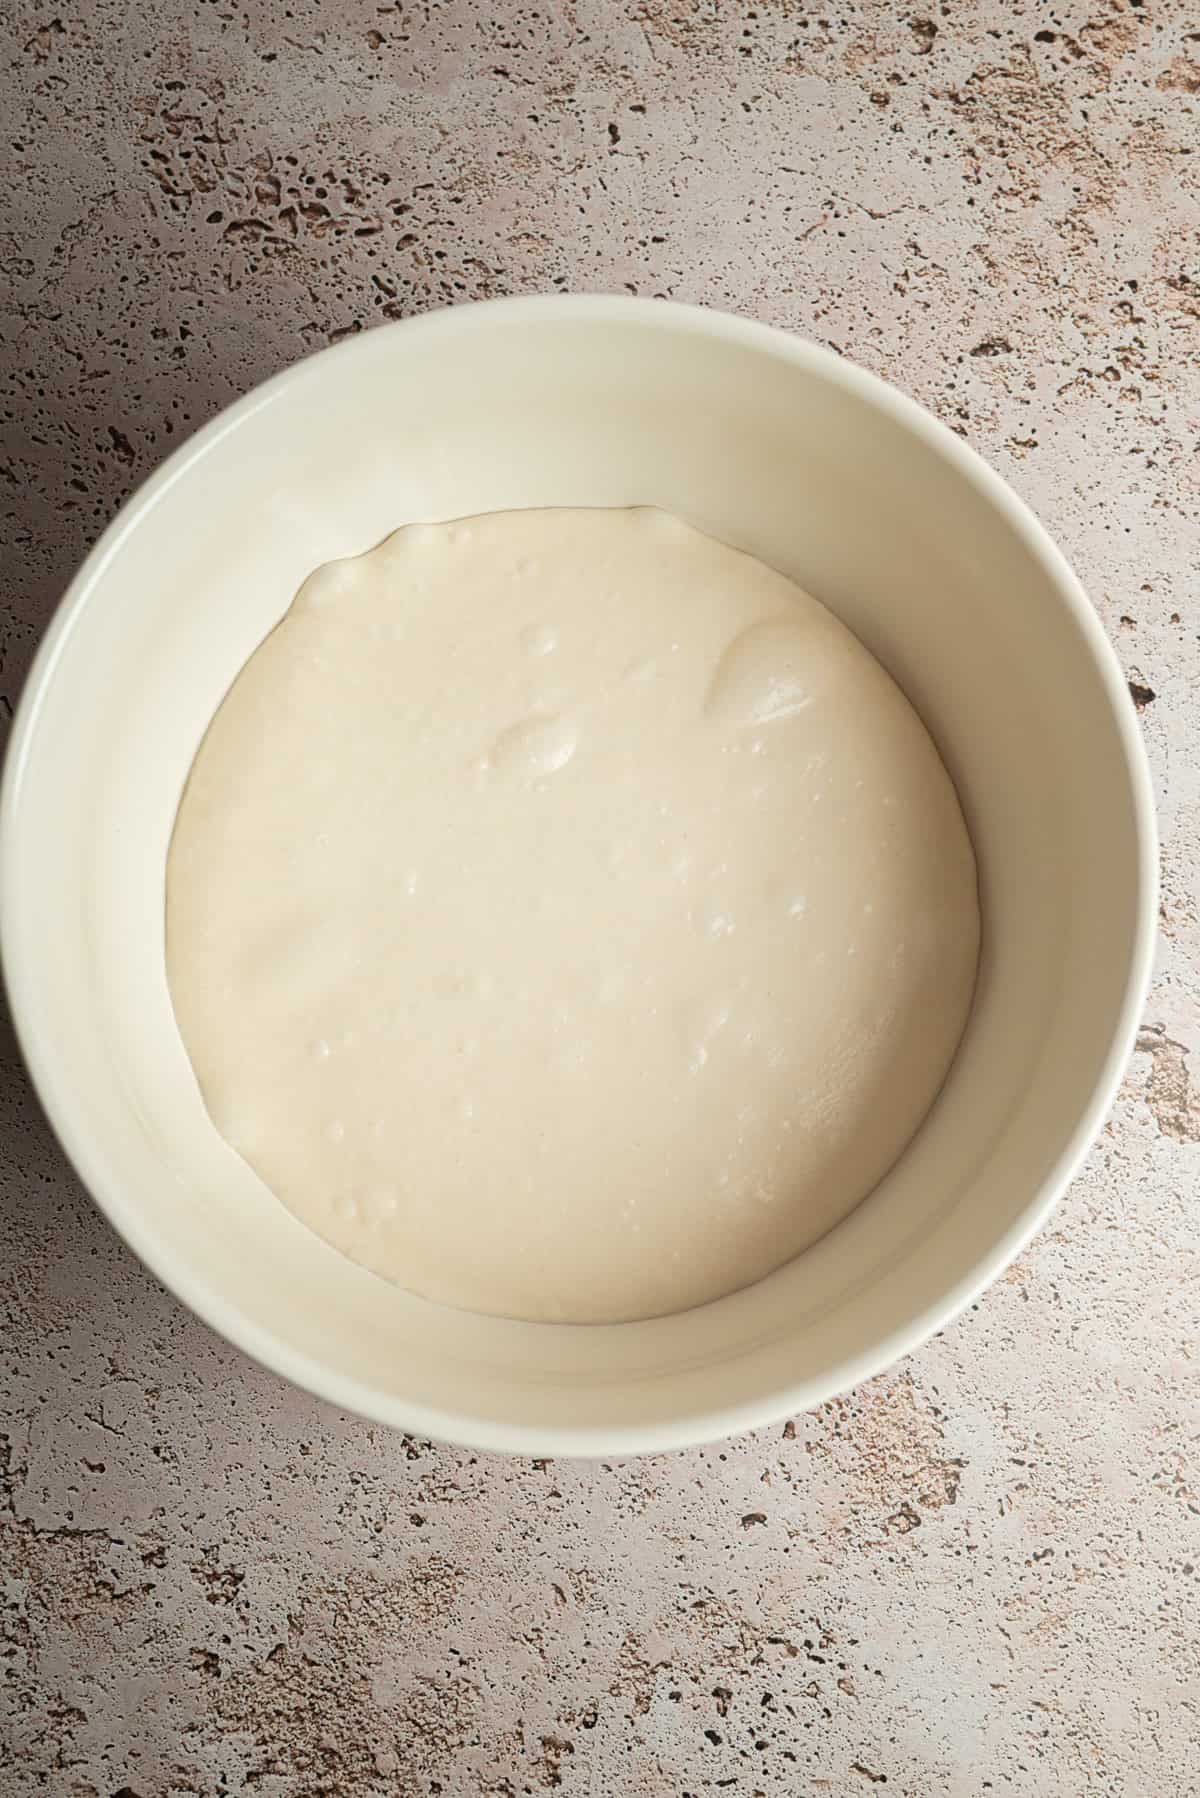
What is bulk fermentation and why it controls the crumb
The bulk ferment is the term for the fermenting and proofing of the dough will do at room temperature. Usually, there is some folding, or kneading of the dough that happens at this stage at the same time.
A dough that is under fermented will be dense. A dough that is over fermented will collapse or bake flat.
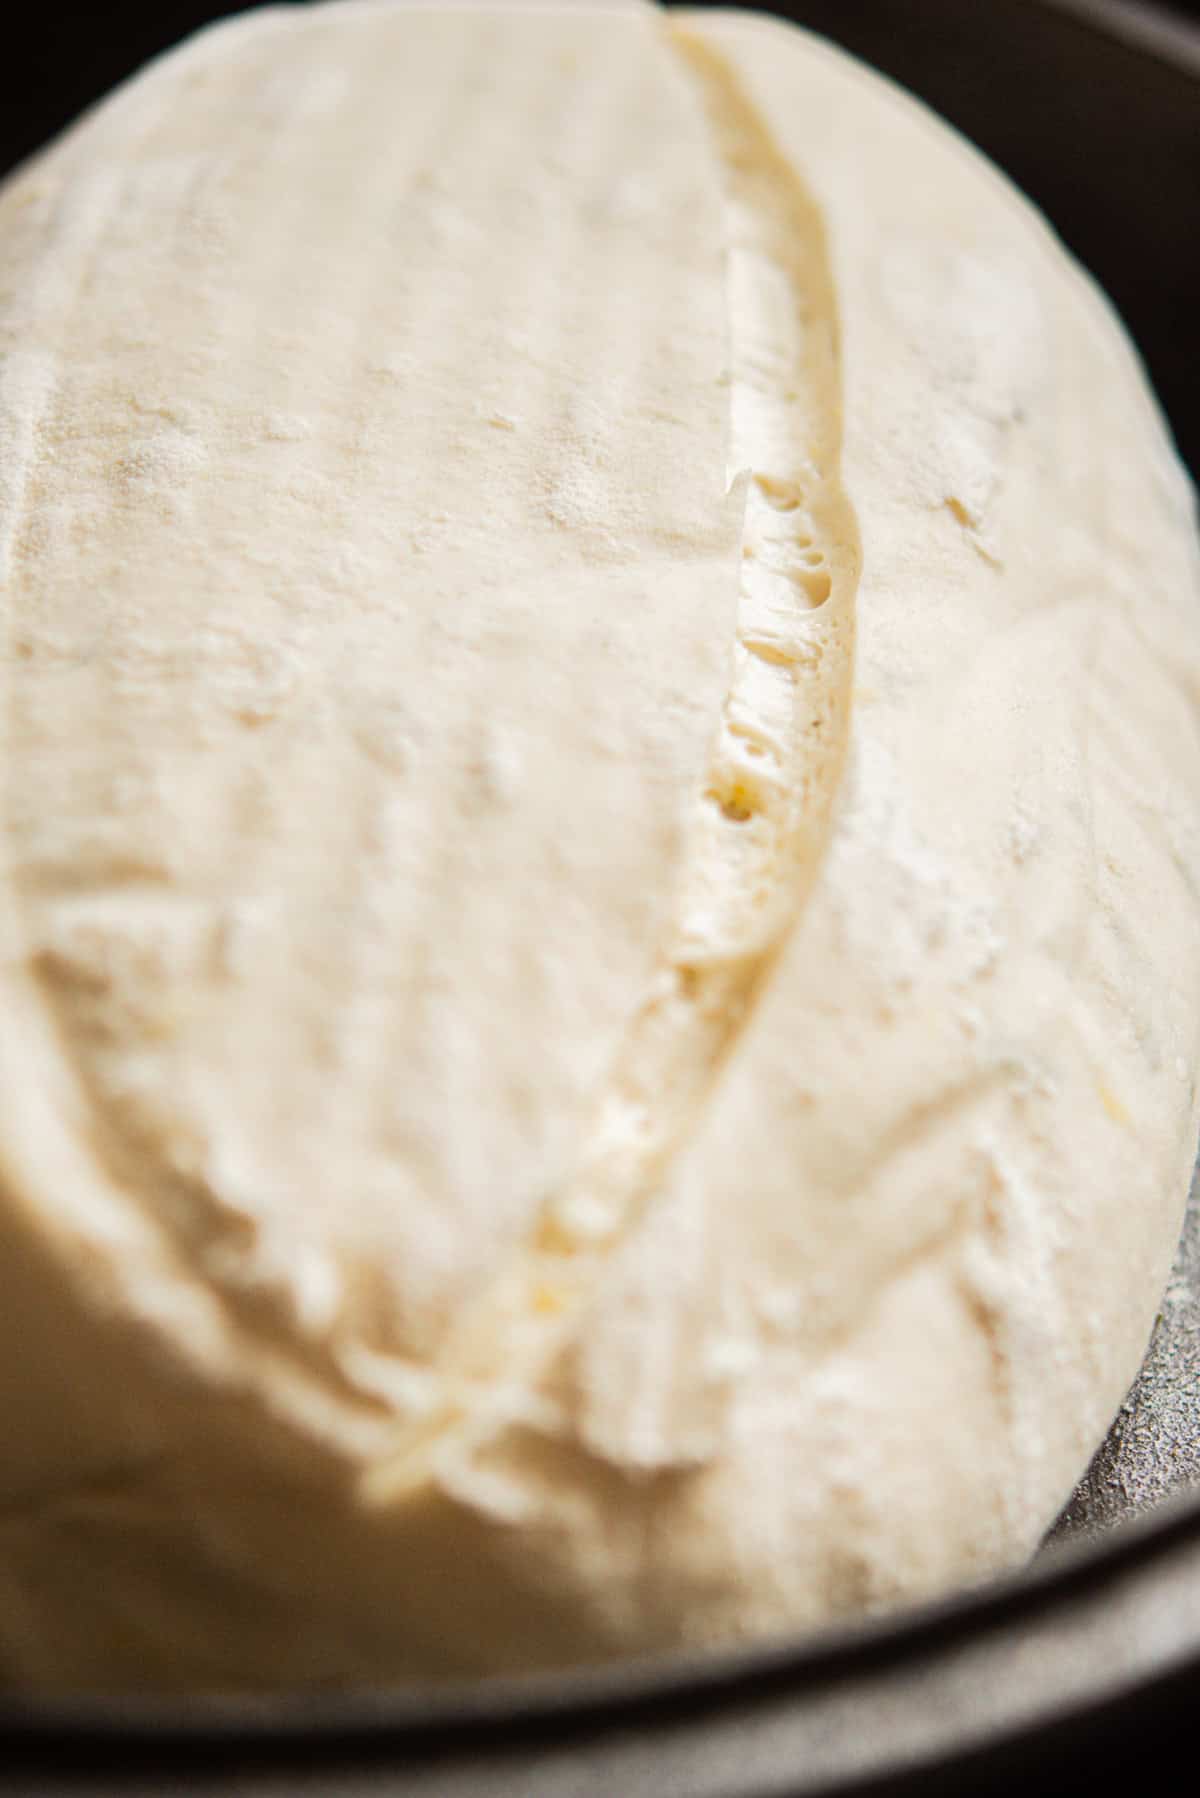
Signs your bulk ferment is ready
- Dough is about 40-50 percent bigger
- Surface looks smoother and slightly domed
- Bubbles form along the sides
- Dough feels airy and elastic
- Poke test: the indent fills halfway back slowly
A handy method to use is the aliquot method. This is where you take a small piece of your mixed dough and place it into a narrow glass or jar. Mark the starting point and let it rise alongside your main dough. Because the sides are straight and clear, you can see the rise better. Once the aliquot dough has increased by roughly 40-50% and shows bubbles along the sides, your bulk ferment is usually right on track.
The dough needs to proof for long enough if you want a light and open crumb. You need to give the yeast time to work through the sugars in the dough. As they do, they release carbon dioxide. The gluten structure that was built up during the autolyse and the folding will hold this gas in little pockets. This gives rise to the dough.
Temperature is key. Cool rooms slow fermentation and a warm rooms speed it up dramatically.
Under fermented sourdough: causes and fixes
Under fermentation is the number one cause of dense sourdough.
Causes
- Weak starter
- Dough too cold during bulk
- Not enough time for yeast to produce gas
Signs
- The dough feels tight, stiff, or firm during folds
- It does not look lighter or airier as it proofs
- The surface stays smooth with no signs of fermentation activity
- The dough tears easily when you try to stretch it
- After baking it’s dense or gummy with sporadic holes.
Fixes
- Use visual cues instead of the clock
- Strengthen your starter with consistent feedings
- Increase bulk ferment time
- Place the dough in a warmer place (but not above 26°C/79°F)
Over fermented sourdough: causes and fixes
Over fermentation happens when the yeast produces more gas than the gluten can hold. The dough becomes fragile and collapses easily.
Causes
- Very warm room
- Extended bulk fermentation
- Starter too acidic
- Dough forgotten in the fridge during cold proof
Signs
- Dough spreads and will not hold shape
- Dough sticks to banneton
- Bakes flat with little oven spring
Fixes
- Shorten bulk time
- Lower dough temperature
- Use less starter
- Refresh starter to reduce acidity
If you want a quick index of all troubleshooting topics in one place, you can jump to my Sourdough Troubleshooting Hub.
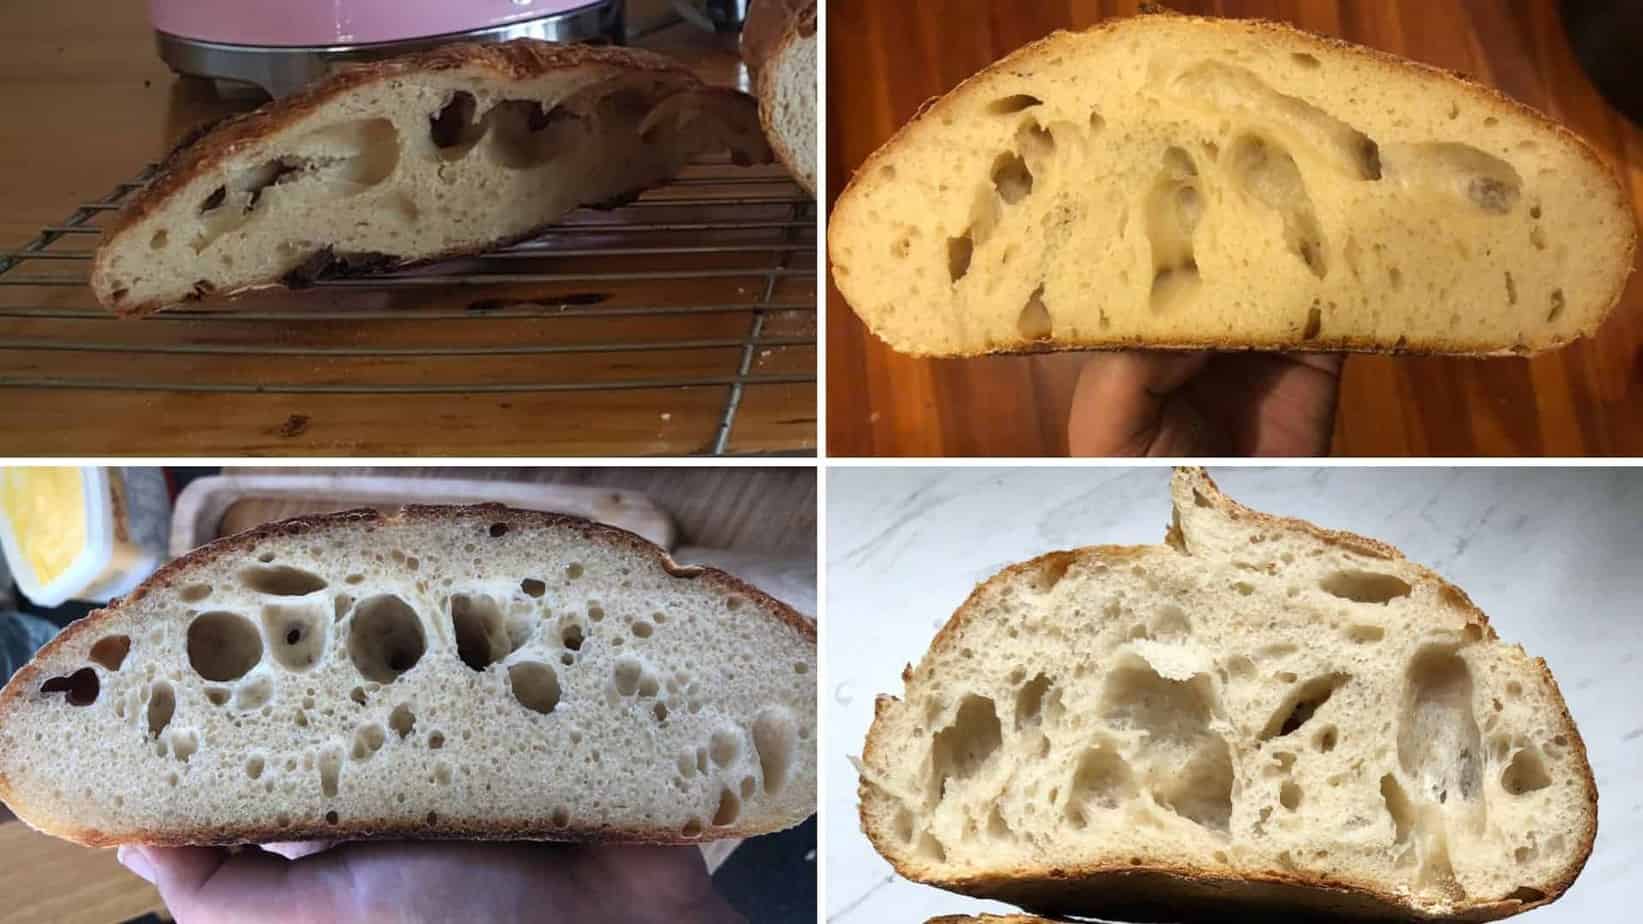
Hydration and flour choice: how they affect the crumb
Hydration controls how open or tight the crumb becomes.
- Higher hydration (75% and up) gives an open, lacy crumb.
- Lower hydration (68 to 72%) gives a tighter, more even crumb.
Flour type matters too. Strong white bread flour creates reliable gluten strength. Whole grain flours absorb more water and ferment faster, so they might need some adjustments.
When introducing different flours such as spelt flour, rye, wholemeal, etc, it helps to start with small amounts and work your way up. 10-15% of the total flour amount is a good place to start.
If you want to see how different hydrations behave in real dough, my Sourdough Bread section has a mix of beginner friendly loaves and more advanced formulas you can try.
If you want to see what a mid hydration dough feels like, my Beginner Sourdough Loaf is a great place to start.
What is autolyse and why it helps your dough
Autolyse is a rest period where flour and water are mixed and left to hydrate. This relaxes the dough, improves gluten development, and makes shaping easier.
Salt and starter are not added until after autolyse because salt tightens gluten and slows absorption.
A quick note on dough feel and ratios
When it comes to sourdough, the exact amount of water and flour is not the most important part. Honestly, I make bread by eye a lot of the time. I tip in the flour and water and mix until the dough feels right. Some days it ends up on the wetter side and some days not as much. So do not stress if your dough does not match someone else’s hydration level exactly. Sourdough recipes can sit anywhere between 65 and 80 % hydration. If your starter is healthy and not overly acidic, the dough can handle higher hydration surprisingly well.
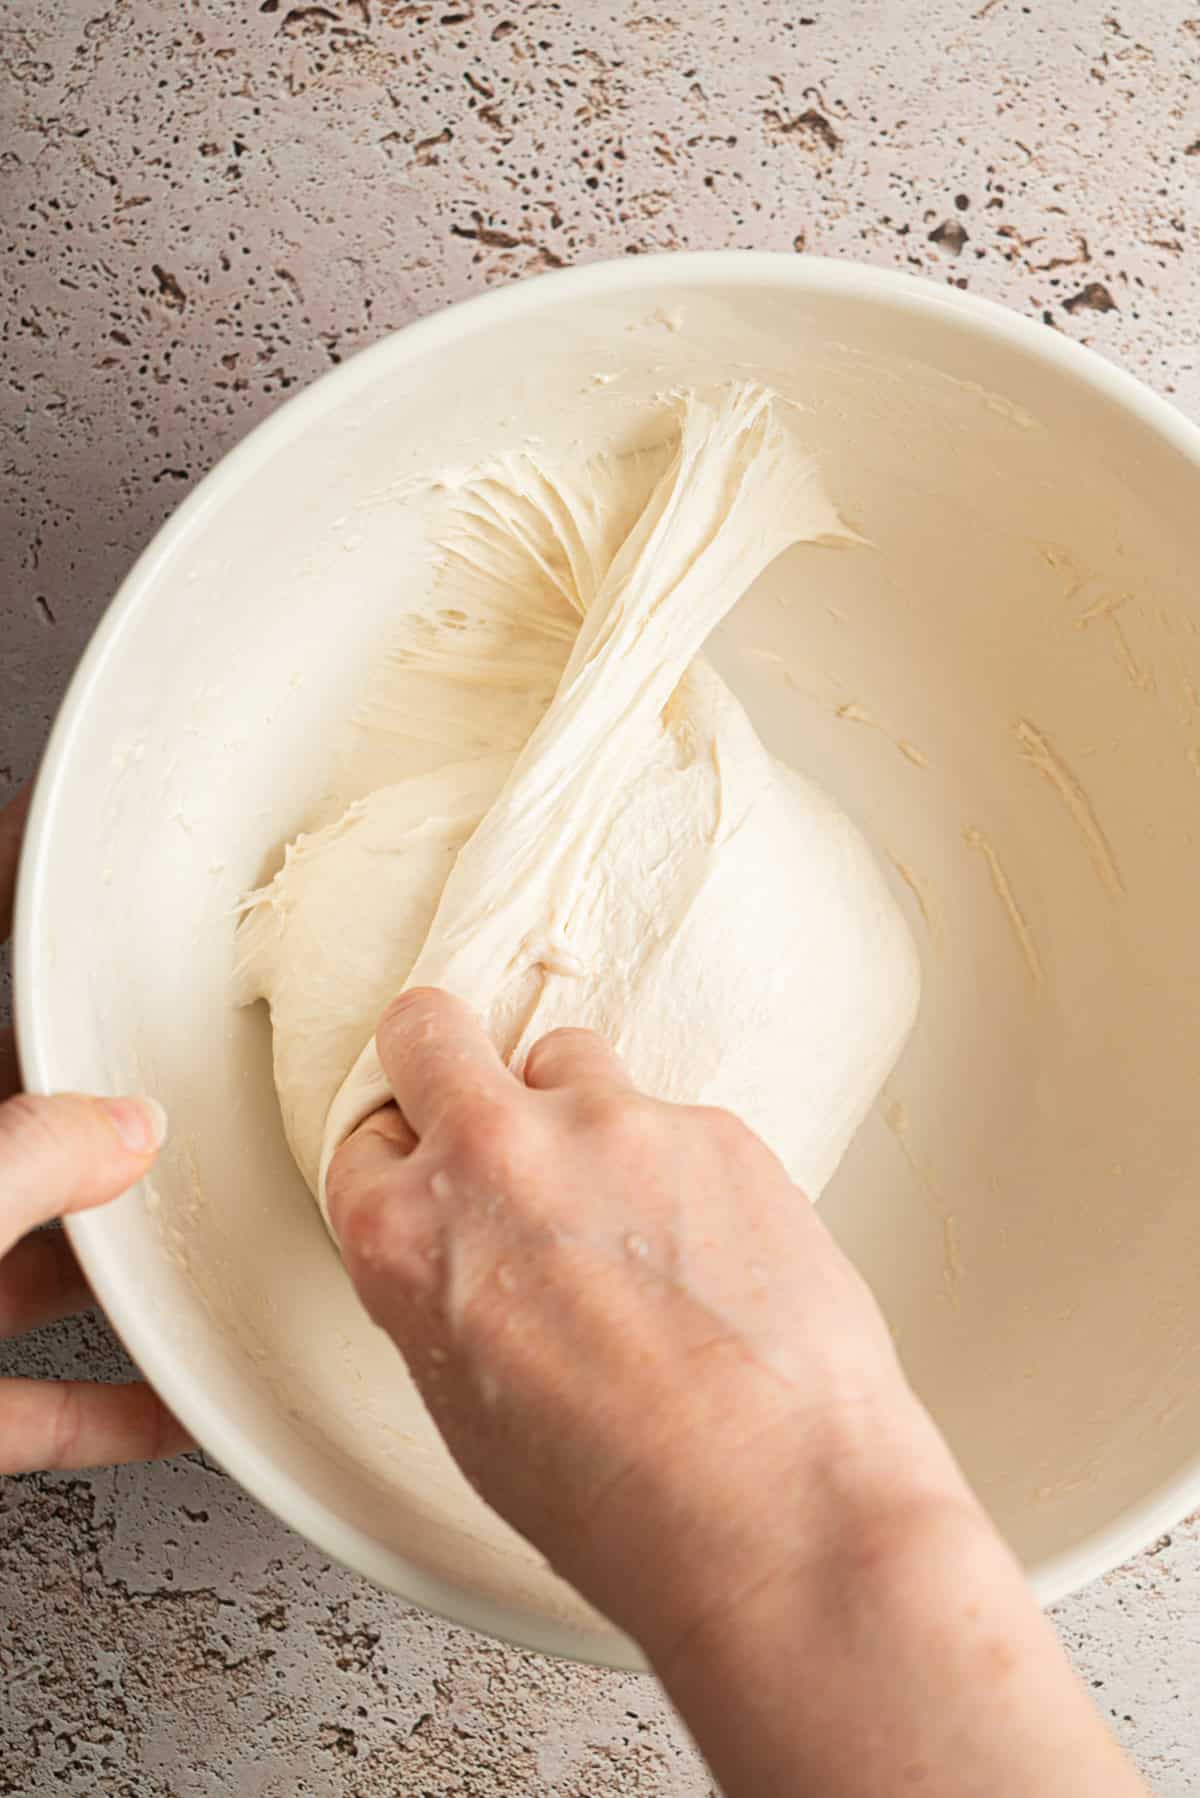
Folding dough: how to build strength before proofing
Folding strengthens the gluten network so it can hold gas. Coil folds or stretch and folds work well.
What good dough strength feels like
- Dough lifts in one piece
- Surface looks smoother
- Dough feels bouncy
- It spreads less after each fold
If your dough stays watery or loose after several folds, look back at your starter.
In my recipe, I either stretch and fold or coil fold the dough fora few hours and then leave it to ferment further until it has reached the ideal proofed stage. I always use wet hands when I am folding my dough as it stops it from sticking to my hands. My dough is technically always sticky and wet, even if the videos I have of my folding don’t show that fully. However, I build up the structure in the dough so it holds together and becomes elastic.
It is normal for the bread dough to spread back out a bit after folding, especially with doughs that have higher hydration. However, you should feel a difference in texture as it develops.
How to shape sourdough for better oven spring
Shaping creates surface tension, which helps the loaf rise up instead of out.
Good shaping feels like:
- The dough tightens as you drag it
- The surface becomes smooth
- It holds a rounded shape
If the dough tears, gluten is underdeveloped.
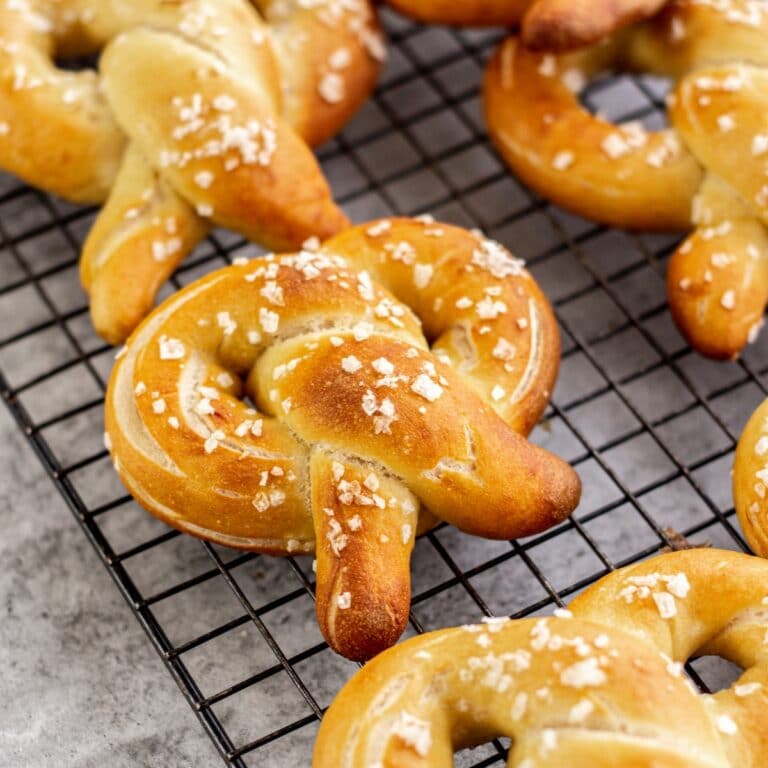
If you enjoy shaping or want to explore different dough styles, my Sourdough Rolls and buns and Enriched Dough hubs have lots of ideas and guides you can follow.
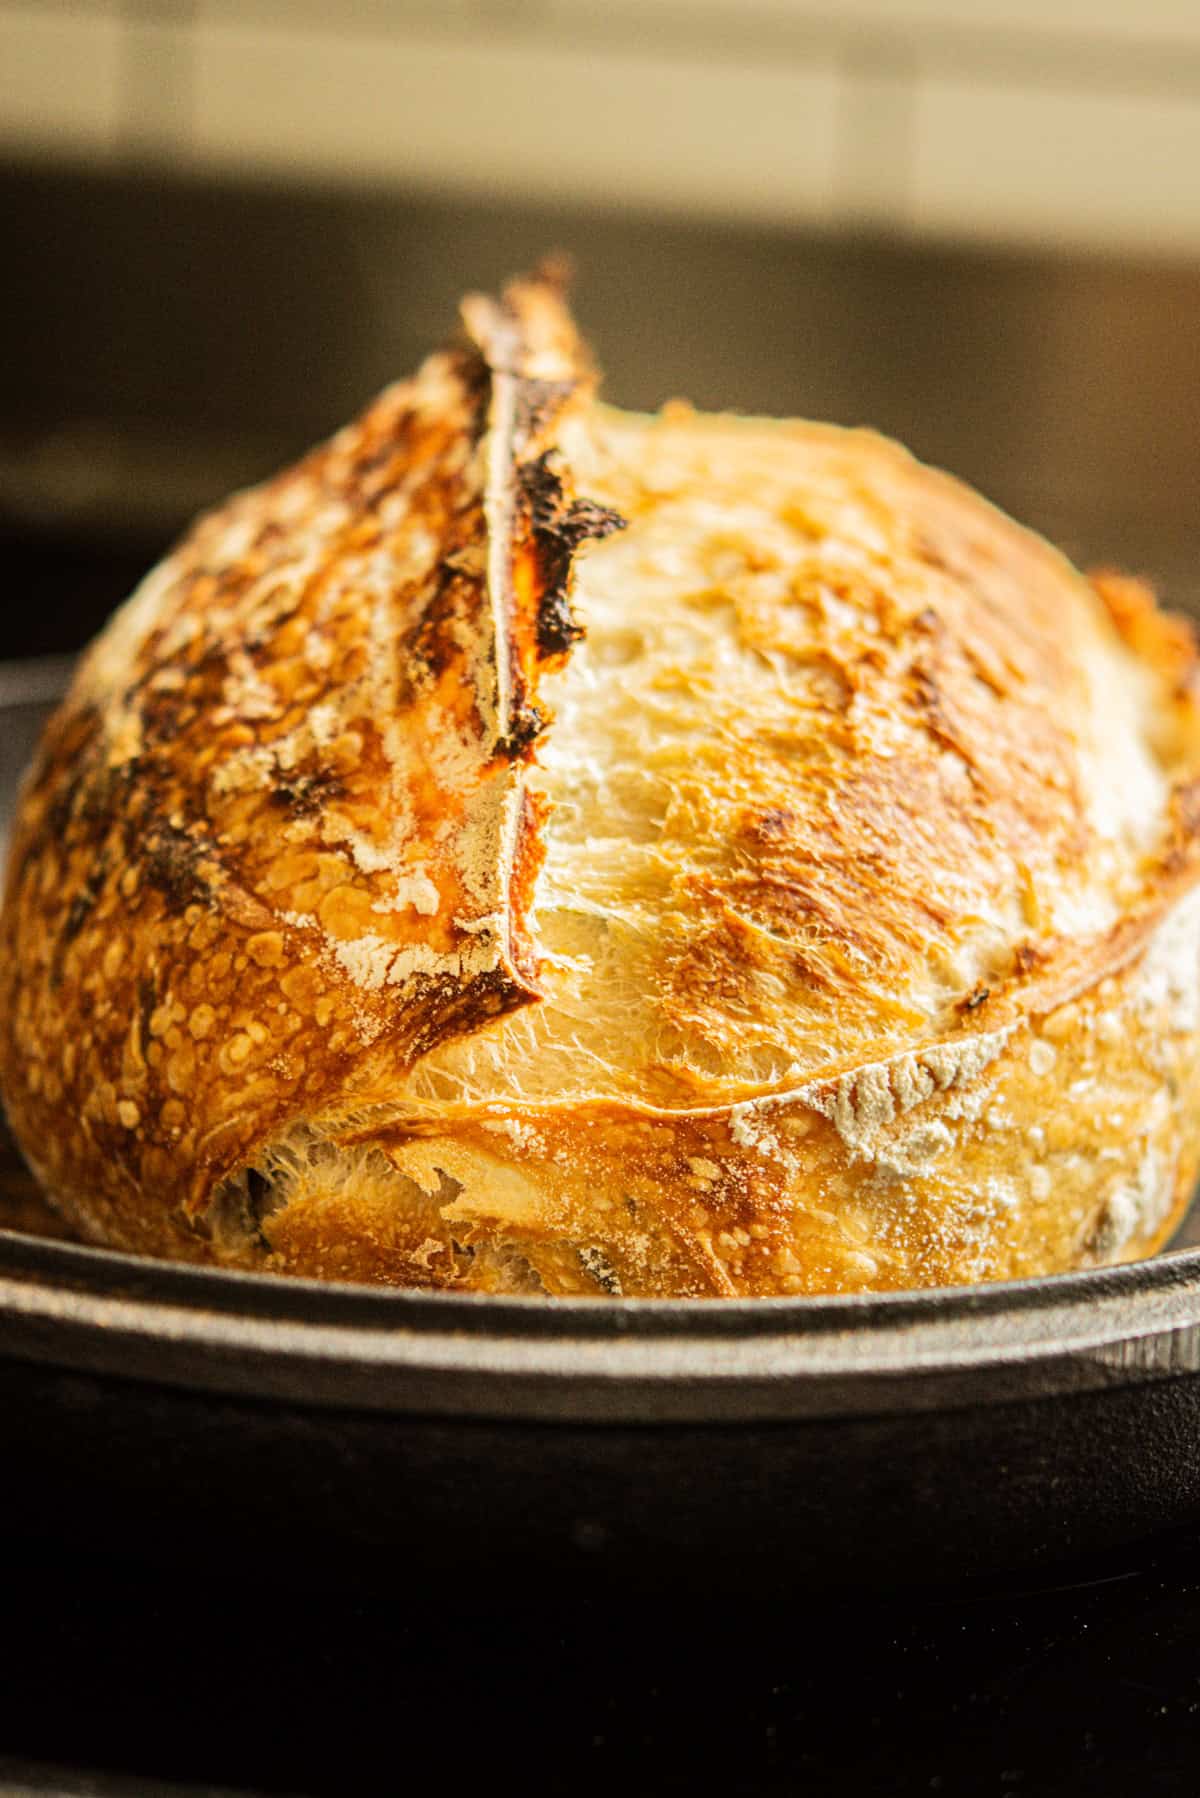
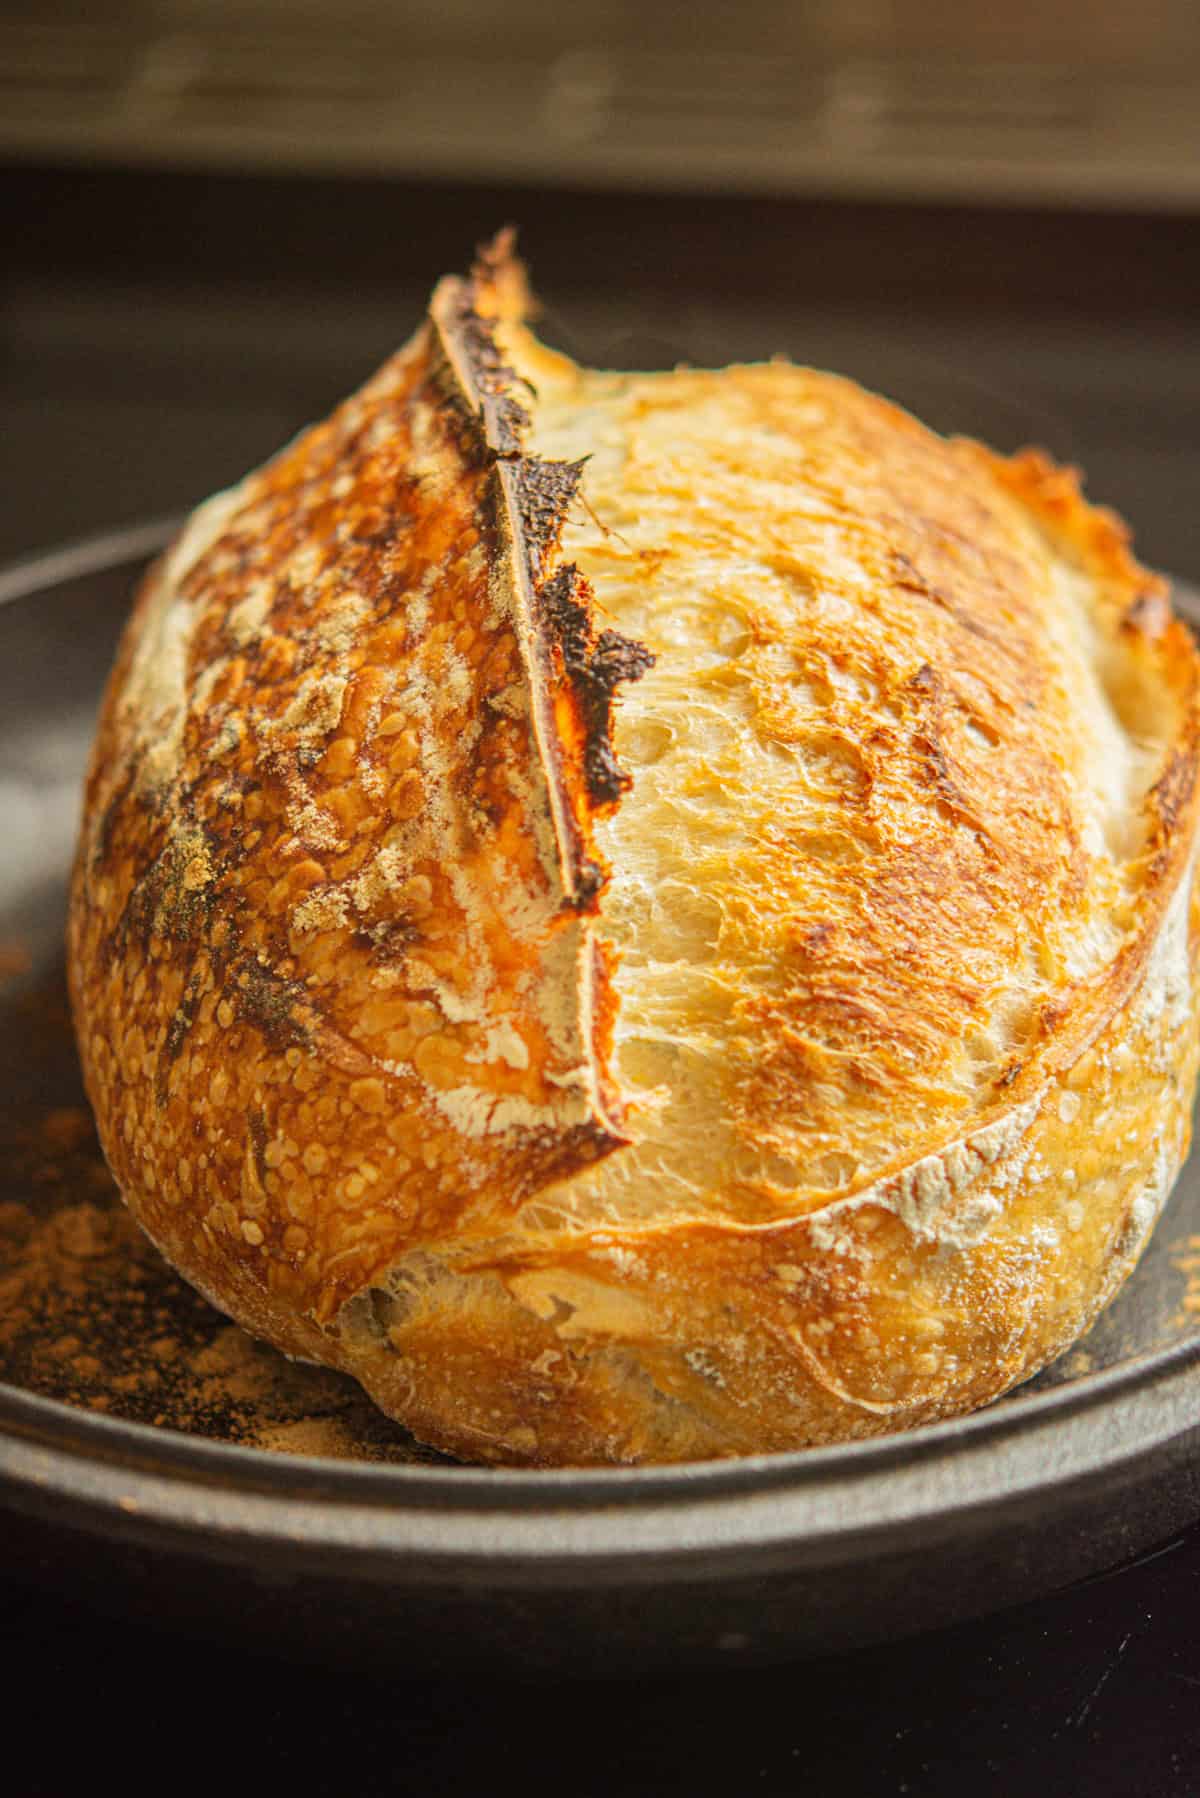
How to bake sourdough for maximum oven spring
Steam is essential. A preheated cast iron pot traps steam and helps the loaf expand before the crust sets.
Tips for better bake results
- Preheat your pot for at least 30 minutes
- Keep the lid on for the first stage of the bake
- Do not open the oven early
- Remove the lid to brown the crust
How to create steam without a Dutch oven
If you do not have one, you can still create great steam:
- Use a roasting pan with a lid
- Bake on a preheated stone or steel
- Add a tray with boiling water or ice cubes
- Cover the loaf with a large stainless steel bowl
Scoring sourdough: how to get an ear
Scoring directs where the loaf will open.
- Use a razor sharp blade
- Decorative cuts stay shallow
- Main slash about 5 to 8 mm deep
- Slight angle for an ear to lift
Cold dough scores cleaner than warm dough.
FAQs about Sourdough
More reading
If you want to explore more sourdough topics, you can browse all of my hubs here:
Starters | Bread | Rolls | Enriched Dough | Laminated Dough | Sourdough Discard | Troubleshooting


Can my inclusions make my bread more dense? I like to do jalapeno and cheese or Italian herbs and cheese. But they always come out so so so dense, the crust looks beautiful, and I have a really good spring, but when I cut into it, it’s so heavy! Help?!
Hey, yes inclusions can sometimes do this. Cheese and add ins like jalapeños add weight and sometimes moisture, which can make the crumb feel dense. It can help to add them once the dough has developed some strength, around 30 to 60 minutes into bulk fermentation, and allow a slightly longer bulk so the dough has time to build enough structure to support the extra weight.
Hello! I have been using a starter for about 6 months. My last bake, i took the starter out of the fridge and fed it twice. It exploded. Lots of of bubbles, not much movement
The loaves did not rise well, were sloppy and the baked loaves are ugly and dense.
Should I go with a new starter?
Thanks
Hey, you can give it two or three room-temperature 1:2:2 feedings until it reliably doubles in around 6 h, then mix your dough and take time to build the gluten well. Sloppy, dense loaves usually come from under-developed gluten or over-proofing
Hi
I’m new to sour dough!
Mine is too dense with no holes… tastes nice but too heavy. Please help, thank you!
I’m new to baking and thought I was doing pretty good til I started putting inclusions into my bread, Parmesan cheese and Everything Bagel, not together, separate loaves.
My plain loaves were big and the crust nice 😊
I started putting Parmesan cheese in my dough and they are so small. Even with Everything Bagel. They still taste good. lol!
I’m perplexed.
I’m going to make a plain loaf tomorrow to see if it rises.
I appreciate any help and advice.
Thank you
Sometimes, the addition of inclusions could slow the fermentation process, so I would double-check that it’s proofed enough. At what stage are you adding your inclusions?
I can’t wait to try your recipe but I have a couple of questions:
How long do you let the flour and water sit on the bench?
After adding the starter and salt do you let it rest before starting the folds?
Thank you!
Thank you for your very clear instructions. Made the most perfect bread thanks to you. I had been trying for a long time but never was I as successful as now, using your recipe. Question: if I make a levain with a 1:3:3 ratio, (as opposed to 1:2:2) do I still use a total of 150 grams as specified in your recipe?
Oh thats great to hear!! And yup you still want to keep the total amount the same 🙂
Hi Ellen! I’m making progress with my sourdough baking but when I first baked a loaf the crust was super flavorful. Haven’t had another one since. What influences the flavor of the crust? Thank you!!!
Hey Janet! Flavor of crust I think has a lot to do with the baking time and temp, and I personally love a very dark brown crust for ultimate flavor. But texture plays a big part too- A well-proofed dough will have a thin crust, that’s crispy and flaky when hot but when it the bread cools, it softens. It’s easy to cut through. An under-proofed dough will create a thicker crust. It still tastes good, however it’s very difficult to cut through and once the bread cools and the crisp goes, an underproofed bread crust will be thick and very chewy and harder to bite through.
Wonderful, informative article. I’ve been baking sourdough since 2012. The bread has always been good, and so I have hesitated tinkering with it. During the pandemic, however, I started watching a lot of YouTube videos showing bread with a texture that was more open and consistent than mine. (Better opening and ears too!) I’m just now beginning to tinker with some changes, and your article has been the most helpful resource I’ve found, so … thanks so much for it.
I see your URL is from New Zealand. I’m from the U.S., but I lived in NZ for two years in the 1970s. (North Island: Auckland, Hamilton, Tauranga) Wonderful country; great people. I hope to return for a visit someday.
Hey Earl, so happy you found the article helpful! Very cool you lived in NZ for a bit too 🙂 it’s such a beautiful place
Hi Eileen. Thank you for your informative article. I am a relatively new sourdough baker. My last attempt produced a gummy, dense loaf after having better luck previously. Little was changed. Here are my questions: First, I use a 1-2-2 ratio for my 4 week old starter with half the flour white and half rye. It doubles around 4 hours and peaks and triples around 6+ hours. When is the better time to use it, 4 or 6 hours, to reduce my risk of gumminess? Secondly, after 4 sets of folds at the start of the bulk ferment, the dough barely rose at all. 10 hours in and it had expanded around 20%. I even had a crust forming on the top. I was pretty sure that dense gumminess awaited and I was right. Thoughts? Thanks!
Do you discard every time you feed your starter?
Yup I do, you can read more about how I feed my starter here