Step-by-Step Sourdough Baguette Recipe
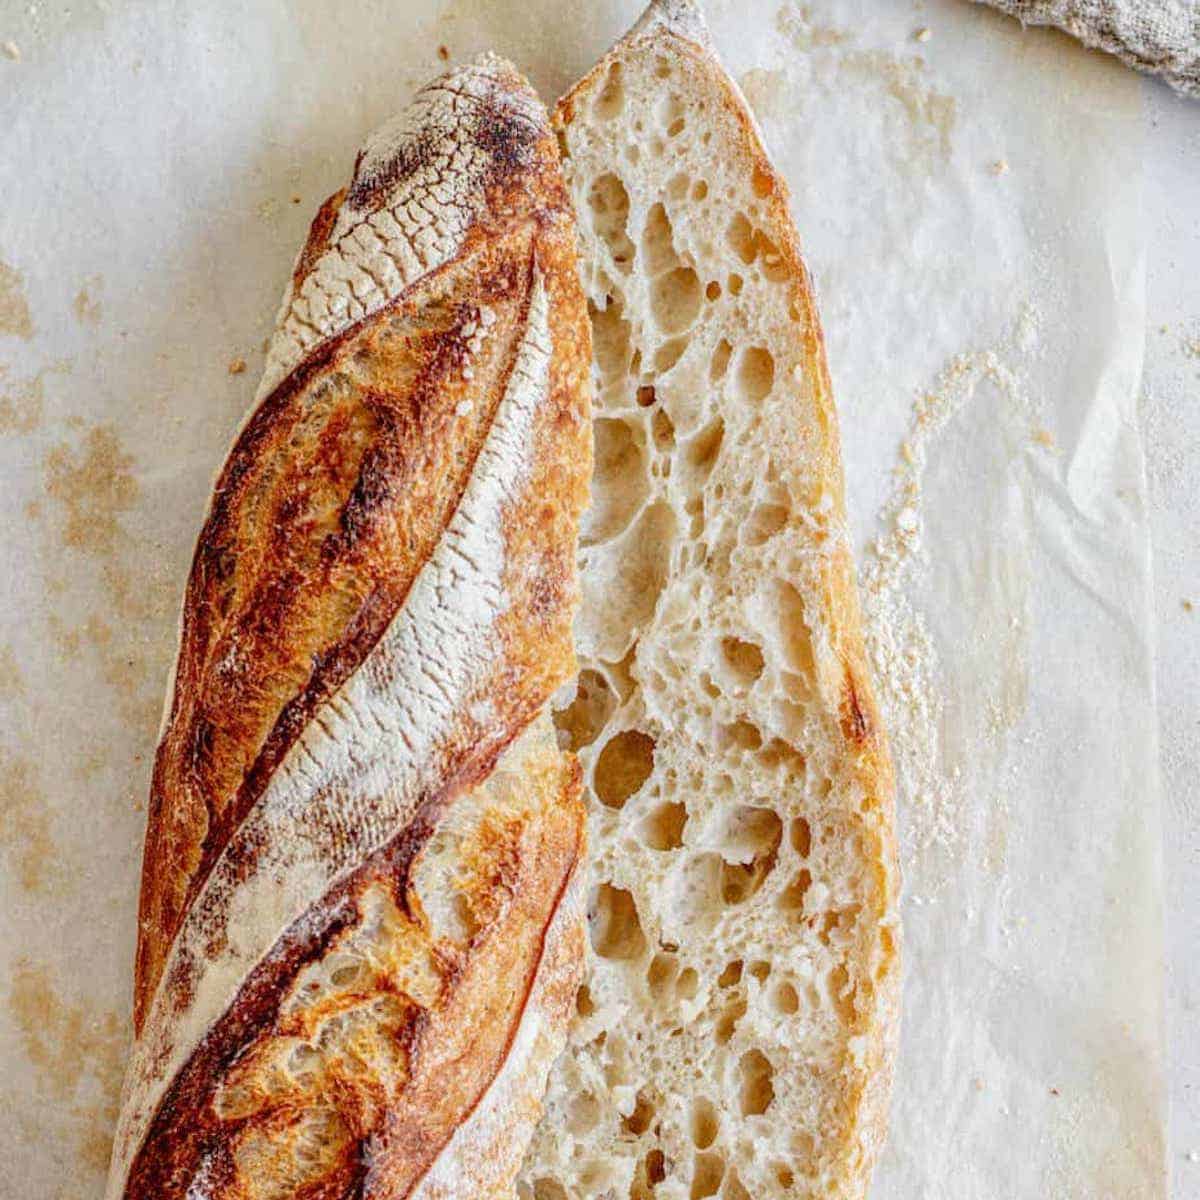
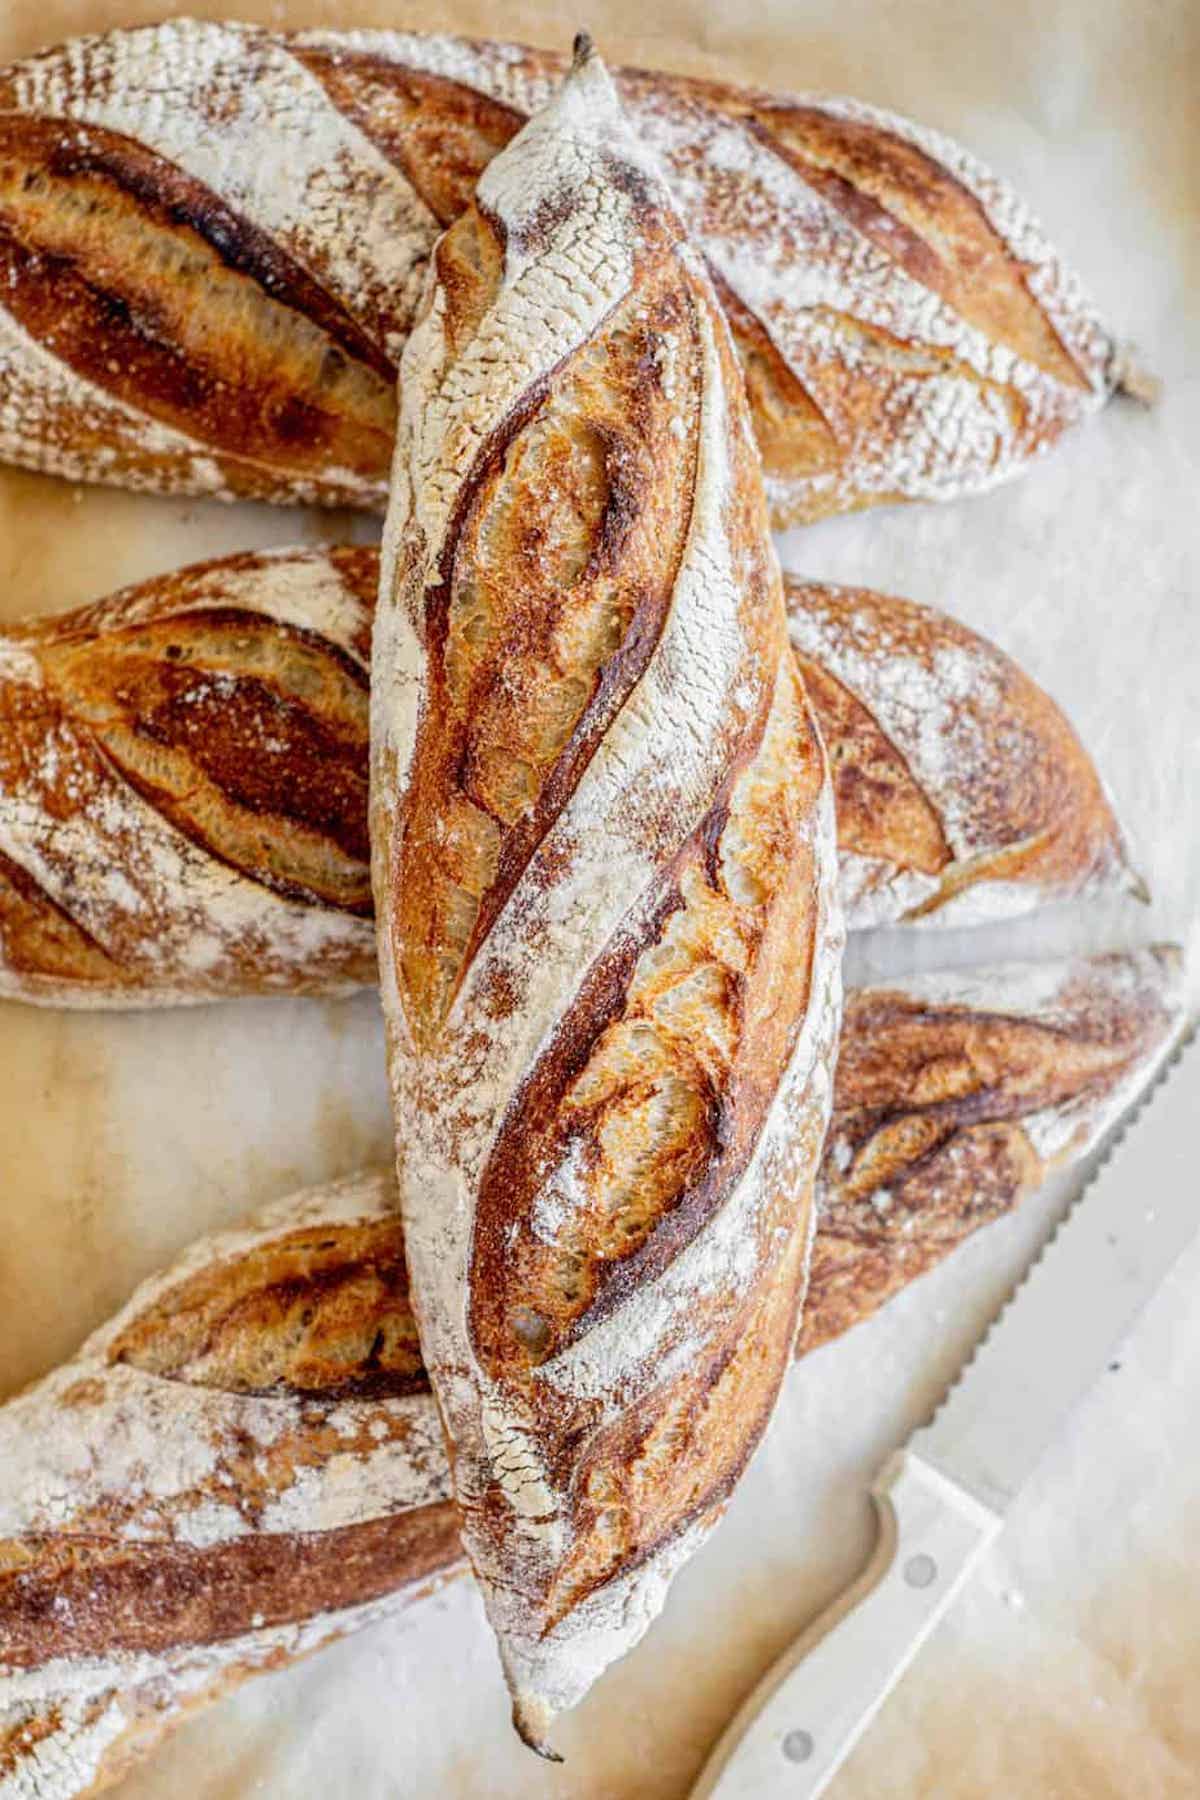
There is something so wonderful about sourdough baguettes. Right out of the oven they have a crackly crispy crust and light, and chewy interior.
What readers say:
Absolutely perfect recipe. I’ve baked these twice, and followed the recipe exactly. The baguettes were beautifully formed, airy, crusty and delicious. Thank you.
Paula
The timing of sourdough baguettes
Making this sourdough baguette recipe is not that hard, and if you read on, you will see.
The timings show a ‘range’ of time to complete these steps. They don’t have to be exact; there is flexibility. The perfect baguette needs time to proof properly so it’s light and airy inside. Then, it needs a hot oven to bake in and some steam to create that crisp crust. I create the steam in my oven using a pan of water or ice cubes. If you love these sourdough baguettes, try this sourdough ciabatta or sourdough fougasse next!
A few ingredients
Your starter needs to be in good condition to make great sourdough bread. Learn more about sourdough starter maintenance, or sourdough bread troubleshooting.


The timing
The timing for homemade sourdough baguettes can be tweaked to suit your schedule, but here is a guide.
- Between 7 am-9 am: Create your levain. The levain can sit and rise for around 4 hours.
- Between 12 pm-2 pm: Autolyze. Flour and water are mixed and left to autolyze in a warm place for about an hour, then the starter and salt are added
- Between 2 pm-7 pm: Bulk fermentation time. First, you will stretch and fold the dough for two hours every 30 minutes. After the last fold, the dough will sit for another 2-4 hours before pre-shaping until it has bulked by around 50%. As with all sourdough, this bulk ferment is very important to achieve an airy crumb, and the timing depends on room temperature.
- Between 7 pm-9 pm: Pre-shape. On a well-floured bench, split the dough into two. Shape each piece into a ball and leave them to sit for 20-30 minutes. Shape into baguettes and place the shaped baguettes in the refrigerator for a cold-proof of at least 8 hours, but up to 24.
- The next morning – Baking day.
High-level method
- Begin by making the levain so it has time rise.

- Leave it to sit until it has at least doubled but not collapsed.
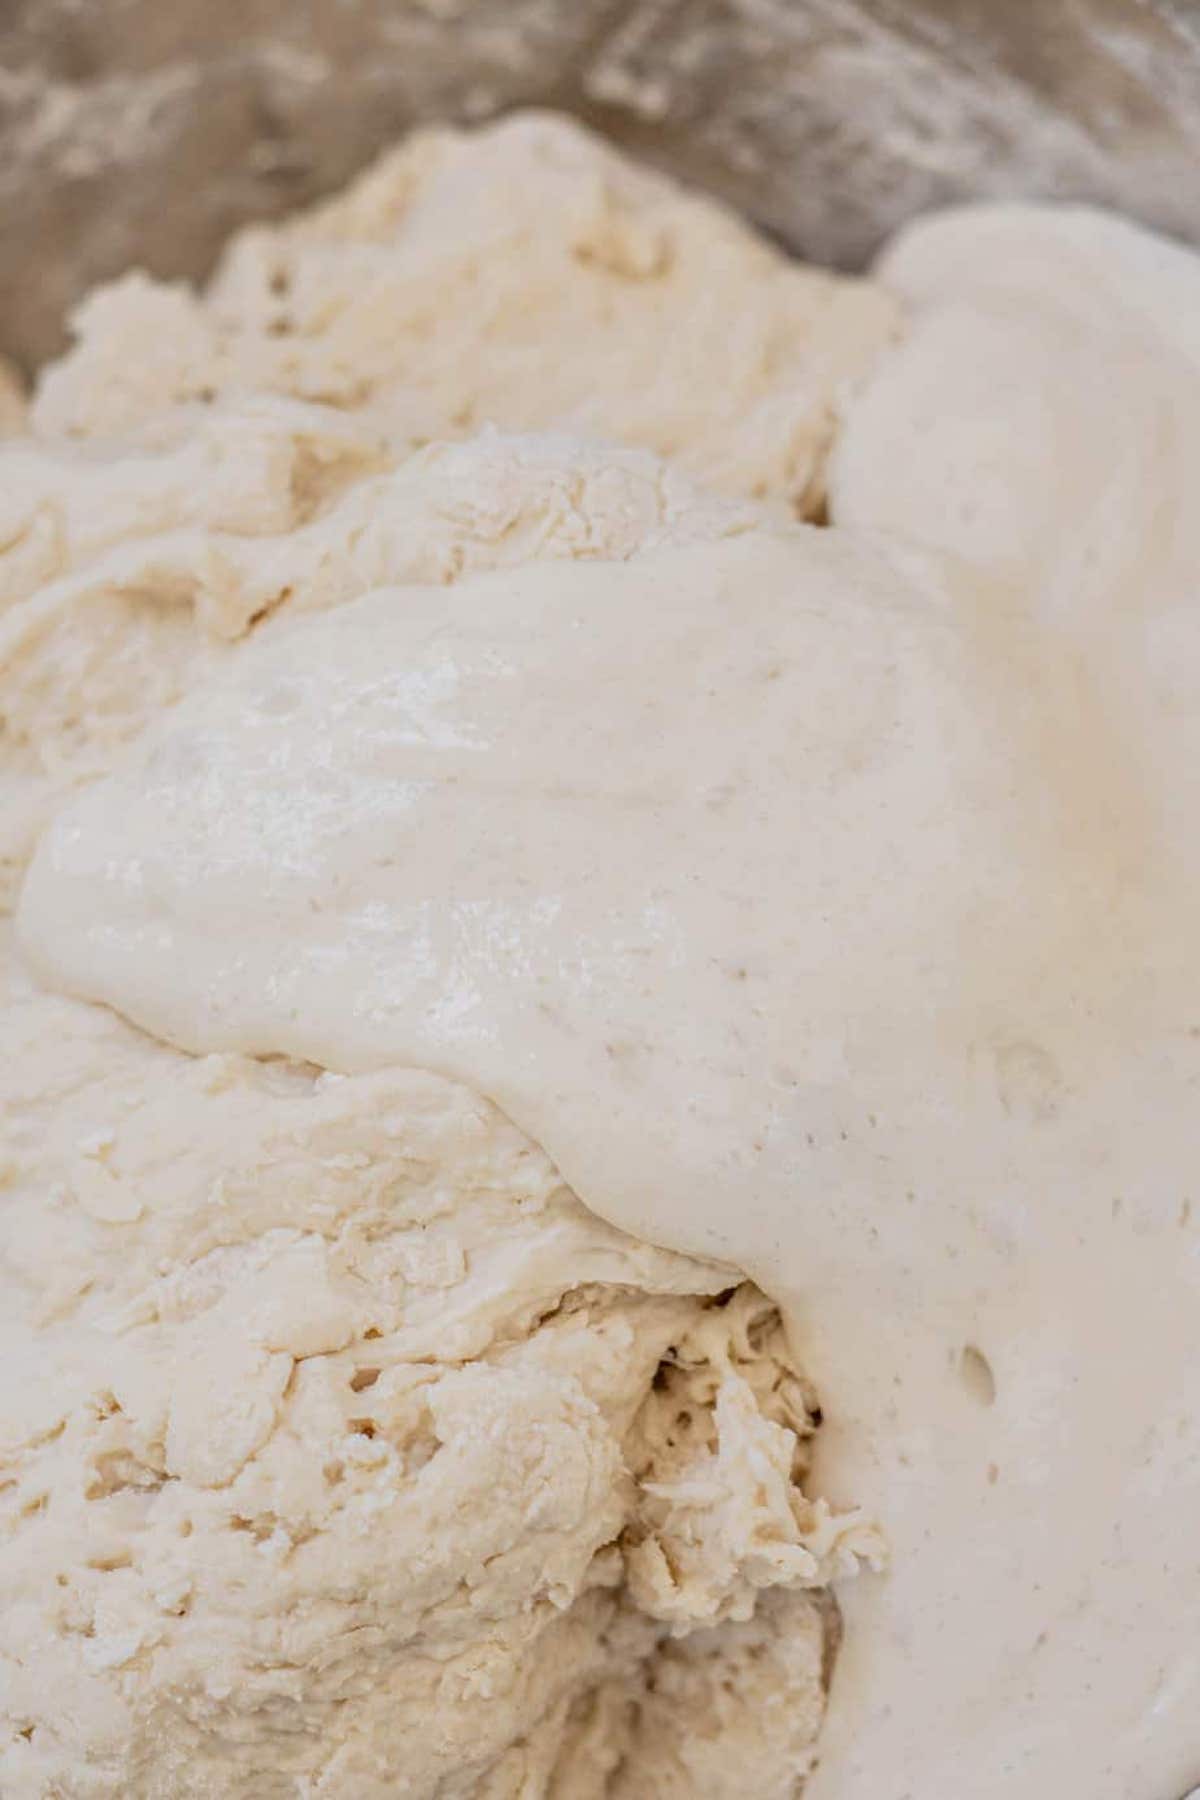
- Mix the main bread flour and water in a large bowl and use wet hands to combine it into a shaggy dough.
- After it has sat and the starter has doubled, add the salt and starter to the dough and mix it well with wet hands. To build gluten structure, give the dough a few slap-and-folds on the counter or let your stand mixer with a dough hook do the work.
- Let the dough rest for 30 minutes, then stretch and fold.
Stretch and folds
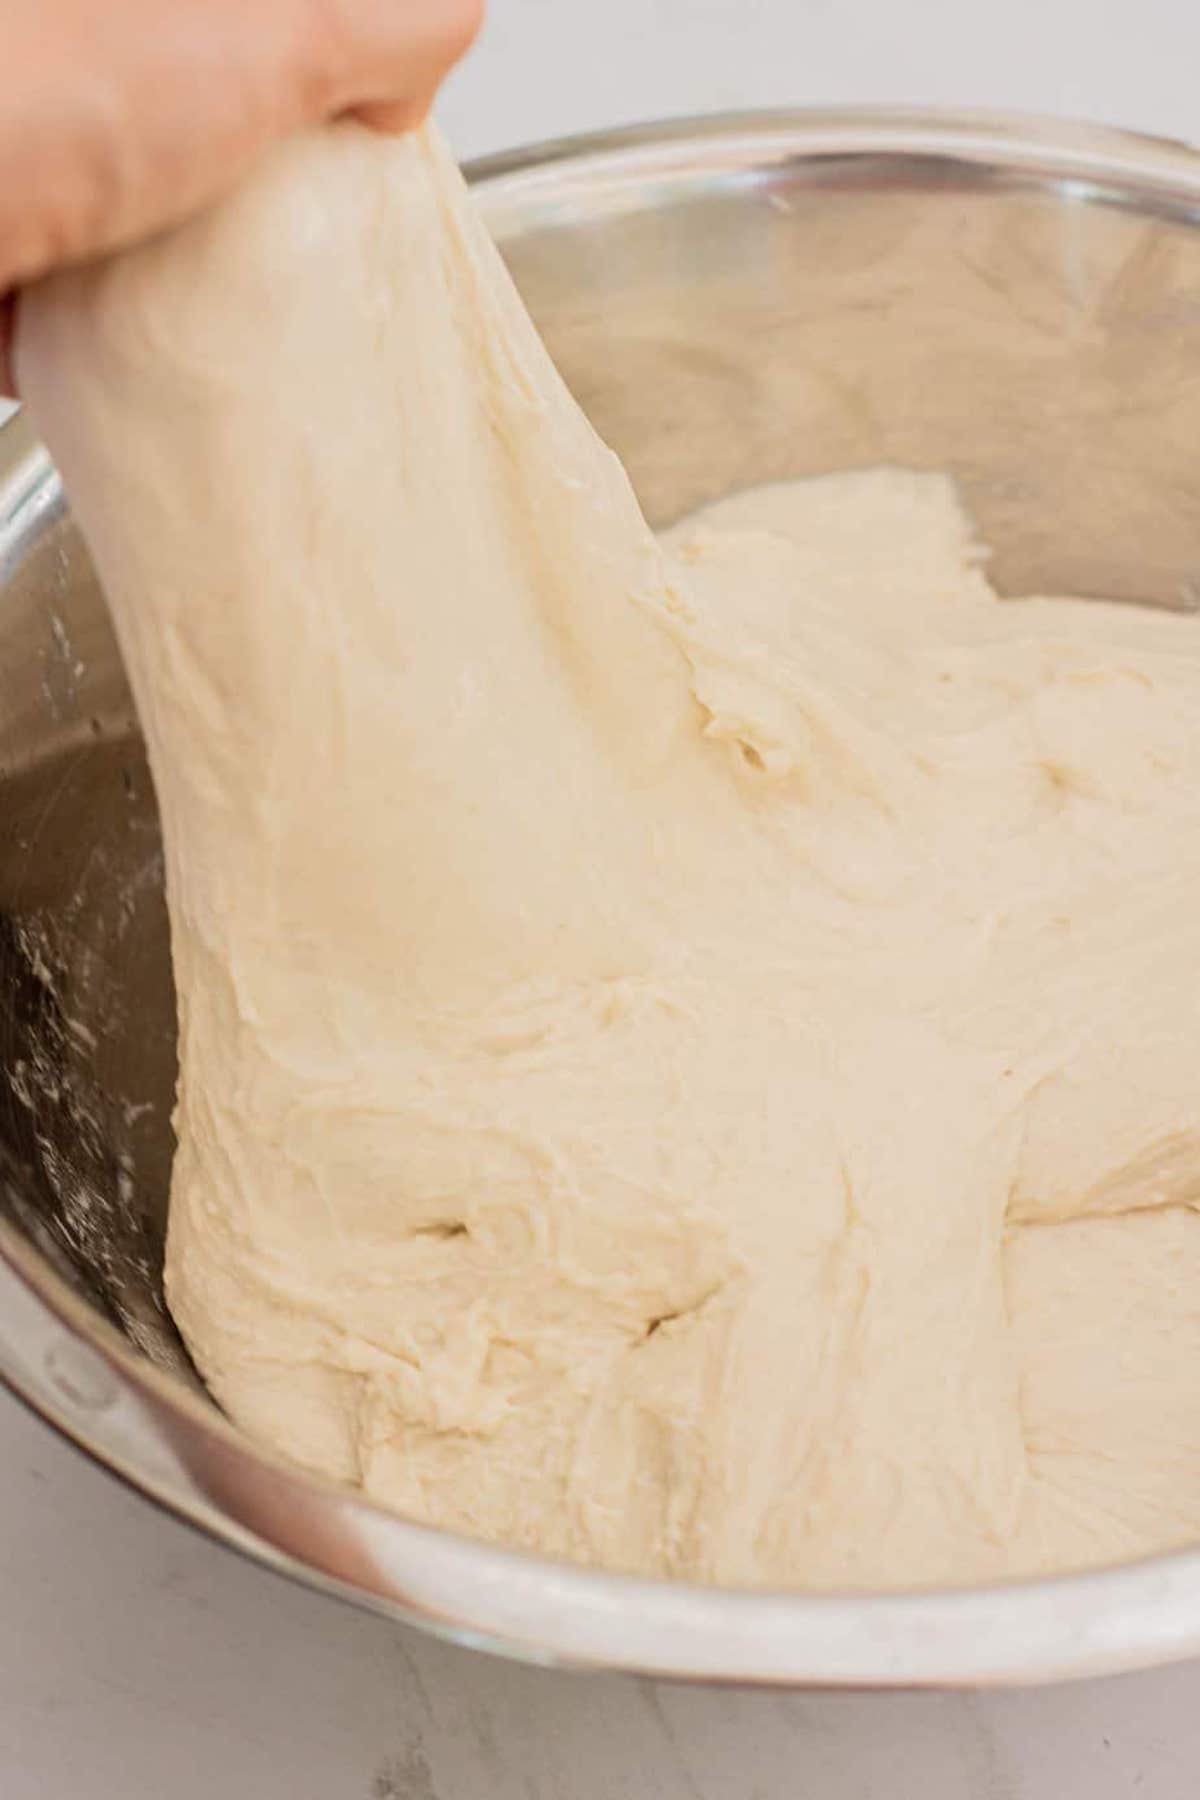
- Using wet hands, take one side of the baguette dough and stretch it up, then pull it over itself. Turn the bowl a quarter turn and repeat this move.
- Continue stretching, folding, and turning the bowl until all sides have been folded.
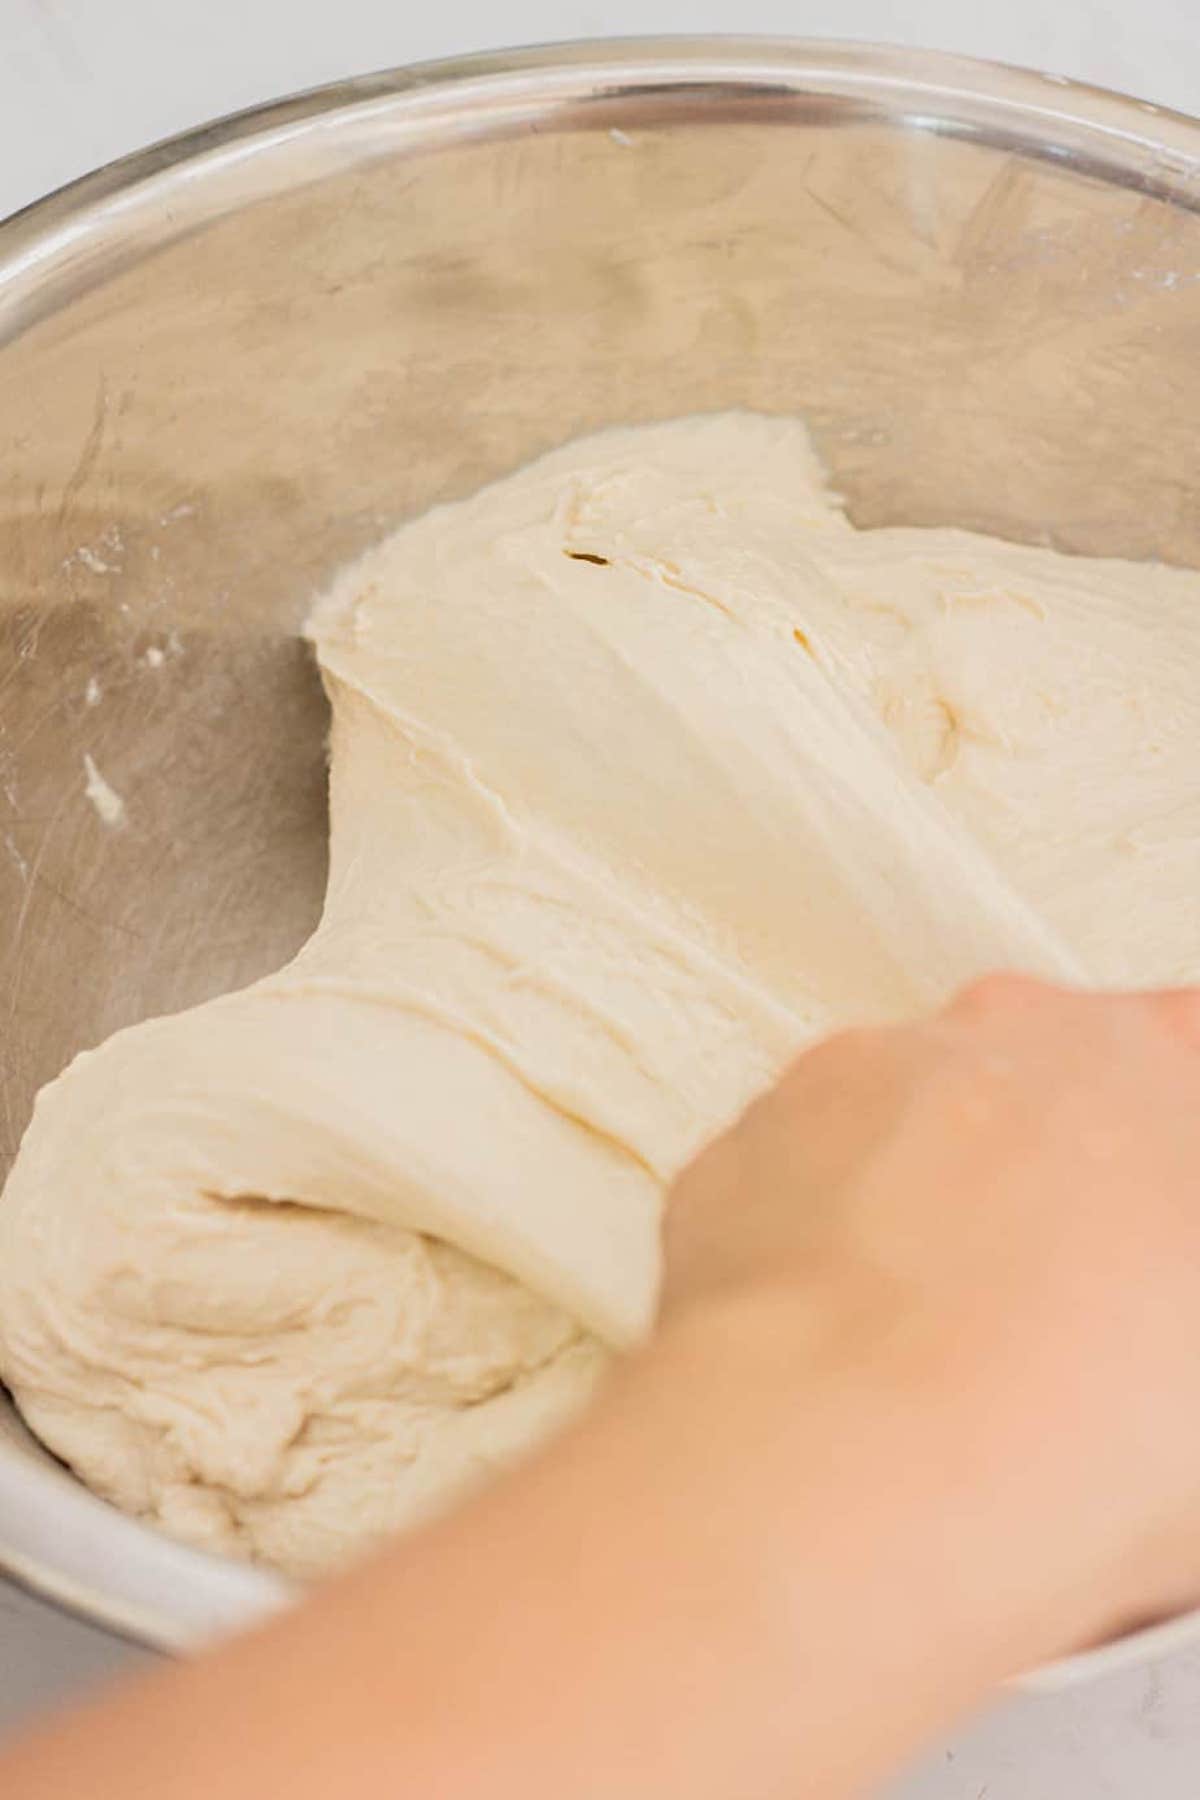
Coil folds – another option
Coil folds are great when its a wetter dough like this baguette recipe. Using wet hands, coax the sides of the dough up with your fingers and lift it from the middle and back onto itself. Turn the dough and repeat on all sides until it forms a ball. If the dough sticks too much to your hands, wet them again. See coil folding in action.
Bulk fermenting
- When the folds are completed, let the dough rest and continue bulk fermentation until the dough bulks by around 50%. This timing will significantly depend on your room temperature.
Shaping
- Cut the dough into 2 and pre-shape into rounds and let them rest for 30 minutes.

- On a floured surface, pat your dough ball into a rough rectangle. Fold the top third down, seal, rotate 180°, and repeat.
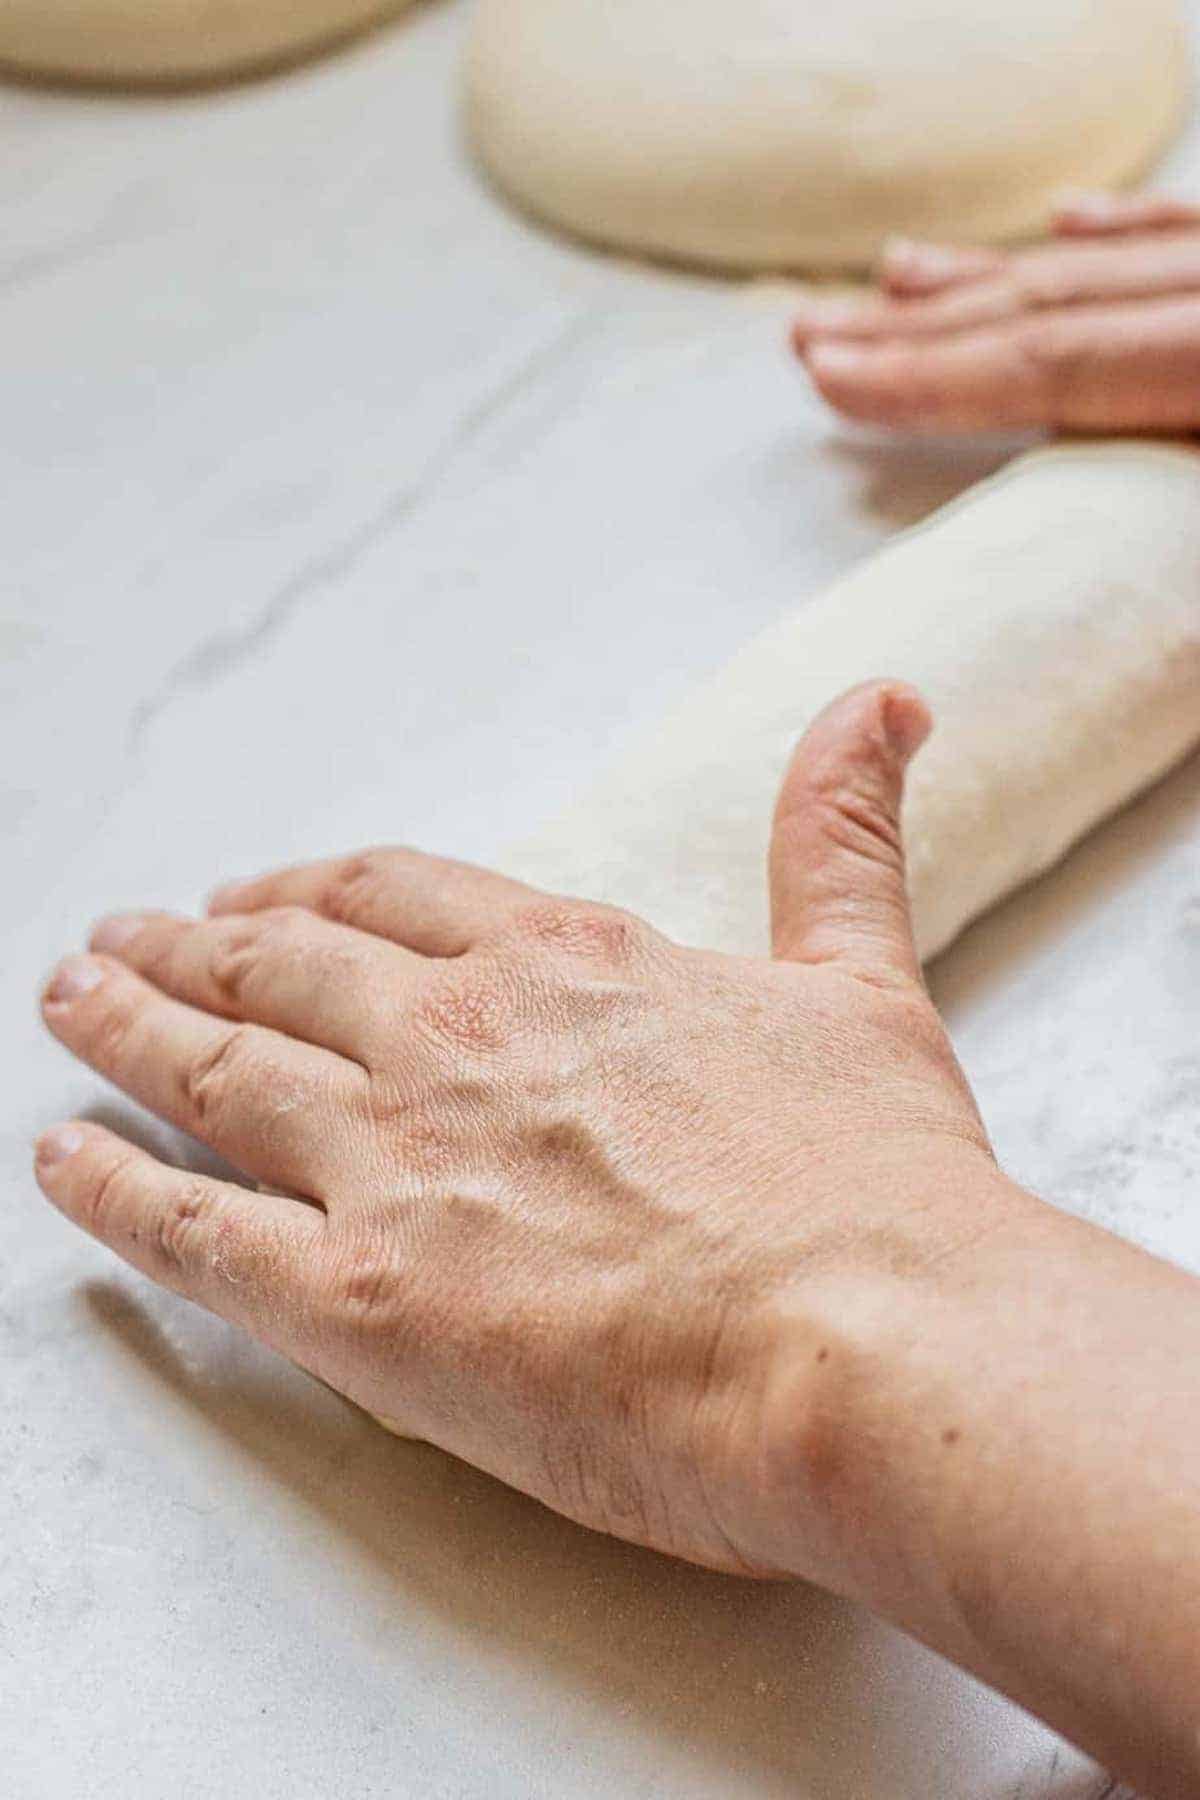
- In small sections, fold a flap over itself, press, and pull gently to lengthen into a 12″ log. Taper the ends by rolling under your palms toward you.

- Place the baguettes seam side up in a baguette pan or in between generously floured kitchen towels or a cloth couche.
Cold Bulk Fermentation
- Cover them with a clean kitchen towel or plastic wrap. Place them in the refrigerator for a cold-proof for 8-24 hours.
Baking
- Preheat your oven to 450 °F (230 °C) with a baking sheet on the middle rack and an empty pan on the bottom.
- Remove your baguettes from the fridge. Dust a board heavily with flour, then invert each baguette onto the floured board. Carefully slide each baguette off the board, onto the hot oven tray. Make at least three angled cuts on each loaf to control where the steam escapes.
- Pour ½ and inch of water or toss in a few ice cubes in the bottom pan to generate steam. Bake 30–35 minutes until deeply golden, then transfer to a wire rack to cool (or tear straight in if you can’t wait).
FAQS
Dense sourdough baguettes may be due to underproofing, or a starter that wasn’t active enough. Make sure your starter is bubbly and active before you begin, and let your dough proof fully. Also, make sure your oven is super hot, and introducing steam into the oven when you start baking can help the bread rise and form a crispy crust.
To slice a sourdough baguette, use a bread knife with a serrated edge. This helps to cut through the crust without squashing the bread. You can either slice it on a bias for longer pieces, or straight across for shorter slices. Always ensure your bread has fully cooled before slicing to prevent it from getting squished or gummy.
Yes, you can make a sourdough baguette without a baguette pan. You can shape the dough and place it on a baker’s couche (or a floured kitchen towel). Crease up the sides of the towels to create ‘walls’ for the baguettes to rest against.
Sourdough baguettes may split or burst on the sides due to several reasons. The most common one is lack of scoring or improper scoring. Another big reason is underproofing the dough.
More sourdough bread recipes

Sourdough Baguette Recipe
Ingredients
Levain
- 40 g sourdough starter
- 40 g all-purpose flour
- 40 g water
Dough
- 440 g all-purpose flour all-purpose flour, minimum 11% protein
- 320 g water
- All the levain or around 100g active starter
- 9 g salt
Instructions
- In a bowl, stir together your starter, flour, and water until fully combined.
- Transfer to a clean jar, cover loosely, and let sit for at least 4 hours until it’s well-doubled but before it collapses.
The Dough
- When the levain is nearly doubled, begin the autolyse. In a large bowl, mix your main bread flour and water with wet hands into a shaggy mass. Cover and rest for 1 hour.
- Add the levain and salt. Using wet hands, squeeze and fold until everything is evenly incorporated. Using wet hands, knead and squeeze briskly for 2–3 minutes and give it a few slap and folds on the counter to kick-start gluten development.
- Let the dough rest in the bowl for 10 minutes, then perform one set of stretch-and-folds (or coil folds; see notes).
- Every 30 minutes for the next 2 hours, repeat one more set of folds (total of 4).
- Cover and ferment in a warm spot (around 25 °C/77 °F) for 2–4 hours, until the dough has risen about 50%.
Pre-Shape
- Gently turn the dough out onto a lightly floured surface and divide it into two equal pieces.
- Take one piece and pat it into a rough square. Fold each corner into the center to form a parcel.
- Flip it seam-side down, cup it between your hands, and roll in small circles on the bench until a smooth ball forms.
- Place each ball on the floured surface, cover with a tea towel, and rest for 30 minutes until slightly puffed and passing the poke test (a gentle press leaves a slow-closing indentation).
Shaping
- Working one ball at a time, place it seam-side up on a floured board and gently press into a horizontal rectangle.
- Fold the top third down to the center, seal with your fingertips, rotate 180°, and repeat.
- Starting at the top right corner, fold small flaps down in succession. Press with your palm heel and pull slightly to lengthen. Aim for a 30 cm (12″) log.
- Roll the log under your palms toward you, tapering the ends into classic baguette points.
- Transfer each loaf seam-side up into a baguette pan or between heavily floured kitchen towels (use the towel edges as “walls” if you don’t have a pan).
- Dust the tops generously with flour, cover and cold-proof in the refrigerator for 8–24 hours.
Baking
- Preheat your oven to 230 °C (450 °F) with a baking sheet or stone on the middle rack and an empty pan on the bottom.
- Remove the baguettes from the fridge.
- Dust a floured board, invert each loaf seam-side down onto it, and score at least three angled slashes with a razor or sharp blade.
- Dust the baking sheet or stone with flour, then slide the loaves onto it. Pour around 1 cm of water or a few ice cubes into the bottom pan to generate steam.
- Bake 30–35 minutes, until deeply golden. Be cautious when opening the door because steam will rush out.
- Cool on a wire rack before slicing (or tear into that crisp crust while still warm!).


Hi Elien!
I would like to preface with the fact that I am a new to sourdough. I do have a starter that is established (it was a friend’s before it was mine) that I did follow all the instructions for, however, when I reached the stage of shaping the dough, I ran into a large problem…
My dough looked very good and felt normal up until the bulk fermentation. In the fermentation, it began to look a bit wet but I assumed this was because I went for a higher hydration ratio of flour/water in the autolyse and I live in a very humid environment. (I did use bread flour!) When I tried to shape…everything was much to wet and too sticky to get anywhere. From what I read, this may have been due to over-fermentation but I’m struggling to see at what stage I may have over-fermented as I did follow all your fermentation times. I’m wondering if you have any advice.
Hey Elizabeth. It’s always hard to gauge exactly what’s happened via text but I’ll see if I can help in anyway.
Was your dough just sticky or was sloppy too?because my dough is also sticky, but it’s still strong and elsastic. If your dough lost it’s elasticity it does sound like it might have over fermented. The fermenting times are always just a guide because it really depends so much on the temperature of your room. Your starter may have also played a part.
If you have an acidic starter (perhaps one that’s not fed that often, or you use a lot of seed starter in your feeding, or one that was used when it was past its peak) that also plays a part. If it brings too much acid into the dough it can break down the gluten structure.
If you’re working in a warm environment you could try feed your starter 1:2:2 Instead (1 part starter, 2 parts water, 2 parts flour). This will slow down the rise a bit.
And then when you make the dough, watch the dough and not the clock. Your dough should feel bouncy and elastic, even with a high hydration.
Do you have ounces and cups recipe?
No sorry, I always use grams for bread
Hi! This is an old post but hopefully you will catch this comment. If I wanted to halve this recipe so I use 35 G each of the leaving ingredients?
Yup 🙂
Great! One more question if you don’t mind. I fed my starter this morning to be ready this evening to do the levain. But now I want skip that and just use the starter.
Is it ok to just feed the starter again for overnight tonight and leave room temp? Or is that too much feeding/leaving out?
This would then be 200g eventually right?
Thank you
Yup that’s totally okay :). However if you’re feeding your starter overnight you might want to feed it 1:2:2 or 1:3:3 (starter:flour:water), so it doesn’t rise too fast overnight and collapse by morning.
You could do for example 40g starter, 80g flour and 80g water, or 30g starter, 90g flour, 90g water if your kitchen is warm overnight.
So no need for the levain? just feed my starter, leave it out overnight, and use 200g with the autolyse?
If making a leaven use 70g of your starter and feed it 70g flour and 70g water as per the recipe, but alternatively you can feed your starter as per your usual way overnight and use that in the morning. As long as it nice and bubbly and not past its peak 🙂
Use approximately 200g fed and active starter
Thank you, Elien, I will try that. It is so perfect before it goes into the ‘fridge. I will try these again.
Oh, and I am going to go over your sourdough troubleshooting guide VERY carefully.
This happens with every recipe I try. The dough is soft and puffy during the initial rise and shaping. Then after the cold ferment it is flat and lifeless. Cooks up with randomly high spots, but is dense as all get out. Why the cold ferment? It looked perfect before that! My poor baguettes look like the loch ness monster.
Hey Janelle, the cold ferment is there to give a deeper flavour profile. If you want to try a same-day bake you can do that instead 🙂
Hi! Great looking recipe.
I have baguette pans given to me for my birthday. Do I just prove the baguettes in them in the fridge then tip out onto a pre baked tray, or bake in the baguette tray?
Obviously the baguette pans wouldn’t be pre heated as the baguettes are in them proving etc.
Not sure what to do with them?
Thanks!
Jack
Hey Jack, I use my trays just to hold the bread shape and then transfer them to a baking tray. I have baked them before in their baguette pans but had a hard time with the bread sticking to the baguette pans afterward!
Brilliant, so prove in the baguette trays then tip them out.
Also, could I make these, then bake them this wknd and then freeze them for next weekend? Then maybe put them in the oven with a splash of water once defrosted?
Thanks!
Yeah for sure! 🙂
Would you recommend anything else to keep/make fresh for a following weekend?
Thanks!
Thank you! Maybe I’ll try both methods to see which gives the best result.