Sourdough Bao Buns (Gua Bao)
Soft and fluffy bao buns using sourdough starter. These steamed buns make the perfect vessel for sticky pulled meats or jackfruit.
Sourdough Bao
A lovely reader of mine put me on to the idea of sourdough gua bao and I’m so happy about it! While I have been perfecting this recipe, we’ve been eating them a lot. My favourite filling is sticky pulled jackfruit with five-spice, ginger, garlic, honey and soy sauce.
Bao are often made with two rising agents: yeast and baking powder. In this recipe the commercial yeast is replaced with sourdough starter, but I am still keeping the baking powder in there. I’ve tried it with and without, and I prefer the added rise of the baking powder boost. Baking powder gives the bao a quick boost of leavening right away when they hit the steamer, so they puff up light and fluffy. Learn how to make a sourdough starter.
Baker’s Schedule
These buns are made over two days. On Day 1 the starter is fed, the dough is mixed and fermented overnight in the fridge. On Day 2, the buns are cut, folded, risen and steamed.
The overnight cold proof develops more flavour and makes the dough easier to handle. You can skip it and rise the dough at room temperature instead, but the flavour will be milder and the dough a bit softer to work with. For the best texture and taste, the cold proof is recommended.
Bao Flour
The flour traditionally used in these buns is low protein bleached white flour that yields brilliantly white, light and fluffy buns.
I’m not using bleached flour in this recipe, though. I’m using an unbleached white all-purpose flour, one with a semi-low protein content of around 10%, to give a light and fluffy bun. If you’re using stronger flour, with a protein level of 11% and above, it will still work well, but you’ll end up with a slightly chewier bun. I also add a bit of cornstarch to soften the flour more.
Method
- Start with feeding your sourdough starter.

- Once the starter has risen, mix all the dough ingredients together into a thick smooth dough.
- Let the dough rise in a warm spot until it has bulked out by around 50%.
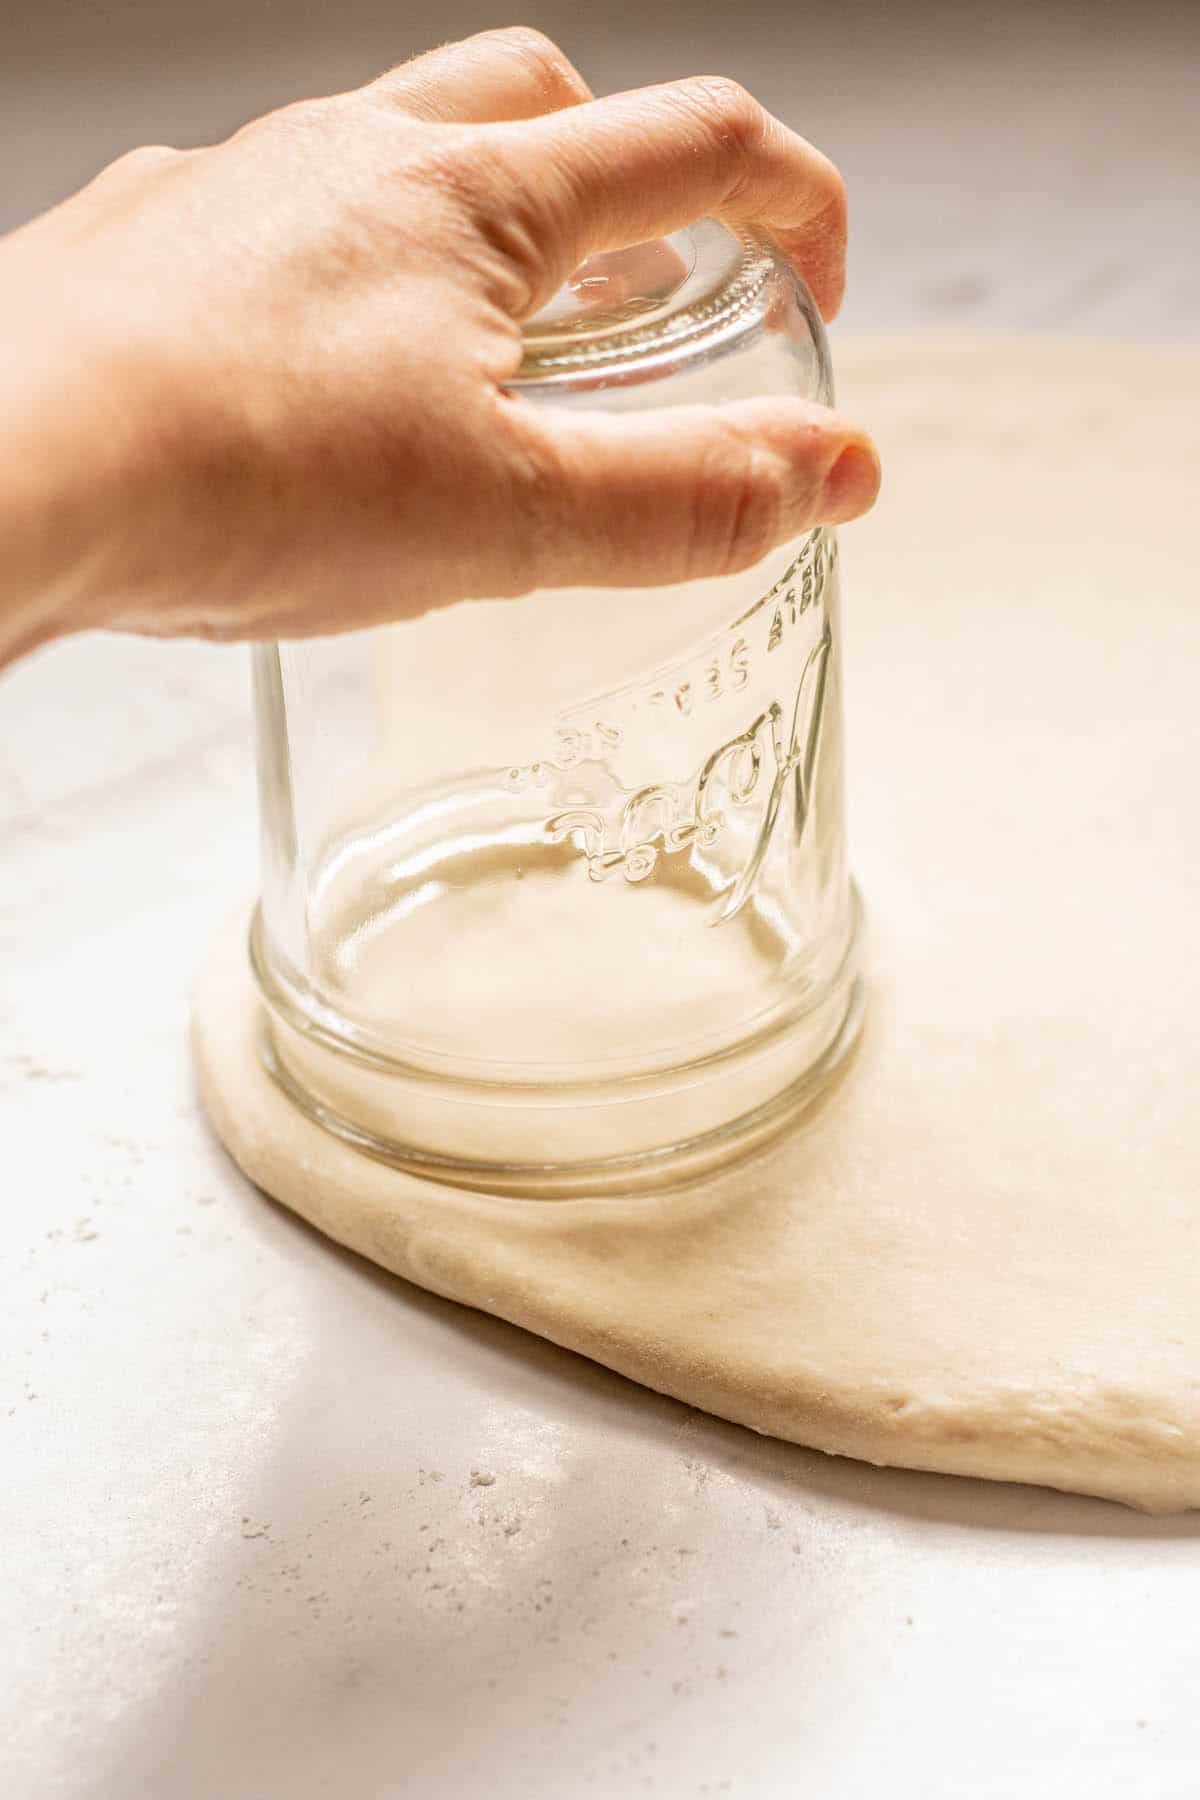
- Roll the dough out into a large circle, about 5mm thick, and use a circle cutter (I use a drinking glass), to cut out dough circles, then roll those into an oval.
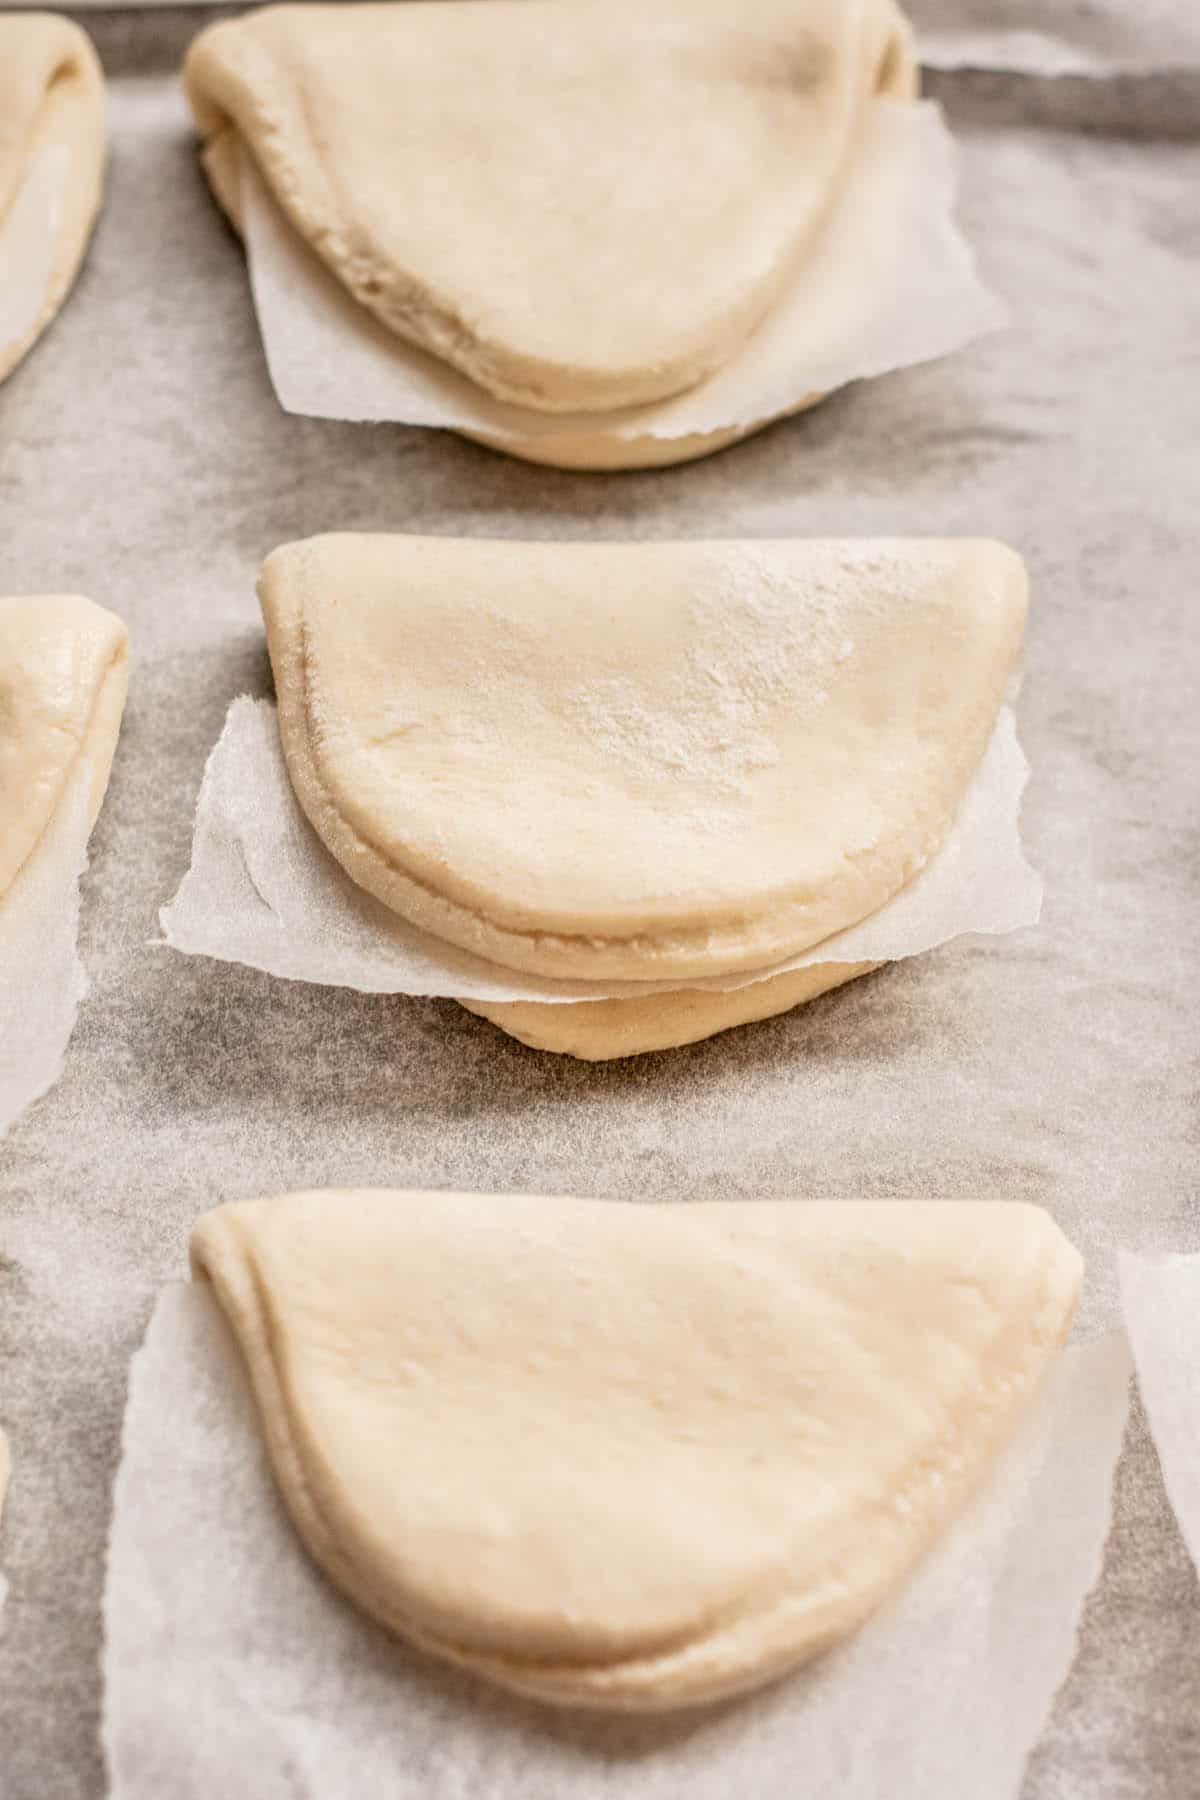
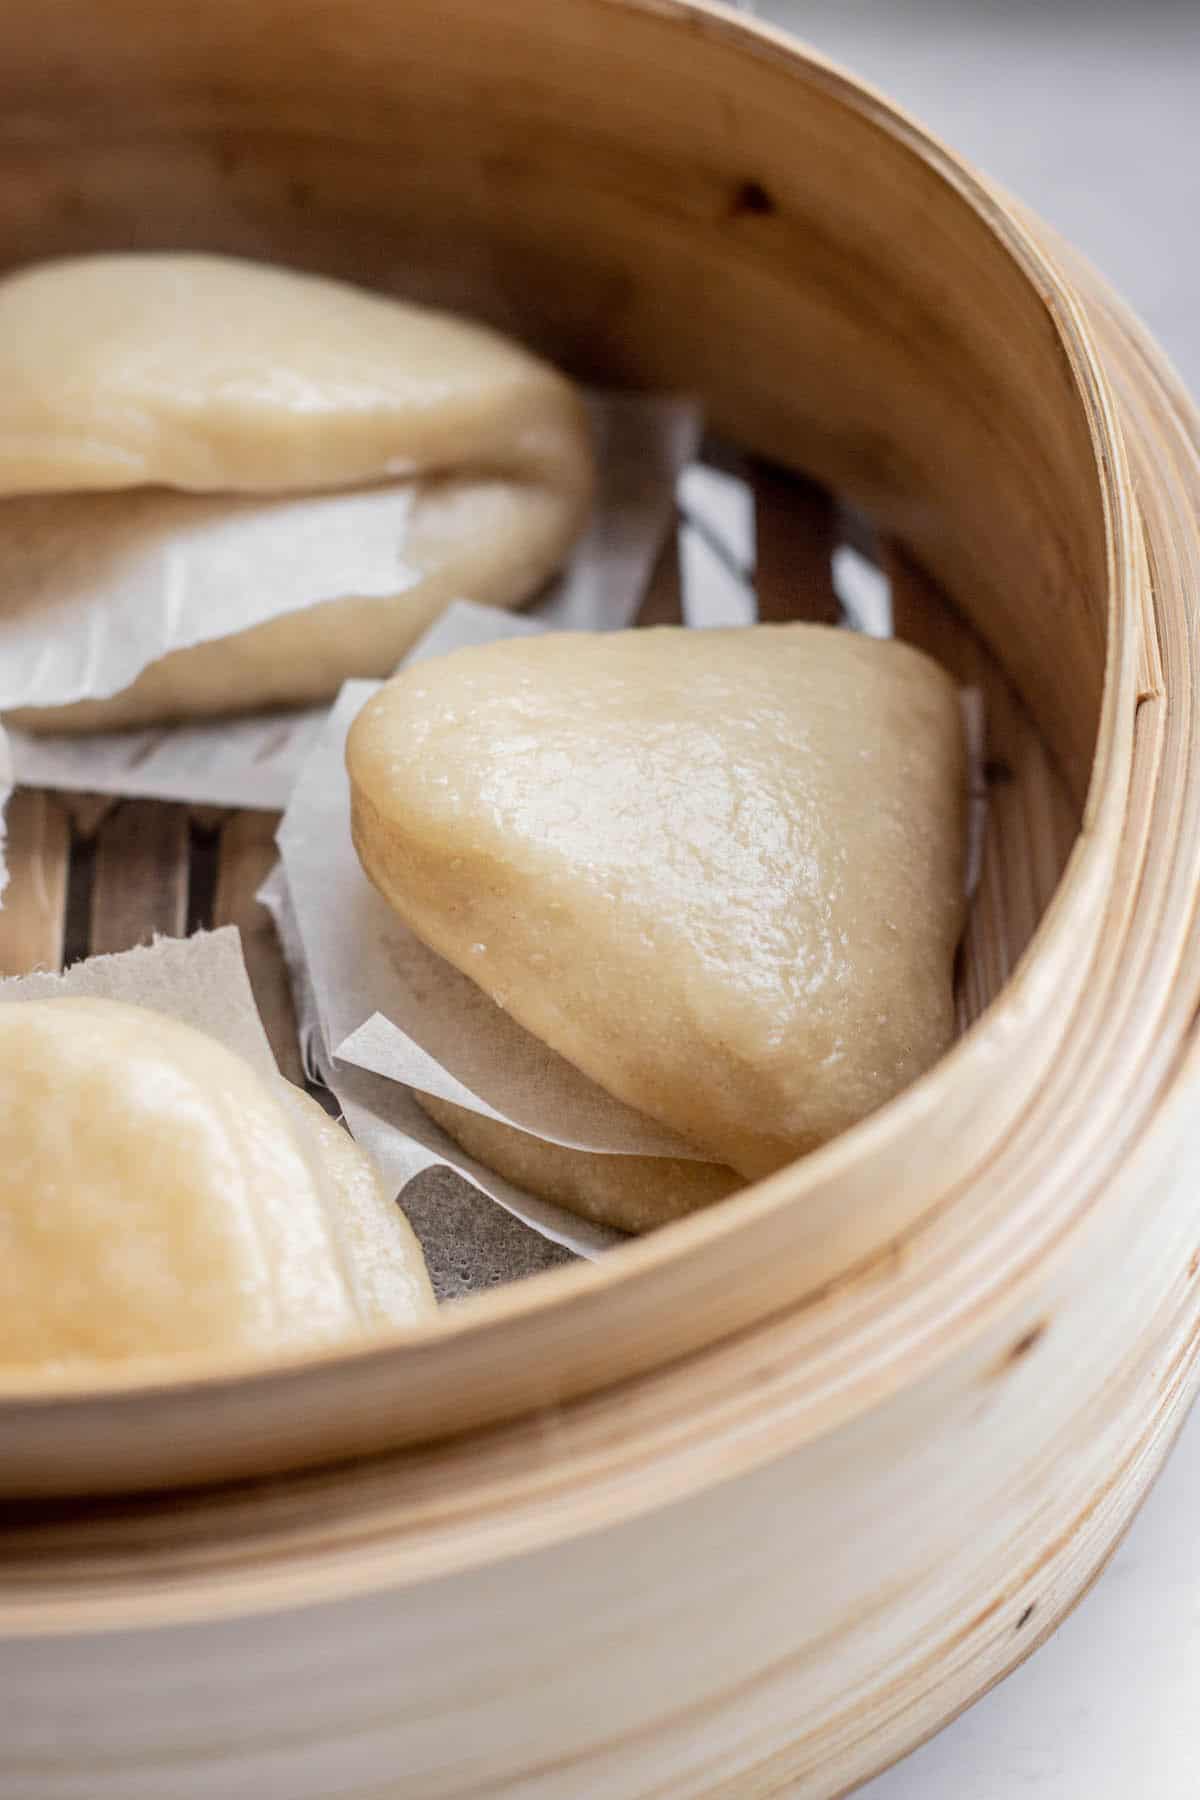
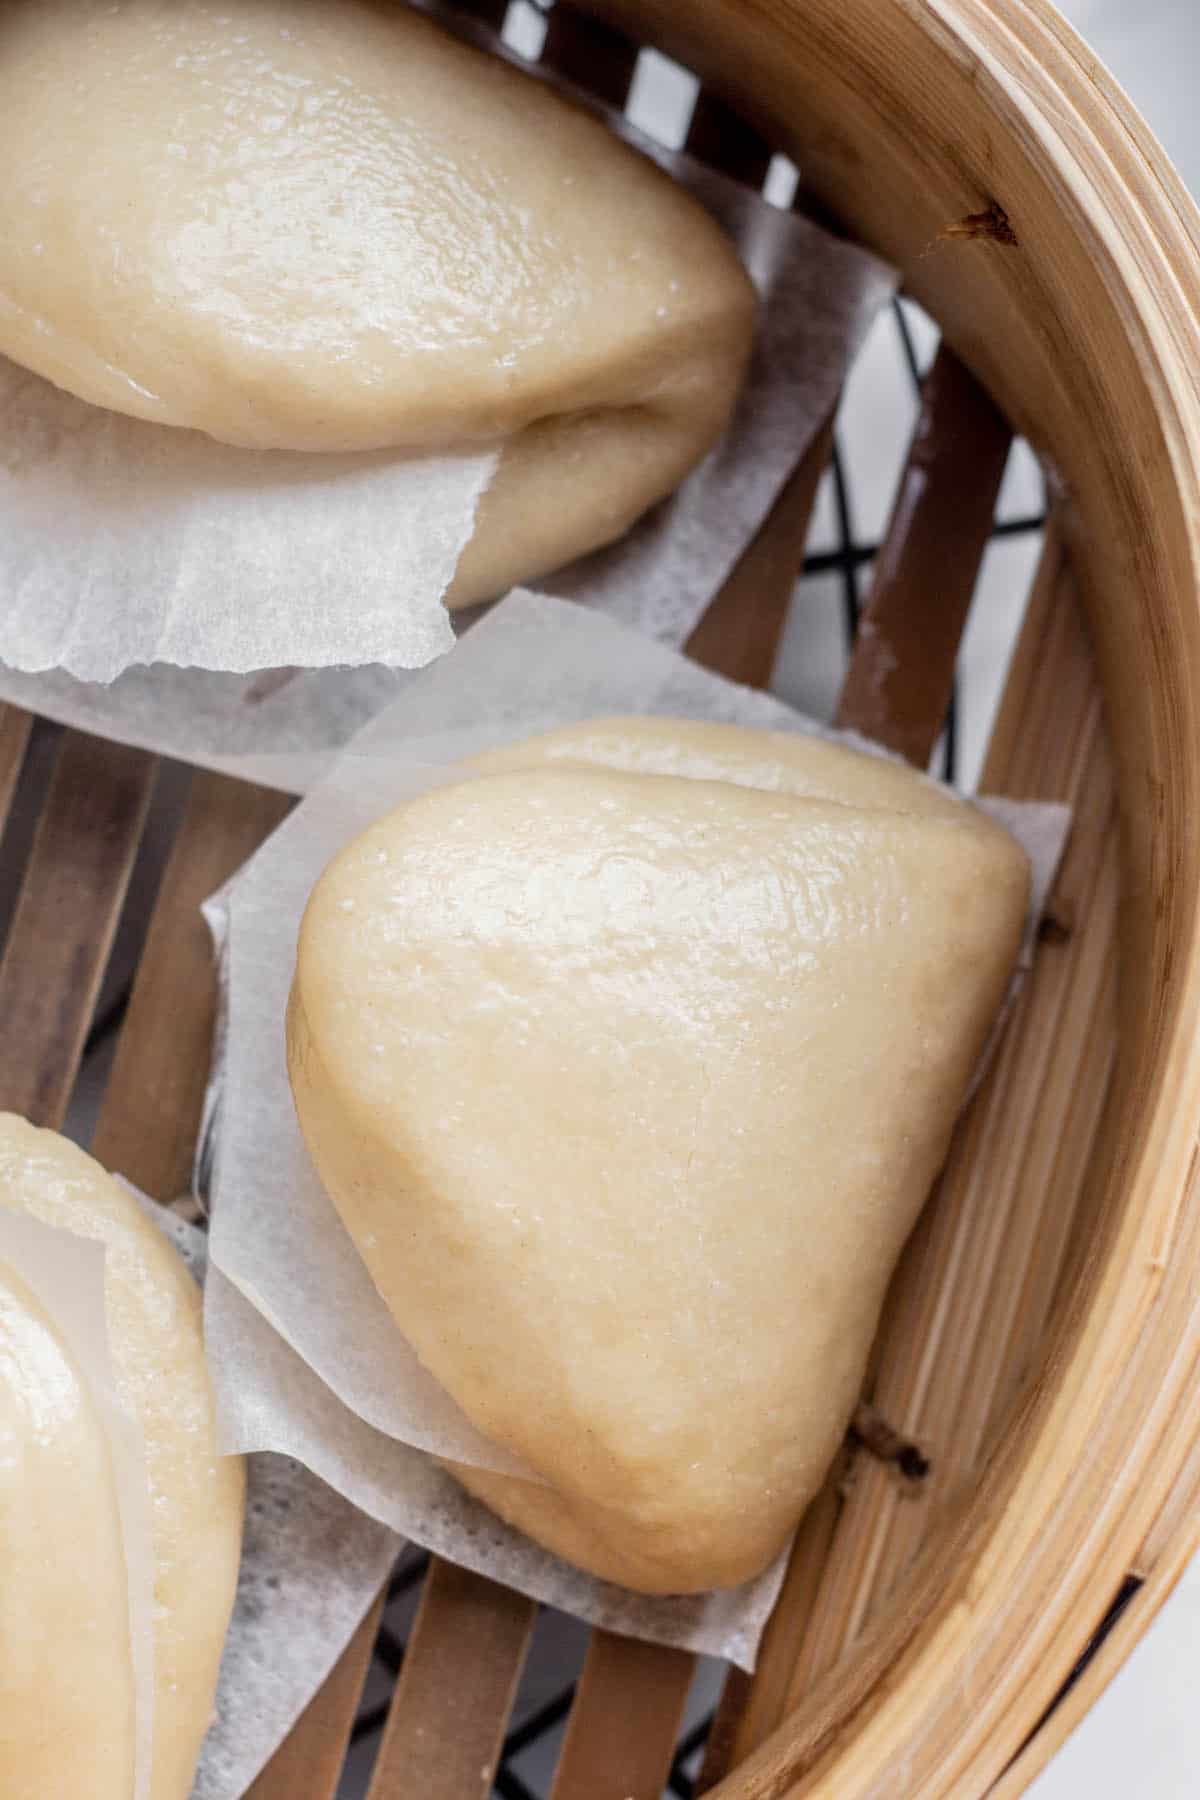
- Fold the oval in half, with a small piece of parchment paper in the middle. This stops them from sticking together.
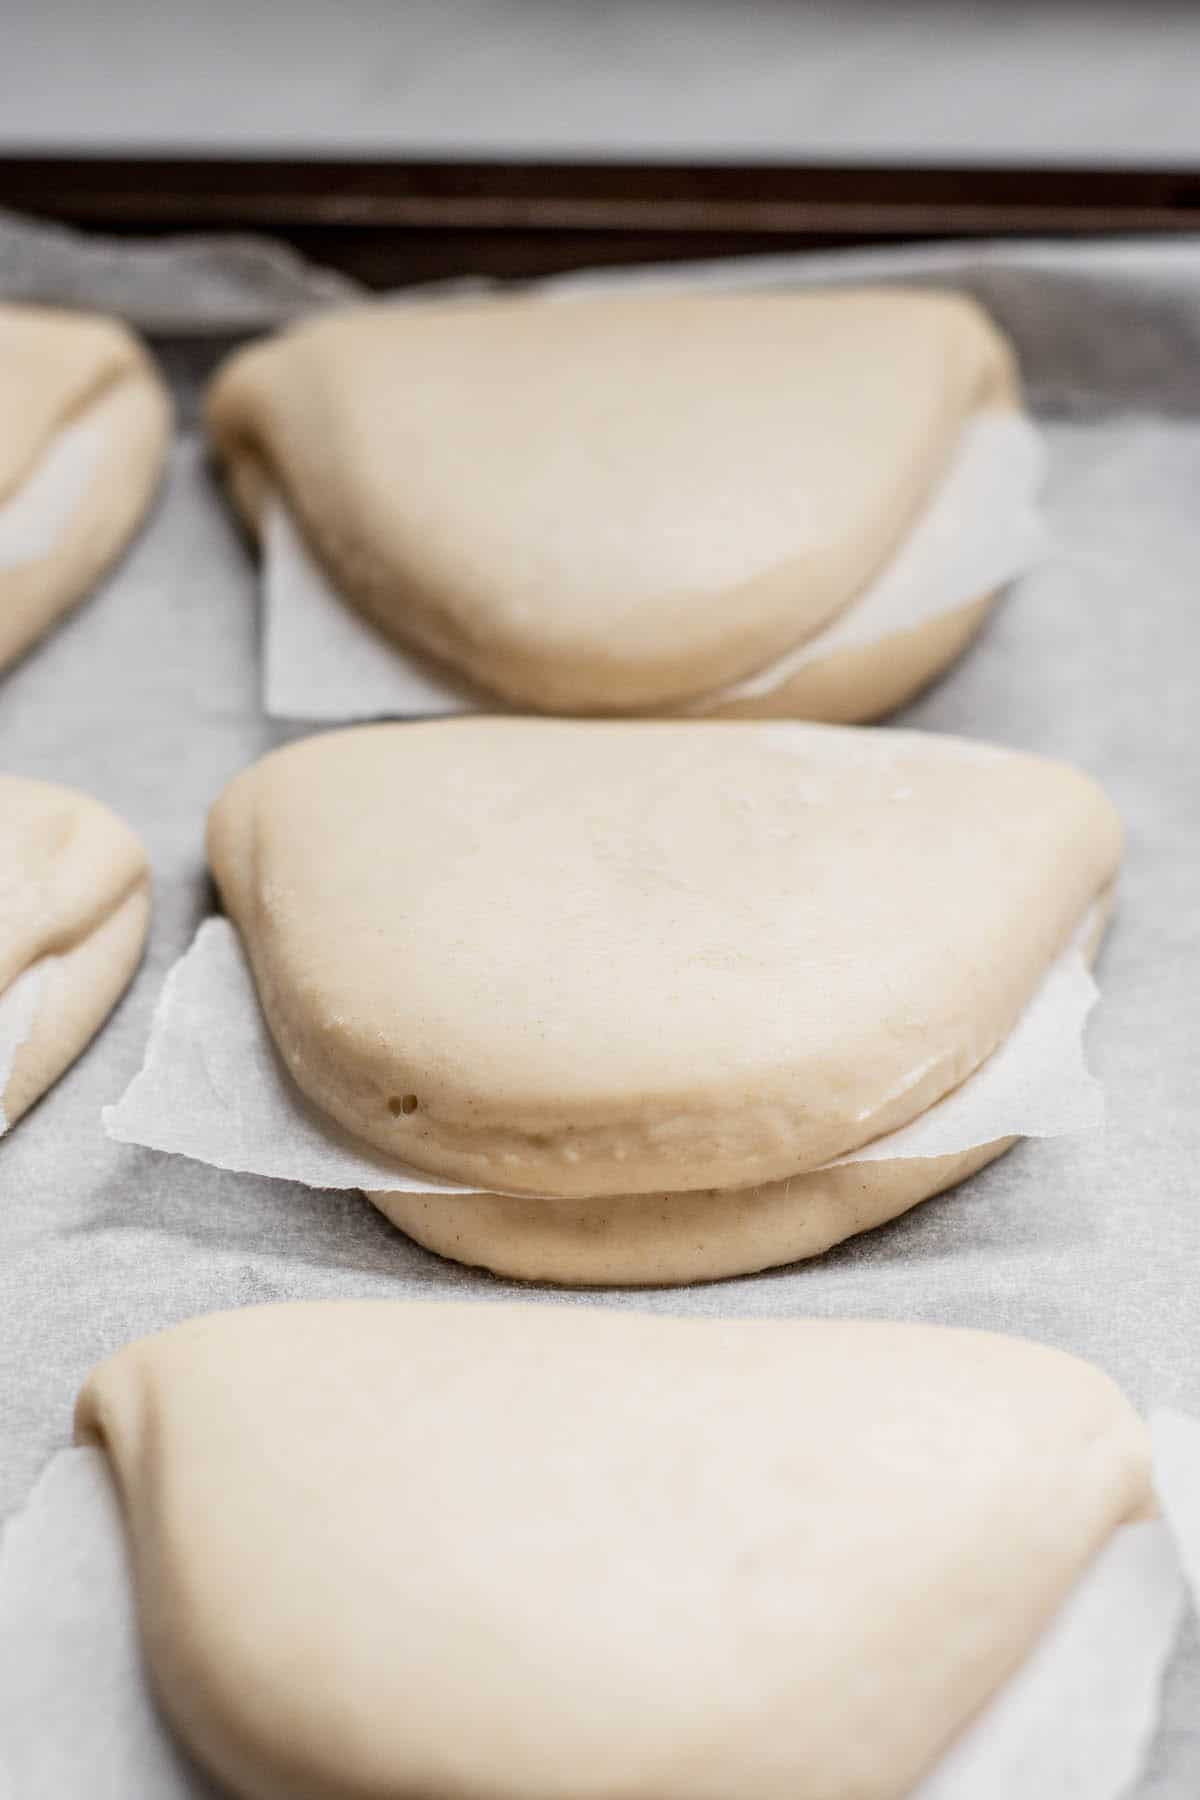
- Let them rise until puffy.
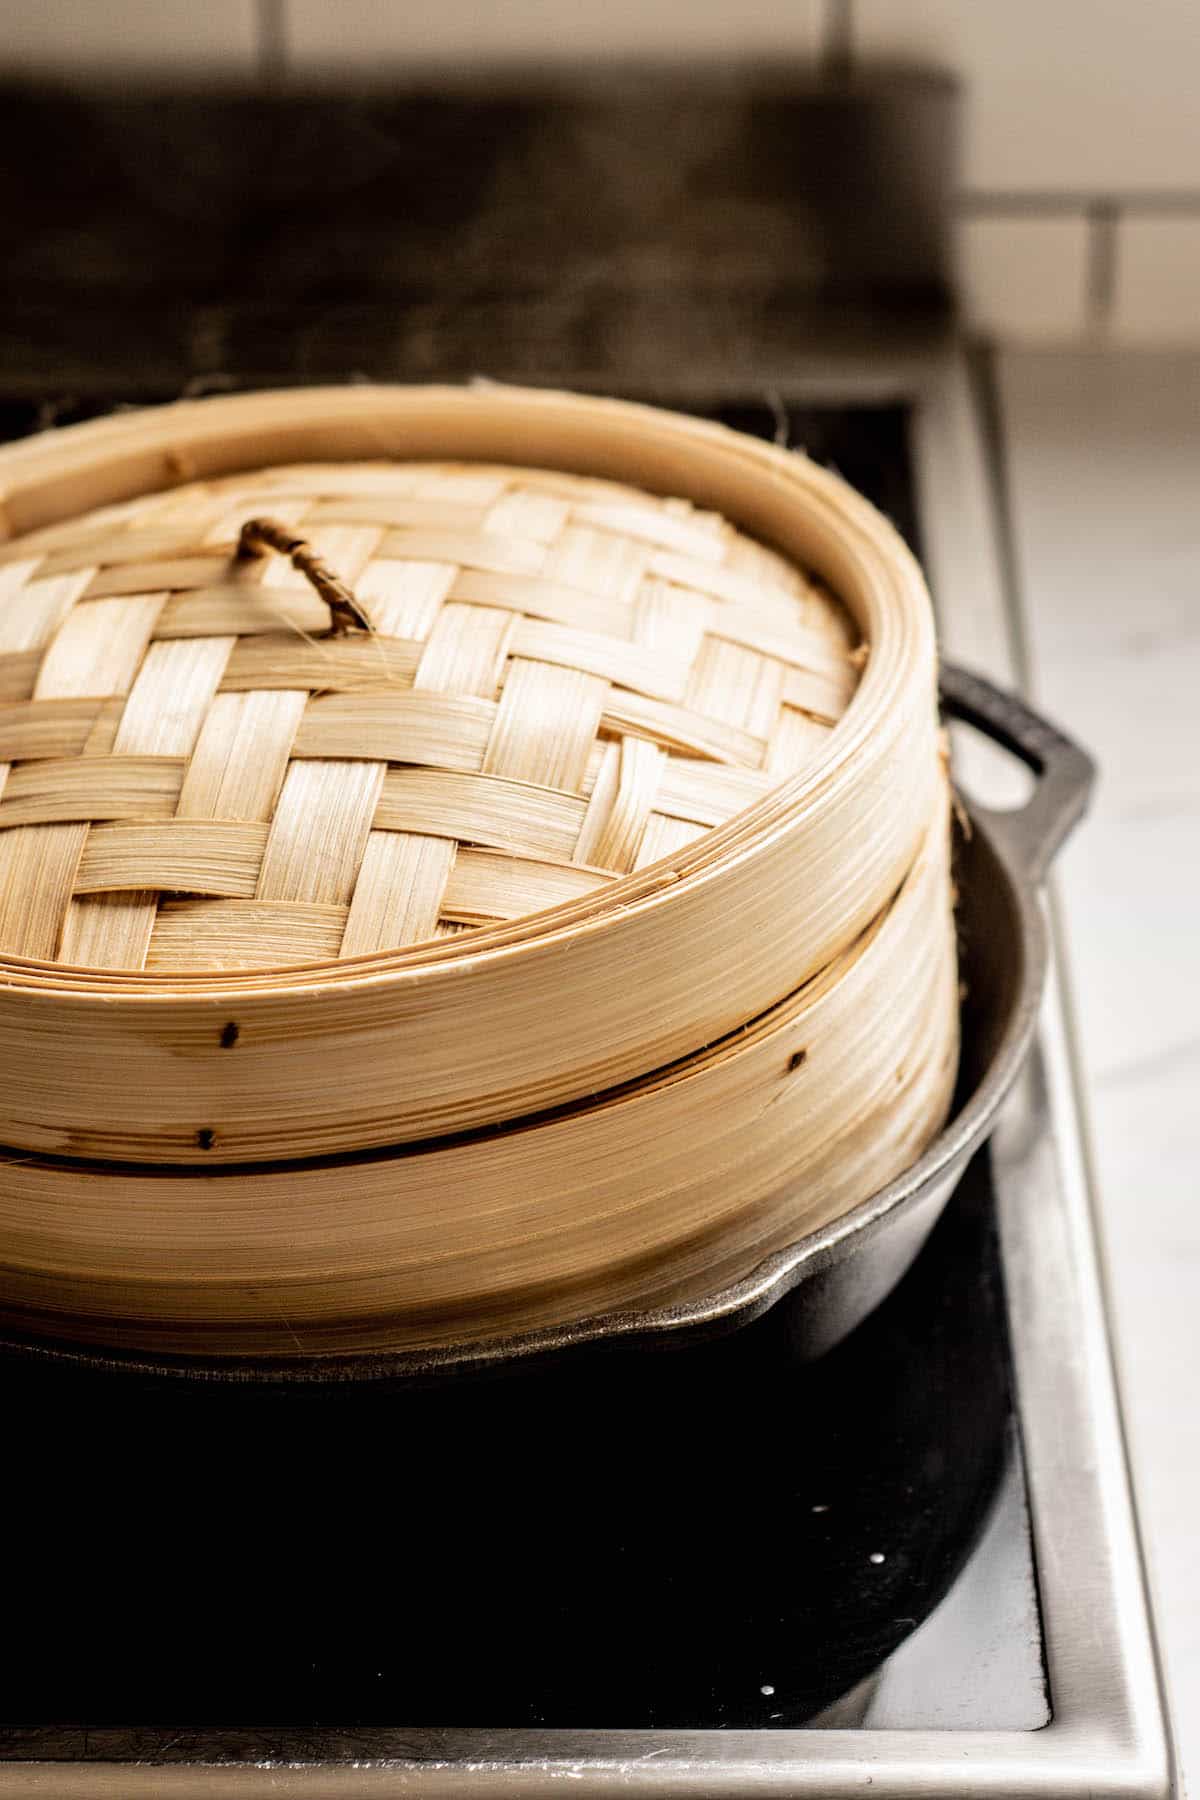
- Steam until cooked through.
- The bao is best served warm. If making these ahead of time, they can be reheated by being placed back in a steamer for 2-3 minutes until warmed through. Pry them open along their fold, and then stuff them with your favourite fillings.
Storage
- Room temperature: Keep cooked bao in an airtight container for up to 1 day. They’ll start to dry out if left longer.
- Freezer: Freeze bao on a tray until solid, then transfer to a freezer bag. They’ll keep for 1–2 months. Reheat straight from frozen by steaming them until heated through.

Sourdough Bao Buns (Gua Bao)
Ingredients
Sourdough Starter
- 40 g starter
- 40 g all-purpose flour
- 40 g water
Bao Dough
- 290 g all-purpose flour
- 100 g sourdough starter
- 30 g cornstarch
- 25 g granulated sugar
- 5 g salt
- 1 tsp baking powder
- 28 g olive oil
- 140 g water lukewarm
Instructions
- In the morning, feed your sourdough starter.
- Once the starter has risen, mix all the dough ingredients in a large bowl and use a fork to combine it into a shaggy dough. Once you can't mix with the fork, switch to using your hands.
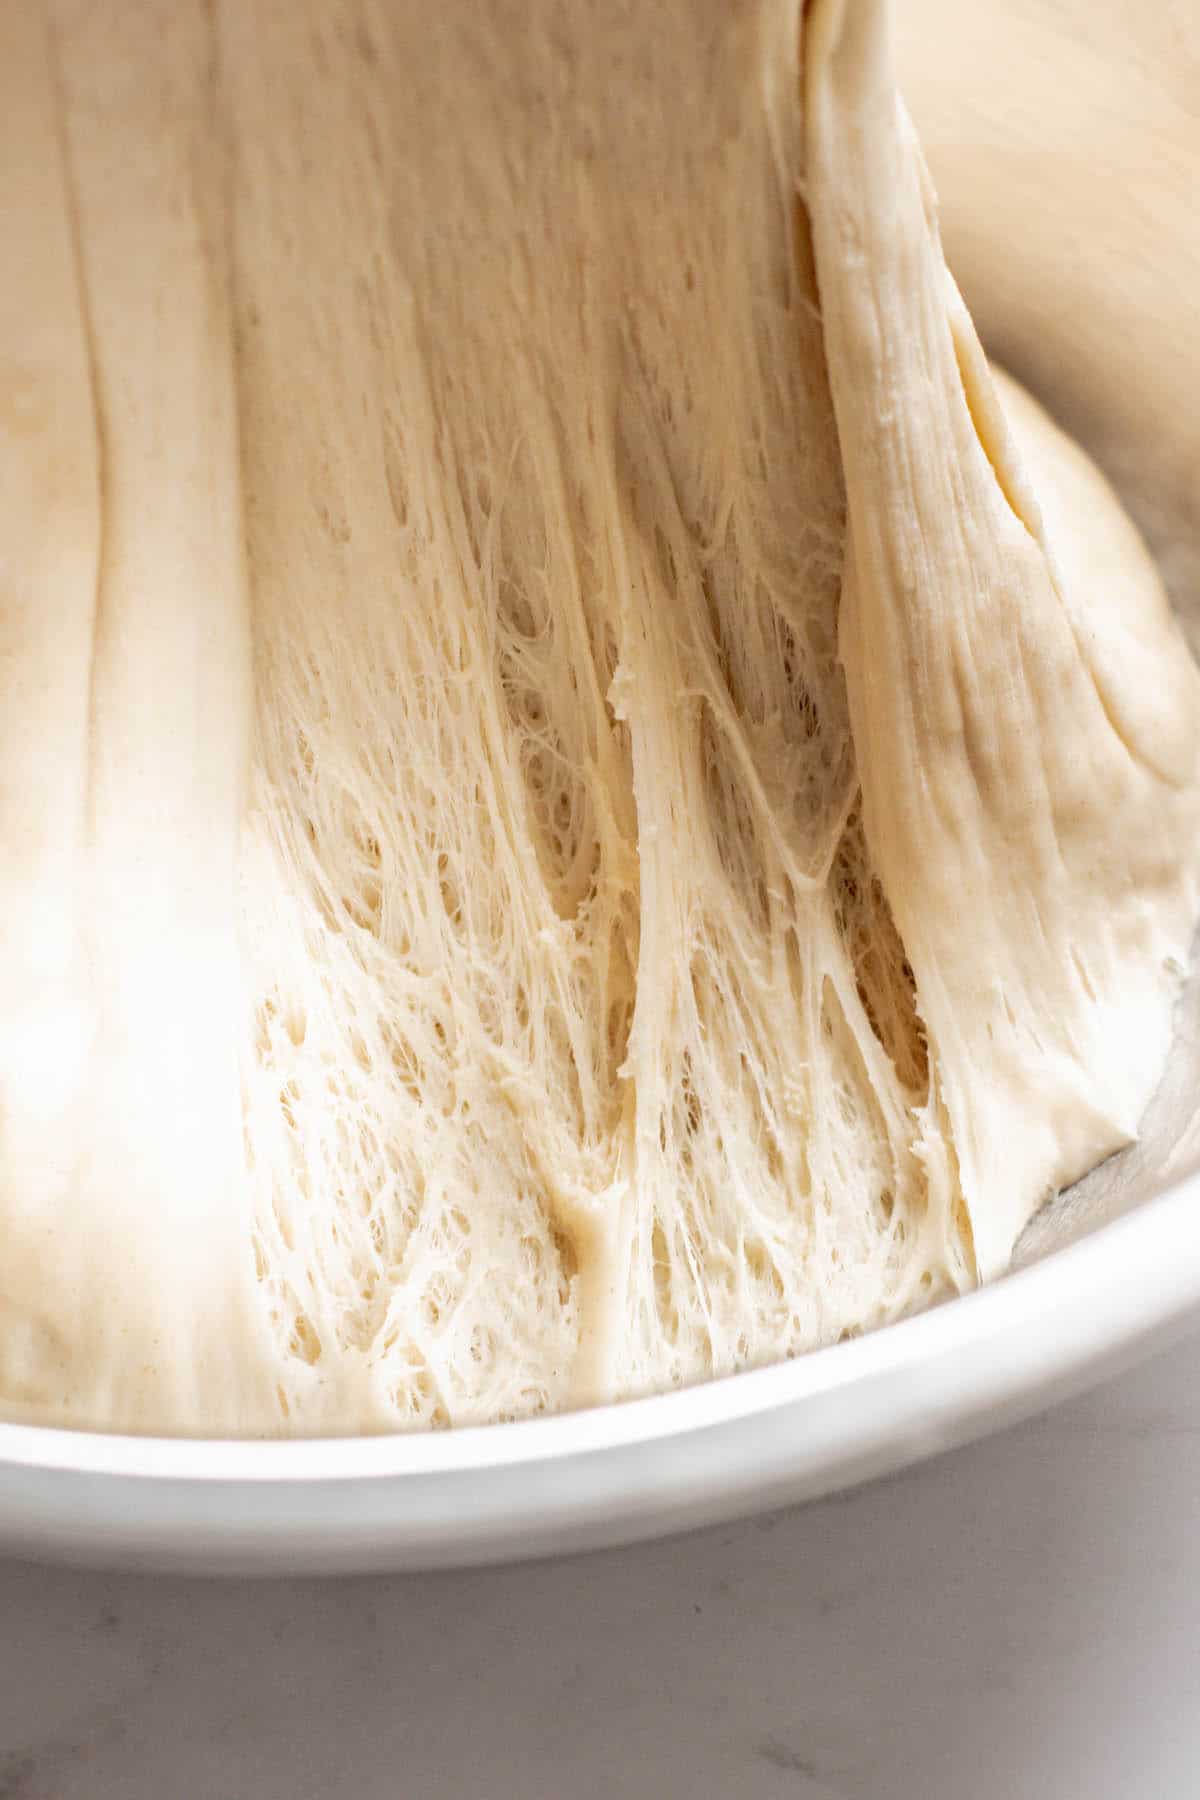
- Combine it all together into a thick and stiff dough. If it's too thick to mix, wet your hands to add a little more water to the mixture. The dough will be very thick. Knead the dough on the bench until it is soft and smooth. Form a dough ball and place it into a bowl.
- Let the dough rise in a warm spot until it has bulked out by around 50%. You can create a warm and humid spot by placing the dough in a turned-off oven next to a mug of boiled water. This can take around 4 hours in a warm space.
- After this rise, cover the bowl tightly with plastic wrap and place it in the fridge overnight. You can skip the cold proof and go right to cutting and shaping but the flavour will be milder and the dough a bit softer to work with.
The Following Day
- Pull the dough from the bowl and place it on a clean bench. Roll the dough out into a large circle, about 5mm thick, and use a circle cutter (I use a drinking glass) to cut out dough circles. (If necessary, use a little flour to dust the bench lightly.)
- Once you’ve cut all the circles you can, gather the remaining dough into a ball and leave it to sit and rest for 10 minutes before rolling it out again.
- Roll a cut-out circle to create an oval around 3-4mm thick. Fold it in half. I place a small slip of parchment paper in between the fold so it doesn't stick together. Place the shaped bun on a tray lined with parchment paper. Continue with the remaining dough circles.
- Let the buns rise again until puffy. Once risen, cut around the risen buns on the baking paper so each bun is on a separate piece. This makes them much easier to lift in and out of the steamer.
- Fill a large saucepan or pot with 3-4 cm of water and bring it to a boil. Place the buns in the steamer 2-4 buns at a time (depending on the size of the steamer.) Add the lid to the steamer, then place it over the boiling water. Leave the buns to steam for around 10 minutes.
- Take the steamer off the saucepan, remove the lid, and lift the cooked buns. Repeat these steps with the remaining buns.
- If making these ahead, they can be reheated by being placed back in a steamer for 2-3 minutes until warmed. Pry them open along their fold, then stuff them with your favorite fillings. They can also be frozen for future use.


Just made these and they are yum! They did take a long time to proof but well worth the wait. Thank you for this amazing recipe!
Thank you for making it! so glad you enjoyed it!
Is there a substitute for cornstarch? Could I use tapioca or arrowroot?
Hey yes you can substitute with either of those 🙂
Hi! Can I make the buns without the added sugar? Or that’s needed for the overnight fermentation? Thanks!
The sugar is only for flavour so you can leave it out 🙂
Have made steamed and even baked bao many times, but with yeast, I am looking forward to using just sourdough for these! I will be stuffing mine first with pork, that is how I have made them in the past. I will let you know how they turn out!
Will the dough taste sour?
Hey the dough doesn’t have a strong sour taste
Does the starter need to be fed? What would happen if I used discard?
Hey this won’t work with discard starter as you need active starter so the buns can rise
This looks promising. Any reason to not stuff the buns before steaming?
I don’t think so! I reckon this would work well as stuffed steamed buns ☺️
Thank you so much for the recipe! My family loved them. Just one typo I noticed, for your starter, you recommend 50g starter, 50g water and 50 water, I realized you meant flour but just thought I would let you know.
Thank you so much for the recipe! My family loved them. Just one typo I noticed, for your starter, you recommend 50g starter, 50g water and 50 water, I realized you meant flour but just thought I would let you know.
Hey! Thanks so much for letting me know, I will fix that right now.
So glad you’re loving the recipe ☺️
I see that you are using an All purpose flour for the buns, is the starter a hi protein starter or have yu made a low protein starter with All purpose flour?
I feed it with all purpose flour too for this recipe 😊